
Have you ever used shrink plastic in any of your crafts? Shrink plastic crafts have been popular for decades, so you may have created some of your first crafts as a child with shrink plastic, markers, and an oven. Well, we consider the Silhouette Shrink Plastic to be quite an upgrade from that—our version is printable and can be cut with your Silhouette machine! In past blog posts, we’ve made floral earrings and watercolor Christmas ornaments using this unique specialty media.
We’re excited to share another fun shrink plastic project with you today. We will be using shrink plastic to create some boho butterflies that we will add to an acrylic sign. Butterflies have been trending over the last few months in categories like home décor, women’s apparel, and party themes, so we think you’re going to love this project. Let’s get started!
Supply List
- Silhouette Portrait® 3 (or machine of choice)
- Silhouette Studio®
- Silhouette Shrink Plastic – Clear
- Silhouette Glossy Vinyl – Navy
- Silhouette Spatula
- Silhouette Scraper
- Acrylic sign
- Printer
- White acrylic paint
- Paintbrush
- Heat gun, oven, or toaster oven
- Hot glue gun
- 3D adhesive dots
- Design IDs #353913, #353914, & #353915 by SAS Creative
- Design ID #152371 by Kolette Hall
Step One: Set Up Butterfly Designs in Silhouette Studio®
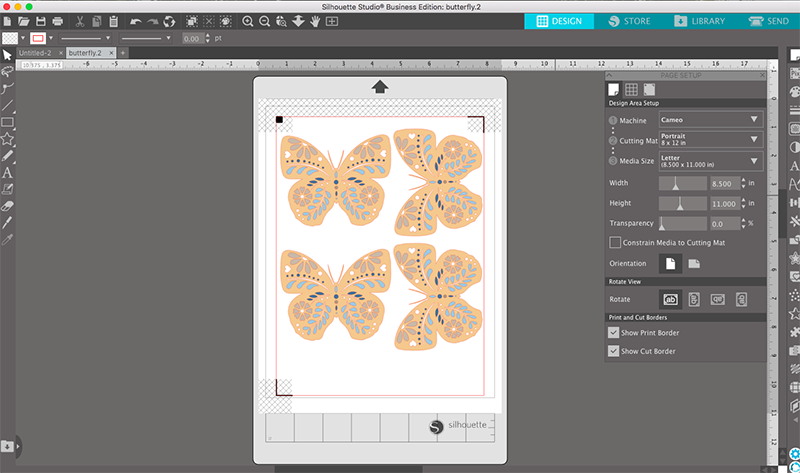
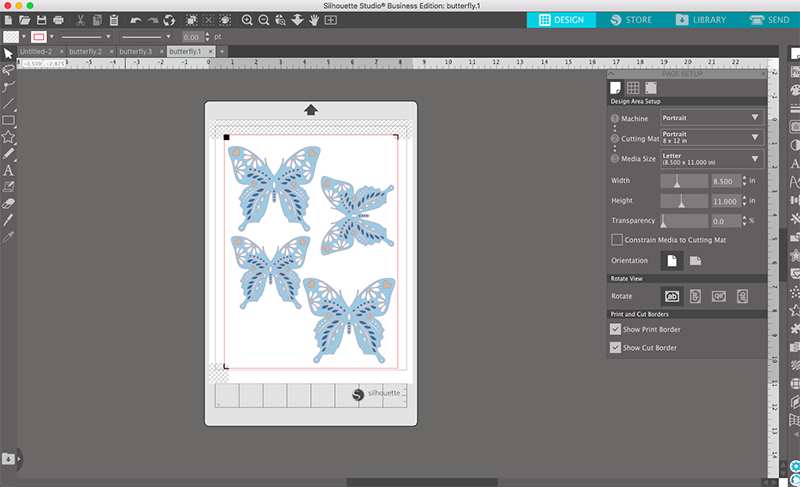
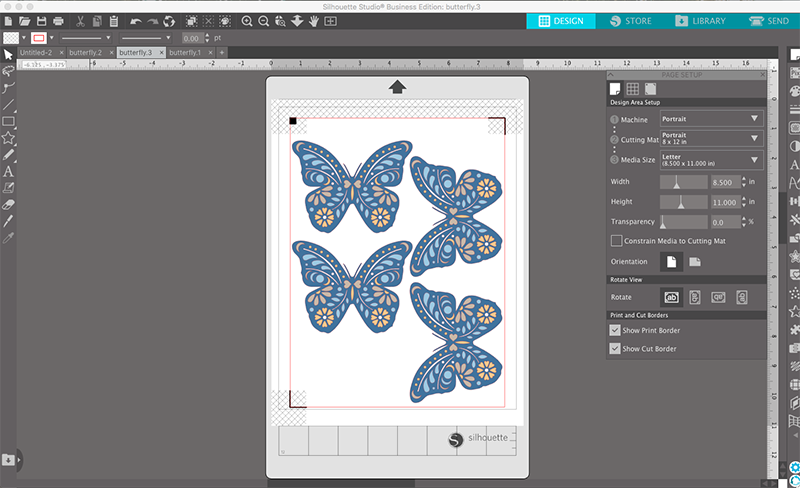
After you’ve purchased the designs from the Silhouette Design Store, open three new documents in Silhouette Studio. The reason you want to create three separate files is so you don’t have to move the butterflies around after you print them. This will ensure a perfect cut! Open the files by visiting your library and double-clicking on each butterfly. This will place the file inside of the document.
An important thing to note about shrink plastic is that the colors always darken when the design shrinks down. With these specific designs, we loved the original colors, but the tones were much too dark in the finished product. To adjust this, we ungrouped the pieces and changed each color to be a few shades lighter. They may look too light now, but this will give you a perfect pastel look once your butterflies are shrunken down. Remember to group each butterfly back together after recoloring them just in case you need to resize them later.
Make sure to turn on your registration marks! This will show you the print and cut borders so you know how much space you have to work with. We were able to fit four of each butterfly on each page. It’s always a good idea to fill your page even if you don’t anticipate using all of the pieces. This minimizes waste, and you’ll end up with a few extra butterflies just in case you need them. We needed to resize two of the light blue butterflies and make them a bit smaller so they would fit on our page. But once the pieces shrunk, you could barely tell the difference.
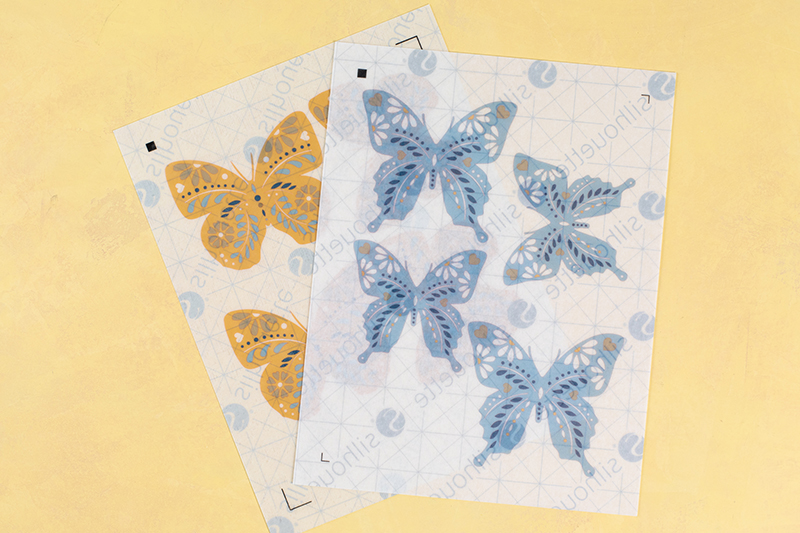
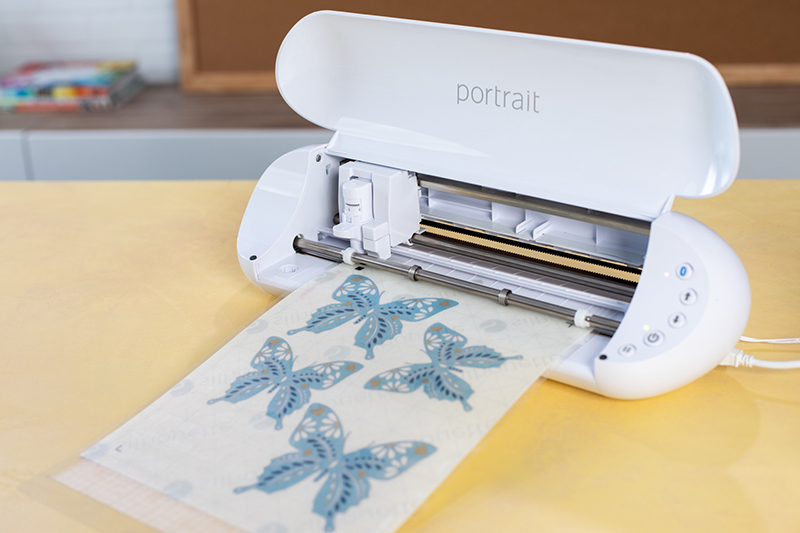
Step Two: Print & Cut Butterfly Pieces
When you’re done preparing your butterfly designs, send them to your printer. Make sure to load your shrink plastic so the design prints on the matte side of the material. Allow the ink to fully dry before loading it into your Silhouette machine.
Because plastic is a bit thicker than other materials, you will need to let the machine make a few passes to cut all the way through your shrink plastic. We used the default “Shrink Plastic” settings, but we decided to add an additional pass after doing a few test cuts. You may need to add a few more passes depending on the age of your blade.
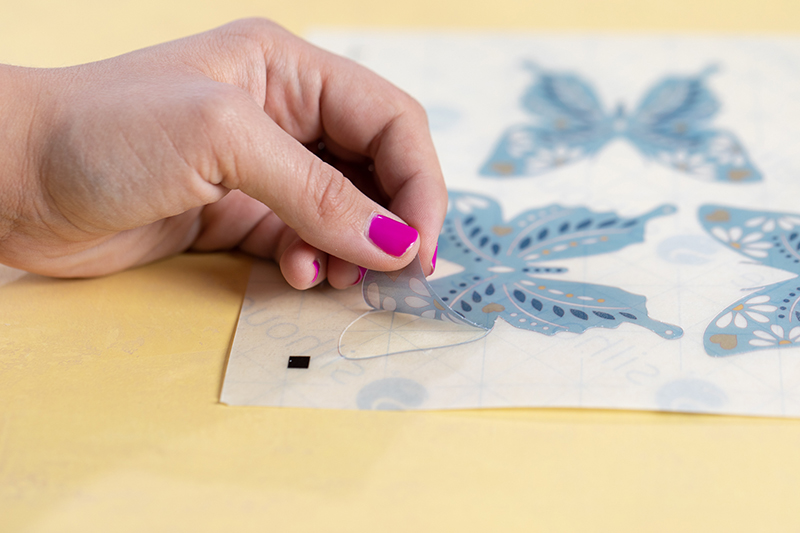
After unloading the mat from the machine, slowly peel the shrink plastic from its backing. This material can be a little fragile, so be gentle! We ended up cutting off the butterflies’ antennae with scissors because they just shriveled up with the heat gun.
Step Three: Set Up Quote Design in Silhouette Studio®
Measure the size of your acrylic sign so you know the maximum dimensions for your quote, and create one more document in Silhouette Studio. Visit your library and double-click the design to open it in your document. Make sure that all of your pieces are grouped together, then select your design and scale it to your desired size. You can scale your design by holding down shift and dragging the small boxes in the corners.
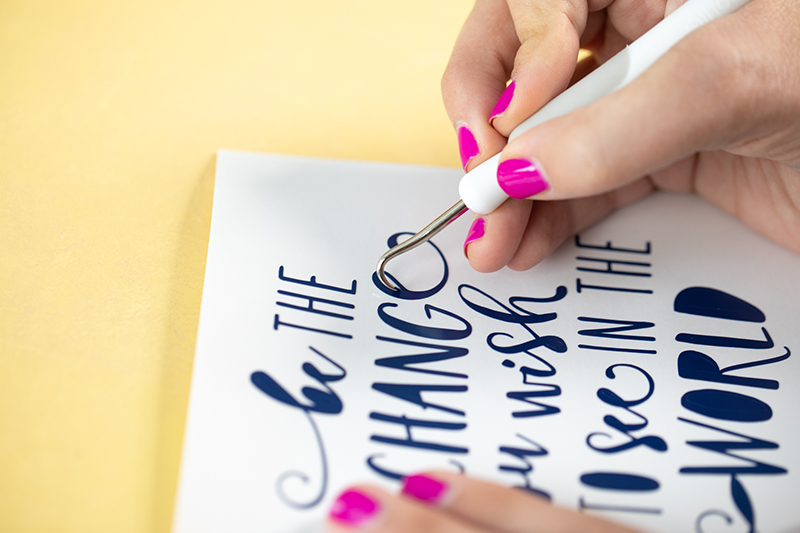
Once your quote is the right size for your sign, cut it with the machine using the “Vinyl, Glossy” cut settings in Silhouette Studio. The default settings worked for us, but you may need to adjust yours if the vinyl doesn’t cut properly. After cutting your design, remove it from the machine and weed out all of the unwanted pieces.
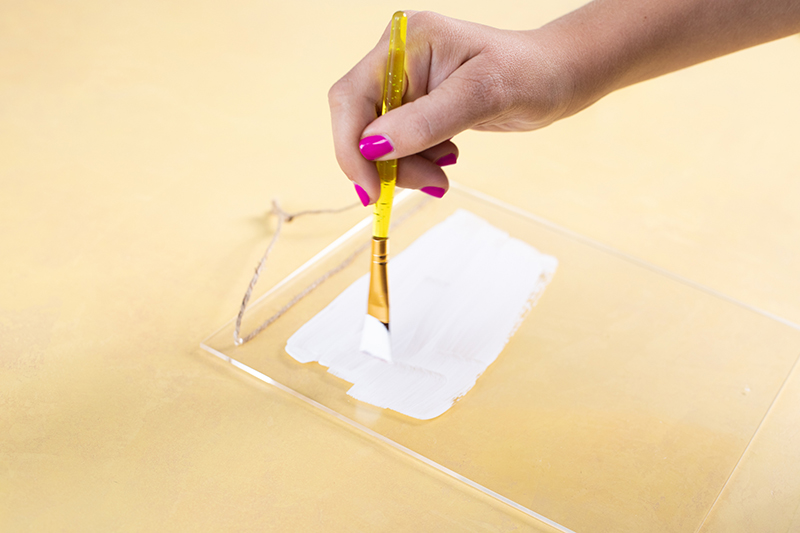
Step Four: Paint Acrylic Sign
This step is optional, but we decided to add some paint to the back of our sign for some contrast. This technique is really trendy right now! We simply took our paintbrush and made loose stokes back and forth on the back of our acrylic sign. Don’t go all the way to the edge—you want to aim for a nice organic shape without sharp edges or lines. Do this step now so your sign has time to dry before gluing on the pieces.
Step Five: Shrink the Butterflies
Are you ready for the best part of the whole project? It’s time to shrink the butterflies. We used a heat gun to do the shrinking, but an oven or even a toaster oven also work well.
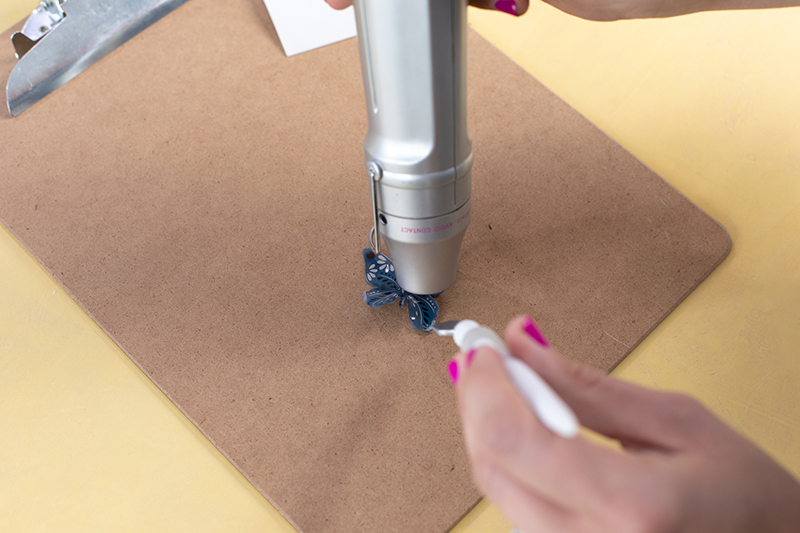
Using the heat gun is so easy. You’ll want to use a surface that won’t completely absorb all of the heat. We originally tried using a baking sheet, but it didn’t allow the shrink plastic to work properly. We found that a clip board was a great surface. Place your butterfly on the clipboard with the glossy side up. Use the spatula tool to ensure that the heat gun doesn’t blow the piece away, and be sure to keep your hands away from the heat! Turn on your heat gun and slowly make circular motions above the butterfly. After a few seconds, the material will begin to shrivel up and shrink. Make sure to move around the entire surface area of the pieces. Continue this process until the edges unfold and begin to flatten out. At this point, use the scraper to flatten the piece.
If you’re using an oven, preheat your oven to 325° F, place your butterflies on a baking sheet lined with parchment paper, and bake for two minutes or until the pieces are flat. Check out this video on how to use our shrink plastic with an oven.
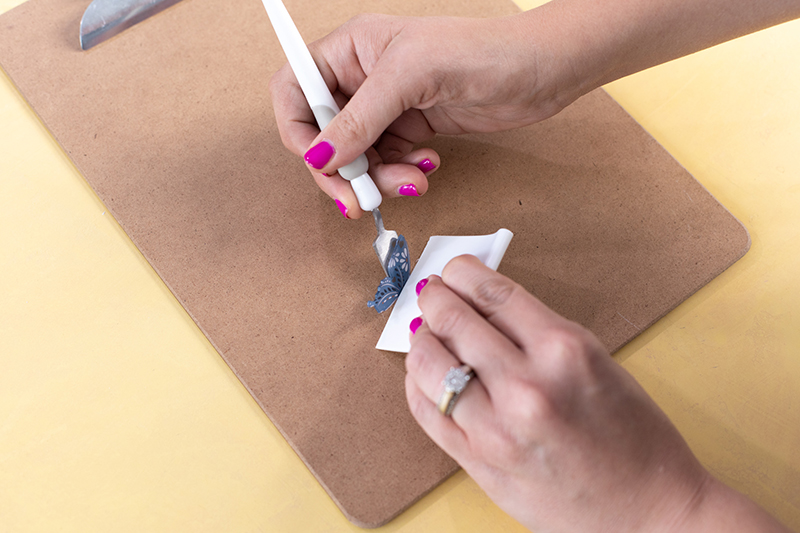
We wanted to add a little bit of dimension to our butterflies. We love the look of a resting butterfly and how their wings are slightly lifted. When the plastic is a still a little warm and pliable, use your scraper and spatula to lift one wing off the surface. You can do this whether you use a heat gun or an oven to shrink your pieces. This step is optional, but it adds some beautiful detail to the finished sign.

Step Six: Assemble the Sign
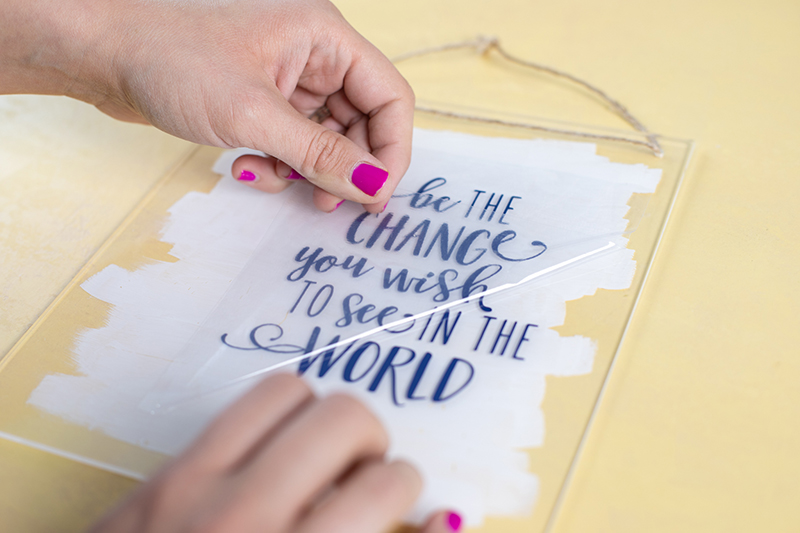
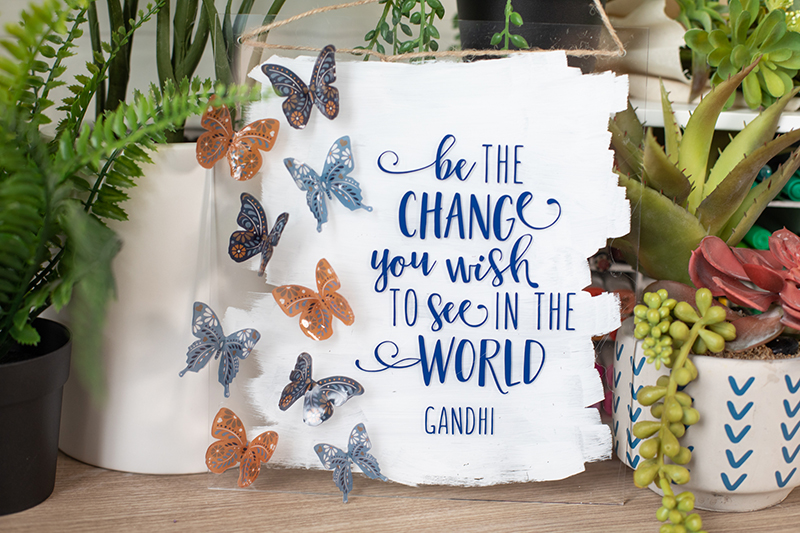
Use a piece of transfer tape to add the vinyl quote to the acrylic sign. You can center the quote, but we decided to put it to the right side. Place the quote on the unpainted side of the sign. This gives your sign the painted look while still keeping a smooth texture.
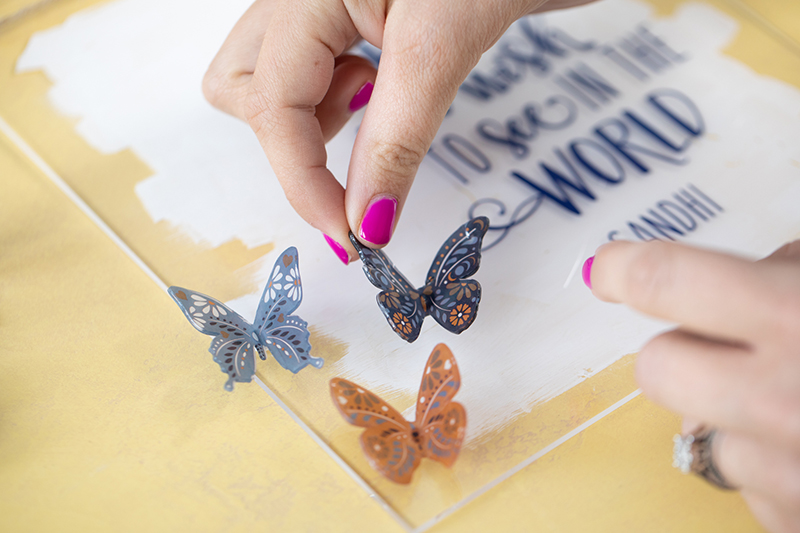
Next, glue the butterflies to your sign. We wanted to use 3D adhesive dots to add them to the sign so the butterflies were raised off of the sign, but the dots weren’t sticky enough on their own. So, we decided to hot glue the dots on so the sign would be more durable. Add a small amount of hot glue to the center of the butterfly on the back and place an adhesive dot on top. Allow it to dry for a few minutes, then place another bit of hot glue to the adhesive dot and place it on the sign wherever you want to add a butterfly. Use your creativity to place the butterflies however you’d like!
Our sign already had a string tied to the top, but you’re welcome to add your own ribbon or remove it entirely. This sign would also look great displayed on a desk or table using a small easel.

Thanks for following along! We hope you enjoyed this tutorial on how to use the Silhouette Shrink Plastic. Remember to check our social media channels for updates on new tutorials, videos, and more!
 Quirky Mug
  Quick Spring Welcome Sign
Laurie Bubenik
July 19, 2021
This was really cool! Thanks for sharing!
Dulce
July 20, 2021
I’m absolutely fascinated with this shrink plastic project! Great Tutorial! My only handicap: my Cameo3 has the Print & Cut function damaged. Please advise me: How can I cut without this function ? Thank you so much.
Kelly Wayment
August 5, 2021
An alternative would be to fill the whole page with a pretty pattern, then only place the outer cut line of the butterflies on the page. It will use more printer ink, but you won’t need to use registration marks if the butterfly cut lines have no blank space around them where precision would be required. I hope that makes sense!