
If there is a nook in your house that needs a bit of holiday cheer, look no further! This brightly colored banner used cardstock and chipboard and a gold pen for a festive touch.
Supplies Needed:
- Silhouette Cameo®
- Silhouette Studio®
- Silhouette Cutting Mat
- Silhouette AutoBlade or Silhouette AutoBlade for Cameo 4
- Silhouette Pen Holder or Silhouette Pen Holder for Cameo 4
- Gold Paint Pen
- Cardstock in colors of your choice and White
- Chipboard
- Adhesive
- Twine
- Design ID #308854, #308852, and #308855 all by Kristen Magee
Step One: Formatting the Design
1. Insert all the designs into Silhouette Studio. Right-click on the JOY and ungroup them so you can separate the letters a bit more. Select all the elements, open the Offset Panel on the right-hand side and select Offset, giving each element an outline of itself.
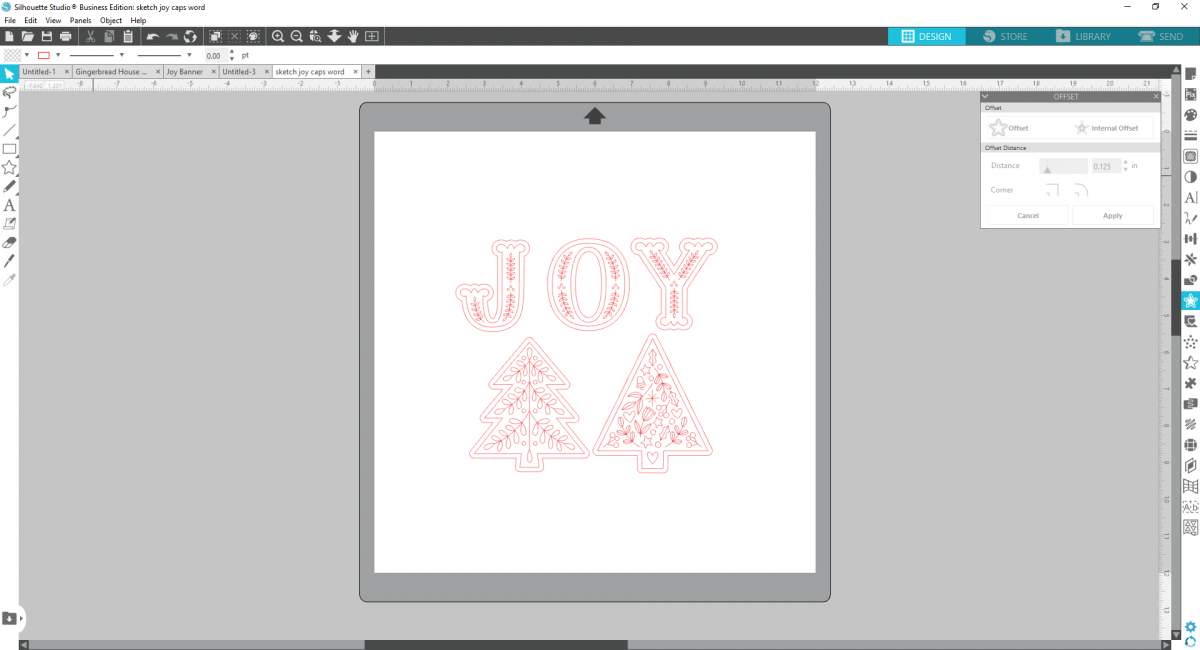
2. Select and size each element to be about 5 inches tall, or however tall you’d like your banner to be.
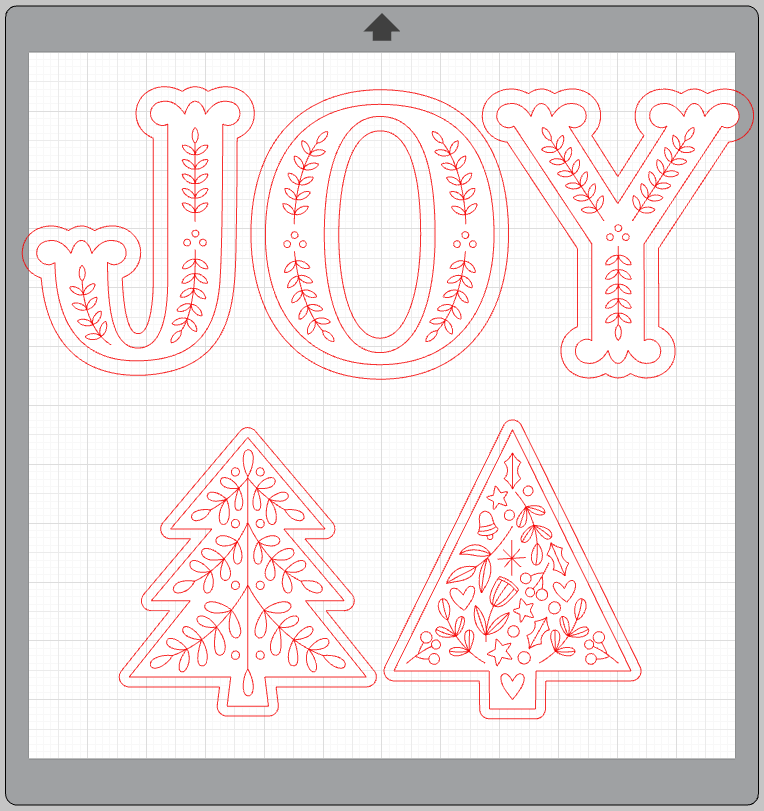
3. Now further ungroup each element so that the inner designs separate from the outline, and the outline is separate from the offset. This allows you to control each element, which is what we want because some portions will be cut and others will be sketched!
4. For this banner, we sketched all the inner designs on various colors of cardstock with a gold paint pen using the Pen Holder. Then we cut the designs out. Then we cut the offsets out in white cardstock. We cut two of each tree type on different colored cardstock.

Step Two: Cutting and Sketching
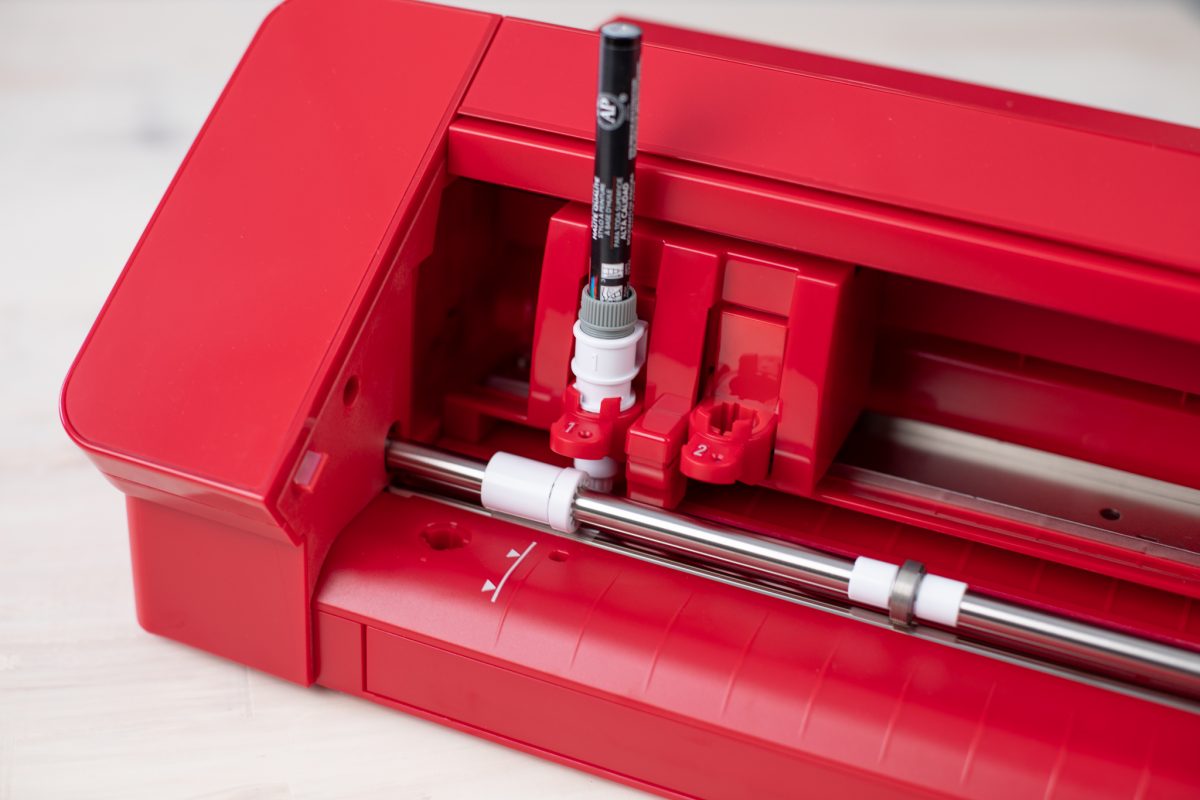
5. To Sketch first, place your pen into the pen holder, using the appropriate adapter. If using the Cameo 4, place the pen holder into Tool 1. If using another version of Cameo, either carriage works.
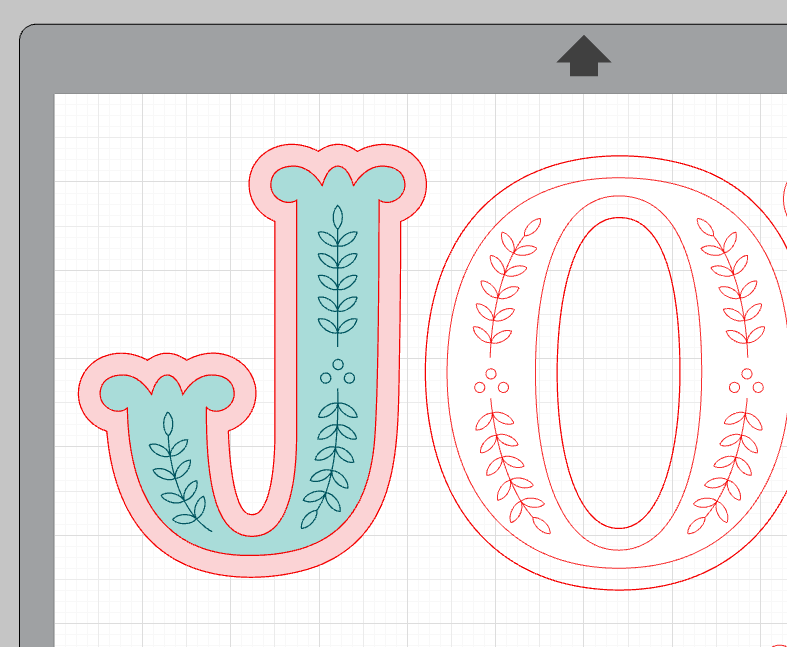
6. We’ll do each element individually to demonstrate how to set your settings. For the “J” in joy, place a piece of yellow cardstock in the upper left hand corner and a piece of white cardstock in the upper right-hand corner. Make sure the pieces of cardstock are large enough for the letters.
7. Set your material to Cardstock, Pain, your action to Sketch, and your tool to Pen holder. To sketch the inner design, select the design element and select “Sketch.” It should turn red if using carriage one (or blue if using carriage two on an earlier Cameo model). Then select the letter shape and the offset and select No Sketch. We are going to cut these parts later. This should make them appear faded. Send to your machine to sketch!
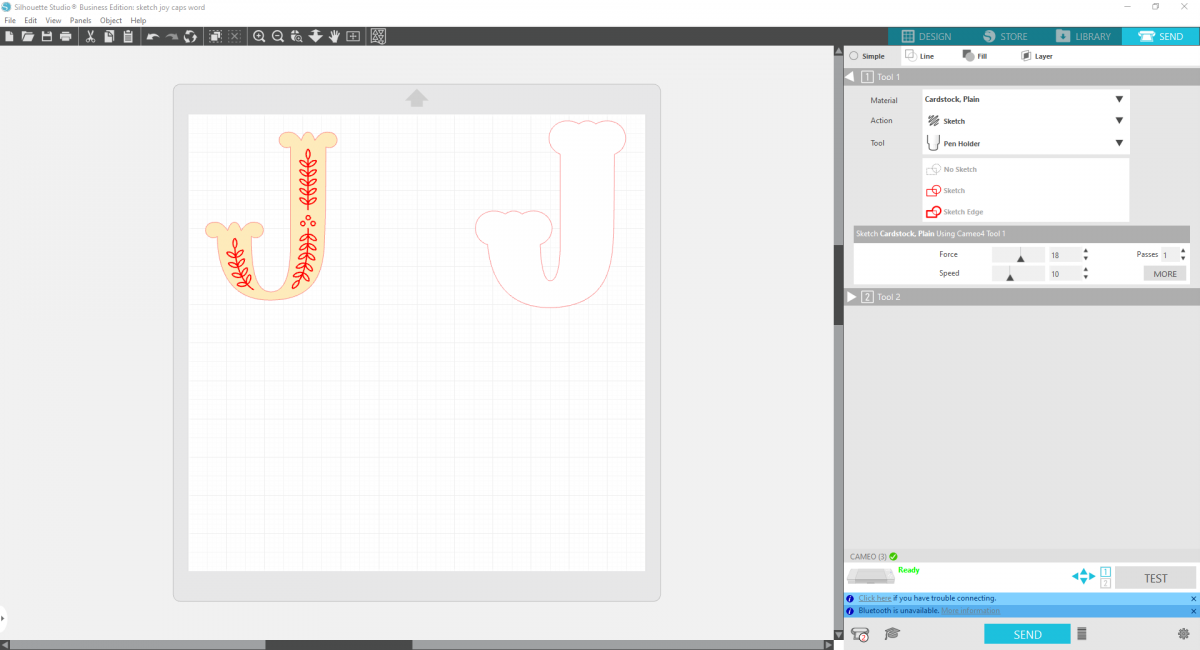
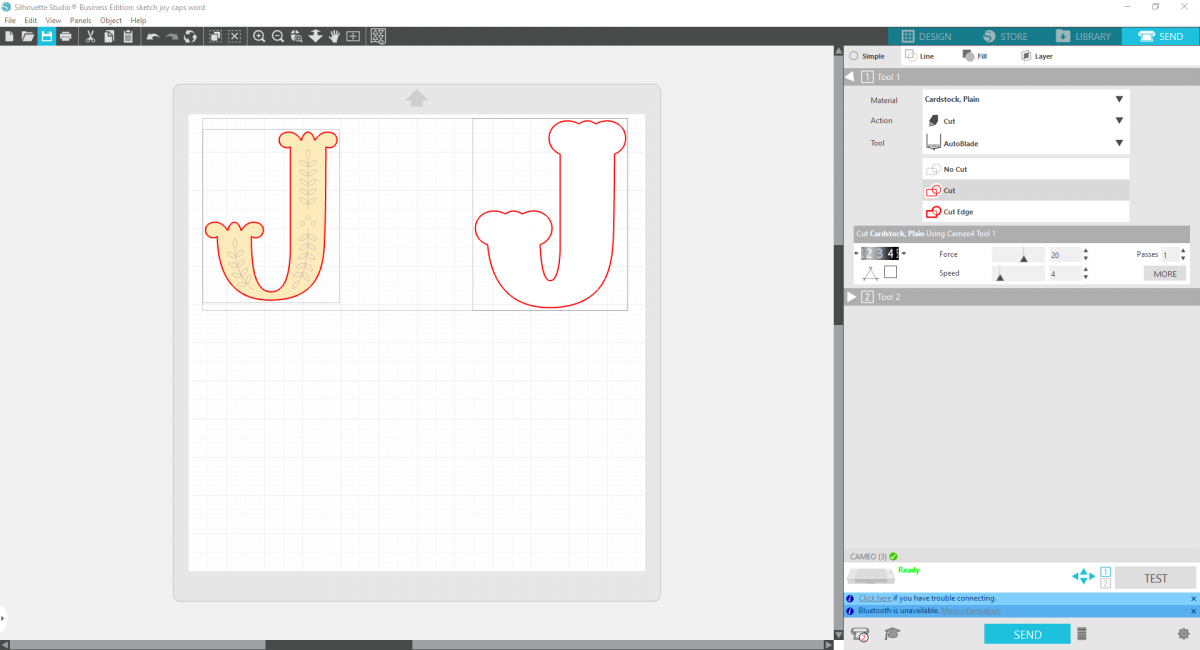
8. After your sketch your design, don’t unload your mat! Simple exchange the pen holder for the Autoblade and the action to Cut. Then change the inner design that we just sketched to No Cut, it should turn faded. Select the J and the Offset and click Cut–These should now be in red (or blue if using carriage two on an earlier Cameo model). Now press send and your designs will cut!
9. Repeat this process for all the trees and letters in your banner! Then cut all the offsets out onto chipboard as well. This is optional but will make your letters a bit sturdier.
**This is also a good project for trying out the Pop-out Cut feature on the Cameo 4! For cutting the offsets of each letter in white, you can skip the mat, load your paper straight into the machine and select Pop-out Cut for Action. This will keep keep all the shapes intact in the sheet until you gently pop them out.

Step Three: Assembling the Banner
1. Glue the white paper offsets onto the chipboard offsets. Then center each sketched piece onto the chipboard offset and glue.

2. Apply twine to the back of each element and glue in place with hot glue or strong adhesive.

3. Hang up and welcome holiday cheer!

 Hedgehog DIY Bookmark
  Quick Spring Welcome Sign
Barb Pierce
January 4, 2020
I have a Portrait 2 and I am wondering if this will work for that machine. I have the sketch pens so I can have them in the machine but I don’t know if there is something that has to be updated for my machine.
Silhouette
January 6, 2020
You should be able to do this project with a portrait! You’ll do the sketching portion first, and then switch the pen for a cutting blade. Don’t unload your media in between the switching, to make sure everything stays in the same position!
Amy Patrice Helus
January 8, 2020
Hey ladies – does anyone know if silhouette studio is compatible with iPad and/iPhone? My laptop died and I am desperately trying to find silhouette mobile. Cricut has an app but I can’t find anything about silhouette. Help?
Silhouette
January 13, 2020
Unfortunately, we do not currently have an app for the iPad or iPhone!