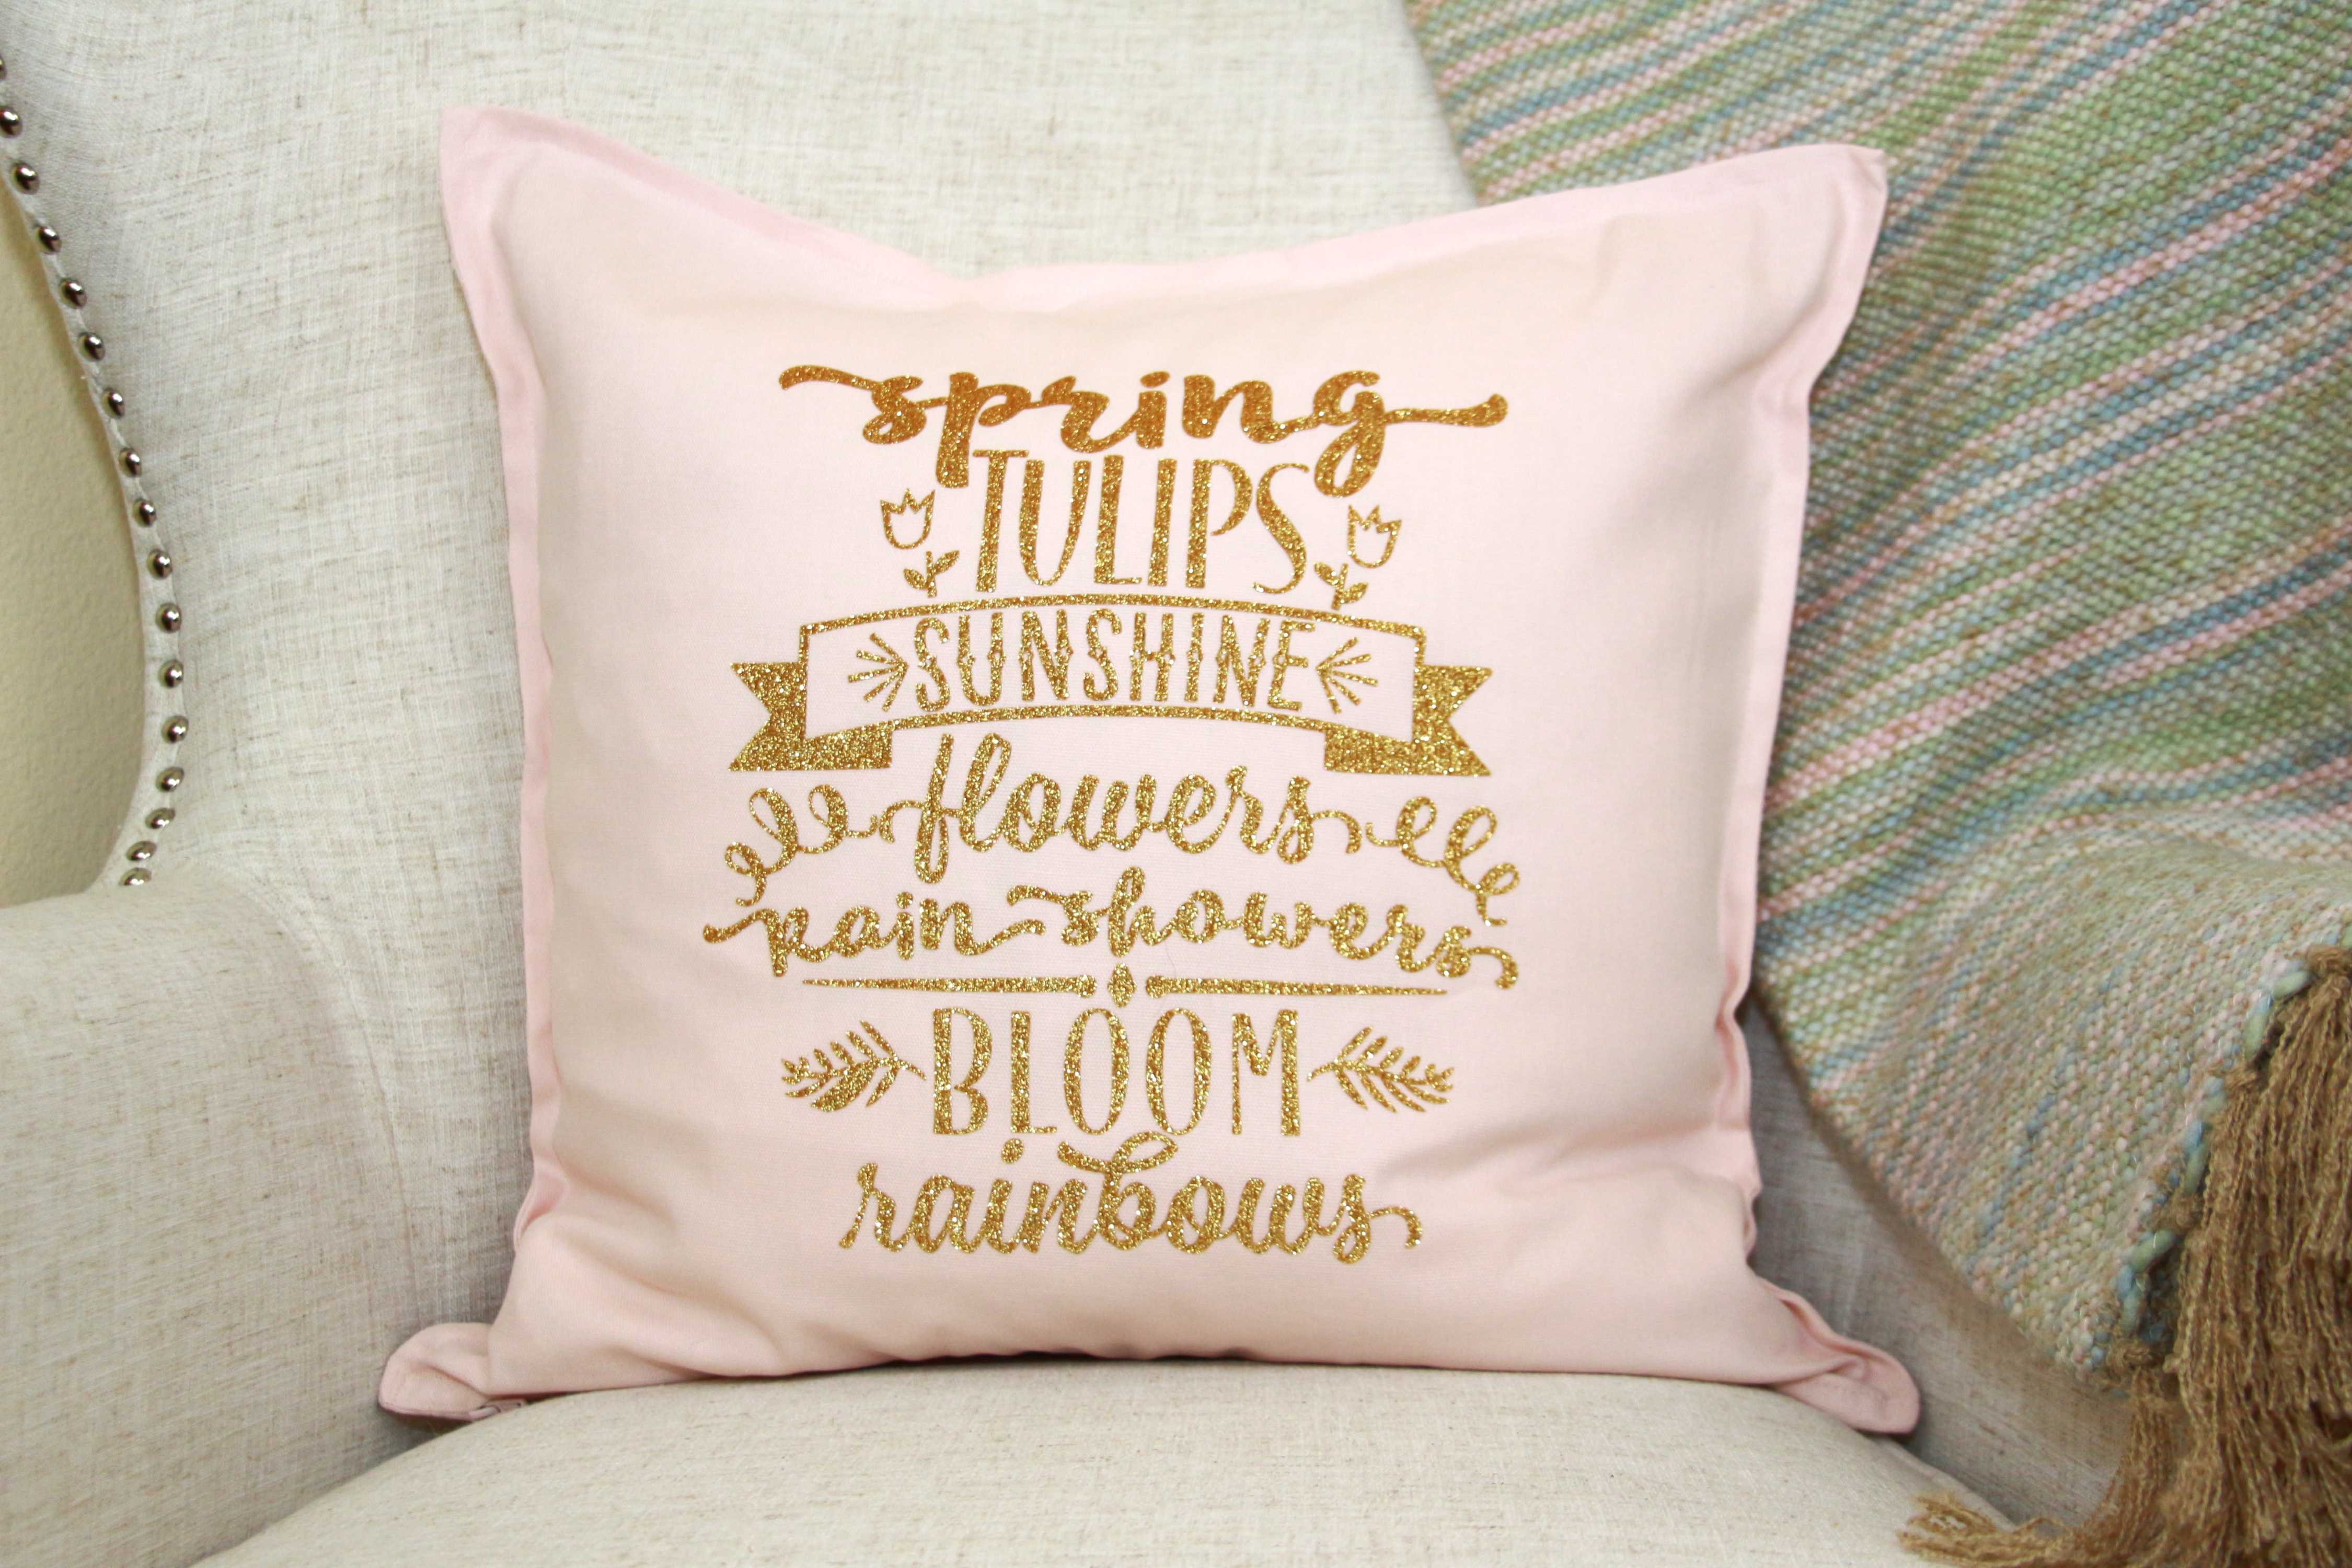
Today I want to share my DIY Spring Pillow I made with glitter heat transfer vinyl. I used a beautiful design from the Design Store with spring word art. There is a complimentary Easter design as well. Keep reading for the tutorial and make a spring-themed pillow for yourself!
Supplies Needed:
- Silhouette CAMEO®or Silhouette Portrait® or Silhouette Curio™
- Silhouette Cutting Mat
- Silhouette Cutting Blade
- Silhouette Studio®
- Gold Glitter Heat Transfer Vinyl
- Pillow Case and Pillow
- Design ID# 191308
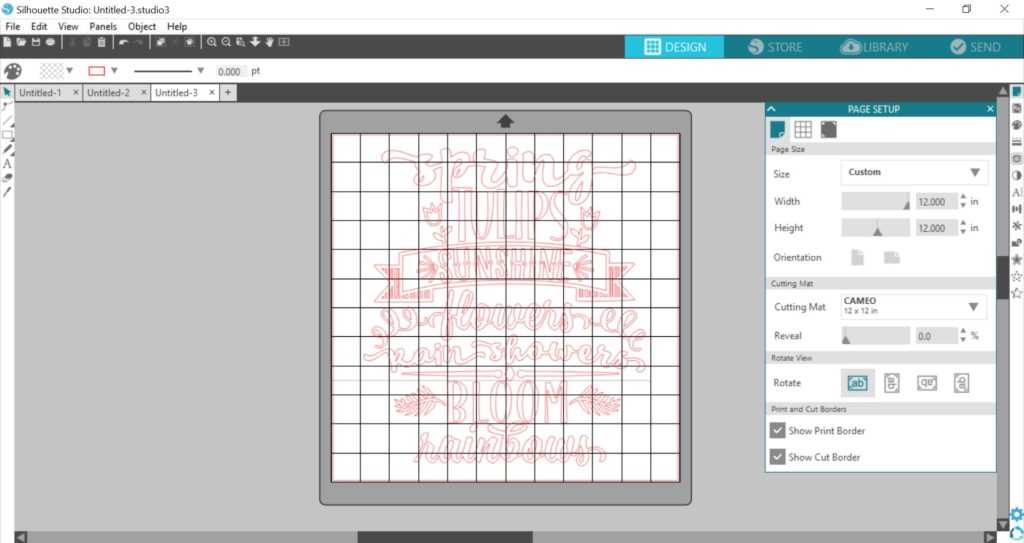
Step One: Creating Your Design
- Open up Silhouette Studio®.
- Select the Page Setup window and adjust your cutting mat size to 12 inches x 12 inches (or the size you would like for your pillow).
- Download and open your word art (Design ID #191308).
- Make your design fill the 12 x 12 space. Be sure to move the design as a group so everything remains lined up.
- Select the whole design and click Object on the top toolbar.
- Select Mirror and flip your design horizontally. Designs must be mirrored when using heat transfer vinyl so that your design appears right side up when you iron it on fabric.
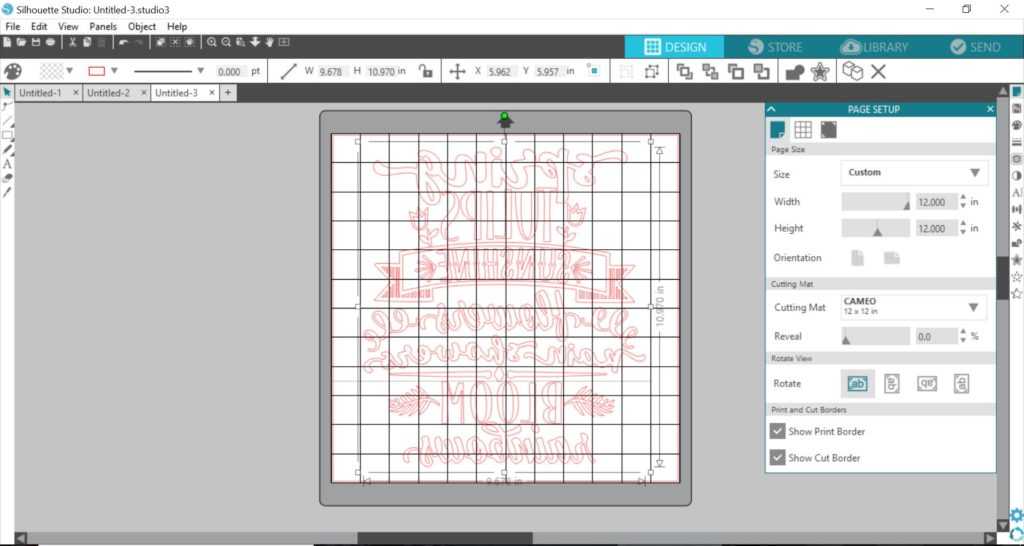
- Load your glitter heat transfer vinyl on a cutting mat, glitter side down, into your machine.
- Follow the prompts in Silhouette Studio® to adjust your blade (if you are using a ratchet blade) for glitter heat transfer vinyl and double-check to make sure your design has been selected to cut.
- Select Send to start cutting.
- Select Unload when your machine has finished cutting your design to remove the cutting mat from the machine.
Step Two: Preparing Your Design
- Remove your sheet of heat transfer vinyl from the cutting mat.
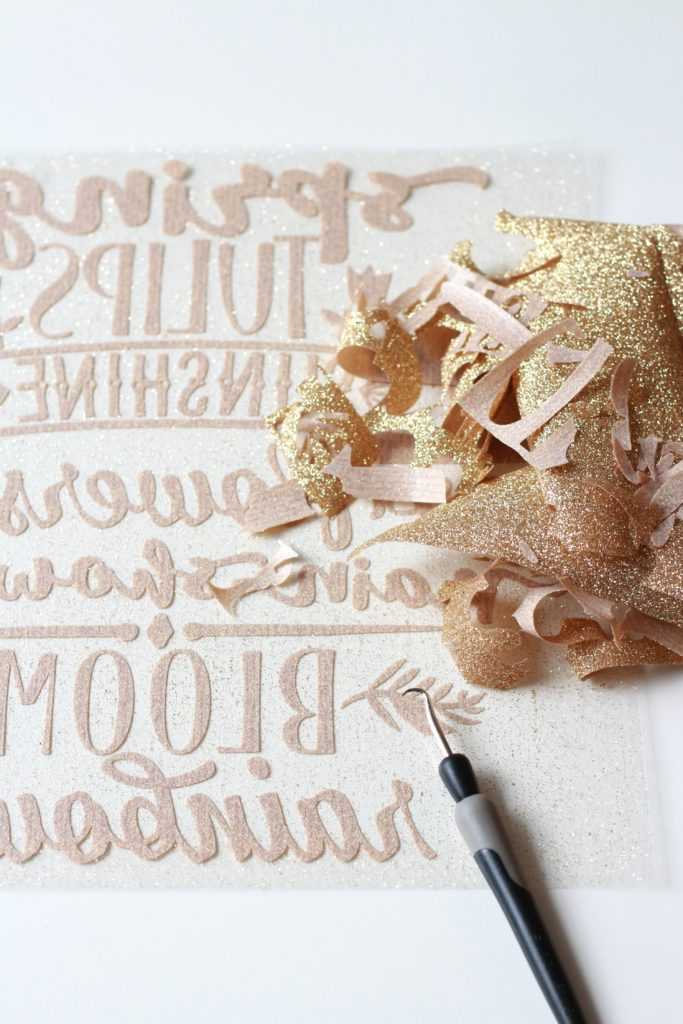
- Use your fingers or a wedding tool to remove the excess vinyl. Be sure to leave your design on the clear carrier sheet. This is how you will iron it onto your pillowcase.
- Carefully remove the centers of the letters and graphics. Flip the sheet over to see the design facing the correct way to make sure you have completely weeded the design.
Step Three: Creating Your Pillow

- Heat up your iron.
- Place your pillowcase on your ironing board and make sure it is flat.
- Place your weeded design face up on top of the pillowcase.
- Cover your design with a clean towel and apply firm pressure with your iron.
- Spot test your design to see if it sticks to your pillow when you pull up on the clear carrier sheet.
- Once your design has transferred, remove the clear carrier sheet and discard it.
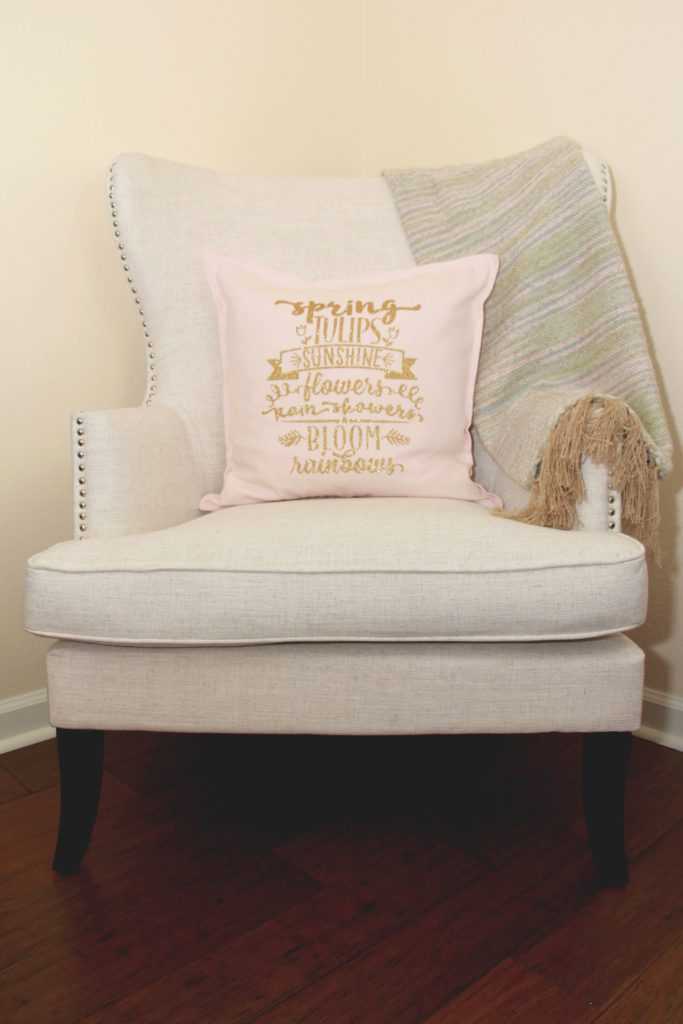
Now you have created a custom spring pillow with word art! Tell me what colors you will use for your pillow in the comments below.
Kelly Wayment
March 26, 2018
Gold glitter heat transfer may be my favorite of all Silhouette products! I love it on the pink pillow! Happy Spring!
Elise Laney
May 14, 2018
Fellow glitter lover right here, Kelly!
Leah
April 12, 2018
I think your color combo is the prettiest!! I would also try a medium gray pillow with white lettering!
Elise Laney
May 14, 2018
Ooooh Leah, I think the gray and white would be pretty too.