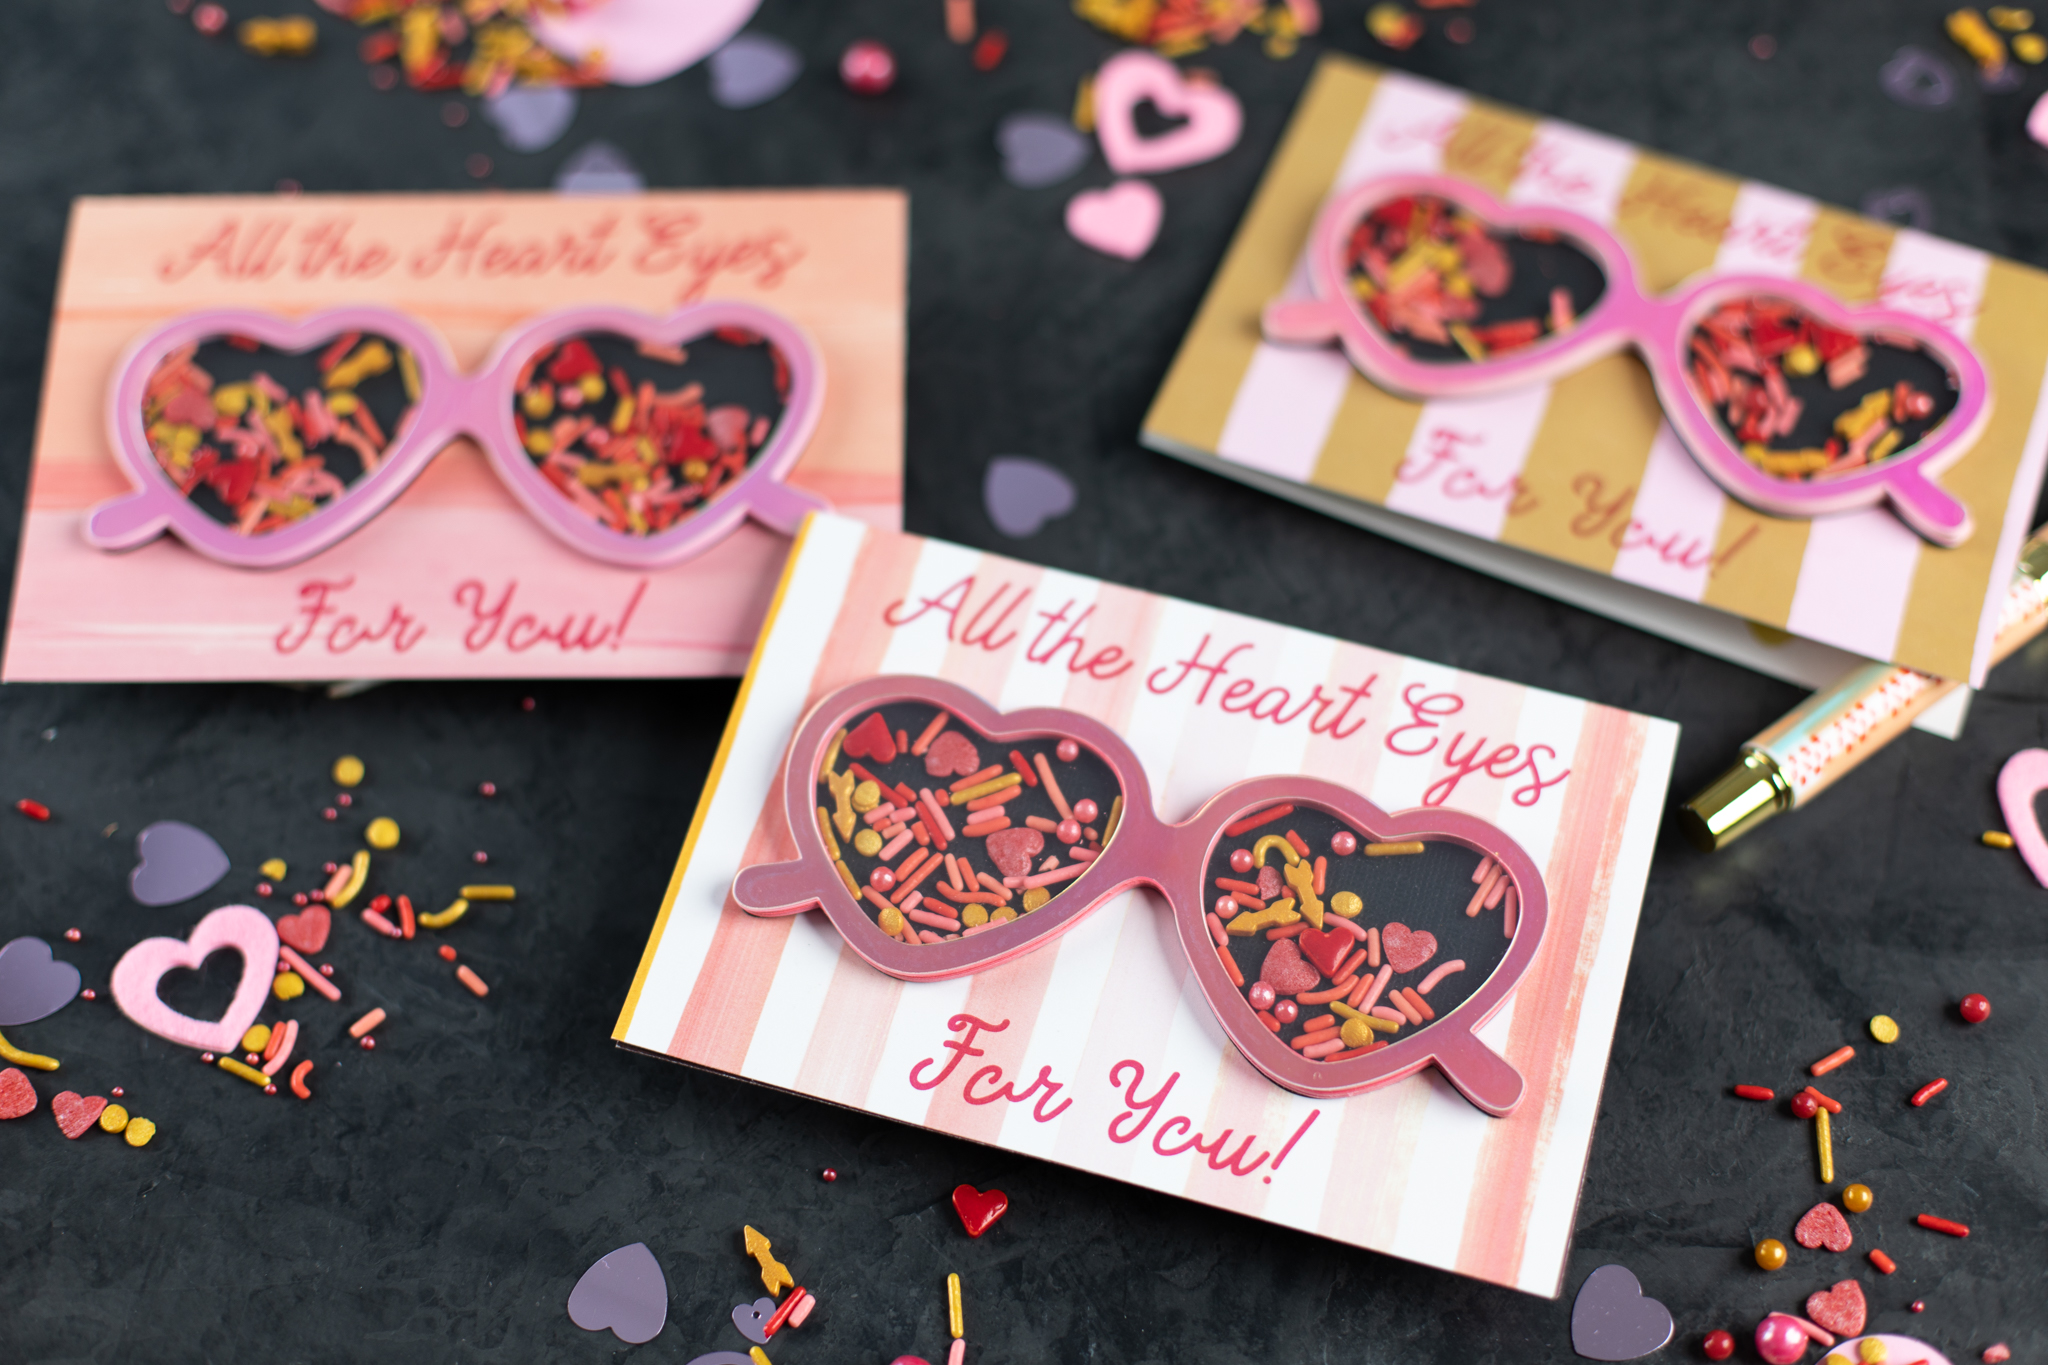
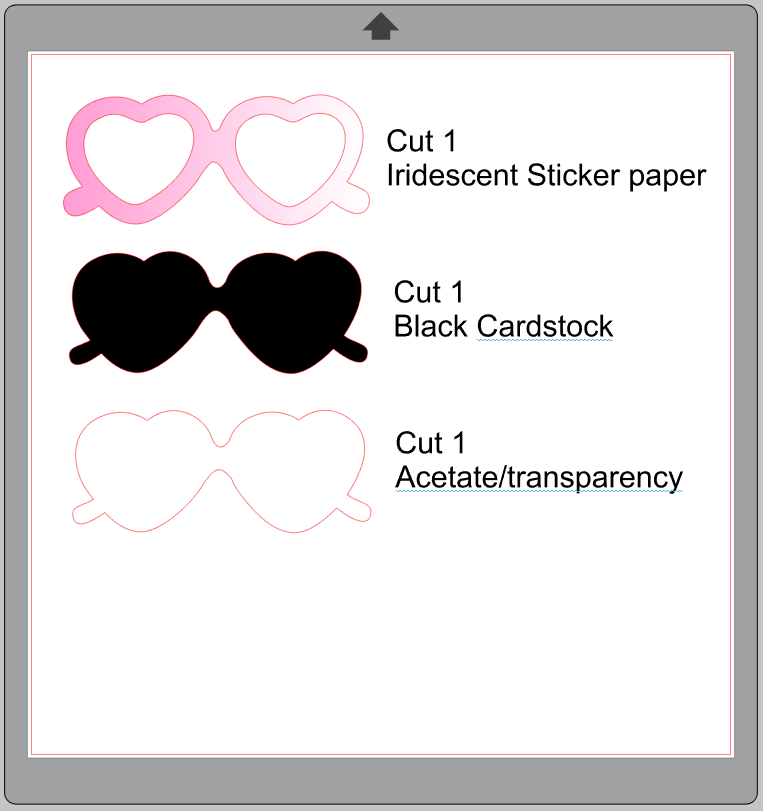
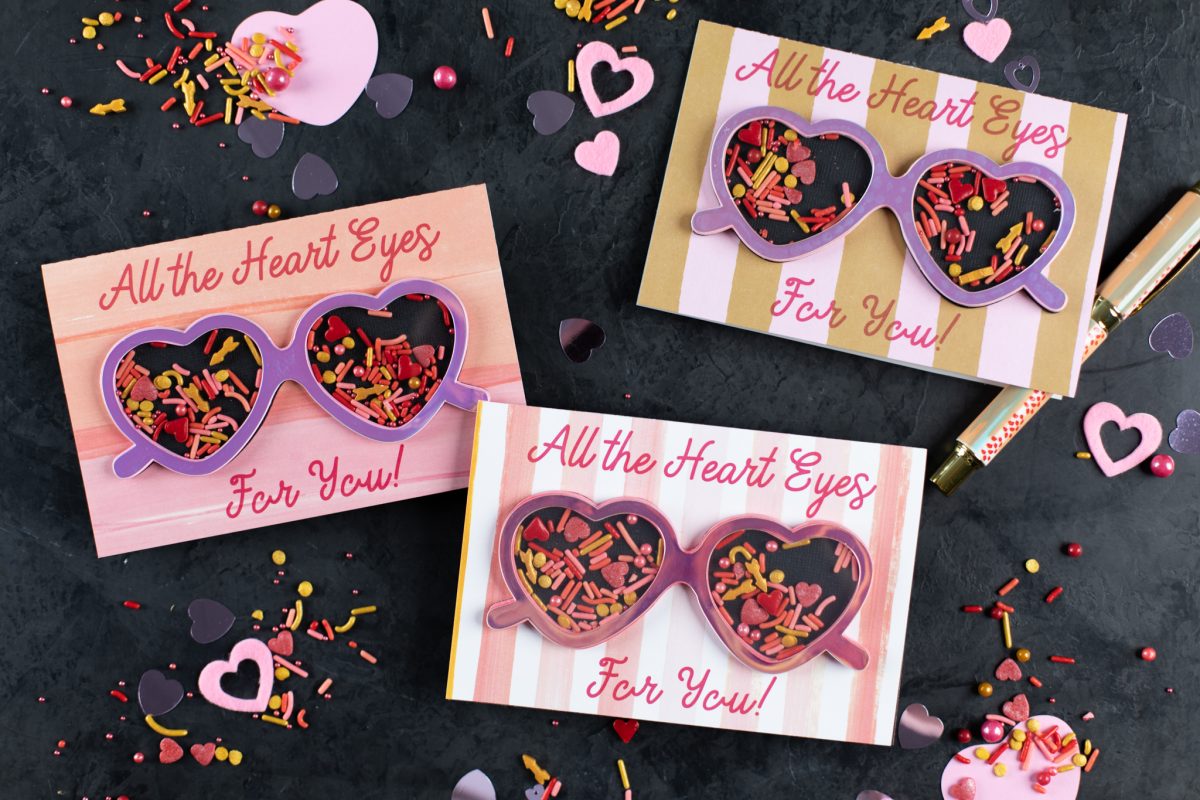
Have you heard of shaker cards? They’re fun designs filled with glitter, sequins, or—in this case—sprinkles! This card is perfect for Valentine’s Day, and we’re using acetate sheets and our new iridescent sticker paper to really make it pop!
Supplies Needed:
- Silhouette Cameo®
- Silhouette Studio®
- Silhouette Cutting Mat
- Silhouette AutoBlade
- 1 sheet of Iridescent Sticker Paper
- 1 sheet of acetate or another transparent sheet
- 1 sheet of 8.5-by-11-inch black cardstock
- 1 sheet of 8.5-by-11-inch pink cardstock
- 1 sheet of 8.5-by-11-inch patterned paper
- Adhesive
- Sprinkles or sequins
- Design ID #298858 for sunglasses and #41286 for Sunday Font
Step One: Formatting the Base Card
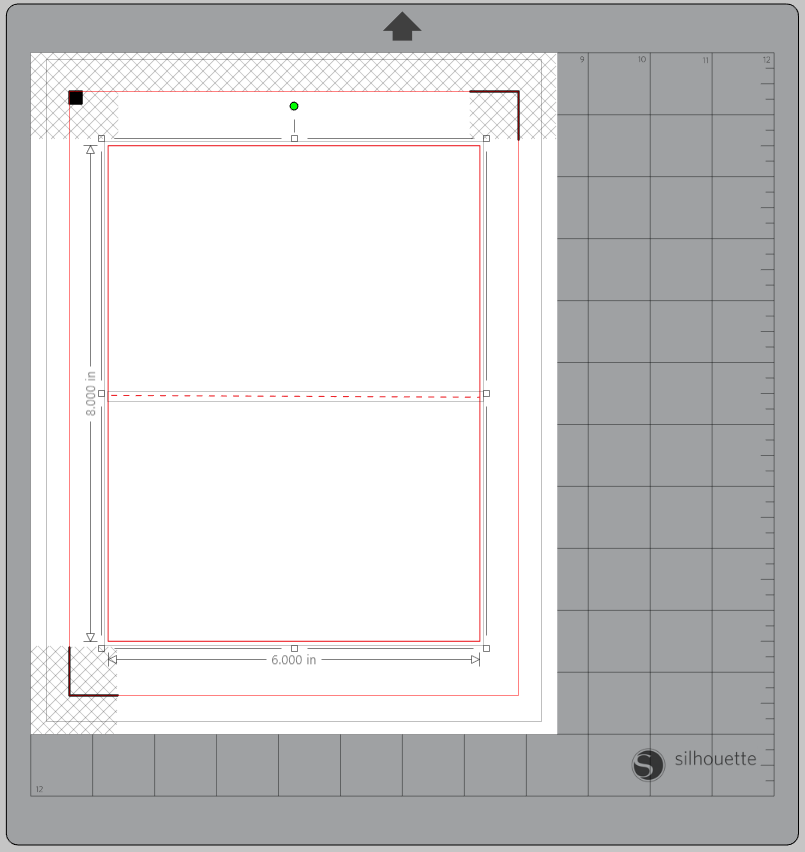
1. Set media size to 8.5 by 11 inches and turn on registration marks. Create a rectangle with the shape tool that measures 8 inches tall by 6 inches wide. Then draw a dashed line through the middle of the card to act as a fold line.
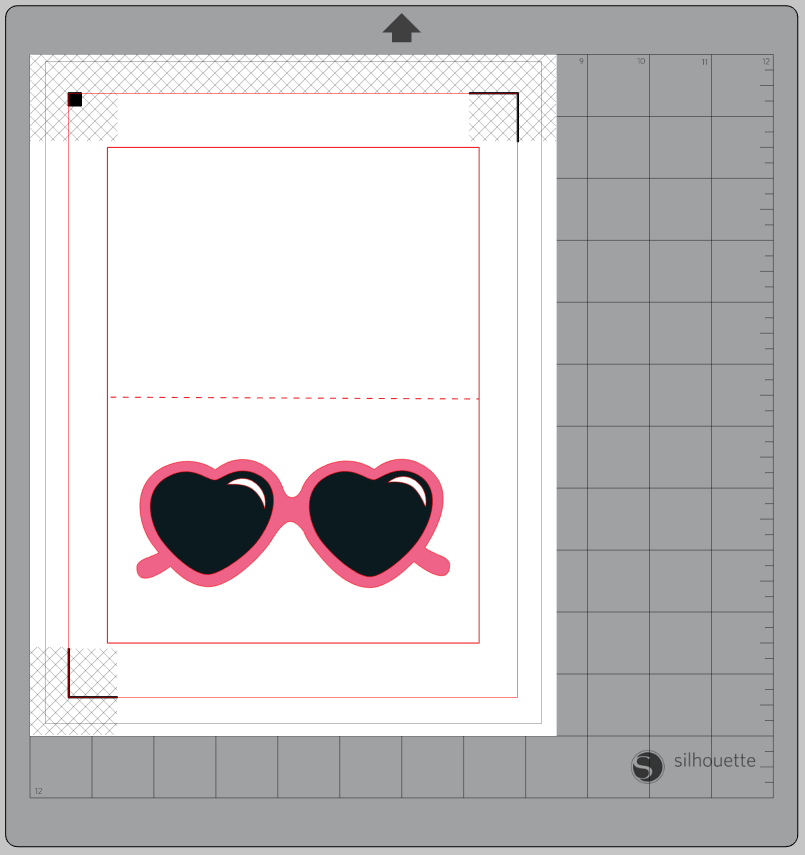
2. Now insert the sunglasses design and size it to approximately 5 inches wide. Center the sunglasses in the bottom half of your card. This is just so we can position the text.
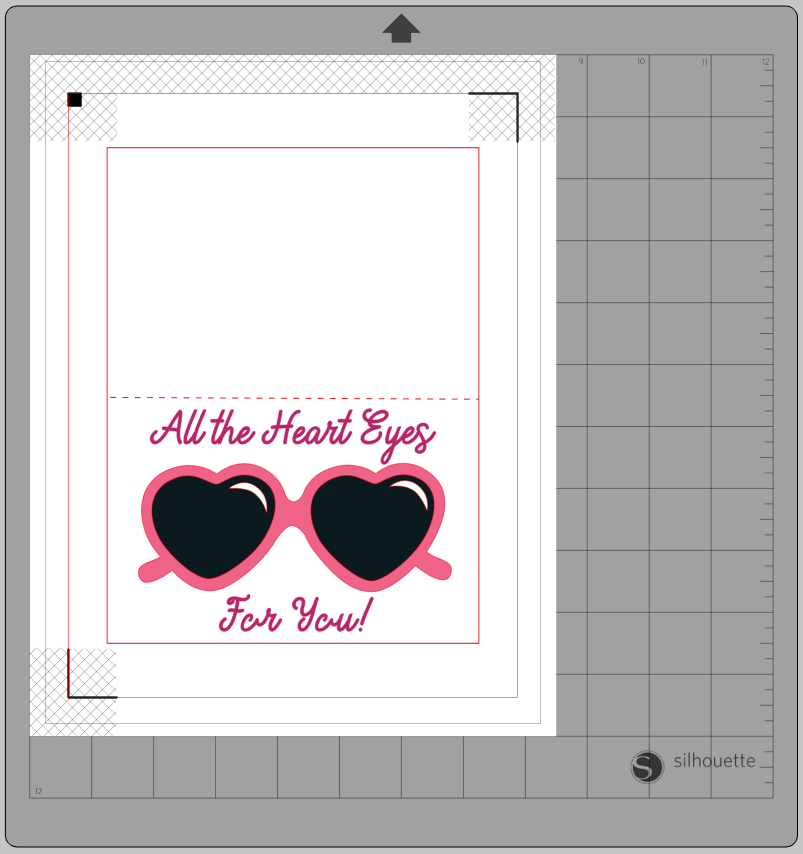
3. Using the Text tool, write your desired phrase. We used, “All the Heart Eyes for You!” But you’re welcome to think of your own pun! Change the font, if you choose, and position your phrase on the card.
We split the text up into two lines, one above the sunglasses and one below. Then we centered it, changed the font to Sunday font, and then welded the letters together.
4. Now move the sunglasses off the page and into your gray area—we don’t want to print those! Use print preview if you can, to make sure your registration marks will print appropriately. Then print!
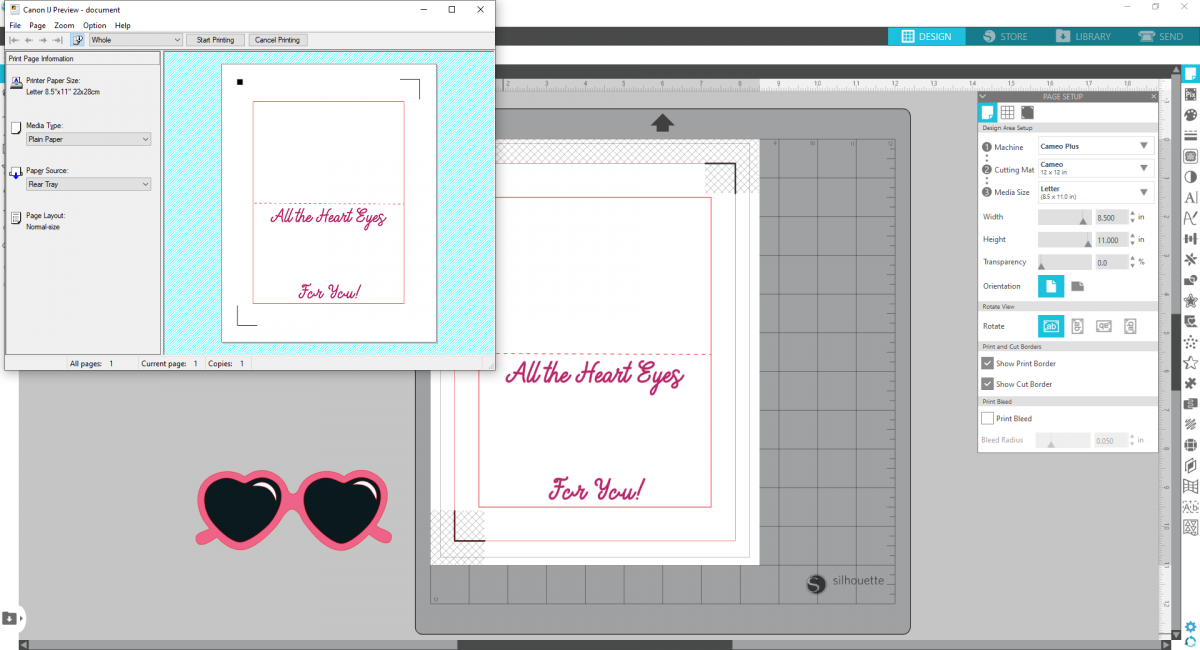
5. Once the page is printed, position it on your mat just as it appears in the software—in the upper left hand corner—load the mat into your machine and cut the page with the appropriate cut settings.
Step Two: Cutting the Sunglasses
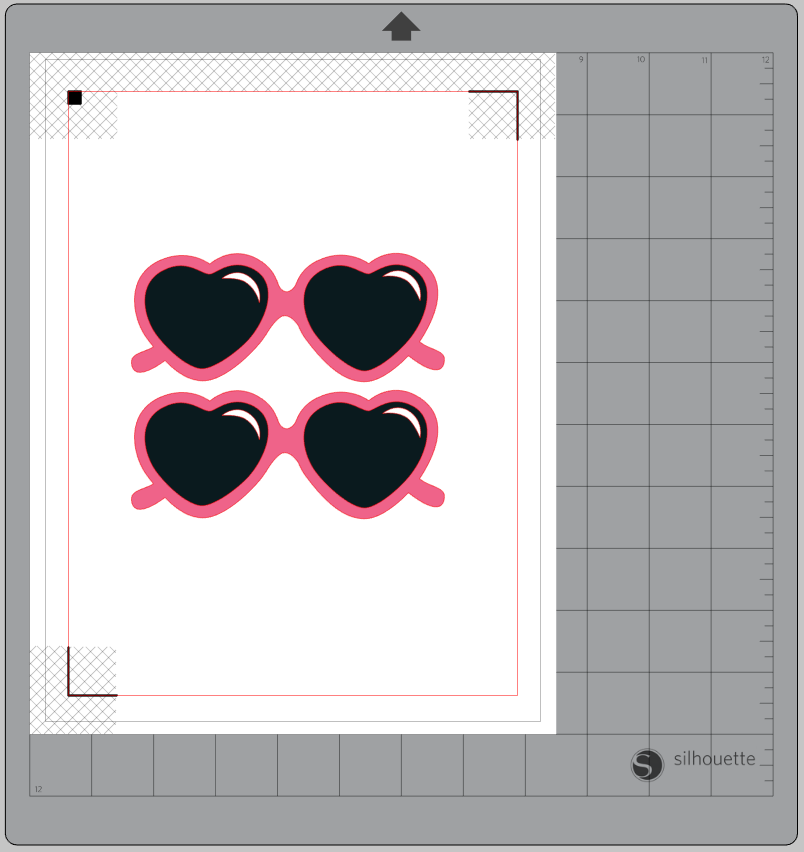
1. Move the card design off to the side and bring the sunglasses back onto the page. Make a duplicate of the sunglasses so you have two pairs.
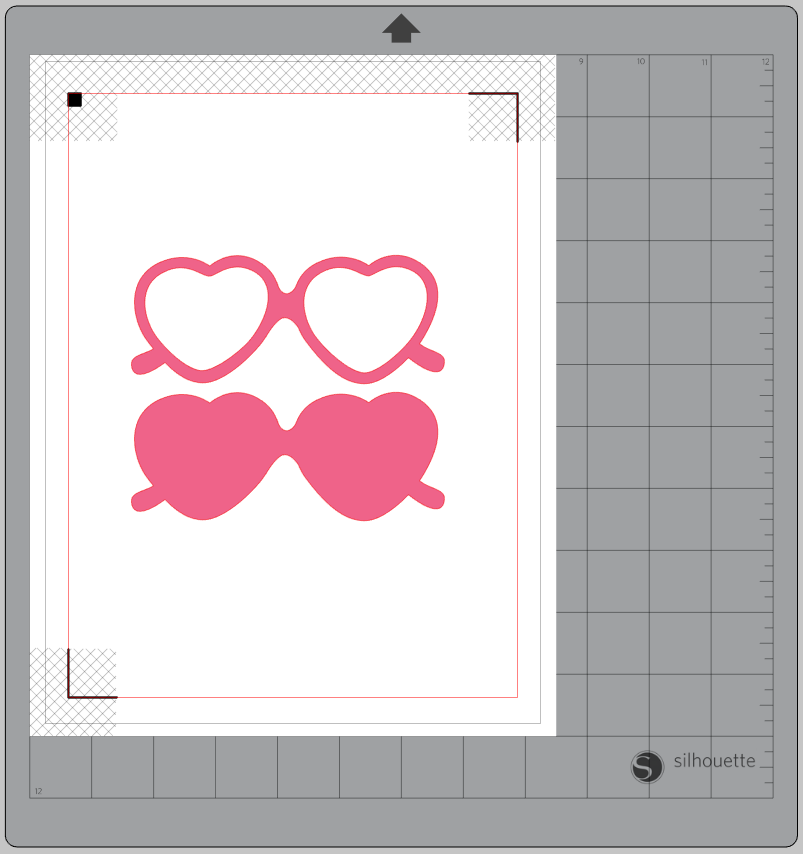
2. With one pair, right-click and select “Weld” so that you’re just left with the outline of the glasses. With the second pair, right-click and select “Ungroup” so you can delete the little white shines in the glasses, and then select the remaining parts of the design. Right-click and select “Make Compound Path.” Now you should be left with just the glasses frames.
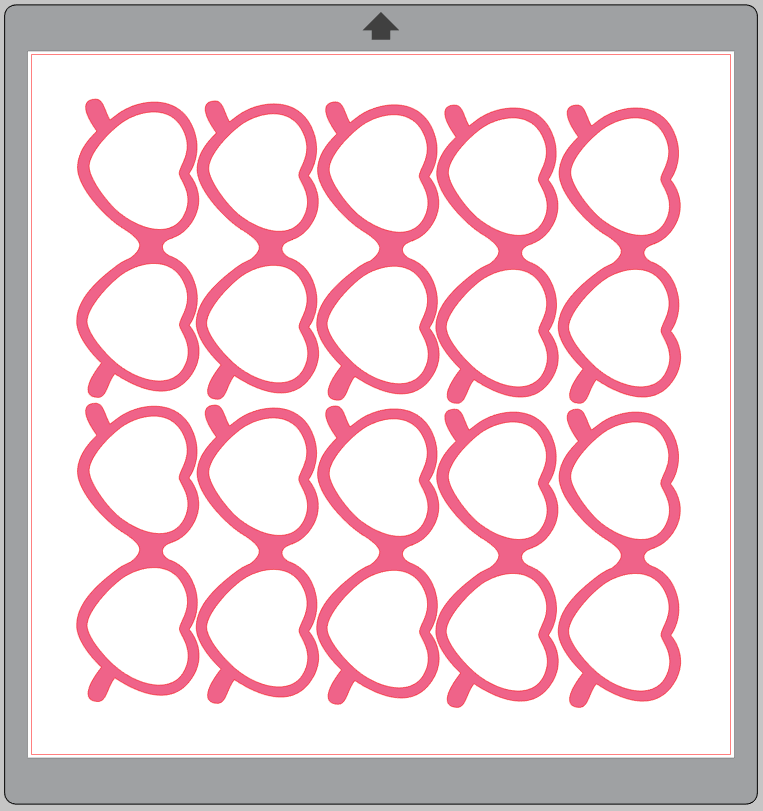
3. To make the shaker we need a number of components! Begin by cutting out 8–10 glasses frames from your pink cardstock.
4. Next, we need one glasses frames design cut from the iridescent sticker paper, one glasses out line cut from black cardstock, and one glasses outline cut from acetate or transparency.
Step Three: Assembling the Shaker
1. Now that you have all your elements cut, it’s time to assemble! Begin by layering and gluing all the pink sunglasses frames together.
2. Now glue the stacked frames on top of the black solid sunglasses piece.
3. Now fill with your sprinkles or sequins! Don’t overfill, as you want them to have room to move around.
4. Now you can glue your acetate sunglasses to the top of the filled frames.
5. Lastly, place the iridescent sticker frames to the very top.
6. Now you can adhere the shaker glasses to the center of your card. Write a sweet sentiment inside and give to your special someone!
 Layered Card with PixScan
  Hedgehog DIY Bookmark
ROSILEIA MOREIRA GANDA
January 30, 2020
MUITO BACAN A IMPRESSORA