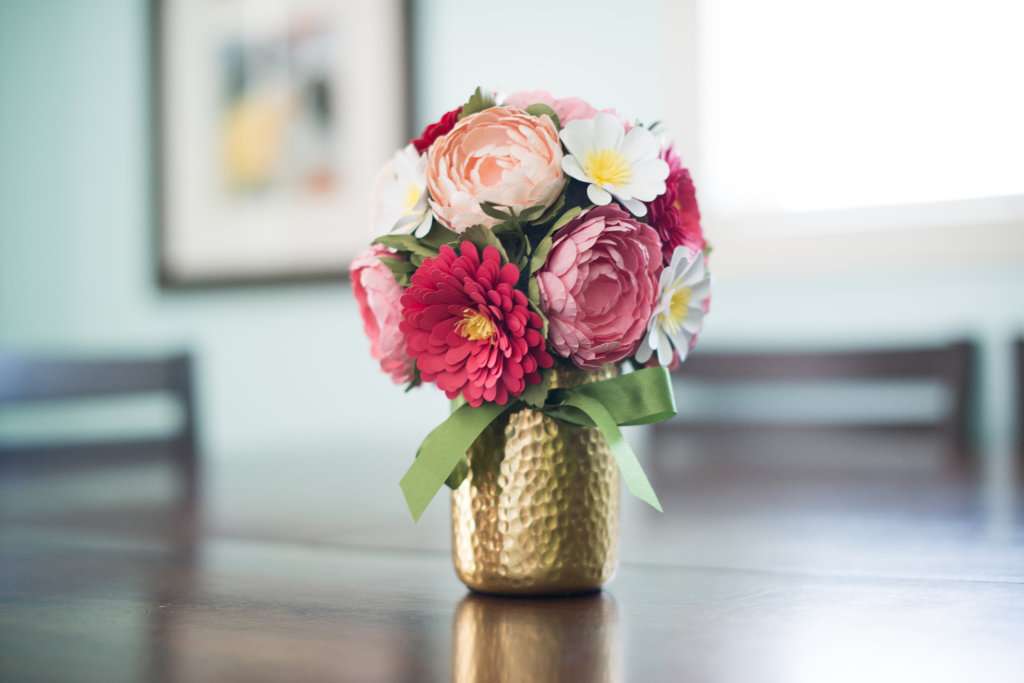
Today we are going to share with you part one of our tutorial on how to make a 3D paper flower bouquet. In this first tutorial, you will learn how to prepare flower designs and cut them out. In two weeks, we will explain how to shape and assemble the flowers and arrange them in a bouquet.
This 3D paper flower bouquet will make a great accent piece for an end table or a coffee table and will last a lot longer than real flowers. Let’s get started!
Supplies Needed:
- Silhouette CAMEO® or Silhouette Portrait® or Silhouette Curio™
- Silhouette Studio®
- Silhouette Cutting Mat
- Silhouette Cutting Blade
- Dry foam ball (color – green; diameter – 4 in.)
- Floral wire (green)
- Floral tape
- Super glue
- Vase
- Ribbon
- Paper for flowers and leaves:
- Peony (text weight paper; color – blossom and blush)
- Aster (65 lb cardstock; color – primary red)
- Cosmo (text weight paper; color – white)
- Flower centers (text weight paper; color – sunshine)
- Leaves and peony green petals layer (text weight paper; color – moss)
- Tools to shape flowers and leaves:
- Silhouette Spatula Tool
- Flower shaping tool
- Embossing mat

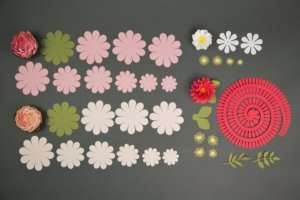
We will be making three different types of flowers: peonies (two different colors), asters, and cosmos. All of the pieces that you will need to create the flowers and leaves can be seen in the image below:
Step One: Cutting Out Peonies
1. Download and open the peony design (Design ID #218502) in Silhouette Studio® and adjust your page settings (in the Page Setup panel) according to the size of your paper and your cutting mat.
2. Place the blossom-colored (pink) paper on the cutting mat and load it into the Silhouette machine. In Silhouette Studio®, go to the Send tab, choose copy paper as the material, and click Send.
3. You will need five pink peonies.
4. Place the blush-colored (light pink) paper on the cutting mat and load it into the Silhouette machine. In Silhouette Studio®, go to the Send tab, choose copy paper as the material, and click Send.
5. You will need three light-pink peonies.
To cut the green petal layer for the peonies:
1. Take the biggest peony petal layer and add a small circle in the middle. The circle will be useful when you are assembling the flowers later. Make seven copies of this layer so that there are eight layers in total.
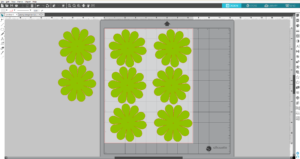
2. Place the moss-colored (green) paper on the cutting mat and load it into the Silhouette machine. In Silhouette Studio®, go to the Send tab, choose copy paper as the material, and click Send.
Step Two: Cutting out Asters
1. Download and open the Rolled Flower design (Design ID #130238). Adjust your page settings according to the size of your paper and your cutting mat.
2. Ungroup the design. (To ungroup, select the object and either click the Ungroup icon along the bar second from the top or right-click and select “Ungroup.”) Move the leaf and the pink circle aside. For this project, the flower doesn’t need to be resized.
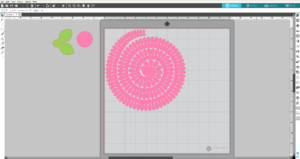
3. Place the primary red cardstock on the cutting mat and load it into the Silhouette machine. In Silhouette Studio®, go to the Send tab, choose cardstock as the material, and click Send.
4. Repeat the process four more times for a total of five asters.
To cut the green leaves for the asters:
1. Move the flower design aside and place the leaf on the workspace. The leaf doesn’t need to be resized. Then make four copies of the leaf so that there are five leaves in total.
2. Place the moss-colored (green) paper on the cutting mat and load it into the Silhouette machine. In Silhouette Studio®, go to the Send tab, choose copy paper as the material, and click Send.
To cut the aster centers:
1. Download and open the 3D Chrysanthemum Flower design (Design ID #78169). In Silhouette Studio®, go to the Send tab, choose copy paper as the material, and click Send.
2. Don’t ungroup this design. Resize it to 2.881 in. x 3.038 in. This is one set that will be the center of an aster.
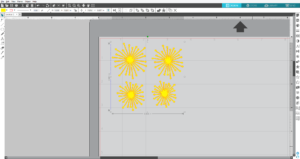
3. You will need five sets of centers to complete the asters. You can cut the centers for both the asters and the cosmos together because they use the same yellow paper. The instructions for the centers of the cosmos are listed below in Step Three.
4. Place the sunshine-colored (yellow) paper on the cutting mat and load it into the Silhouette machine. In Silhouette Studio®, go to the Send tab, choose copy paper as the material, and click Send.
Step Three: Cutting Out Cosmos
1. Download and open the Flowers design (Design ID #19408). Adjust your page settings according to the size of your paper and your cutting mat.
2. Ungroup the design and delete all of the flowers except for the flower that is shown below. Resize the flower to 2.4 in. x 2.4 in.
3. You will need five cosmos. Each flower consist of two petal layers, so in total, you need ten copies of petal layers.
4. This step is optional: you can delete a circle from the middle of the five top layers. Select shape – right click – Releasing Compound Path – select circle – click delete.
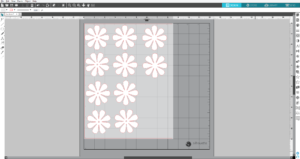
5. Place white paper on the cutting mat and load it into the Silhouette machine. In Silhouette Studio®, go to the Send tab, choose copy paper as the material, and click Send.
To cut the cosmo centers:
1. Download and open the 3D Spider Mum design (Design ID #58681). Adjust your page settings according to the size of your paper and your cutting mat.
2. Ungroup the design. For the cosmo center, you need four petal layers . You can take any petal layer from the 3D Spider Mum design, just make sure you have four layers and resize each layer to each of these sizes: 1.1 in. x 1.1 in., 1.05 in. x 1.05 in., 0.8 in. x 0.8 in., and 0.65 in. x 0.65 in. That is one set.
3. You will need five sets of the cosmo center. One set consists of four petal layers, which are shown below, so you will need twenty petal layers in total.
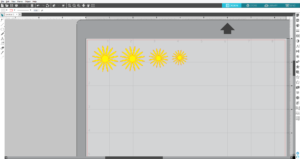
4. Place the twenty petal layers on the workspace. As was previously mentioned, you can cut the centers for the yellow asters and the cosmos together because both of the centers use the same yellow paper.
5. Place the sunshine-colored (yellow) paper on the cutting mat and load it into the Silhouette machine. In Silhouette Studio®, go to the Send tab, choose copy paper as the material, and click Send.
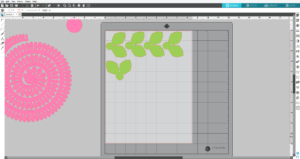
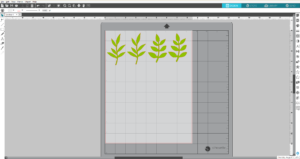
Step Four: Cutting Out Leaves
1. Download and open the 3D Large Leaf Vine design (Design ID #201443). Adjust your page settings according to the size of your paper and your cutting mat.
2. Ungroup the design. Delete the smaller leaf and the folding lines. Resize the remaining leaf to 3.083 in. x 1.823 in., and make another copy.
3. Download and open the 3D Large Leaf Vine Set design (Design ID #201458).
4. Ungroup the design. You will also delete the smaller leaf and the folding lines from this design. Resize the leaf to 2.796 in. x 1.825 in. and make another copy. You will have four leaves in total.
5. Place the four leaves on the workspace.
6. Place the moss-colored (green) paper on the cutting mat and load it into the Silhouette machine. In Silhouette Studio®, go to the Send tab, choose copy paper as the material, and click Send.
Now all of the flowers and leaves are cut out. We will share all of the tips and tricks for shaping and assembling the flowers for the 3D paper flower bouquet in part two, which will be posted in two weeks.
Jacki
September 14, 2017
Why is there never a picture of the project at the beginning of the first page of any of the Silhouette blog posts? We have to scroll to the very bottom to see what it is that is being made; in the case of today’s post, it’s only part 1, so there is no picture of the final project. Tutorial 101 – show me what you’re creating, it shouldn’t be a guessing game!
Kelly Wayment
September 16, 2017
Jacki, I’m not seeing what you’re seeing. What device and/or browser are you using to view the blog posts? On my mobile phone and on a desktop monitor I see the finished project photo at the beginning of each post.
Angie D.
September 17, 2017
I can see the finished project at the beginning of the post also. I’m viewing on my Amazon Fire tablet.
Barbara
September 16, 2017
Just cannot seem to get the rolled flowers, mind do not seem look correct.
Kelly Wayment
September 16, 2017
Barbara, the shaping and assembly of the flowers will be covered in Part 2.
CherylW
September 16, 2017
Thank you for Part 1.
Linda
September 21, 2017
When is part 2 coming out?
Silhouette
September 21, 2017
September 27th
Aadila
November 29, 2017
It was amazing but yet exact shape was hard to obtain. But still good.
Thanks and keep up the good work.