Being able to insert, remove, and adjust your blade is an important part of learning how to use your Silhouette. Find your machine below and follow these steps if you wish to learn how to manually adjust your blade.
CAMEO 2, Portrait 1, and Curio
1. Remove the blade from the tool holder by twisting the knob counterclockwise and pulling out the blade.
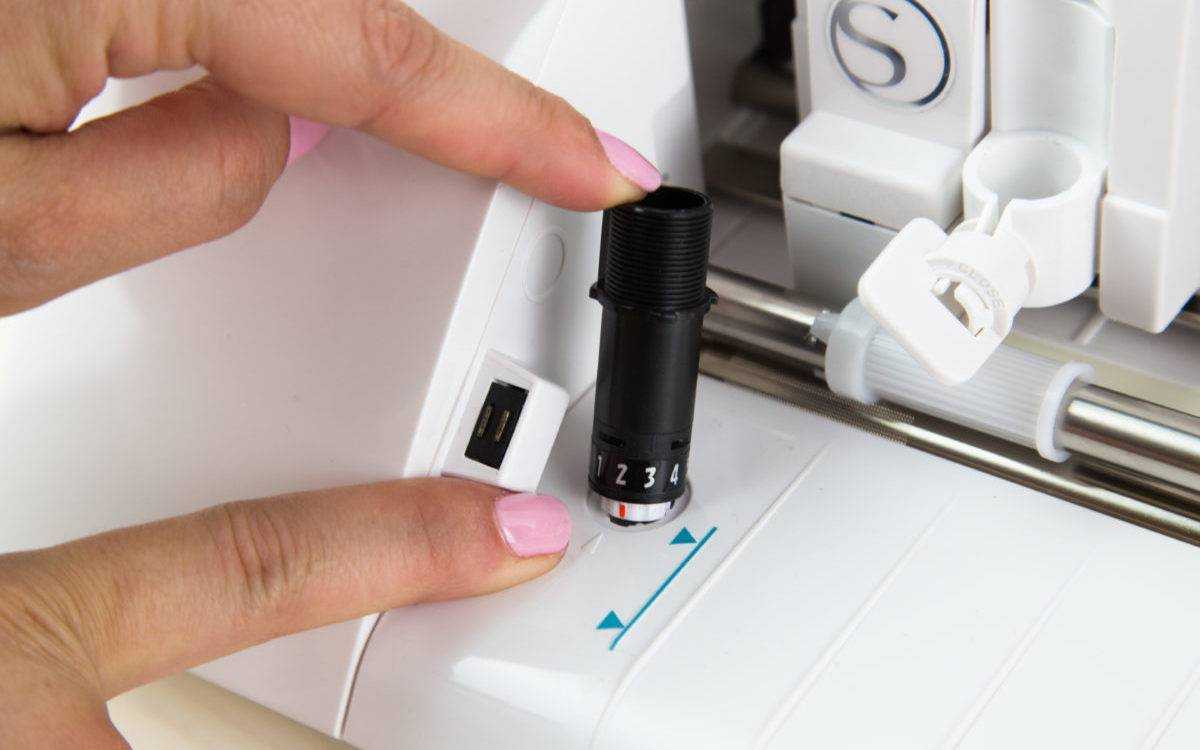
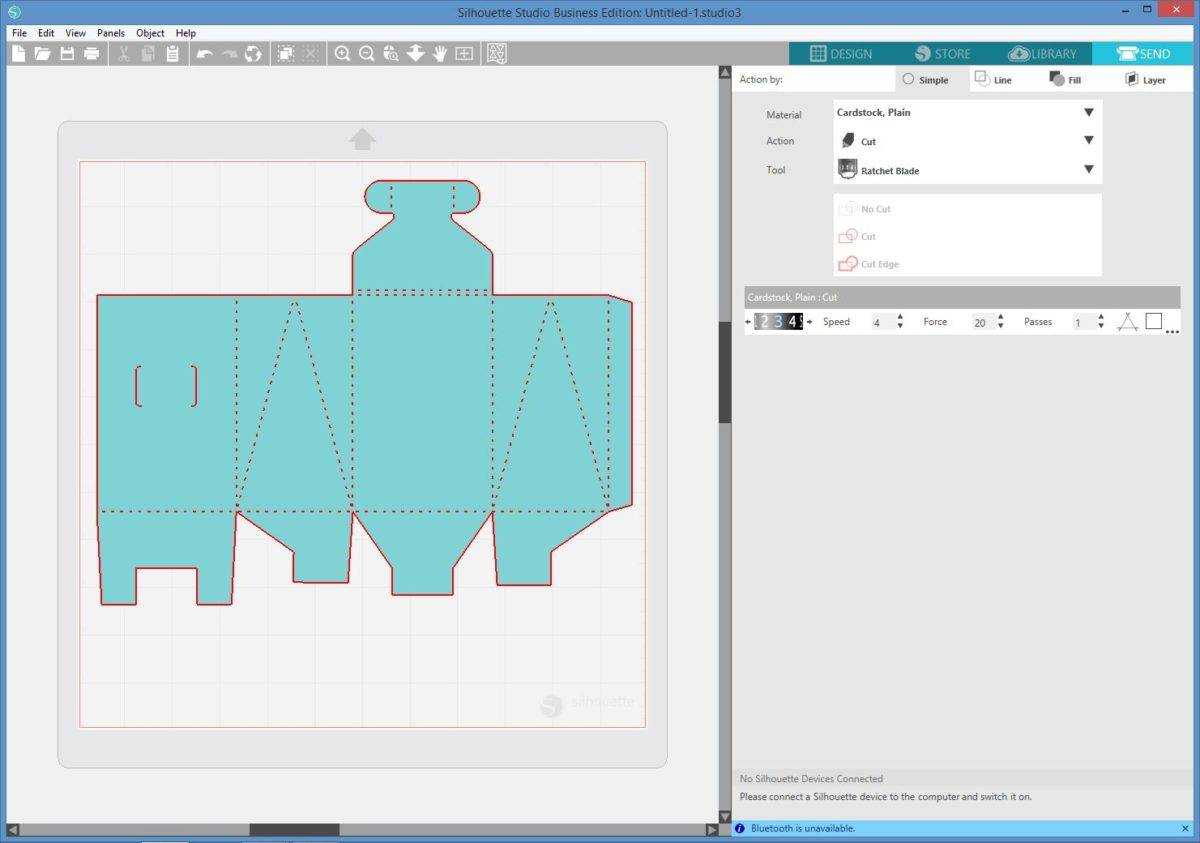
2. The blade needs to be manually adjusted to the number indicated in the Send panel prior to cutting. Different materials will require different blade settings.
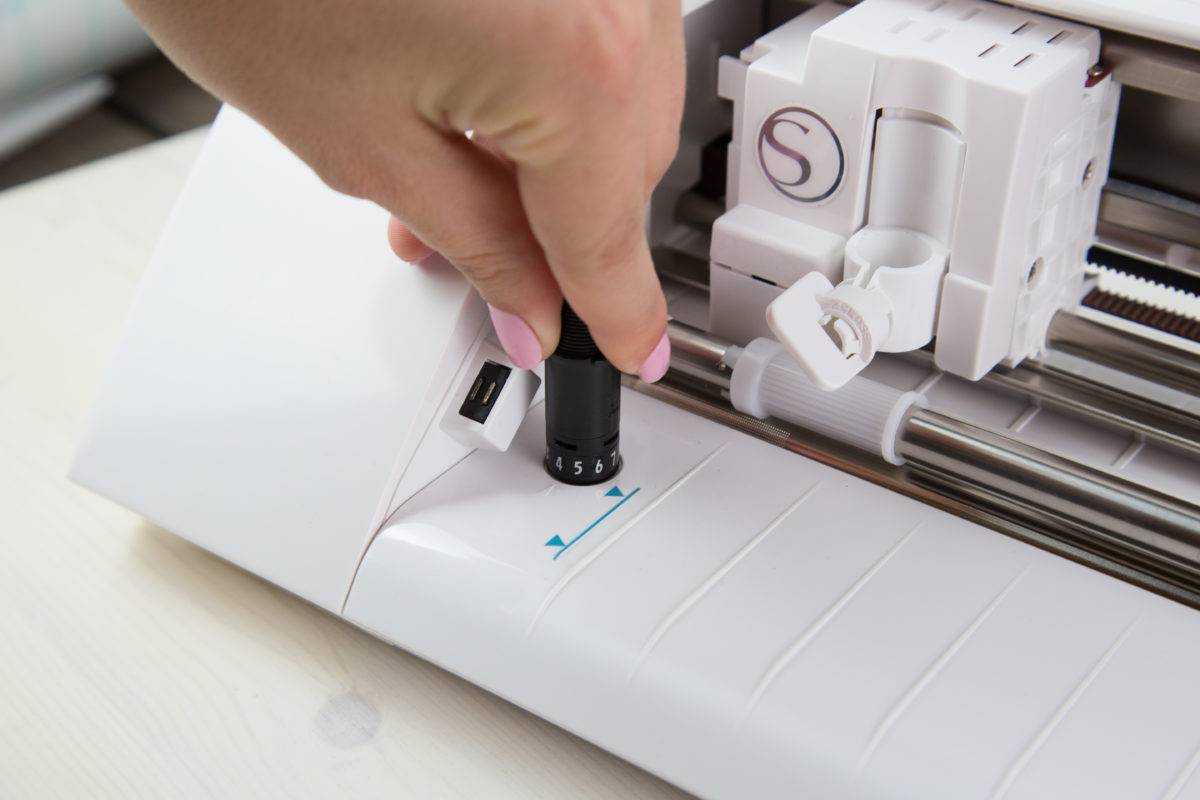
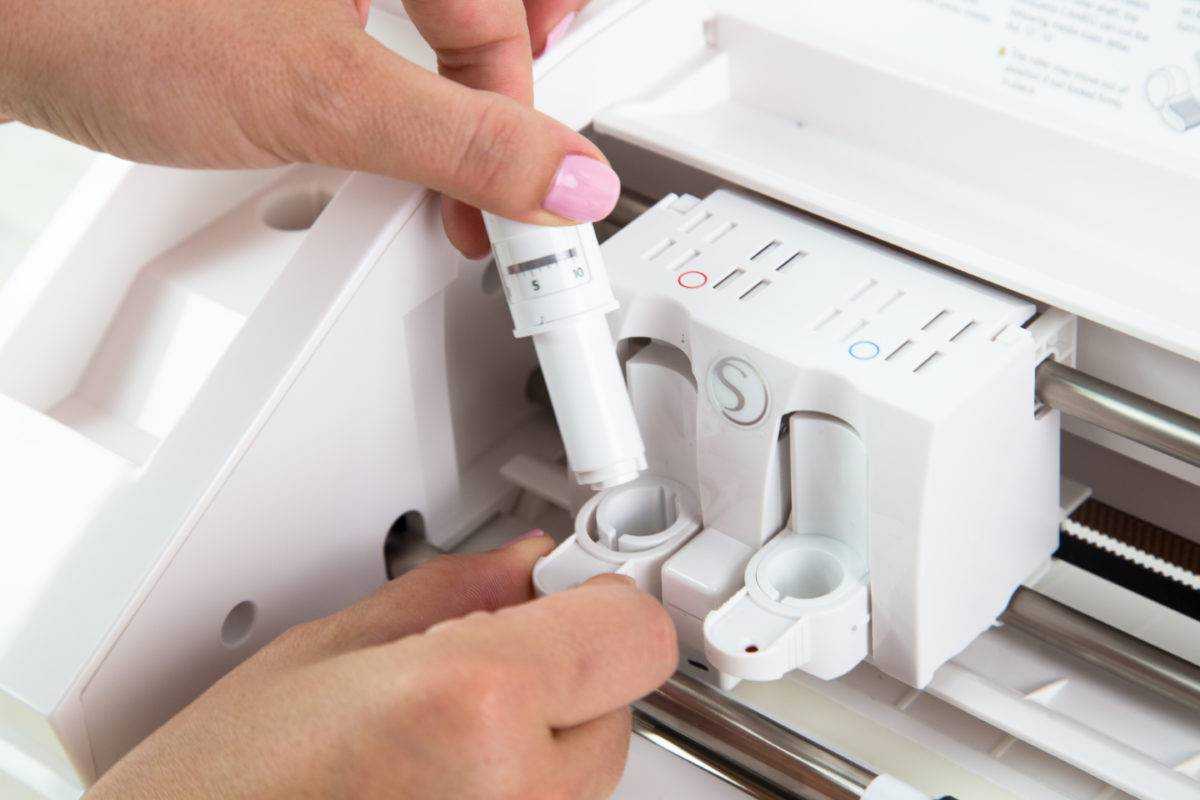
3. To adjust the blade setting, place the blade into the adjustment socket so the arrow on the socket lines up with the red line on the blade. A ratchet cap, which is included with each blade can be used also.
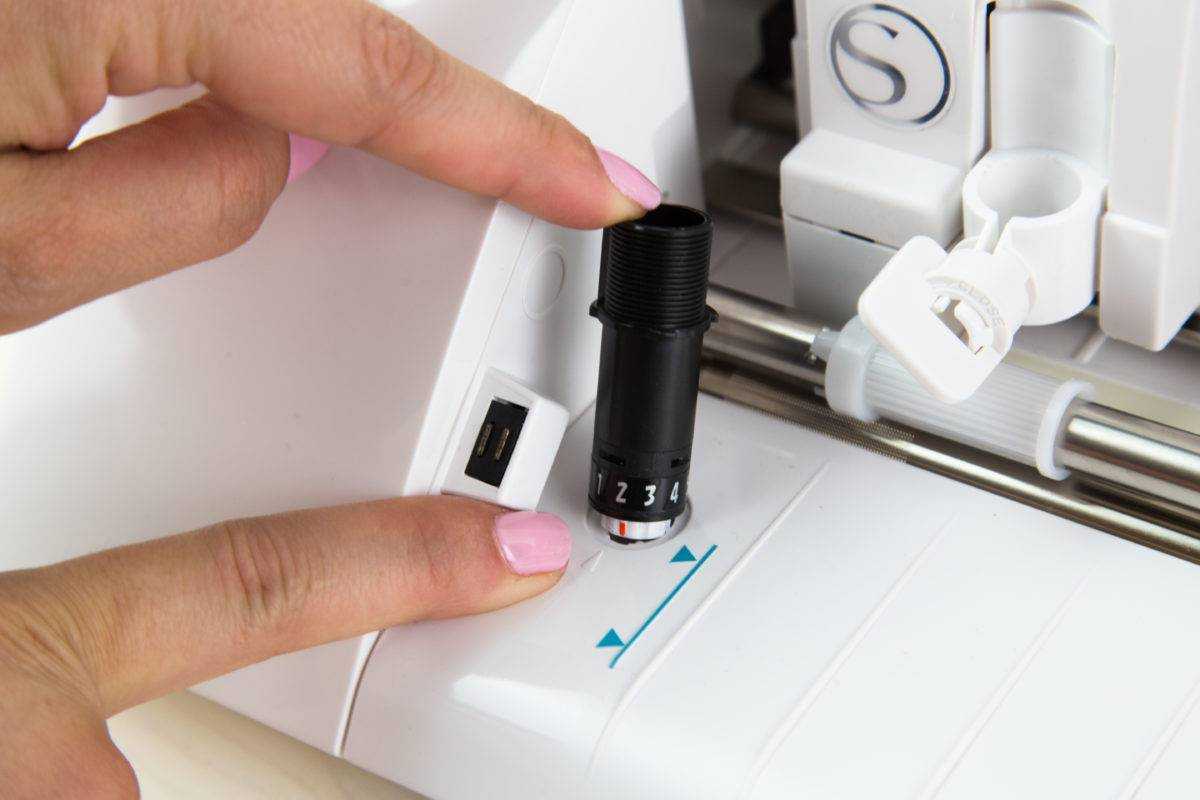
4. Turn the blade to the desired number.
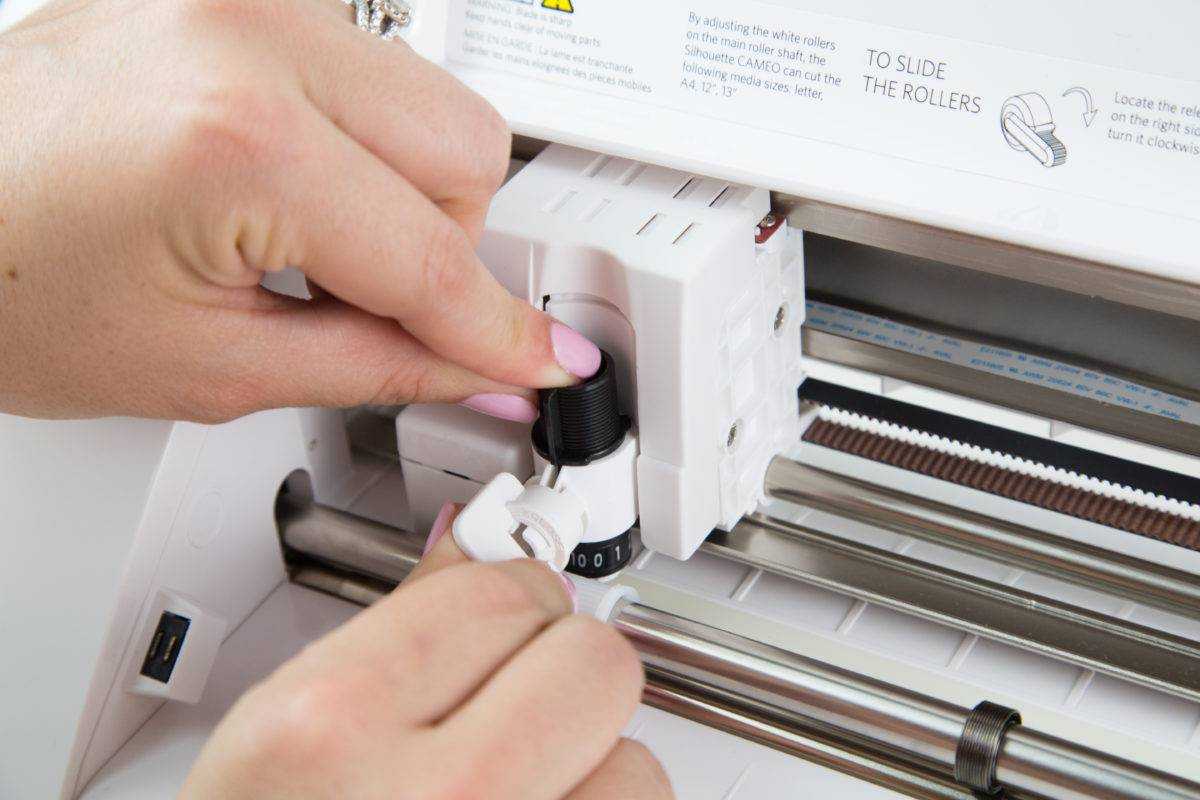
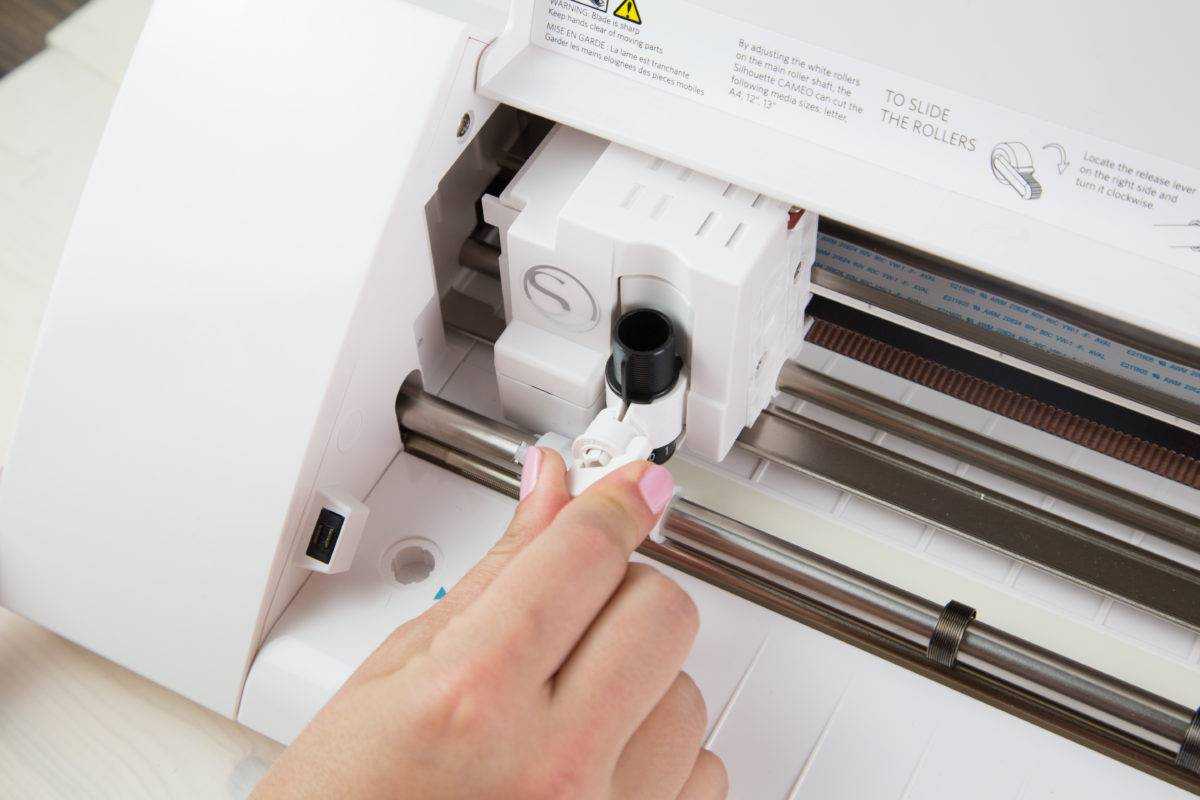
5. Reinsert the blade into the tool holder.
6. Turn the knob clockwise so the blade locks into place.
CAMEO 3 and Portrait 2
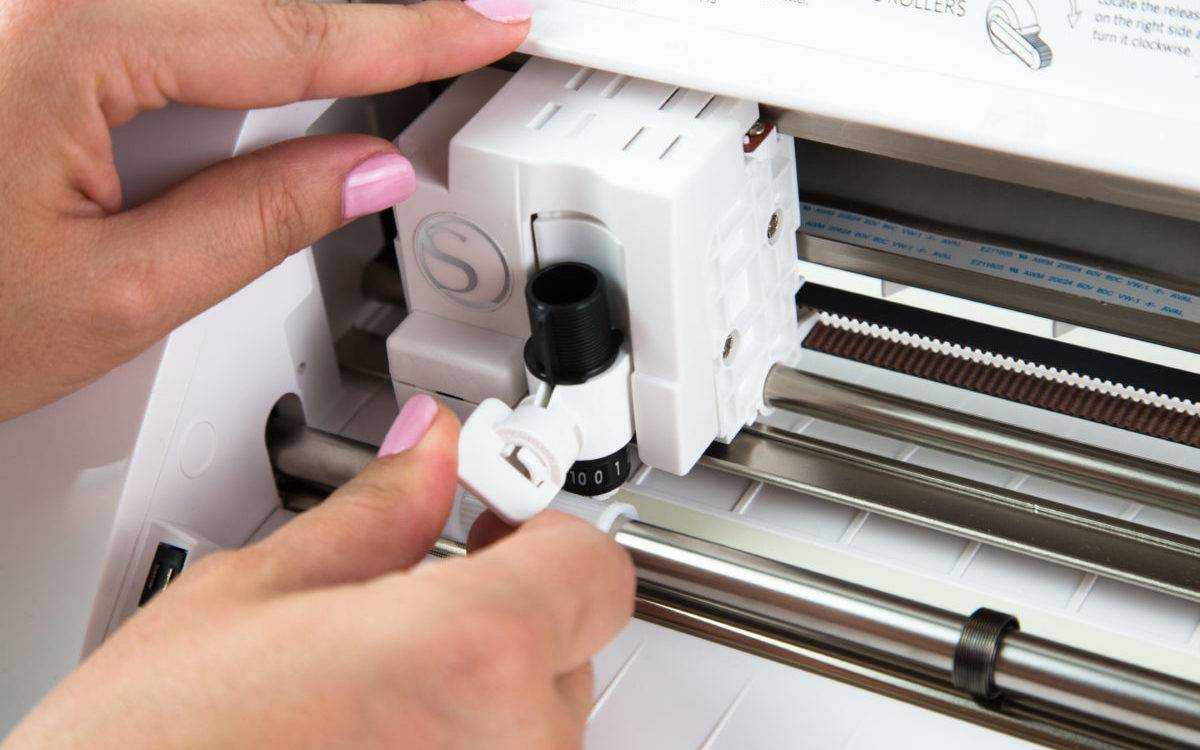
If you’re using a CAMEO 3 or Portrait 2, the process of removing and reinstalling a blade is slightly different.
1. To remove the blade, pull gently on the tip of the tool holder. A small piece will extend, allowing you to pull your blade from the tool holder.
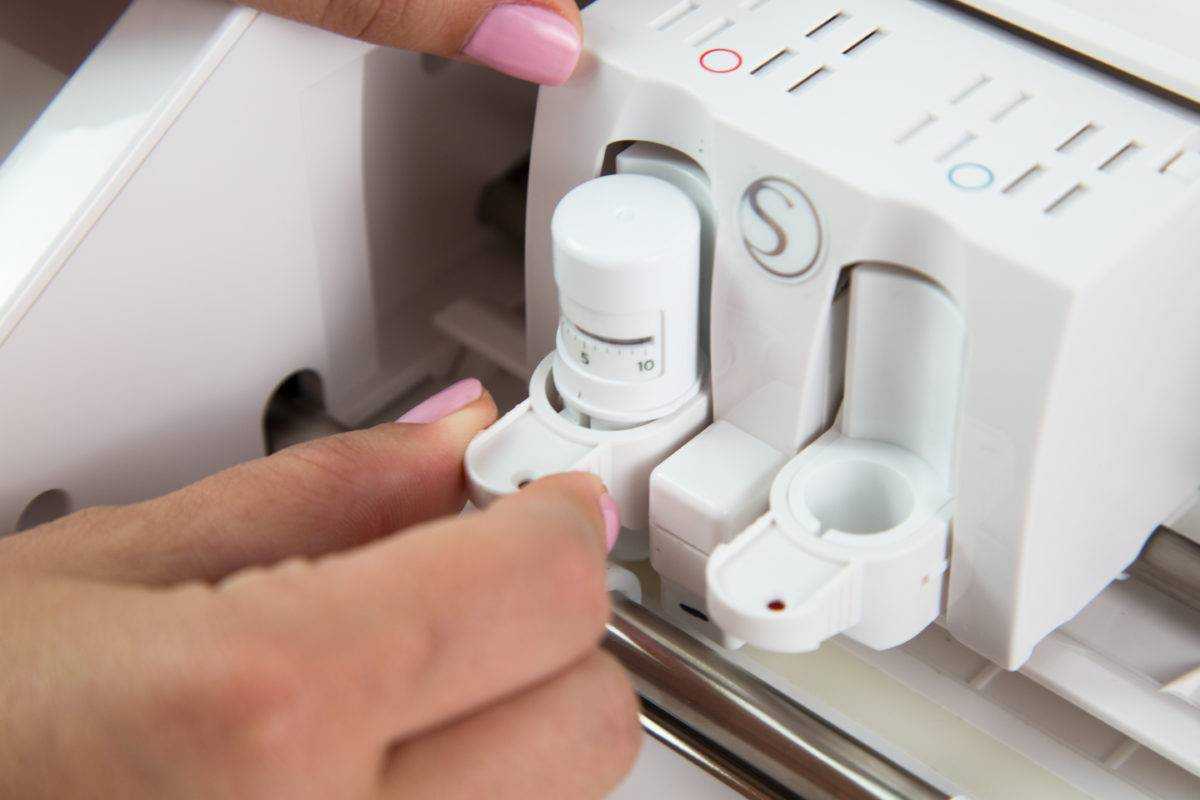
2. If you are using a ratchet blade, please see Steps 3 and 4 in the above section. Once your blade is adjusted, place it in the desired tool holder. Note: The AutoBlade can only be used in the left-hand tool holder on the CAMEO 3.
3. Gently push the extended piece back in place while you are holding the blade down. Make sure the lock clicks into place.
