What is “PixScan™ technology?
- “PixScan™ technology allows you to cut precisely around any printed image or position cut lines in a specific location on your material using a camera or scanner.”The PixScan™ feature cuts according to an image’s actual size, whether it be to provide a contour cut around the image, to nest images into an oddly shaped material precisely, or to replicate a pattern at its original size.
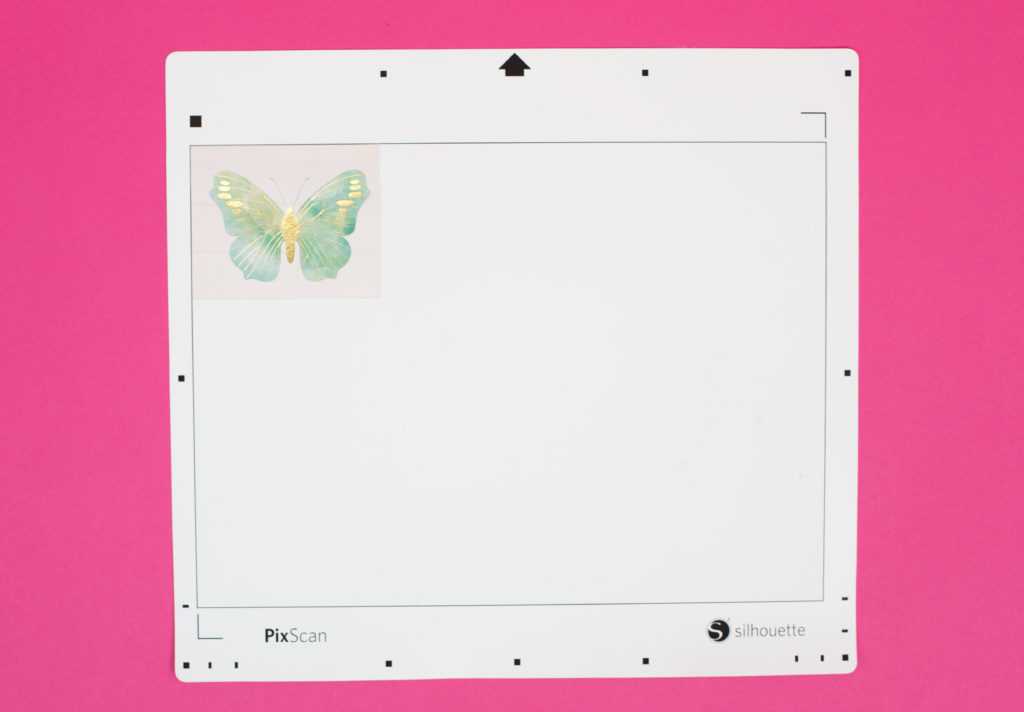
- The PixScan™ mat comes with its own registration marks, which allows it to use the Silhouette’s optical scanner to find the right place to cut.
- Any material placed on the mat can be imported into Silhouette Studio® via scanner or camera, and then have cut lines assigned through tracing, drawing tools, or opening designs.
- You need the correct size of PixScan™ mat for each machine (CAMEO, Portrait, or Curio).
What can it do?
It has a variety of uses to add to the “toolbox” of each Silhouette machine.
- Cut from scraps of paper with exact placement of cut designs on those scraps
- Cut out images that are already printed, such as pattern paper, photos, fabric, or commercial cards
- Cut out stamped images or digitize your collection of stamps into cut files
- Cut around original artwork or digitize hand-lettered or hand-drawn items
- Cut to the full edge of 8.5 in. x 11 in. pages without the margin required with Print & Cut
- Cut images you print from other programs on your computer
- Sketch on pre-printed tags and shapes
Today we’re going to show you just how easy it is to make any custom cut you want.
Supplies Needed:
- Silhouette CAMEO® or Silhouette Portrait® or Silhouette Curio™
- Silhouette PixScan™ Cutting Mat
- Silhouette Cutting Blade
How-to: PixScan™
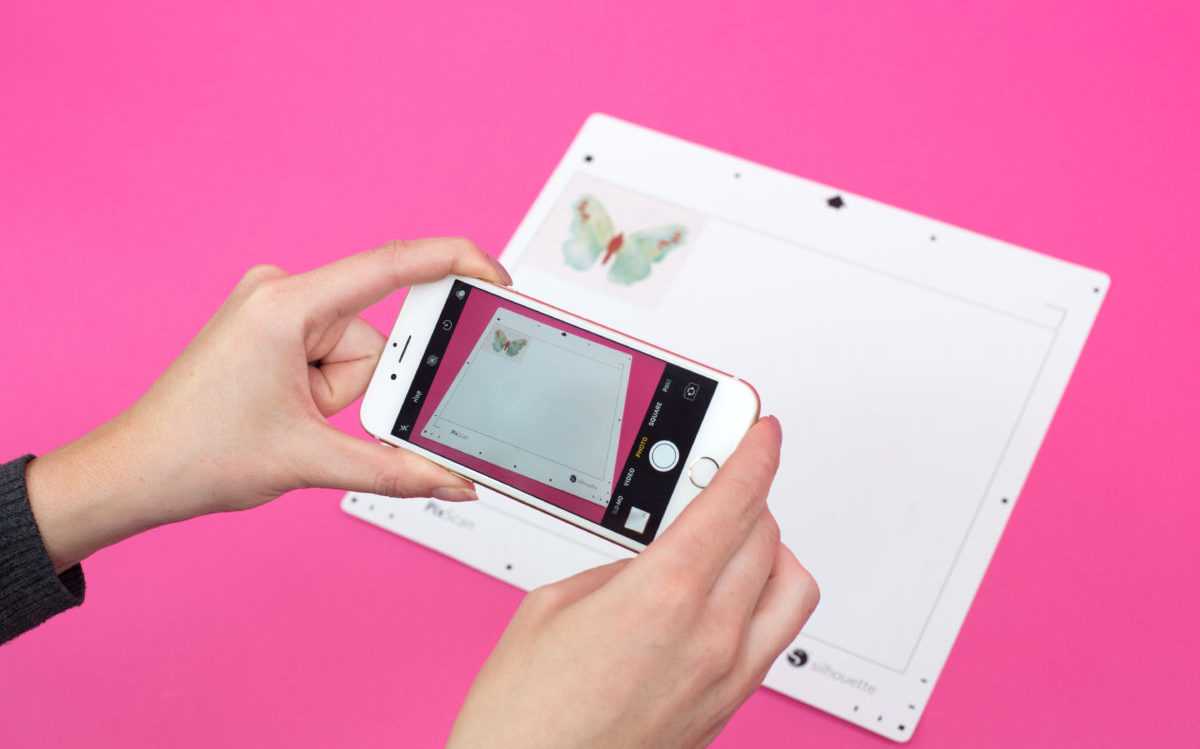
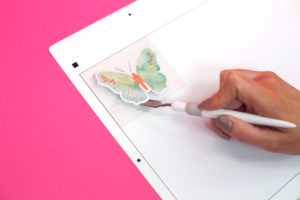
1. Place the photo or image you want to cut out on your PixScan™ mat. Press down so that your image is stuck securely to the mat. Take a picture using your smartphone or scan in your PixScan™ mat. For optimal results, when photographing or scanning the PixScan™ mat, ensure that no zoom is used, your lighting is even, the entire mat is clearly visible in the image, the PixScan™ mat is flat, and the cut media is contained within the black cut border.
NOTE: If you are using either PixScan™ mat for the Silhouette Curio™, you’ll notice there is no black line outlining the workspace. However, you can see there there is the outside space, which is a white/cream color, and an adhesive space, which is a bright-white color. The adhesive space is the workspace that your material must be inside in order for the PixScan™ technology to work.
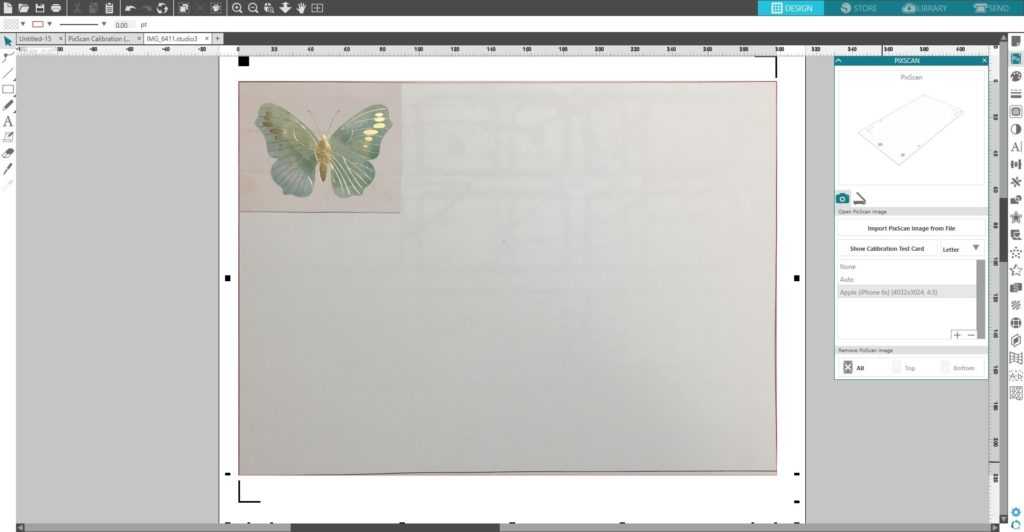
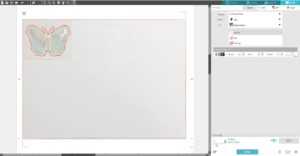
2. Click on the PixScan™ icon in the Silhouette Studio®. Select “Import from File” or “Import from Scanner.” A window will pop up for you to navigate. Select your image and click “Open.”
Tip: If you see a message that says you need a calibration profile, click “Show Calibration Test Card,” choose your printer size, and print the page. Take a picture of the printed calibration page from a bird’s-eye view and ensure that the calibration dots fill the entire image. Do not put the page onto the PixScan™ mat. The image should include only the dots. Save your image to your computer. Click the plus (+) icon under the Camera Calibration section of the PixScan™ panel. A window will pop up. Select your calibration image and click “Open.” After that, PixScan™ is calibrated for your camera. You only have to do this once per camera.
3. Once you have your PixScan™ image loaded, you are ready to create or place your cut lines. Trace your image or manually add cut lines where you want your machine to cut. Delete any excess cut lines that you do not need. You also can add an offset line to your design.
4. Choose your cut settings according to the material on your mat.
5. Send your project to your Silhouette machine and watch the magic happen.
And that’s it! It’s super easy to cut whatever you want with the PixScan™ feature. Use it to cut photos, drawings, cardstock, or whatever else you can think of!

Kelly Wayment
June 28, 2024
You can use it with vinyl as long as it is smooth and flat to allow the static charge to hold on to it. Rolled vinyl that wants to go back to its rolled shape will not necessarily work well, and it would need to be trimmed to fit the ES mat cutting area.
Kelly Wayment
June 28, 2024
Yes, you can use the heat pen while using the ES mat. 🙂
Yurii
March 2, 2024
Hello. May it be used with heat pen?
Thanks
Jerome
February 24, 2024
Hi, works this with the normal vinyl foils or only with printer papter etc?
Kelly Wayment
February 16, 2024
Once you’ve pushed the mat up against the rollers, just press the “Load” arrow button (bottom right on the display). Does a regular sticky mat load into the machine for you?
Michelle a goodall
January 24, 2024
Hello! I just got my new electrostatic mat and have watched every video i can find on it. However, what i can t find is why it wont feed into my cameo 5/ it slides right up the rollers but wont go any further. and yes- iam pushing the into button. help!