The Silhouette Mint™ utilizes thermal printing to create a stamp out of your chosen design. And with Silhouette’s specially designed Mint inks, the ink absorbs through the stamp, and you can stamp up to 50 times without having to reapply ink. Creating custom stamps is easy. Just follow the instructions below!
Supplies Needed:
- Silhouette Mint™
- Silhouette Mint Studio™
- Silhouette Mint™ stamp kit 45 mm x 45 mm
- Mint Ink – Red
- Design ID#237394
- Design ID#14199
1. Open your design in Mint Studio™ and resize it to the stamp size of your choosing.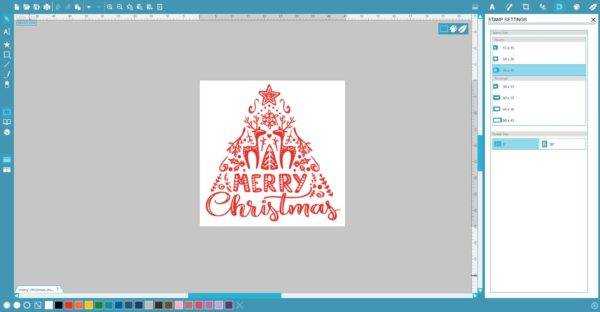
2. By clicking “Send to Mint” our Mint Studio™ will automatically flip your image and prepare the file to be printed!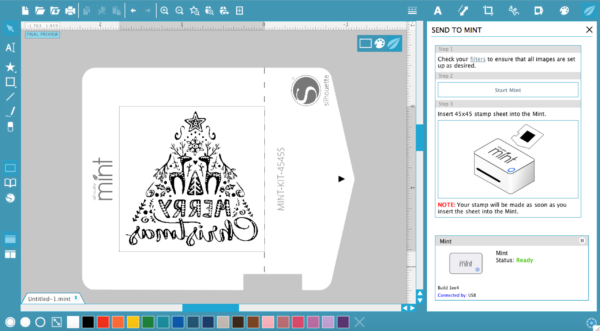 3. Unwrap your stamp sheet from its packaging. DO NOT remove the plastic layer covering the rubber.
 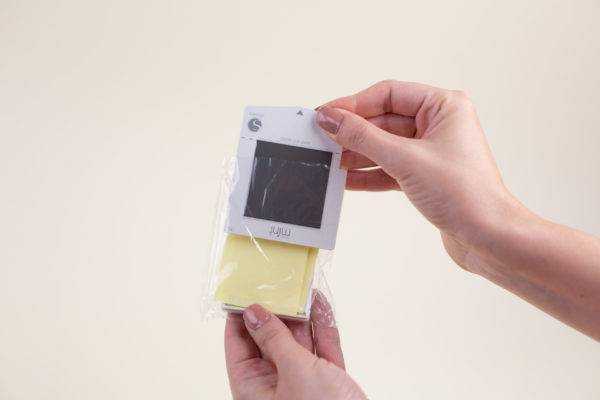 4. Insert the stamp sheet through the back slot of the Mint arrow first. You will feel the stamp catch inside the machine.
 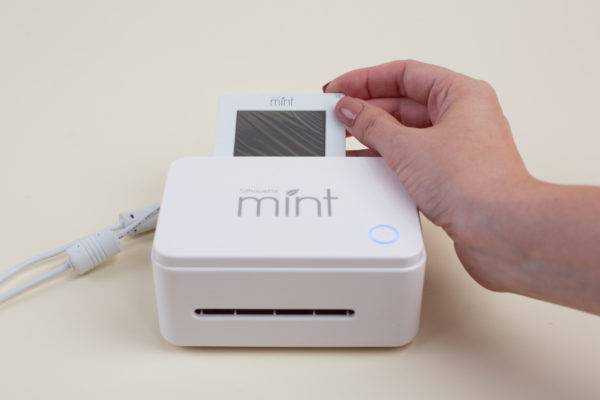 5. In Mint Studio™, click “Start Mint” and watch the magic happen. Pull out your stamp once it has finished printing.
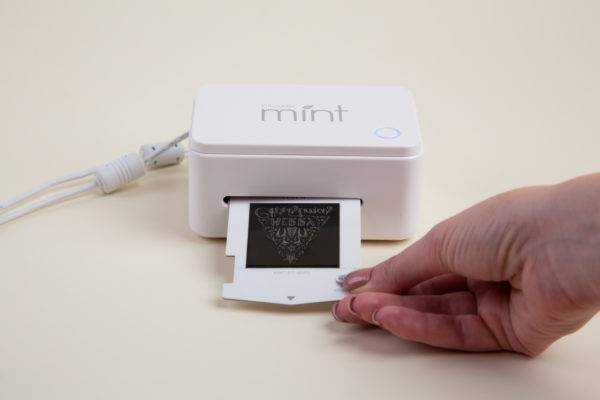 6. Assemble your block by sliding the top into place.
 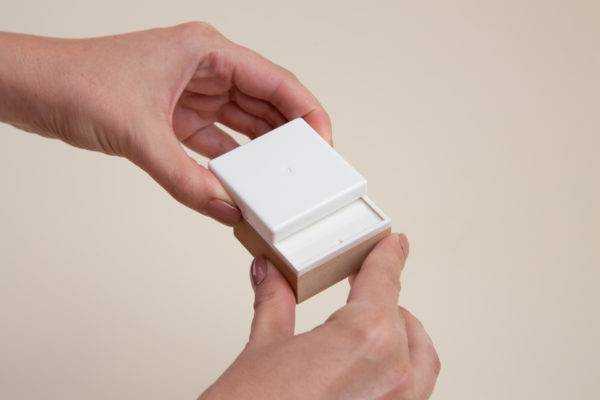 7. Remove the lid from the block. Pull off the brown protective sheet to reveal the adhesive mat.
  8. Take your 3D relief in hand, peel off the plastic, and remove the cardboard surrounding it. There are perforated lines across the cardboard that help make removing the stamp easier.
 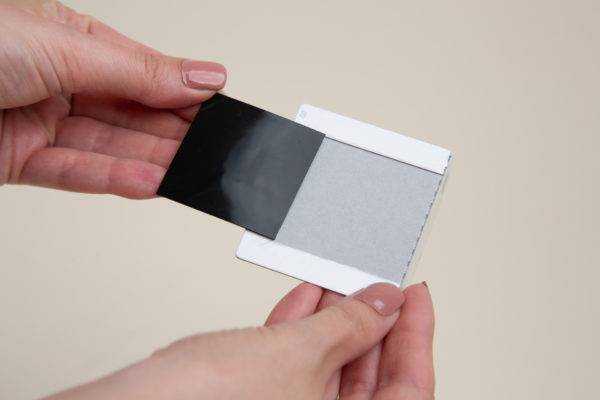 9. The back of your 3D relief is coated with a sticky adhesive for easy application. Stick your stamp to the interchangeable base.
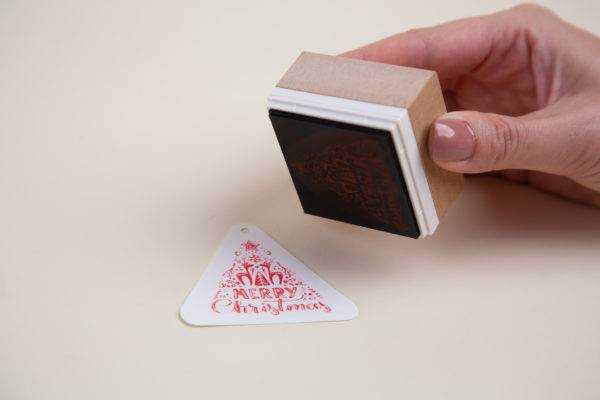
 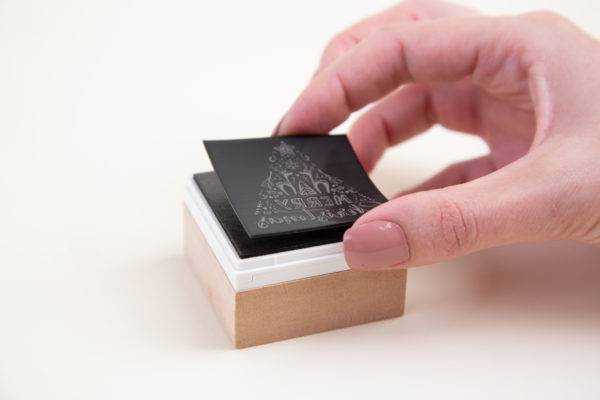 10. Using Mint Inks, apply ink directly to the stamp. The inner reservoir on the stamps will absorb the ink only where the stamp is printed. Using this method of applying the ink directly to the stamp, the color goes only where you place it. After you apply the ink, wait 5–7 minutes before stamping.
 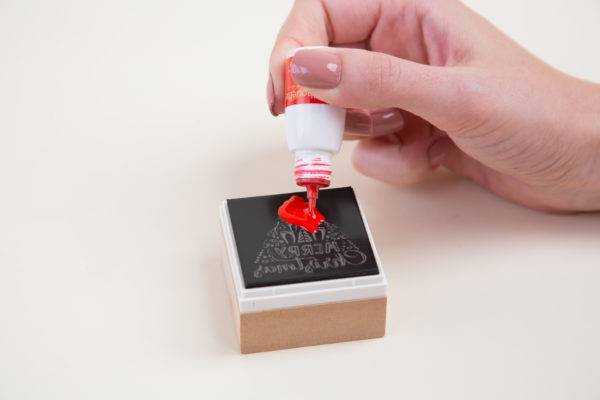 11. The first couple of times you use your stamp, the design will be blurry. The excess ink just needs to be stamped off. Use a scrap piece of paper and stamp repeatedly. When the excess ink blots off, your stamp will be crisp and clear.
 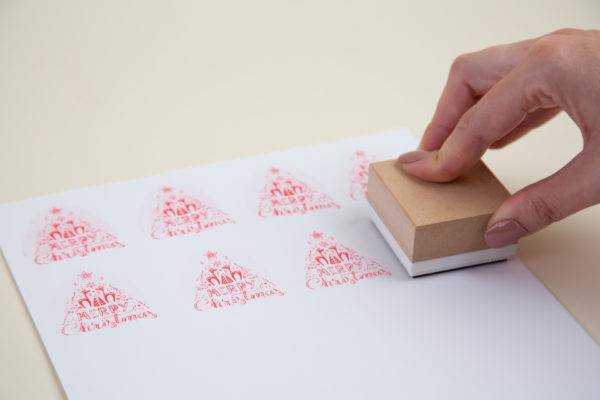 12. Don’t forget to stamp the stamp label to put on your block so that you can tell which stamp is which.
 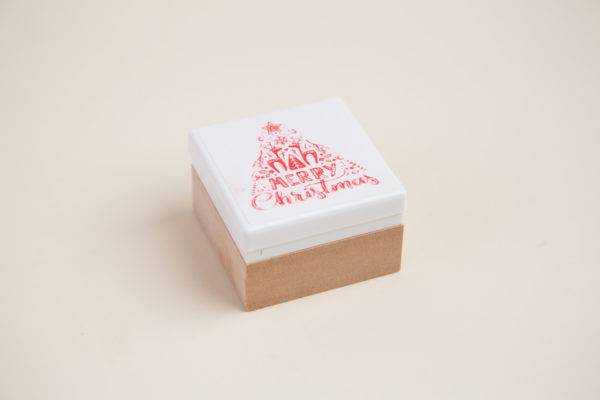 13. You can stamp 50+ times with your custom stamp before the stamp needs to be reinked.