
My kiddo started preschool earlier this month, and I was looking for a way to label her spare clothing because of the occasional wardrobe changes, from potty accidents to sticky/dried slime goo. Lost and found piles are pretty much ubiquitous in school settings, so I think this project is a win-win for teachers and parents! There are two types of Silhouette Printable Heat Transfer, one for light fabrics and one for dark fabrics. I decided to go with the one for dark fabrics because the heat transfer material is less opaque so the ironed-on designs show up well on both light and dark fabrics. The heat transfer material for light fabrics is more transparent, so it shows up best on light fabrics only. This project is so easy to do that you can certainly make a set of labels with each type of printable heat transfer! Follow along with this tutorial below to ensure your children’s clothes don’t get lost at school!
Supplies Needed:
- Silhouette CAMEO®, Silhouette Portrait®, or Silhouette Curio®
- Silhouette Cutting Blade
- Silhouette Studio®
- Silhouette Printable Heat Transfer (for dark fabrics)
- Inkjet printer
- Iron
- X-ACTO Knife
- Silhouette Design Store Print & Cut designs of your choice. For this project, I used:
Step One: Create the Clothing Label Design
- Create a rounded rectangle shape measuring 1.375 inches by 0.375 inches. Feel free to adjust your dimensions to suit your needs.
- Type child’s name with font of your choice and select the fill/line colors of your choice.
- For my project, I used the Miss Sallie Dots Font (ID#214540) downloadable from the Silhouette Design Store.
- In the Line Style window, I also increased line thickness to create a “bold” font style.

- Insert additional designs, if desired. For this project, I added several Print & Cut designs using creatures that my children likes, such as butterflies, caterpillars, ladybugs, and dinosaurs.
- Ungroup the Print & Cut design and delete the cut lines. We only want to keep the printed design.
- Resize the printed design to fit inside the rounded rectangular shape.
- In the Send tab, be sure to change the text (child’s name) to No Cut.
- Group together the rounded rectangle, text, and printed design.
Step Two: Send to the Silhouette
- Before printing, ensure that registration marks are turned on and visible.
- Copy and paste the grouped object as necessary to fill the entire 8.5-inch-by-11-inch Printable Heat Transfer sheet. NOTE: Do not mirror the label image.
- Check that your labels are inside the Print & Cut borders.
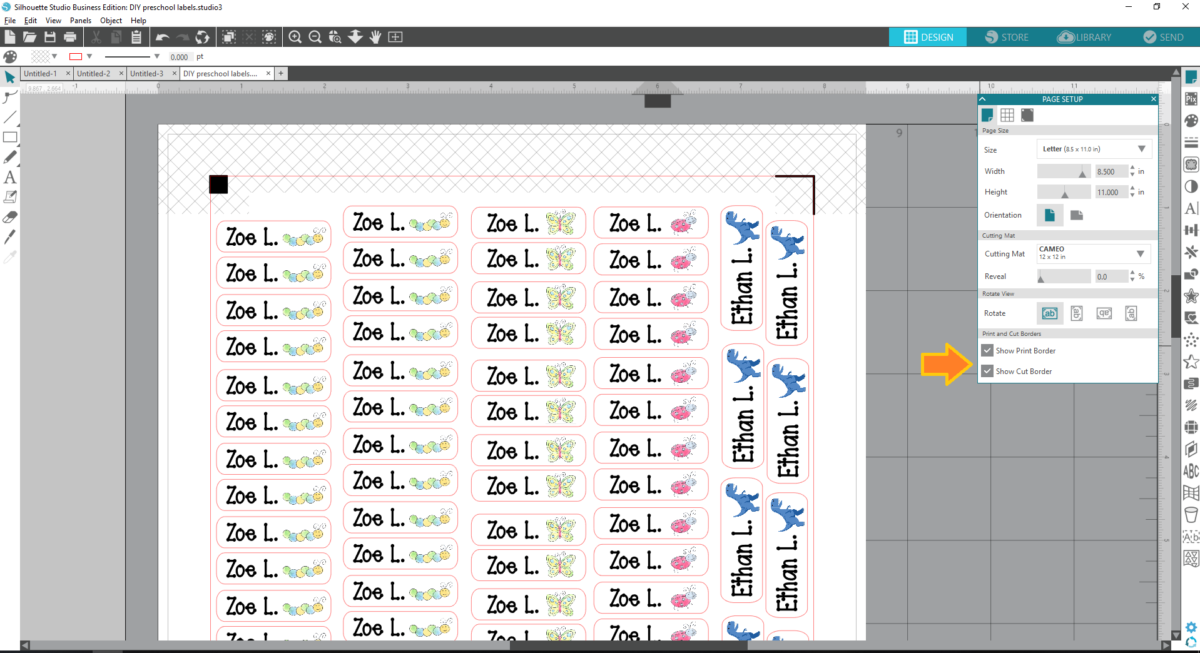
- Feed the heat transfer sheet into your inkjet printer so that it will print on the blank side (not the lined side) and proceed to print.
- Load your printed sheet into the Silhouette cutting machine.
- Go to the Send tab in Silhouette Studio®, and make sure you are using the proper cut settings.
Step Three: Apply the Label to the Apparel
- Peel the printed image from the backing of the heat transfer sheet and place it print side up on the fabric. TIP: I found it easier to peel back these small labels with an X-ACTO knife.
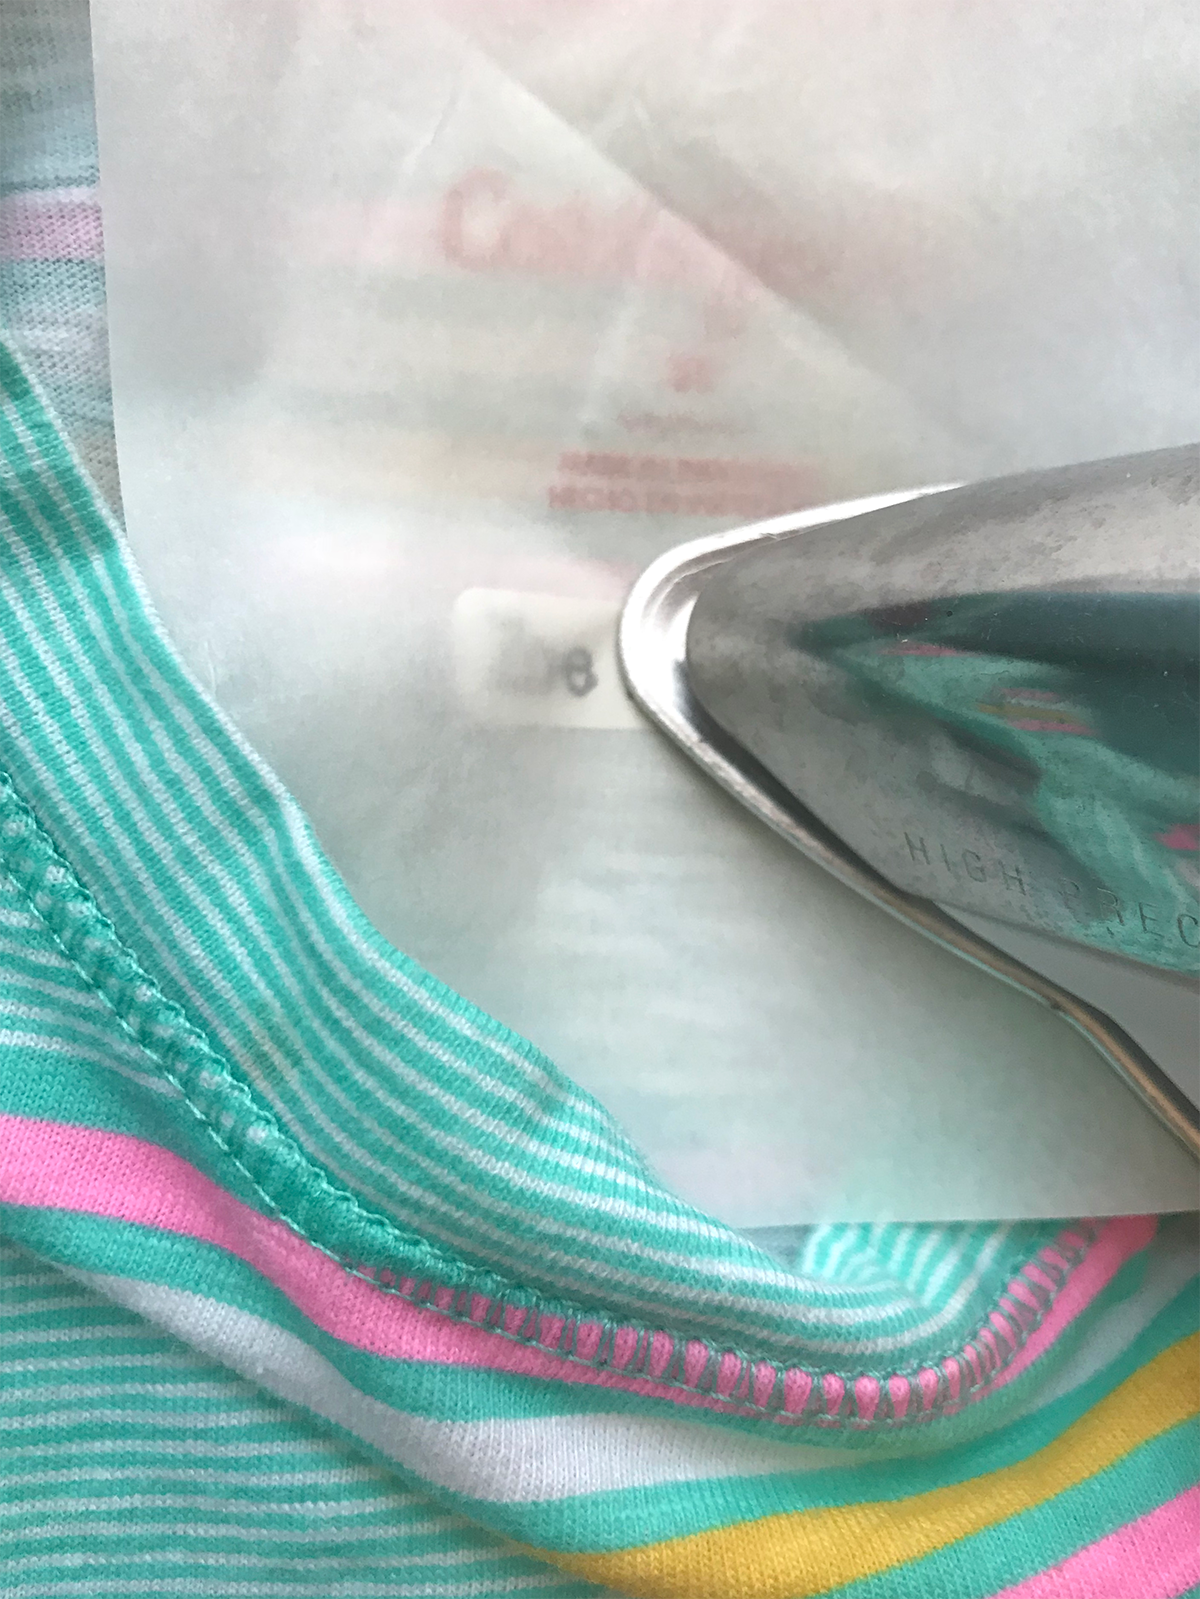
- Cover the image with a sheet of parchment paper that is included in the Printable Heat Transfer package.
- Make sure your iron is set to the “Cotton” setting.
- Press down directly on the parchment paper covering your image and hold for 60–90 seconds, depending on the size of your labels. For my project, I found that 60 seconds was enough.
- Wait for the heat transfer material to cool and then remove the parchment paper to reveal your custom clothing label!
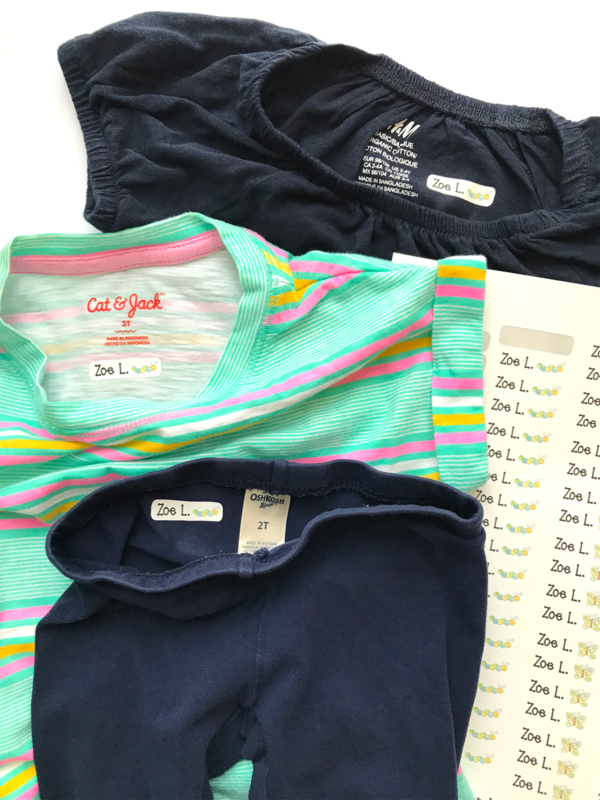
And that’s it! This project is simple, fun to customize, and the last step (ironing) can be easily done one evening while watching your favorite show on Netflix. The Silhouette Design Store has over 8,700 Print & Cut designs and 8,000 fonts, so you can really get creative in creating personalized clothing labels!
What design would your kiddos’ labels have?
VERONICA Segovia
August 30, 2018
Do you printed with regular printer inkjet
I believe once you wash it the inker disapier if you printed with inkjet printer.
Do we have to use inkjet o LaserJet?
Thanks…
Kelly Wayment
September 4, 2018
Hi Veronica. It is designed to be washable, even when used with an inkjet printer. An inkjet printer is recommended with this printable heat transfer material, not laser jet.
Christine Lustig
September 5, 2018
Hey Veronica! I’ve washed my kid’s clothes more than once since I made this project and the ink does not wash out! The labels still look great! Have fun labeling away! 🙂
Laura Scott
September 1, 2018
This is such a good idea but it needs to be expanded. My neighbor would get upset when he visited his mother at the assisted living place because she wasn’t wearing her clothes. They hide the names inside the garments–a must for children but not for adults. Because they are adults their full names can be shown on the outside of their clothing. Doing so would help caregivers sort the clothes so they can be returned to the correct patients and the patients could help as well.
Kelly Wayment
September 4, 2018
Great idea. Thanks for sharing!
Laura Scott
September 1, 2018
I forgot to mention the excellent instructions given for adding labels to clothing. Job well done. As soon as my Silhouette is up and running, I plan to do some labeling for friends. Thank you for sharing with us.
Laura Scott
September 1, 2018
A true story. Years ago when my son was in the first grade, he kept losing his coat. I purchased two coats and both disappeared the first day he wore them. Therefore, I sewed a ski jacket for my son with racing stripes down the sleeves and bright colors. It, too, disappeared the first day. On the left front side of the coat using an embroidery pen, I wrote his name, address, and home phone number. At his school they had a female volunteer who gathered up coats she said she found on the playground and she was taking them to another school and giving them to students there. She claimed they could not find the owner’s of the coats. Since my son’s name, address, and phone number was clearly written on the front of his coat, it was returned to me.