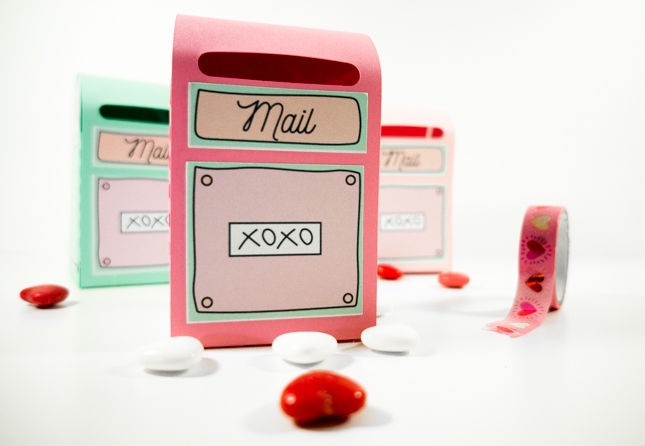
Valentine’s Day is quickly approaching and if you’re anything like me you’re totally unprepared. Fortunately for us, it’s quick and easy to create an adorable Valentine gift box using the Silhouette CAMEO®.
Here’s what you’ll need:
- Silhouette CAMEO®
- Cardstock
- Adhesive
- Silhouette Printable White Sticker Paper
- Cutting Mat
- Ratchet Blade
- Printer
Step 1
Open your design in Silhouette Studio® and double check that the registration marks are turned on and your design is within the guide lines. Load your card stock into the printer and print the base for the mailbox design. Your design should print along with the black registration marks.
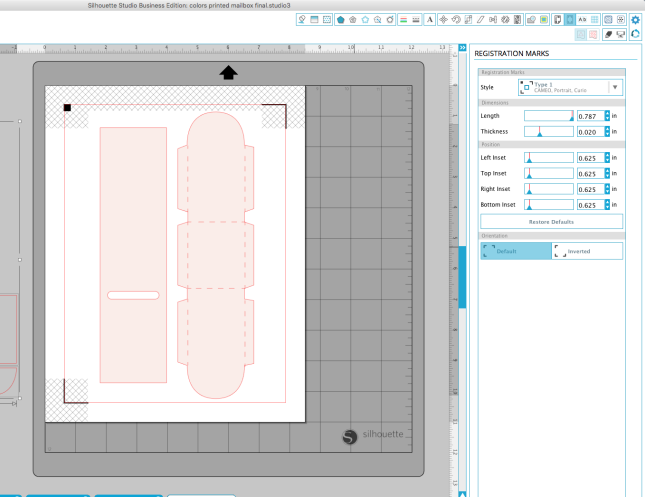
Place the printed design on your cutting mat and load it into the CAMEO. Select your material in the cut settings window and set your blade to the recommended setting. The CAMEO will then perfectly cut out the mailbox design.
Step 2
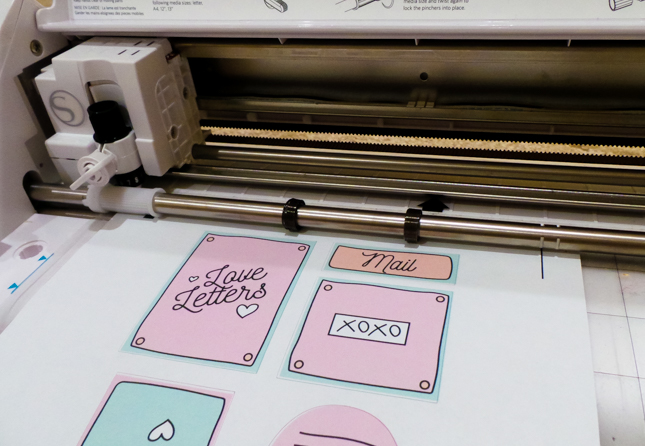
At this point you’ll want to repeat the Print & Cut process for the decals that will decorate your mailbox base. For my design I opted to use printable white sticker paper instead of card stock to create a cleaner finished product. Just be sure to change your blade settings if you change materials.
Step 3
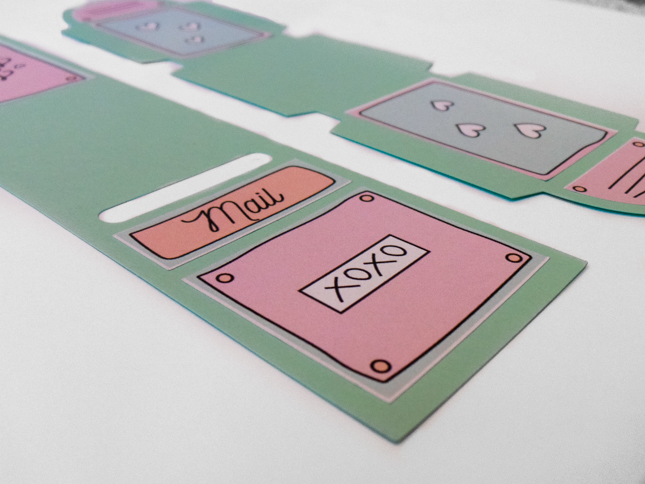
I find that its much easier to apply the stickers to the mailbox base before assembly. Once you have all of your stickers in place you can use your adhesive along the perforated edges of the mailbox base to glue the two pieces together.
Step 4
Fill your super sweet little mailbox with candies, love notes or even Valentine’s cards! The possibilities are endless! These are so easy to make and come together so quickly, I was able to make one for every student in my little guy’s class, they are the perfect size for little hands.

Kelly Wayment
February 9, 2016
Too cute! I’m off to download it now!
Kayla Brasher
February 10, 2016
Thanks, Kelly!
Marilyn
February 10, 2016
Thank you Kayla!
Kayla Brasher
February 11, 2016
Of course! I hope it was helpful!
Suzanne
February 10, 2016
Adorable!!!
Quick question – what kind of printer do you use for the graphics?? They look so good!
Thanks!
Kayla Brasher
February 11, 2016
Hi Suzanne, Thank you!! I use an Epson Stylus Photo 1400!
Ana
March 25, 2016
letter font that you used? Thank