What is PixScan™?
PixScan™ technology allows you to cut precisely around any printed image or position cut lines on a specific place on your material. PixScan™ technology cuts according to an image’s actual size.
What does this mean? When you use PixScan™ mobile, you can take a picture of an image on the PixScan™ mat, trace it and edit it in the app, and cut it out.
Opening the App
First, download the PixScan™ Mobile app on your device. Open the app. It will open with a brief tutorial.
Taking the Picture
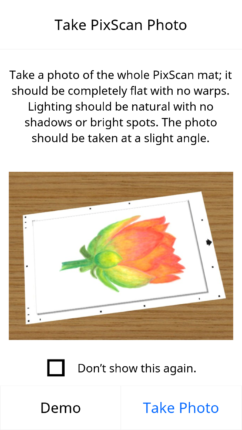
After reviewing the demo and when you are ready, select the “Take Photo” option.
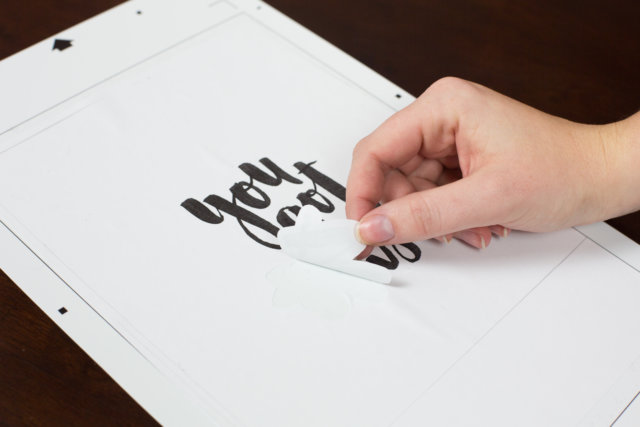
Place your image onto the PixScan™ mat.
For optimal results when photographing the PixScan™ mat, make sure that:
- You don’t zoom in.
- Your lighting is even.
- Your entire mat is clearly visible in the image.
- Your PixScan™ mat is flat.
- Your cut media is contained within the cut border.
Take the picture of the mat at a slight angle. This will help the app read the lines better.
Tool Bar

There are five tools at the bottom of the screen for you to use.
Tracing
Auto Trace
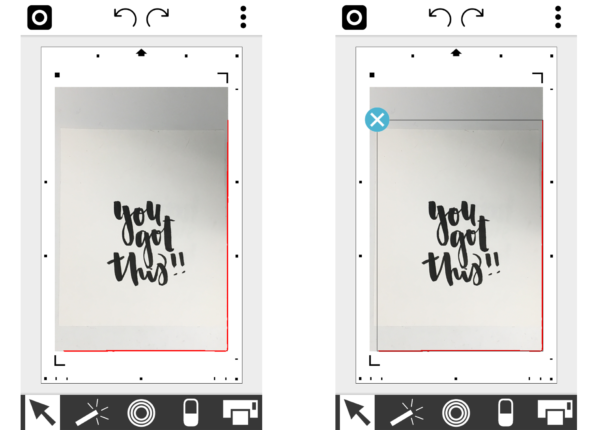
As soon as you select “Use Photo”, the software will trace your photo and add cut lines. If your lighting isn’t even, it can create lines in places with shadows. So when you are taking the photo, try to keep shadows to a minimum.
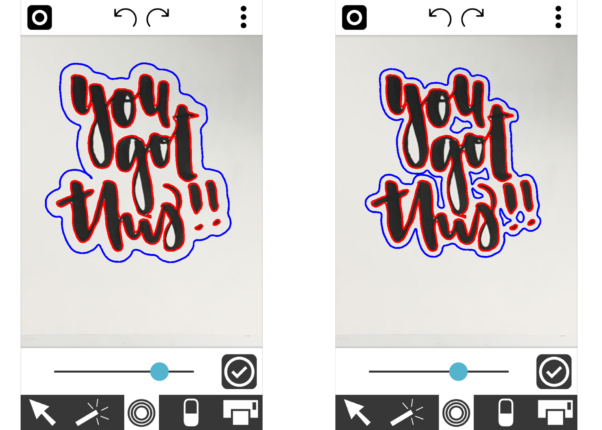
If the software didn’t choose the correct area to trace, don’t worry! It is a simple fix. Make sure you are under the selection tool. If there are lines that were created that you do not want (like the red ones shown below), tap on them. A square will appear around the group of lines. Click the blue “x” in the corner to delete them.
Tracing Icon

To create your own trace lines, tap on the Trace icon. Then tap the place on the design you want to trace. If you want to trace the entire design at once, use your fingers to drag a selection box around the design. Blue lines will appear. If you want to zoom in, use your fingers to pinch and expand the screen.
Once you are satisfied with the blue preview lines, tap the checkmark next to the slider bar. This is signaling that you want to keep the lines. The blue lines will turn into red cut lines. If you forget to tap the checkmark and move onto another icon screen, your lines will be lost and you will need to recreate them.
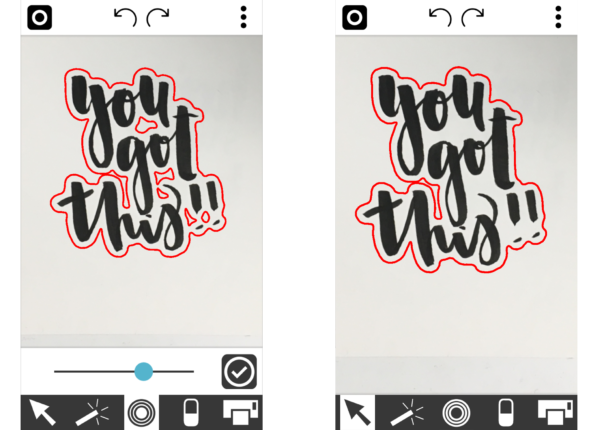
Offset
You may want to cut out your design with a slight offset. An offset will create a line farther from the image’s edge instead of cutting directly along the image’s contour.
To create an offset, use the selection tool to select all of the lines you want to offset. The easiest way to do is this to use your fingers to drag a selection box around the objects. Then, click the Offset icon. This will create blue lines around your design. Adjust these in and out by moving the slider at the bottom.
Click the checkmark when you are finished to turn the blue preview lines into red cut lines. The offset tool will delete the original trace lines it was referencing so you don’t have two sets of cut lines.
Eraser
The eraser can be used to clean up any loose or stray lines that may be unwanted. Often when offsets are created, there may be some extra shapes inside of the blank spaces of the design. Use the eraser to delete them. Adjust the eraser size using the slider bar, and zoom in using your fingers.
Another way to delete unwanted lines is to select them and click the blue “x”.
Use the Undo and Redo icons at the top of the screen when needed.
Sending Designs to Your Silhouette
Once your design is ready to be cut out, tap the Send to Silhouette icon.
First, choose your material type. Then, choose your action. In most instances, you will be selecting to cut out your image.
Once you have your material type selected, you will see the recommended speed, force, and depth. The speed will determine how fast the Silhouette machine cuts. The force (also referred to as the “thickness” setting in other Silhouette cutting applications) determines hard the blade is pressing down as the material is being cut. The depth refers to the blade setting and will help you know what to set your blade to. Though it is recommended to use the default settings, you can adjust them as needed.
Last, choose which machine to send the job to. PixScan™ Mobile works through Bluetooth® with the CAMEO 3 and through Silhouette Link with all other machines. Silhouette Link is a program that runs in the background of your computer. Make sure you have one or the other set up to send your cut job to your machine.
When you are ready, load your PixScan™ mat into your machine. Then, tap Send. The job will be sent directly to your Silhouette from the app.
Alice
January 10, 2017
I do not have a smart phone, but I do have an ipad. Can I take [ictures with that and use a pic scan mat.
Sierra Dungan
January 10, 2017
Yes, the PixScan Mobile App works with iPads as well. It requires iPad 2 or later running iOS 6 & above. We would advise you to ensure your device is updated and it should work.
Vanita
February 1, 2017
thanks for this tutorial! I hate using my pixscan mat because I can never the trace to work 🙁