
Cari here with you today & I’m super excited to be sharing a project that I made this fabulous “I love you” design. You are going to love this design! I was thrilled with it when I got it and my mind was racing with a million ideas!!
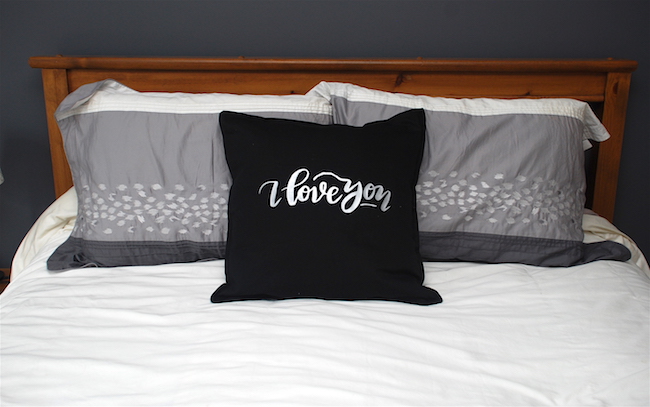
I decided to create a heat transfer image for a pillow cushion to put on our bed.
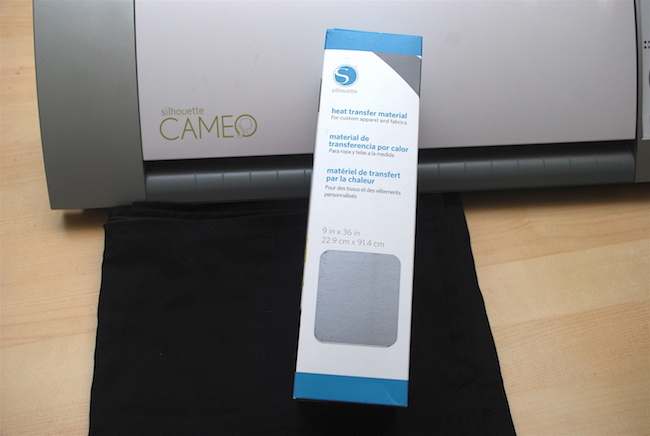
Supplies:
Silhouette CAMEO®
Heat Transfer (silver)
Iron & pillow cushion
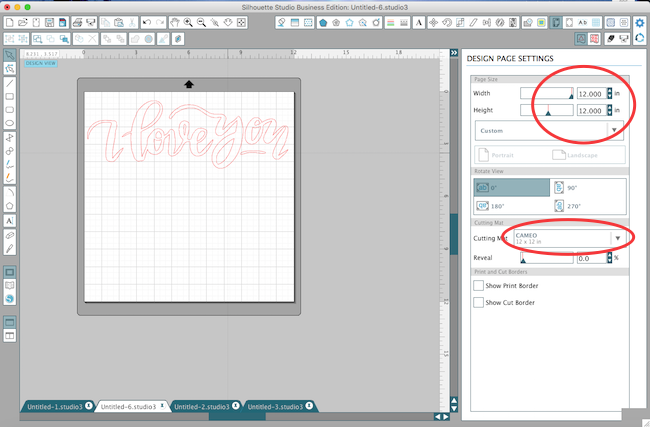
STEP ONE:
- Open up the design in your Silhouette software. Resize the image for the project you are crewing. I sized mine to approximately 11 1/2 in. x 4 in..
- Make sure your page settings are set correctly (I chose a page size of 12 in. x 12 in.).
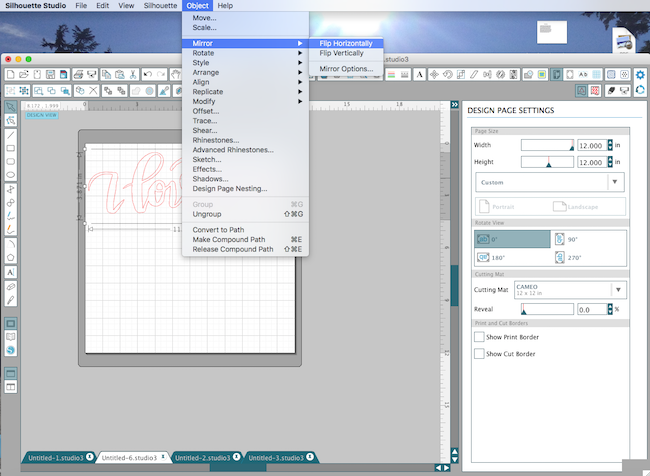
STEP TWO:
- Flip design horizontally or in other words mirror the design image. When using heat transfer you must always remember to mirror your image otherwise when you iron it on to your project it will appear backwards and you don’t want that!
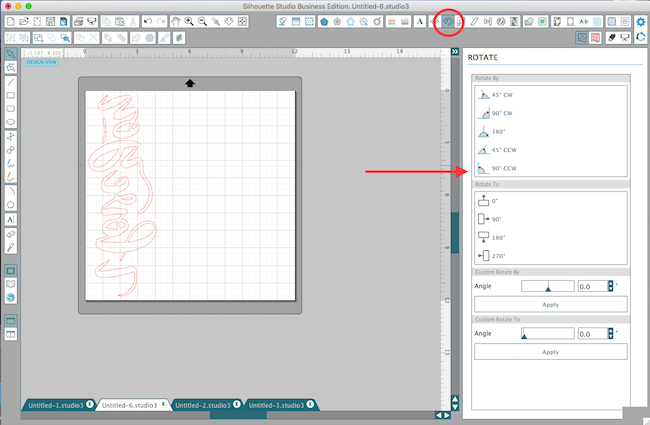
STEP THREE:
- Rotate the design.
- I needed to do this because the heat transfer I was using was only 9 in. wide. If you’re using the 12 in. wide heat transfer, you don’t need to this.
STEP FOUR:
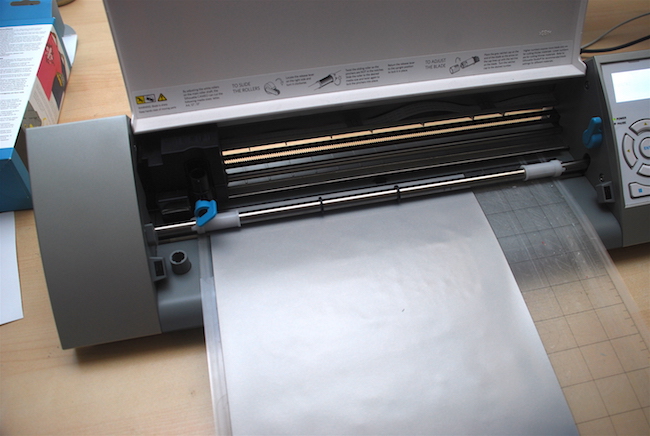
- Head to the Cut Settings window and select “Heat Transfer Material” then make sure to change the depth of your blade.

- When using the Heat Transfer or Vinyl products you can adhere them to a cutting mat or feed them right into your Silhouette. I chose to use a mat because I like the stability of it.
STEP FIVE:
- Once the design is cut you will want to trim closely around the image. Weed out the unnecessary parts.
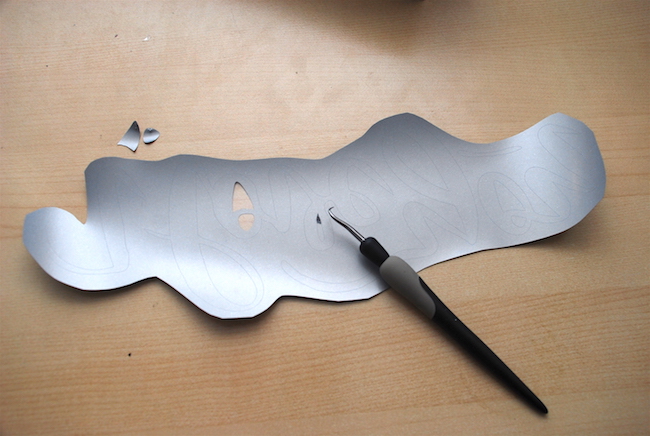

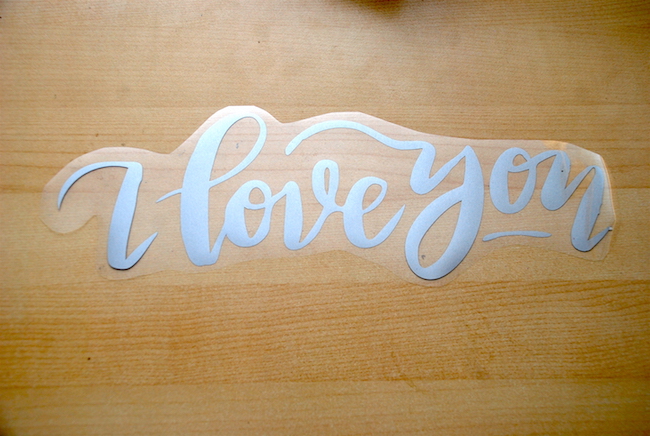
- You will then be left with your cut out design.
STEP SIX:
- Place the design (right side facing up – so you can read it) where you want it on your project, place a light tea towel over top and then iron the design onto your project.
NOTE: Make sure to read the instructions that come with your heat transfer material for appropriate heat settings and length of time to keep the iron on the design. I move my iron around rather than leaving it one place.
And don’t forget the towel, otherwise the plastic will melt and stick to your iron–and you don’t want that!
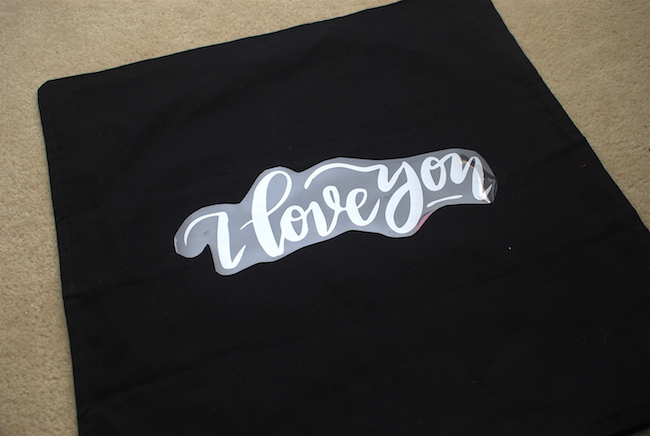
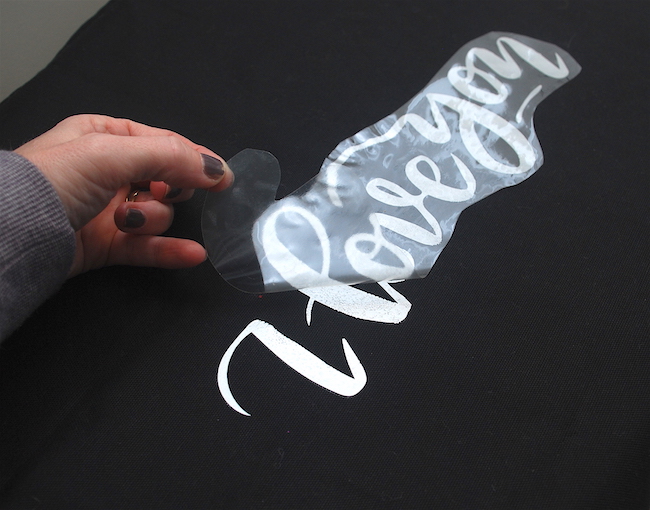
- Once the heat transfer is adhered, peel off the plastic. Be careful when doing this and be sure that the design has completely adhered to the fabric. If not, just place the tea towel back over top and iron it a bit longer.
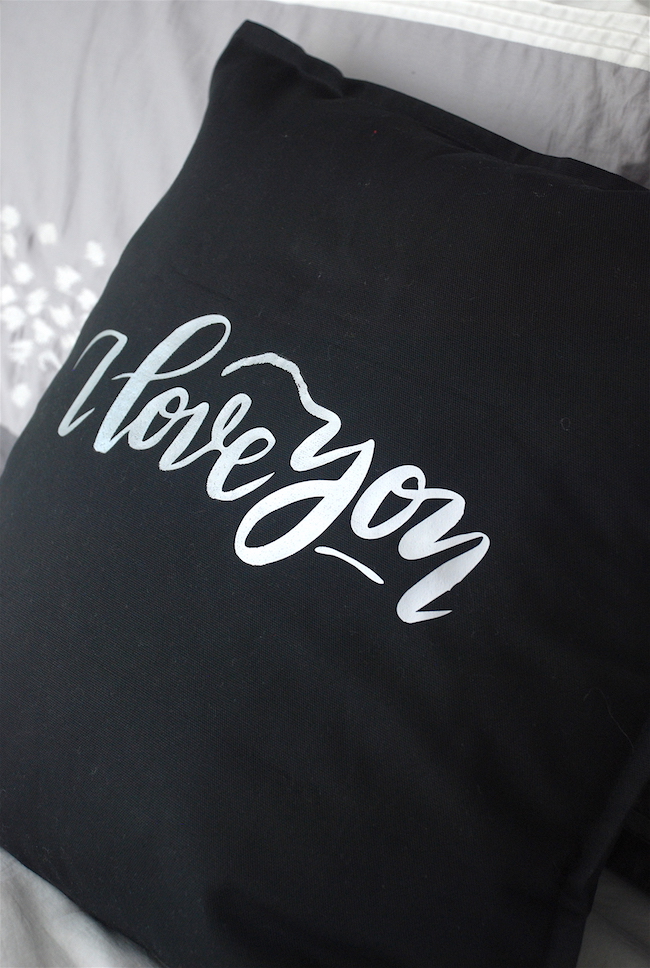
Here’s a close-up of the fun silver color.
Kathy
February 17, 2016
Love the colors. I also get the bumpy look that you have on the swoopy part of letter y. How do we prevent that and keep it looking smooth? Pretty pillow!
Vicki D
February 20, 2016
Hi Kathy, my thinking is that the iron might be a bit too hot or left on a little too long or perhaps iron the pillow to smooth it before laying the htv. Hopefully someone can confirm this :-).
Karley Hall
February 23, 2016
Yes! If the points aren’t the issue, the application process can make or break a project! When ironing, I always you a dish cloth or sheet between my iron and the heat transfer material. This prevents me from melting my design!
Karley Hall
February 23, 2016
Hi Kathy,
I think you are referring to the bumpy edges of the actual cut file. This this is a hand lettered design, the “font” isn’t perfectly smooth. If you want to edit this, you can ungroup the design and double click on the shape. This will allow you to edit points and you can delete whichever points you don’t like!
Please let me know if you have any other questions!
Cari
February 27, 2016
Hi Kathy,
It’s actually not bumpy in real life. The cushion/fabric is a bit lumpy itself but the design is smooth. And like Karley has already mentioned the actual design is wavy like that.
I, too, use a cloth over top of my design when ironing so the heat isn’t too hot and there’s no burning happening. I usually move the iron around rather than keeping it in one place as well.
Kelly Wayment
February 17, 2016
It’s beautiful, Cari! The silver heat transfer on black is definitely a favorite combination of mine. What a great idea to put this design on a pillow!
Vicki D
February 20, 2016
This is such a great idea – I think I’ll do this for my cousin and his new wife. Thanks for sharing.