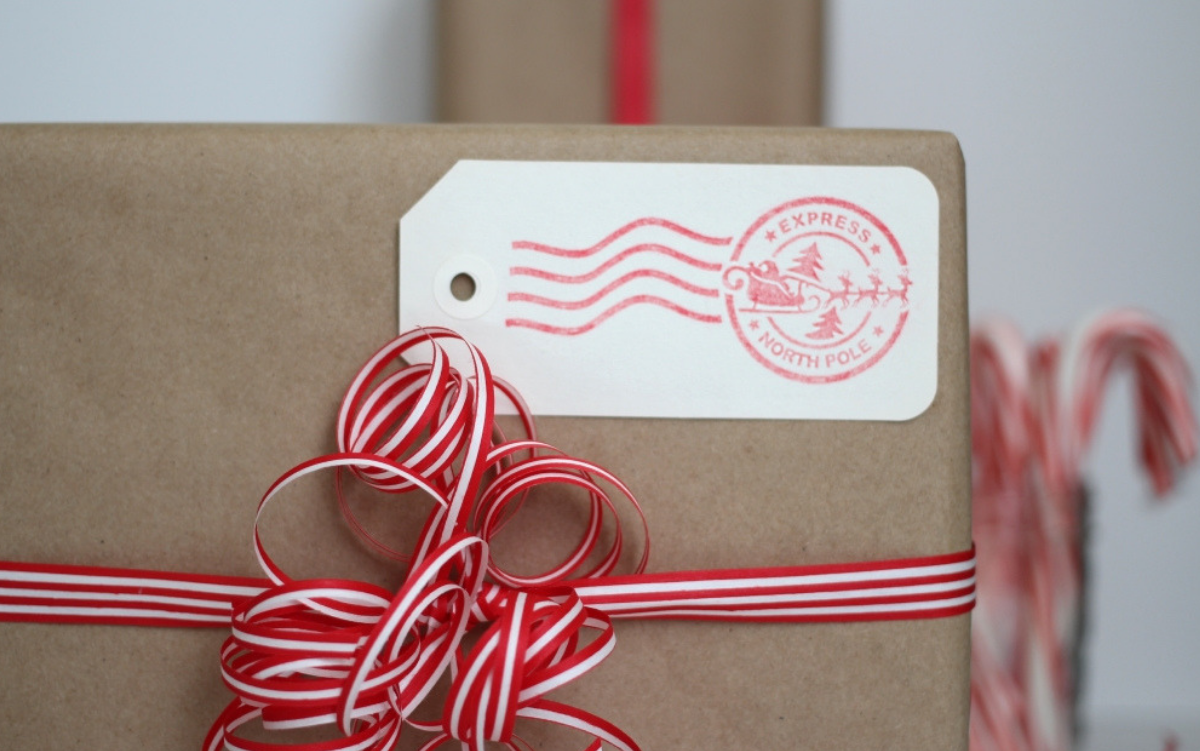
Can you believe that the craft stores in California have Christmas decorations up already? Well, I figured I had better get on the bandwagon and start crafting some holiday inspired crafts and gift wrap. I love decorating and wrapping with inexpensive kraft paper that I can decorate to match any theme I have going on. Keep reading to see how I made this Santa Postage Stamp with the Silhouette Mint – my first Mint project!
Supplies Needed:
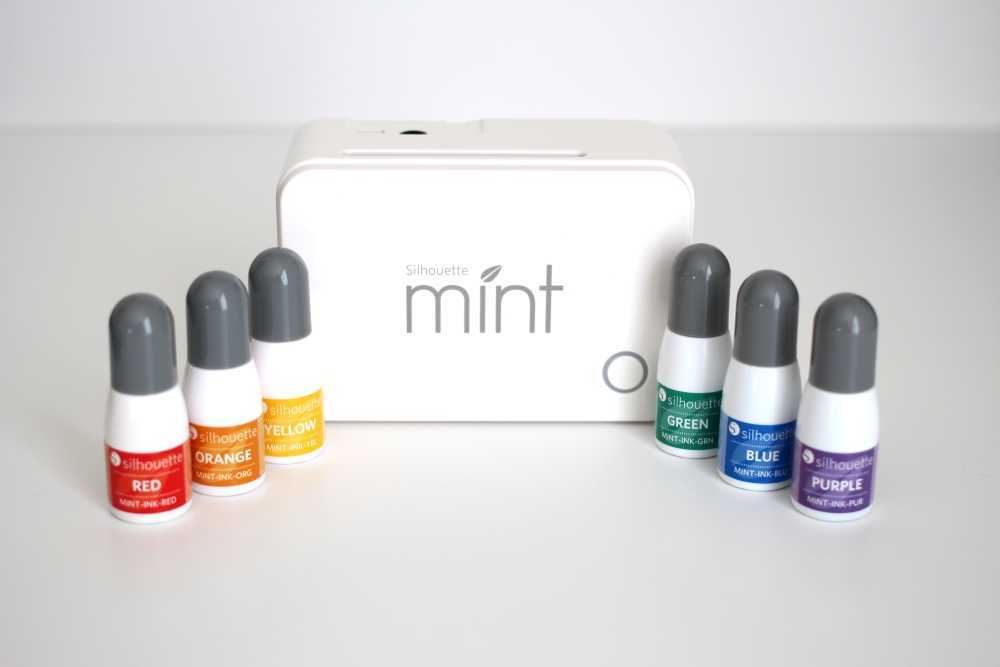
- Silhouette Mint™
- Mint Studio™
- Silhouette Mint™ Stamp Kit
- Silhouette Mint™ Ink
- Kraft Paper
- Design ID #160549
Step One: Creating Your Stamp
- Download and open the Silhouette Mint™ software. This is NOT the same software you use if you have other Silhouette machines.
- Select the size stamp you will be making from the menu on the right. The screen will automatically change when you select the size. My stamp is the 90 mm x 45 mm.
- Download and open your design (Design ID #160549). If you already have a design you want to use in your Silhouette library, be sure to download your designs to the Silhouette Mint™ software. I clicked “Pending Downloads” from the top of the screen and downloaded my files.
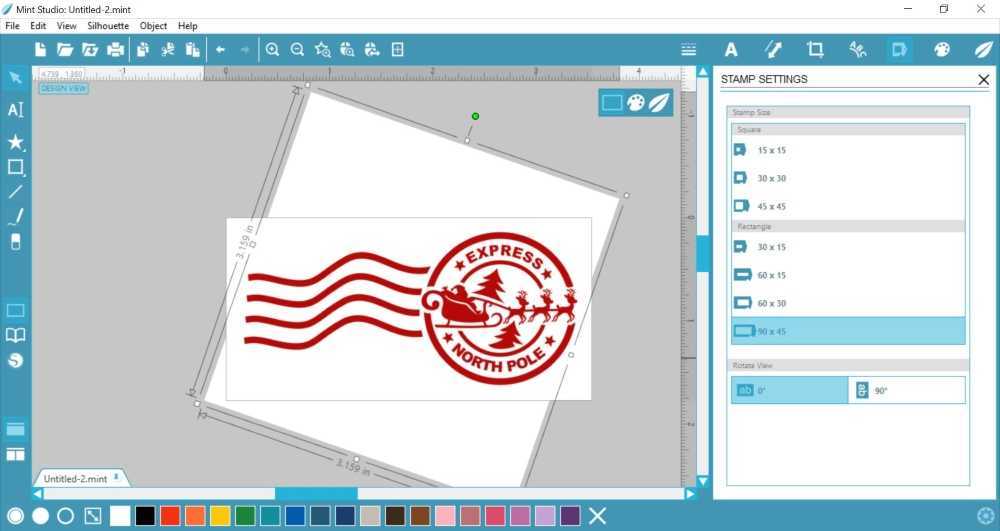
- Resize the design to fit the stamp size on the screen. I had to rotate my design to fit my template. You can do this by clicking the design and then rotate the little green circle at the top of the design.
- Click the leaf icon to preview your stamp. The software will automatically mirror your design. You can select different filters to give your stamp different effects, but I like the clean lines of the “standard” filter.
Step Two: Creating Your Stamp
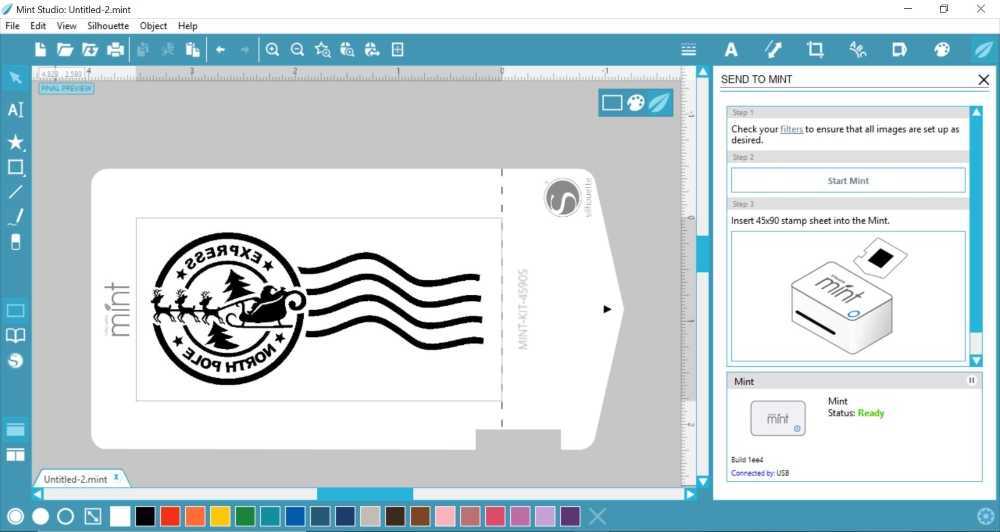
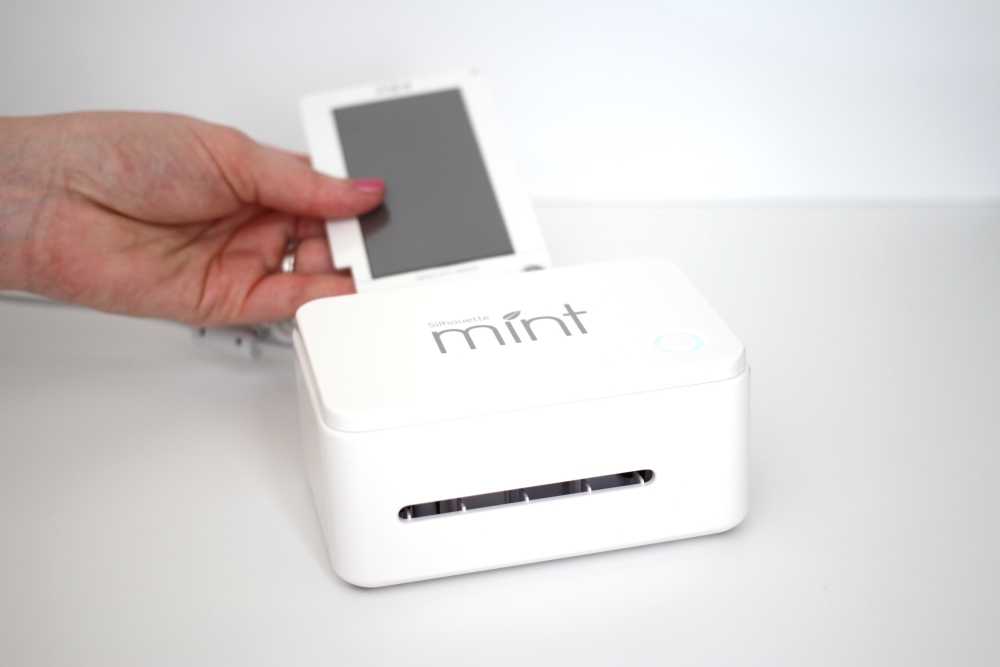
- Plug in your Silhouette Mint™ machine’s power cord and connect the USB cord from your computer to the Silhouette Mint™.
- Your Silhouette Mint™ will sync, and then you’ll see the “ready” note at the bottom of the screen in Silhouette Studio®. You can then click “Send.”
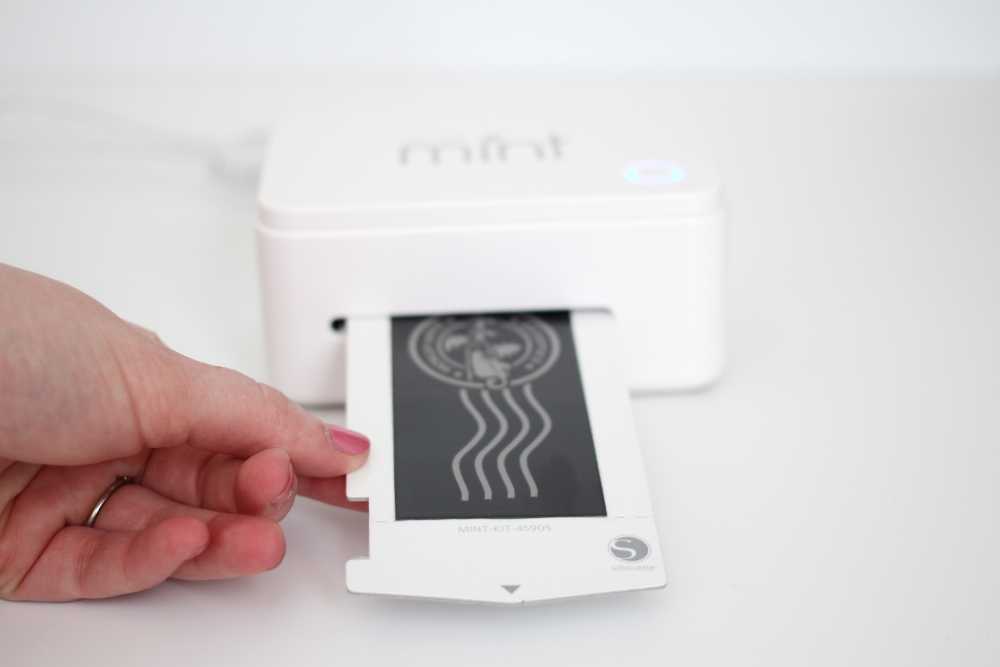
- Once the Silhouette Mint™ starts to blink, load your stamp sheet (the cardboard with rubber in the middle) into the back of the machine, rubber side facing up and the arrow pointing to the machine. Do NOT remove the plastic.
- Gently remove the stamp sheet from the front of the machine and tear along the perforated cardboard. Next, remove the plastic and pull out the rubber stamp!
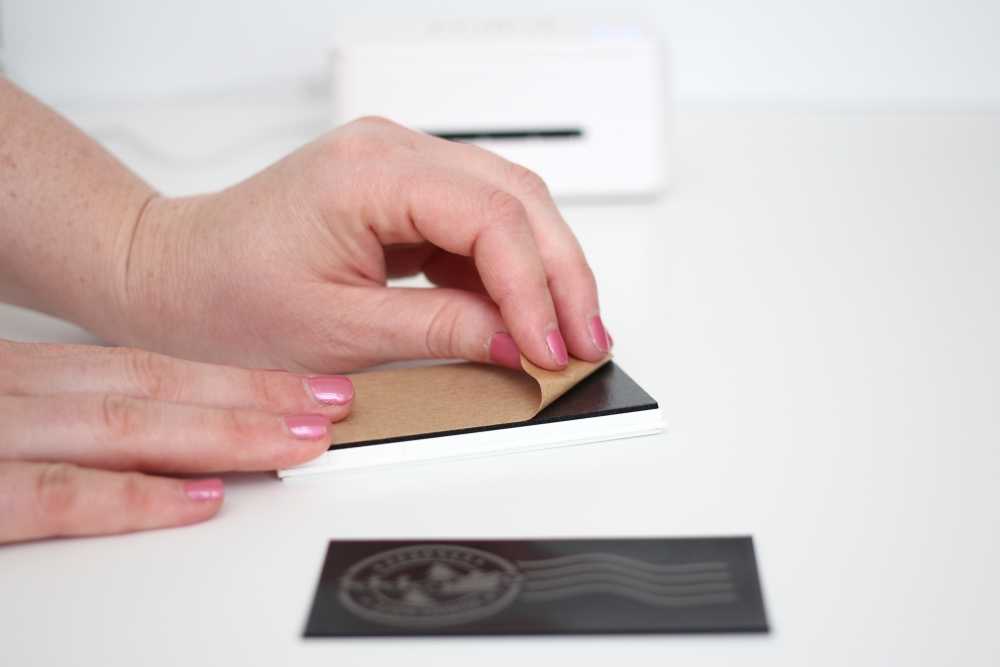
- Remove the adhesive sheet from the base of the stamp and adhere the rubber to the base. Ta-da! You have a Santa Postage Stamp. I find that this step is easier if I have the base snapped onto a block; it wobbles less and gives me more space to make sure the stamp is straight.
Step Three: Ink Your Stamp
- Place your stamp rubber side up on a piece of paper.
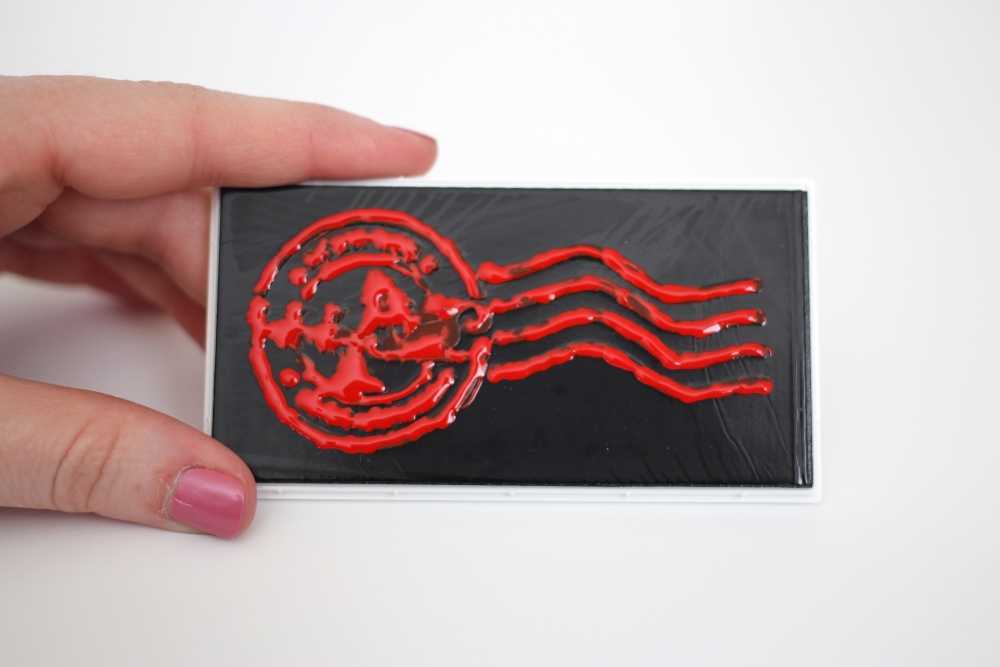
- Gently squeeze the ink bottle to add ink to your stamp.
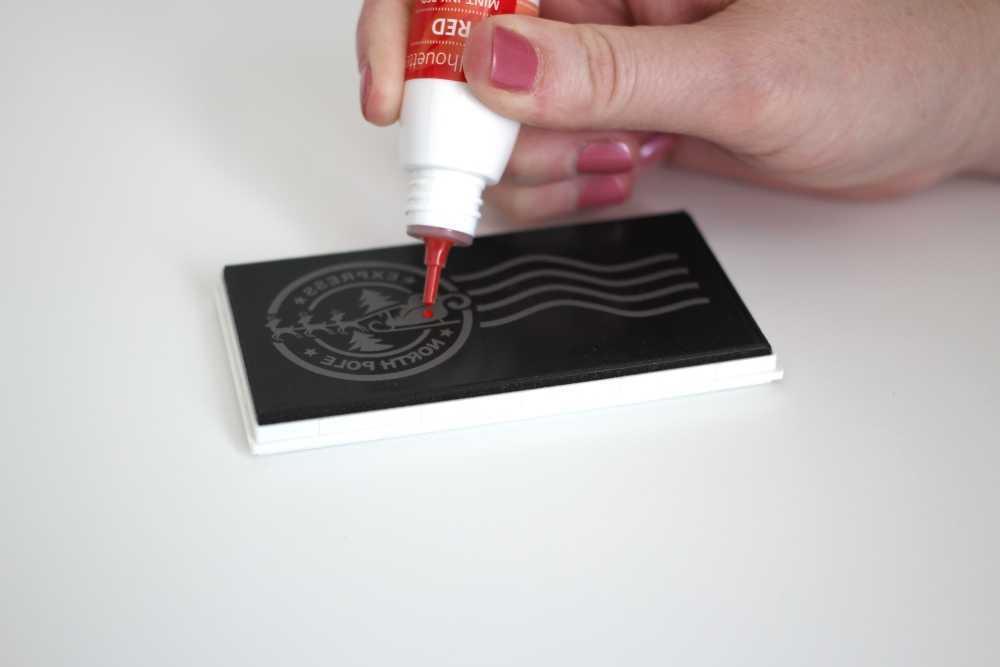
- Allow your ink to soak into your design for a couple minutes and then blot the excess ink by stamping on a piece of scrap paper. I had to stamp about 10 times to remove the excess ink, and then I used a paper towel to clean up the edges.
- Practice on some test pieces of paper to figure out how to line up your stamp and then get to crafting!

How cute would this Santa Postage Stamp be on Christmas morning for the presents under the tree? Talk about a special delivery! I will be dreaming up new gift wrap ideas and ways to incorporate my Silhouette Mint™ stamps to decorate.
Please visit Polka Dotted Blue Jay blog for more crafts and Silhouette project inspiration.