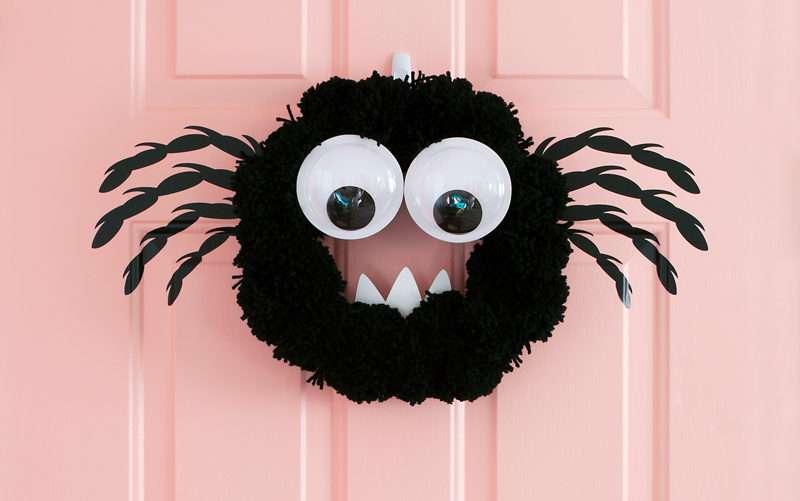
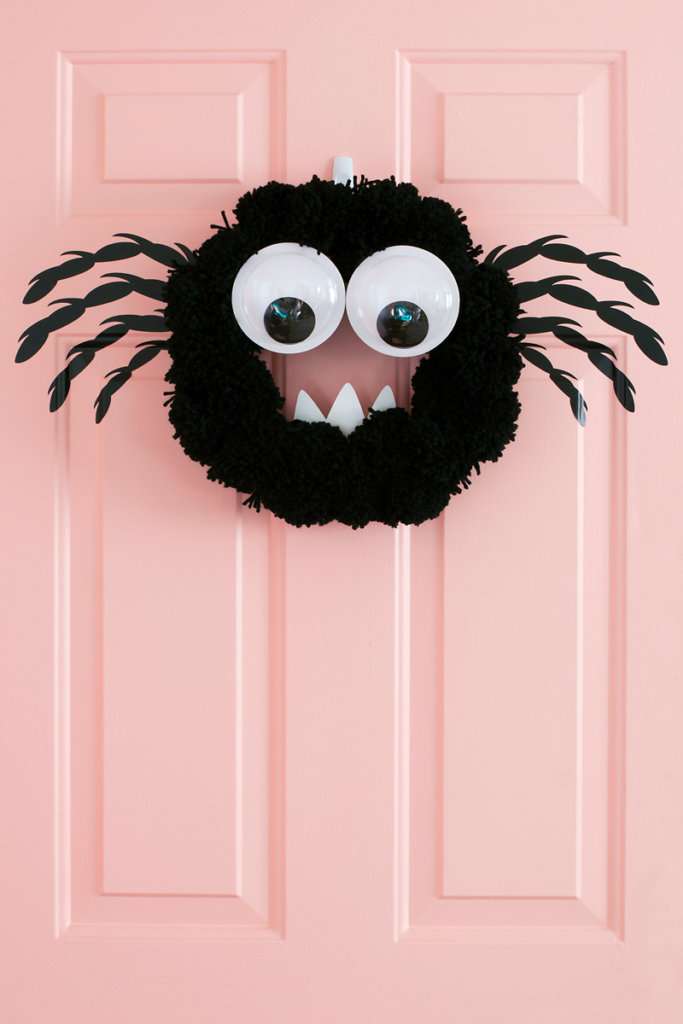
I love LOVE crafting for Halloween, and this DIY spider wreath is one of my all time, TOP holiday projects! I think it turned out so so so cute! Even my hubby was like, “WOAH, I really like that Brie,” and when your husband notices, then you know you did something right.
To make your own creepy-crawly wreath, follow the steps below.
Supplies Needed:
- Silhouette CAMEO® or Silhouette Portrait® or Silhouette Curio™
- Silhouette Cutting Mat
- Silhouette Cutting Blade
- Silhouette Studio®
- Silhouette Matte Vinyl
- White Card Stock
- White Foam Wreath, Painted Black
- Giant Googly Eyes
- An Assortment of Black Pom-Poms
- Hot-Glue Gun
- Design #67120
- Design #108211
Step One: Dress Up The Wreath
Start by painting a foam wreath black. Once dry, attach the black pom-poms to the foam wreath with a hot-glue gun. I feel like EVERYBODY has made a pom-pom wreath, RIGHT? Once your wreath looks like the beginnings of a hairy spider, attach the googly eyes with your BFF, the hot-glue gun.
Step Two: Cut The Spider’s Legs
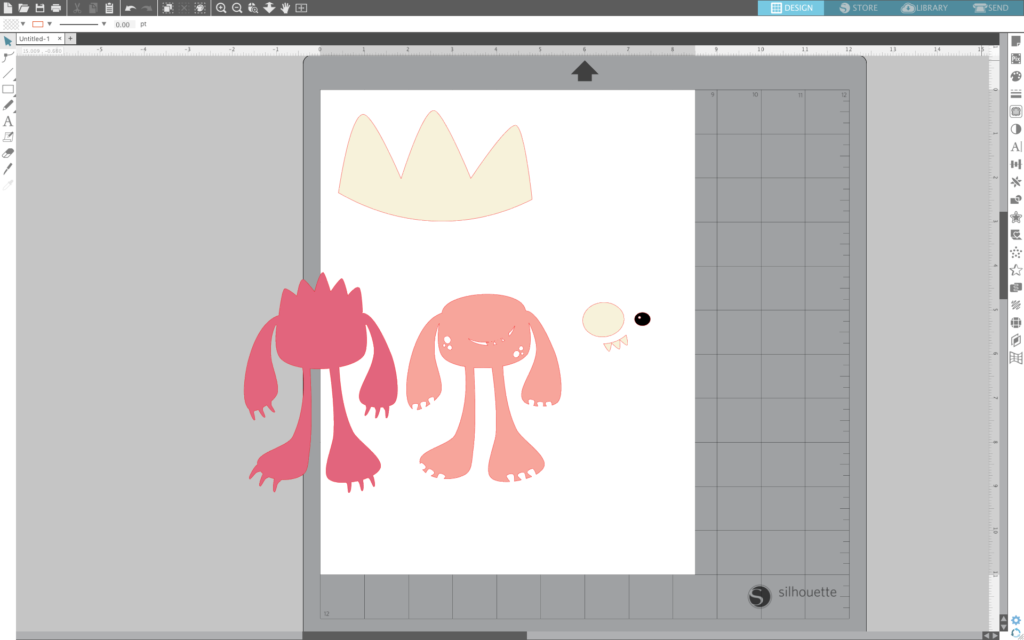
Now comes the fun part. To make the creepy-crawly spider legs, you will need the legs (and only the legs) of Design #67120. Really any spider legs in the Silhouette Design Store are super cute, but I liked this design the best. As you can see below, I sized my legs the biggest they could go horizontally with the Silhouette matte vinyl, so 9 inches across.

Once your spider’s legs are cut from the vinyl, apply them to your door. The legs will be BEHIND the wreath, so eyeball accordingly.
Step Three: Cut The Spider’s Teeth
Next, you will need to add some yummy teeth. I searched “Monsters” in the Silhouette Design Store, and I found a cute little monster with some pearly whites that I liked. I used only the teeth from Design #108211, as you can see below.
I did use a toothpick to attach the teeth to the wreath (hey, that rhymed) by simply adding a drop of hot glue to the teeth and attaching the toothpick. VOILA.
Hang your adorable creepy, crawly spider wreath over the legs, and you have a Halloween wreath that is sure to attract some attention… errr, flies.
Kelly Wayment
June 28, 2024
You can use it with vinyl as long as it is smooth and flat to allow the static charge to hold on to it. Rolled vinyl that wants to go back to its rolled shape will not necessarily work well, and it would need to be trimmed to fit the ES mat cutting area.
Kelly Wayment
June 28, 2024
Yes, you can use the heat pen while using the ES mat. 🙂
Yurii
March 2, 2024
Hello. May it be used with heat pen?
Thanks
Jerome
February 24, 2024
Hi, works this with the normal vinyl foils or only with printer papter etc?
Kelly Wayment
February 16, 2024
Once you’ve pushed the mat up against the rollers, just press the “Load” arrow button (bottom right on the display). Does a regular sticky mat load into the machine for you?
Michelle a goodall
January 24, 2024
Hello! I just got my new electrostatic mat and have watched every video i can find on it. However, what i can t find is why it wont feed into my cameo 5/ it slides right up the rollers but wont go any further. and yes- iam pushing the into button. help!