
If you love the look of watercolor flowers but don’t actually know how to paint, this project is for you! Use Silhouette’s new Image Transfer Paper to easily add detailed designs to wood, metal, brick or concrete.
Supplies Needed:
- Silhouette CAMEO® or Silhouette Portrait® or Silhouette Curio™
- Silhouette Cutting Mat
- Silhouette Cutting Blade
- Silhouette Studio®
- Silhouette Image Transfer Paper
- Silhouette Matte Vinyl – Gray
- Silhouette Transfer Tape
- Wood Sign (make your own or buy)
- Wet Washcloth or Paper Towel
- Design ID #173641
Step One: Set Up The Design To Be Cut
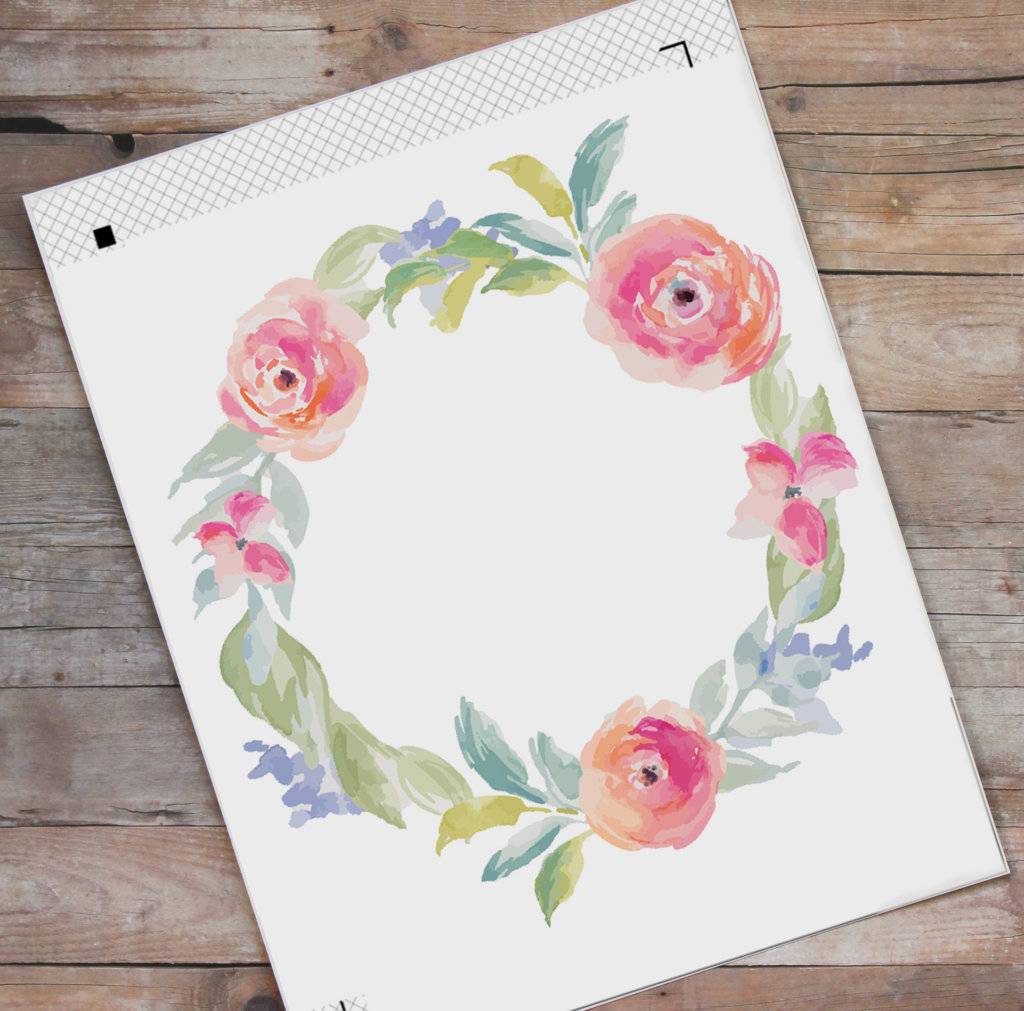
- Select the Page Setup Panel (this icon can be found on the toolbar on the right-hand side of your page) and adjust your page to 8.5 x 11 inches.
- Open Design ID #173641 (watercolor image) in Silhouette Studio® by locating it your library. Mirror the image if you have text or if you don’t want your final image to be mirrored.
- In the Page Setup Panel, turn on the registration marks by setting the style to Type 1. Adding registration marks is important because your machine reads these marks in order to cut your shapes out perfectly.
- Open the package of Image Transfer Paper.
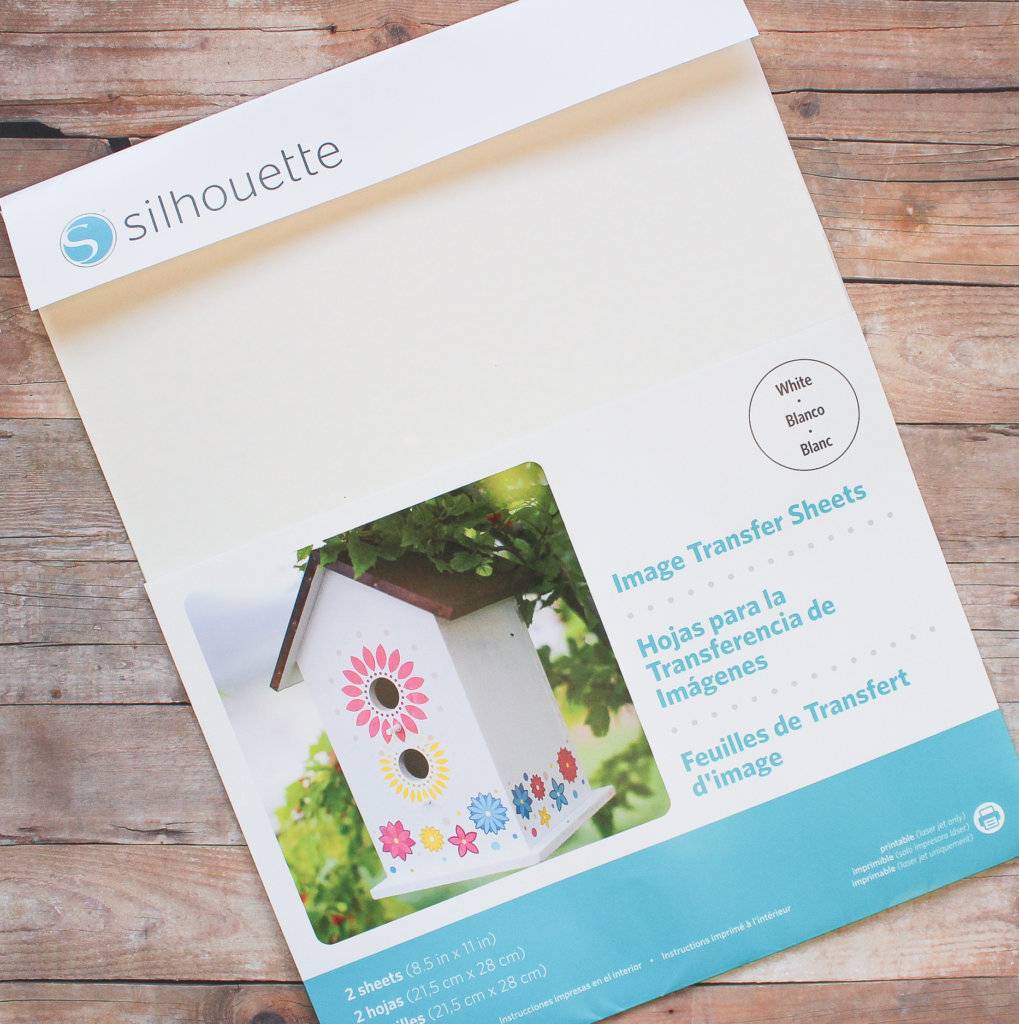 You’ll notice that there are four sheets included: two white sheets and two green adhesive sheets.
Step Two: Print & Cut The Design
- Feed the white paper into your printer so the image will print onto the blank white side.

- Print the image with your printer’s highest quality settings. (NOTE: Please note that this paper only works with laser printers, NOT inkjet printers.)
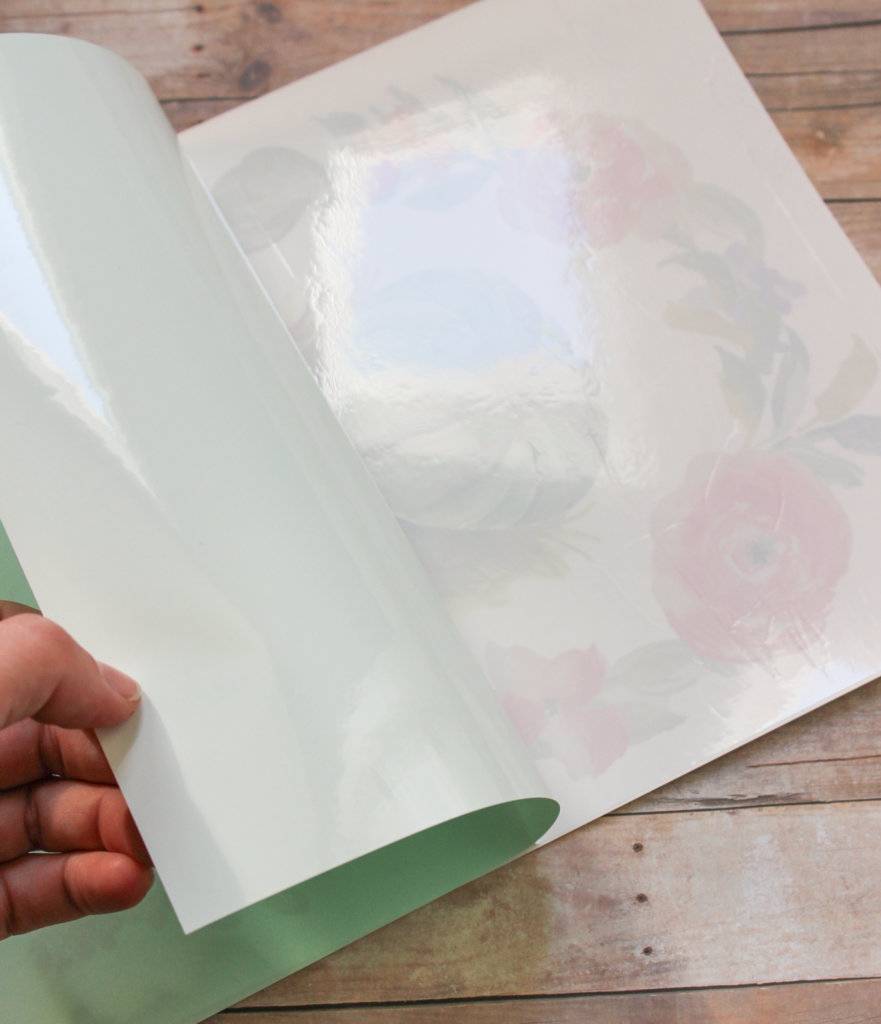
- Apply the green adhesive sheet to the top of the printed image by peeling away the green backing on one end, aligning it with the end of the printed paper, and then peeling away the rest of the backing paper while smoothing the adhesive down onto the paper. Use a Scraper Tool to rub the adhesive sheet onto the printed image.
- Now that your Image Transfer Paper is all set up, it’s time to have the machine cut it out. Place the paper onto your cutting mat. Next, load your printed sheet into your Silhouette machine and select the “Image Transfer Paper” cut settings from the menu. Be sure to adjust the blade settings accordingly.
- When the cutting process is complete, peel away the clear plastic layer exposing the adhesive. Be sure to not touch the paper too much because it is very delicate.

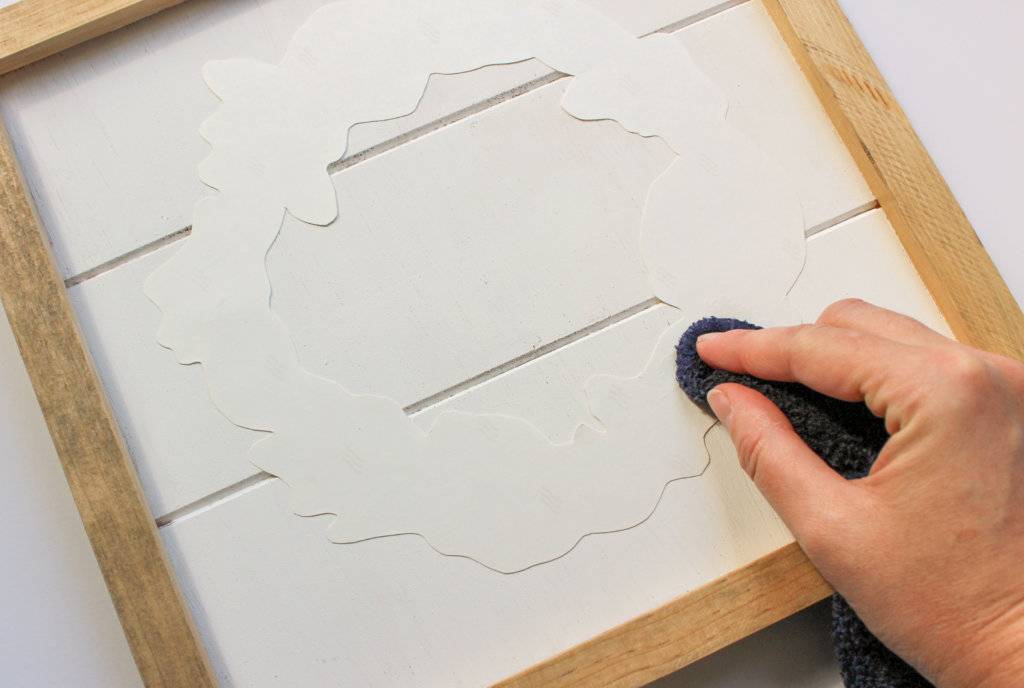
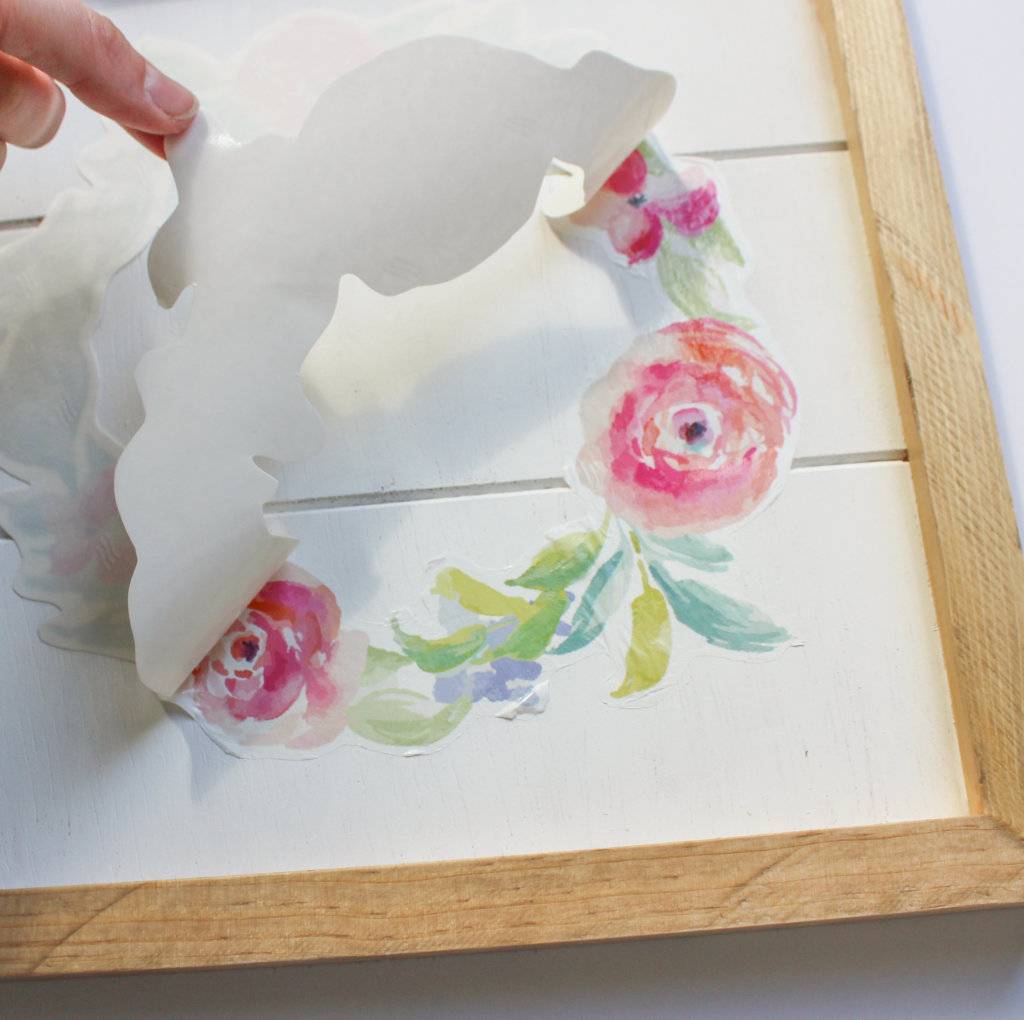
- Apply the sheet PRINTED SIDE DOWN onto the wood. Wet the paper backing thoroughly. Wait 10 seconds and check that there are no dry spots. Carefully peel away the backing paper to reveal your pretty design! If there are parts that don’t want to peel away from the backing, rewet them, wait 10 more seconds, and then try peeling the paper back again.
- Cut words of your choice out of gray vinyl and apply them to the center of the wreath using transfer tape. Be careful not to overlap the transfer tape onto the transfer paper because the transfer paper might peel off from the sign.

What will you create with Silhouette’s new Image Transfer Paper?
Kelly Wayment
June 28, 2024
You can use it with vinyl as long as it is smooth and flat to allow the static charge to hold on to it. Rolled vinyl that wants to go back to its rolled shape will not necessarily work well, and it would need to be trimmed to fit the ES mat cutting area.
Kelly Wayment
June 28, 2024
Yes, you can use the heat pen while using the ES mat. 🙂
Yurii
March 2, 2024
Hello. May it be used with heat pen?
Thanks
Jerome
February 24, 2024
Hi, works this with the normal vinyl foils or only with printer papter etc?
Kelly Wayment
February 16, 2024
Once you’ve pushed the mat up against the rollers, just press the “Load” arrow button (bottom right on the display). Does a regular sticky mat load into the machine for you?
Michelle a goodall
January 24, 2024
Hello! I just got my new electrostatic mat and have watched every video i can find on it. However, what i can t find is why it wont feed into my cameo 5/ it slides right up the rollers but wont go any further. and yes- iam pushing the into button. help!