One of the things I love about Silhouette is that they have numerous products to chose from, and for this blog post I wanted to create something with the printable heat transfer material.
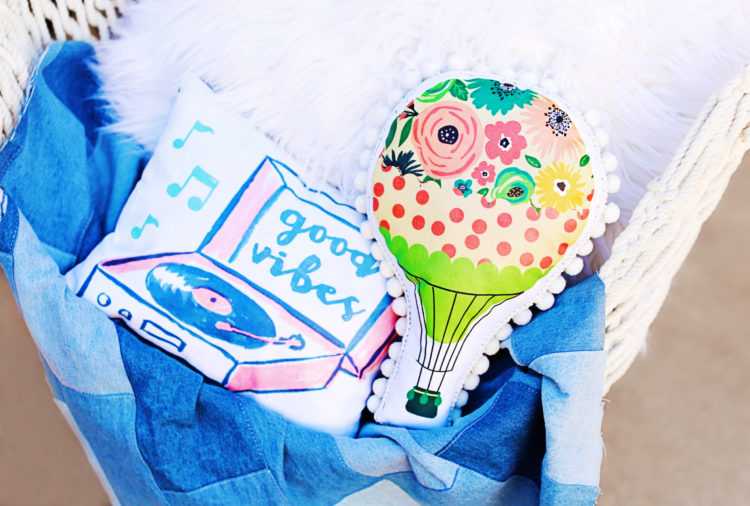
This was the very first time I used this product. Don’t get discouraged by the idea of trying something new because if I can make these cute mini pillows on my first try, then you can too.
Supplies Needed:
- Silhouette CAMEO®, Silhouette Portrait®, or Silhouette Curio™
- Silhouette Studio®
- Silhouette Cutting Mat
- Silhouette Cutting Blade
- Silhouette Printable Heat Transfer Material (for Light Fabrics)
- Printer
- Iron
- Ironing Board
- Fabric
- Trim
- Pillow Stuffing
- Sewing Machine
- Hot Glue Gun
- Scissors
- Design ID #199774
- Design ID #128156
Step One: Set Up the Design to Be Printed
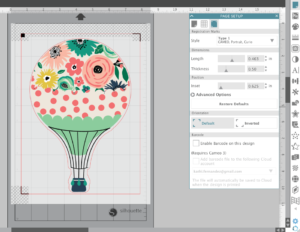
- Open the Page Setup panel and adjust your paper size to 8.5 inches x 11 inches.
- Click on the registration marks icon and add your type of registration marks.
- Add your design to fit the page. (Tip: If your design has text or if you like the layout just the way it is, you will need to mirror the design so that it can be applied to fabric correctly.)
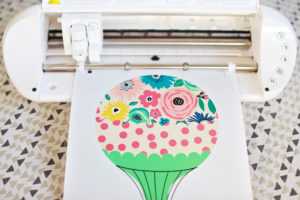
- Once you’re satisfied with your design, send it to your printer to print. (Make sure your design prints on the white side, not the red grid side.)
Step Two: Cut the Design
- Load your printable heat transfer material into your machine.
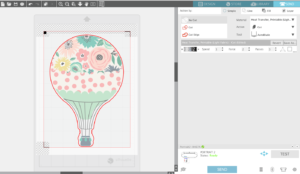
2. Select “Send” located on the top right side of Silhouette Studio®.
3. Make sure you chose “Heat Transfer, Printable (Light Fabrics)” from the material drop-down menu.
4. If you have the Autoblade, it will automatically switch to the correct blade depth.
5. To make sure it cut through, I set the number of passes to 3.
Step Three: Iron on the Design
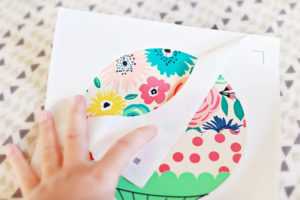
- Peal the extra film off. I started from the left corner of the material, but you can start from any corner.

2. Iron your fabric first to get rid of any wrinkles
3. Place the heat transfer material on top of your fabric with the design facing down. That way you are ironing on the red grids.
The directions on the package say to place another fabric material on top of the red grids but it was taking a bit too long for me so I decided not to use one.
Step Four: Sew the Pillow

I am not an advanced sewer, but I can do the simple basics, and that’s all you need to make this pillow. I just used my scissors to cut around the shape of the hot air balloon. Then used the same shape to cut out another fabric for the backing of the pillow.
Once I sewed the fabrics together, I stuffed the case with some pillow stuffing. Then I took my hot glue gun and glued the white pom pom trim around the pillow.


Of course I had to use my adorable niece as my model. If hot air balloons aren’t your thing, then check out the countless designs in the Silhouette Design Store. Cute little forest animal pillows would be exciting to make as well.
Kelly Wayment
June 28, 2024
You can use it with vinyl as long as it is smooth and flat to allow the static charge to hold on to it. Rolled vinyl that wants to go back to its rolled shape will not necessarily work well, and it would need to be trimmed to fit the ES mat cutting area.
Kelly Wayment
June 28, 2024
Yes, you can use the heat pen while using the ES mat. 🙂
Yurii
March 2, 2024
Hello. May it be used with heat pen?
Thanks
Jerome
February 24, 2024
Hi, works this with the normal vinyl foils or only with printer papter etc?
Kelly Wayment
February 16, 2024
Once you’ve pushed the mat up against the rollers, just press the “Load” arrow button (bottom right on the display). Does a regular sticky mat load into the machine for you?
Michelle a goodall
January 24, 2024
Hello! I just got my new electrostatic mat and have watched every video i can find on it. However, what i can t find is why it wont feed into my cameo 5/ it slides right up the rollers but wont go any further. and yes- iam pushing the into button. help!