I don’t know about you, but I love all kinds of paper flowers and plants. After I managed to kill off my real succulents (you know, the ones that are supposed to be easy to take care of), I decided to make a set of paper succulents. Keep reading to learn my favorite tips and tricks for making these look realistic.
Supplies Needed:
- Silhouette CAMEO®, Silhouette Portrait®, or Silhouette Curio™
- Cardstock in varying shades of green
- Ink pads
- Ink applicator (sponge or felt dauber)
- Spatula tool
- Low-temp hot glue gun
- Small pebbles
- Small containers
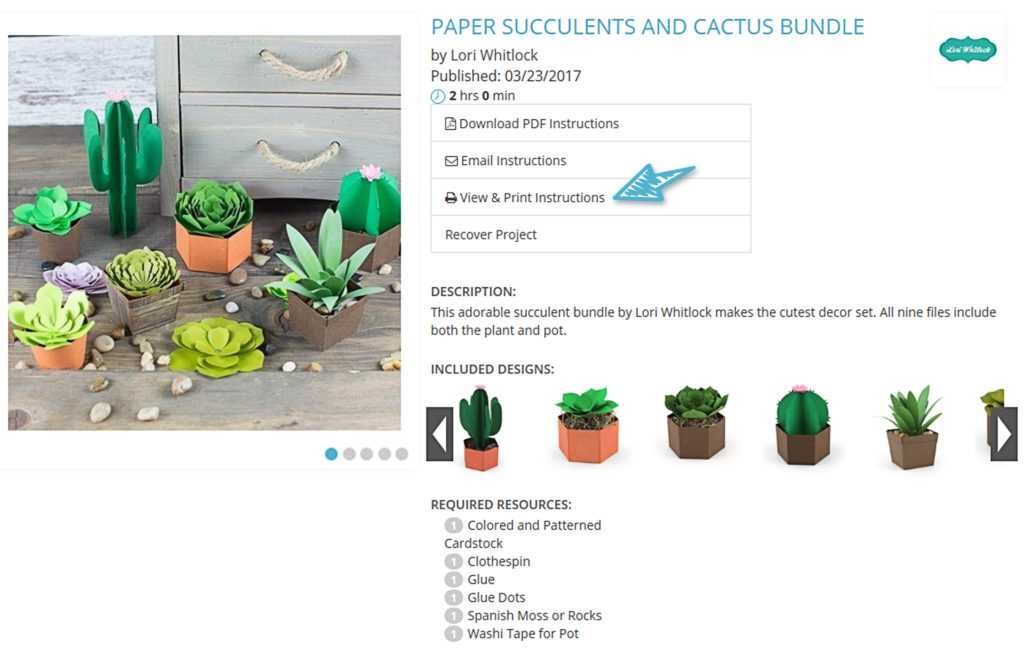
- Ready, Set, Make project: Paper Succulents and Cactus Bundle (Design ID #1573)
Step One: Download Designs
Have you ever tried a Ready, Set, Make project in the Silhouette Design Store? You can scan each project to see an estimated time, a description, and a list of included designs. If you own some of the designs already, your price is discounted for those designs.
1. Purchase the Paper Succulents and Cactus Bundle. We’ll use three of the designs in this project.
2. Once you’ve checked out, go back to the project page in the Design Store. Now you’ll see links to download PDF instructions, receive instructions by email, or view and print the instructions. Sometimes the instructions will be written out in text, and sometimes they will link you to a blog post.
Step Two: Open, Resize, and Cut Designs

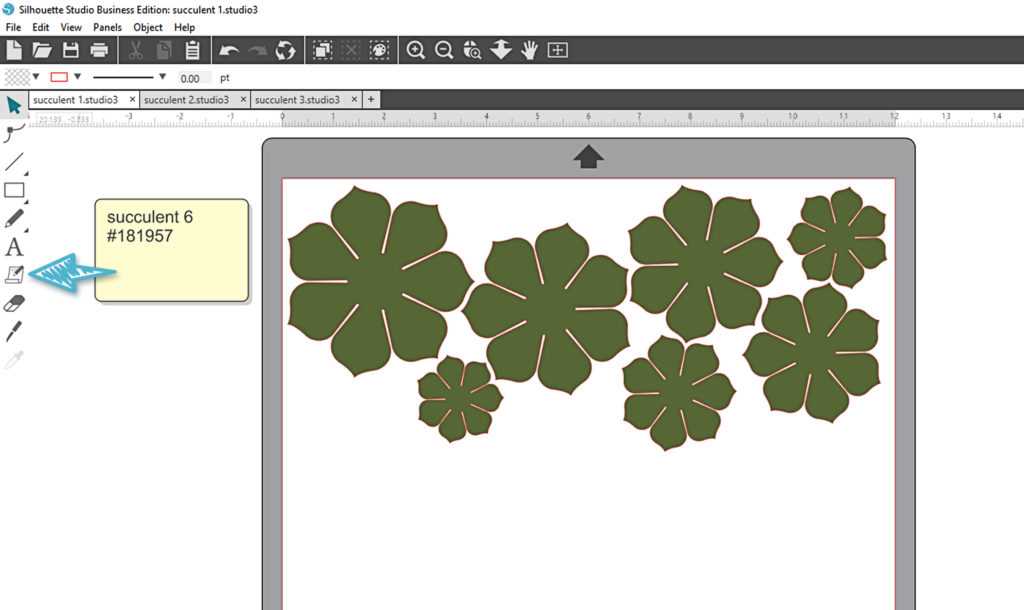
1. Open the designs from your Silhouette Studio® library that you want to use for your succulents (I opened one design per page), and then ungroup them.
Tip: Use the sticky note feature to make note of the design ID # for future reference, especially when working with a lot of similar files or files with common names.
2. Resize as necessary by dragging the corner handles of the selection box. Make sure you select all the pieces at once so that you resize everything proportionately.
Resizing tip 1: To test the size of a succulent, cut the bottom layer (or more) from scrap paper, roughly shape it so it represents the plant size, and test how it looks in your pot.
Resizing tip 2: On one of these succulents, I copied the bottom piece twice and scaled one copy to 115% and one to 130% in order to increase the overall size of my succulent. An alternative would be to scale all the pieces larger at the same time without adding layers.
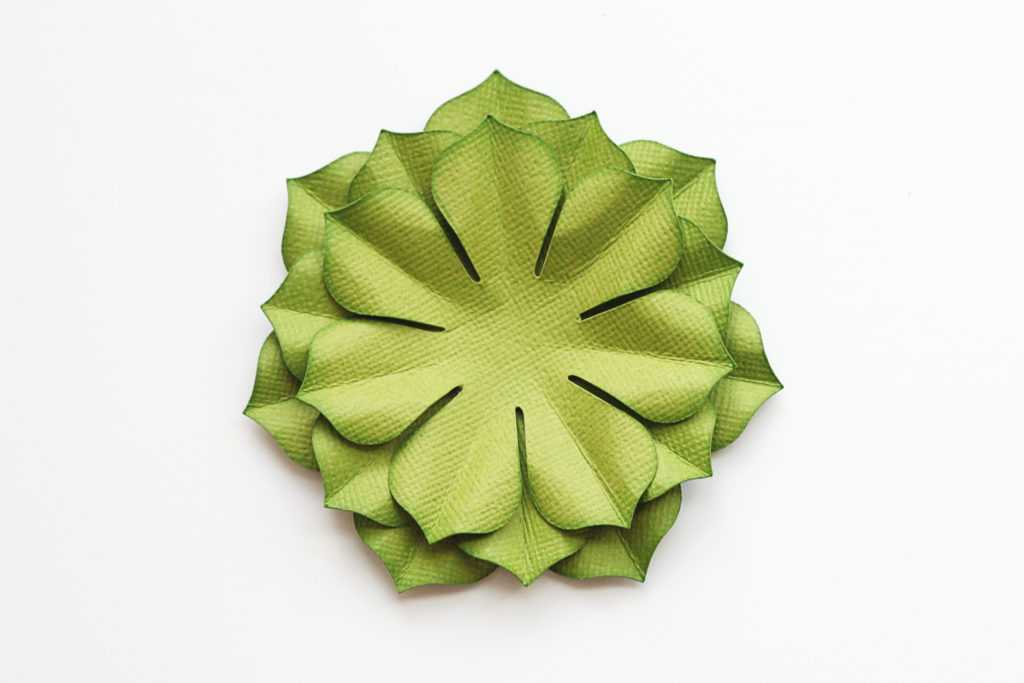
3. Cut each succulent from plain or textured cardstock. I chose three shades of green for this project, but feel free to try reds, blues, and purples as well.
Step Three: Add Color
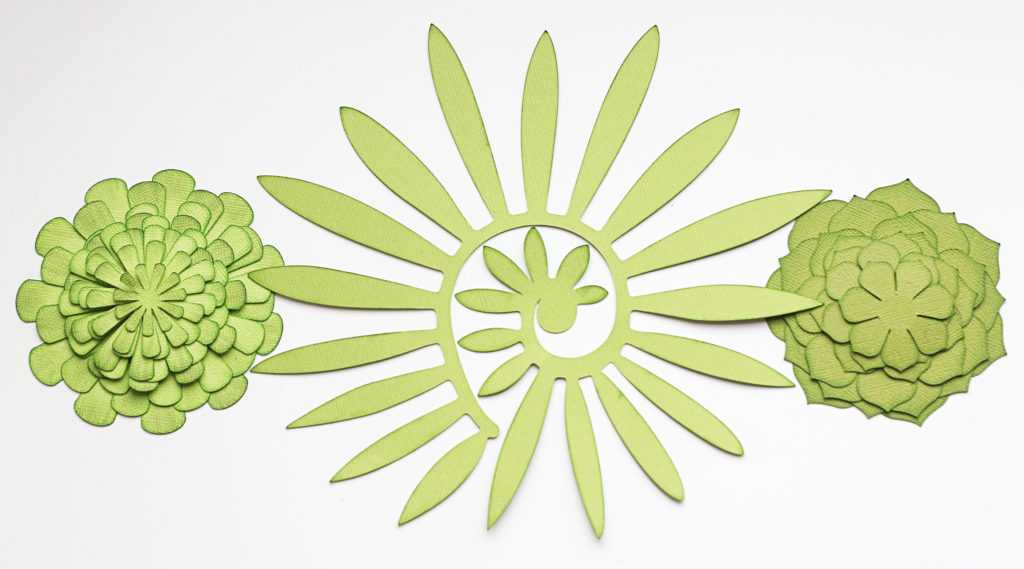
1. Use ink pads in one or more colors to add color to the edges of your leaves.
2. For dye inks, I use a clean makeup sponge to pick up the ink from the pad and then dab or lightly brush it on the edges of the leaves.
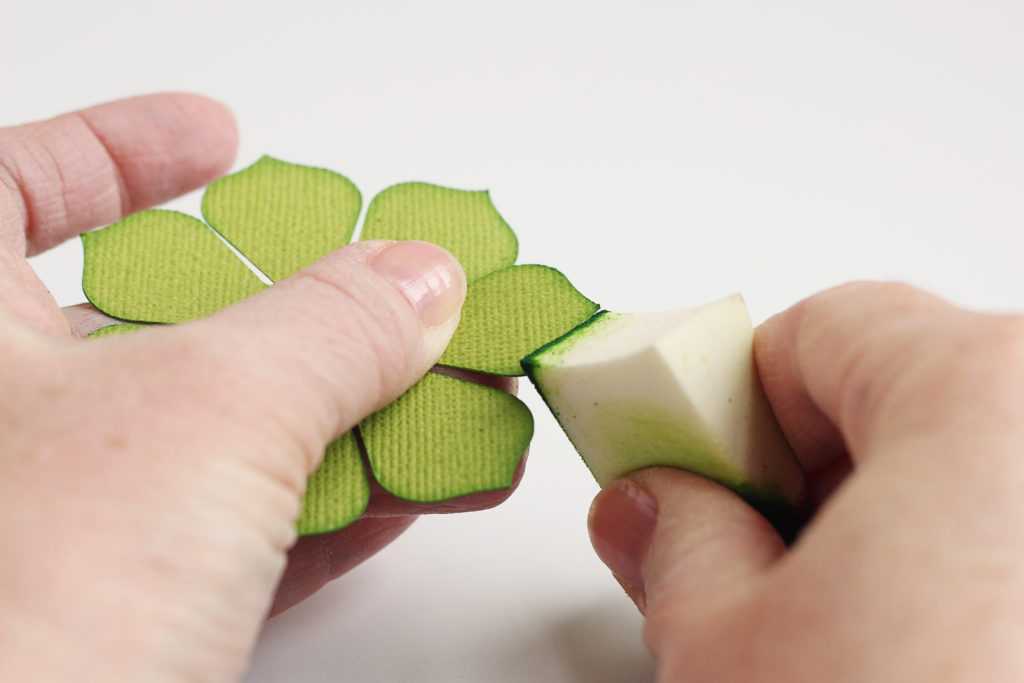
Tip: Use a scratch piece of the same paper to experiment with colors and practice your technique. Start lightly because you can always add more color later.
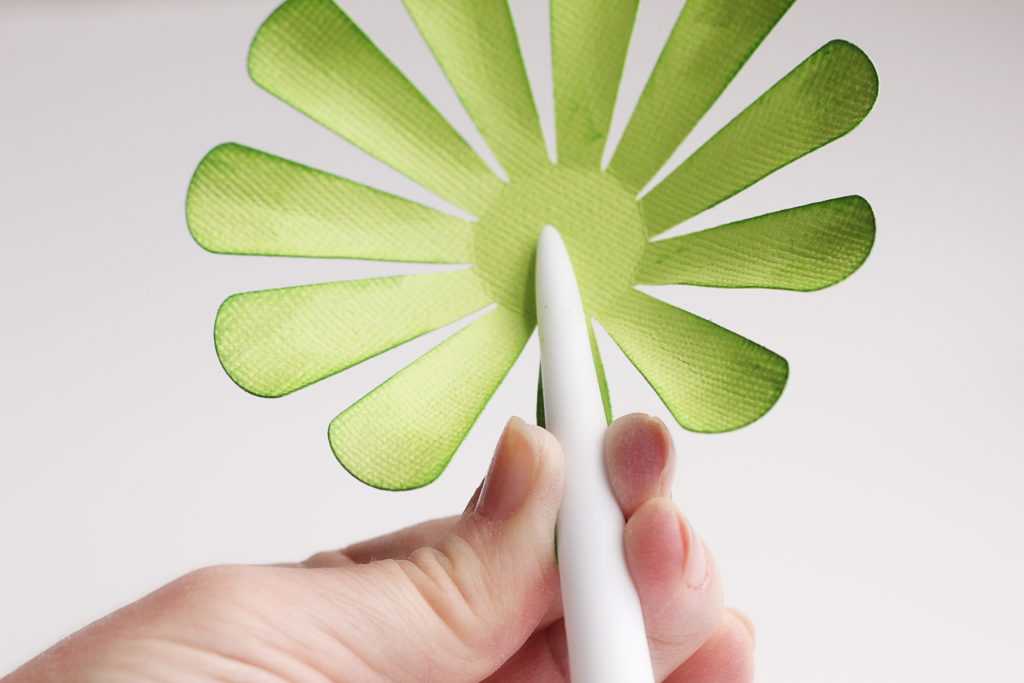
Step Four: Shape Leaves
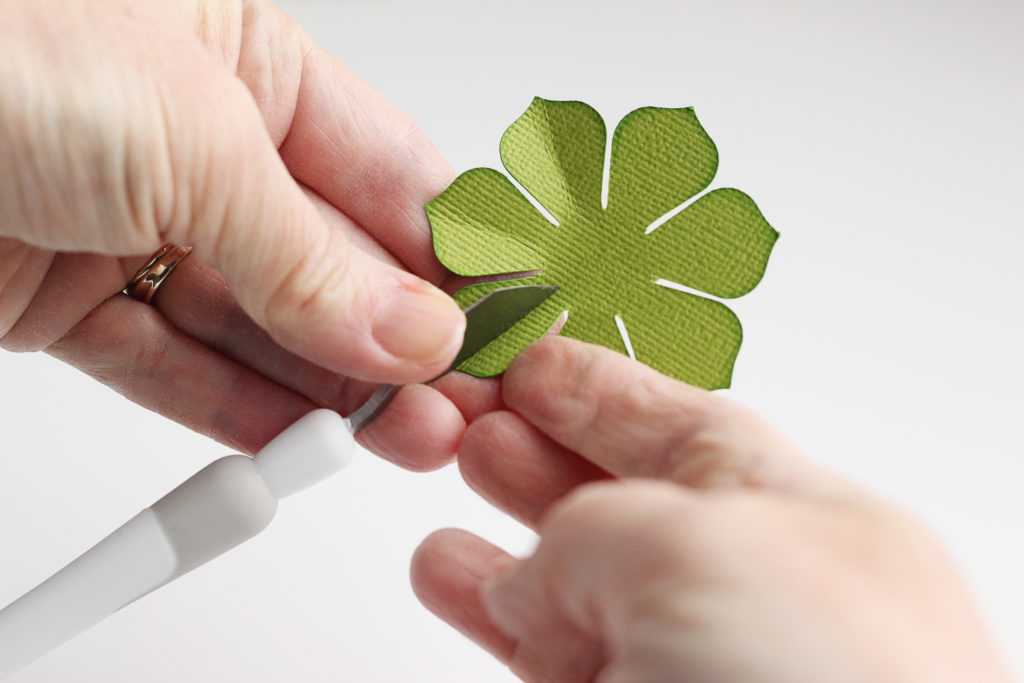
1. Use your fingers or any kind of long tool to shape the leaves. I tend to use my spatula tool because I can use the metal end to add creases and the plastic-handle end to curl the cardstock.
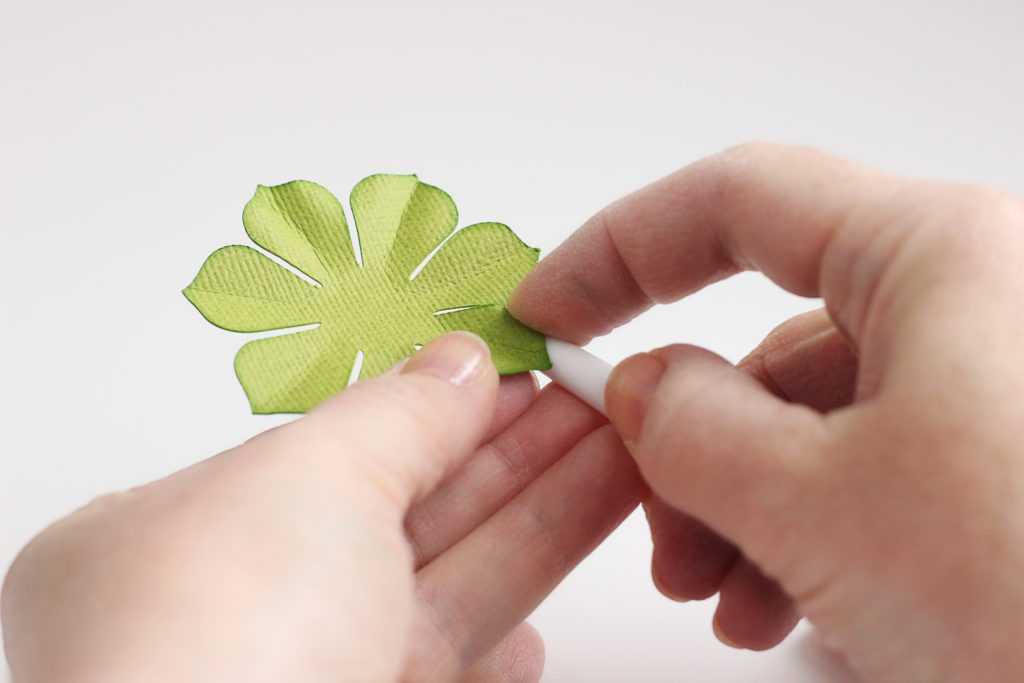
2. There’s not necessarily a right or wrong way to curl your leaves. You just don’t want them flat, and what’s important is being consistent in your method.
Tip: Mist lightly with water to soften the paper before shaping. This makes the paper more pliable temporarily, and then it will stiffen when it dries and permanently hold its new shape.
3. For the taller rolled succulent, roll the leaves first (start on the outer tip and roll towards the center) before gluing to the center. Then you can lightly pull each leaf with your fingers to give it a curve—similar to curling a ribbon with scissors.
Step Five: Assemble Designs
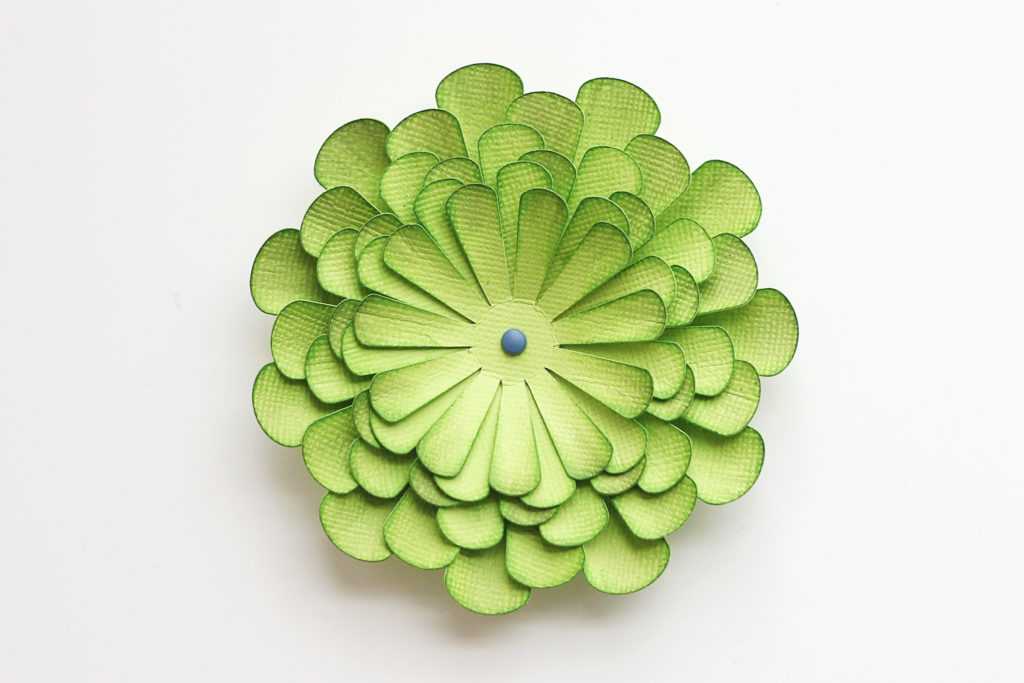
1. When all the paper pieces are shaped and dry, use a low-temperature hot glue gun to attach the layers.
2. For the layered succulents, start with the bottom (largest) piece, add a bit of glue in the center, and press the next largest layer in place.
3. Try to avoid lining up the leaves or petals. Instead, focus on placing the tips of the upper layer of leaves in between the gaps of the lower layer of leaves.
Tip: If you have trouble keeping the layers centered, poke a pin hole through the middle of each layer before gluing. Place a brad through the holes to line them up and attach them together. The hole makes it easier to find the center before committing to glue, and you only need to glue the layers not attached with a brad.
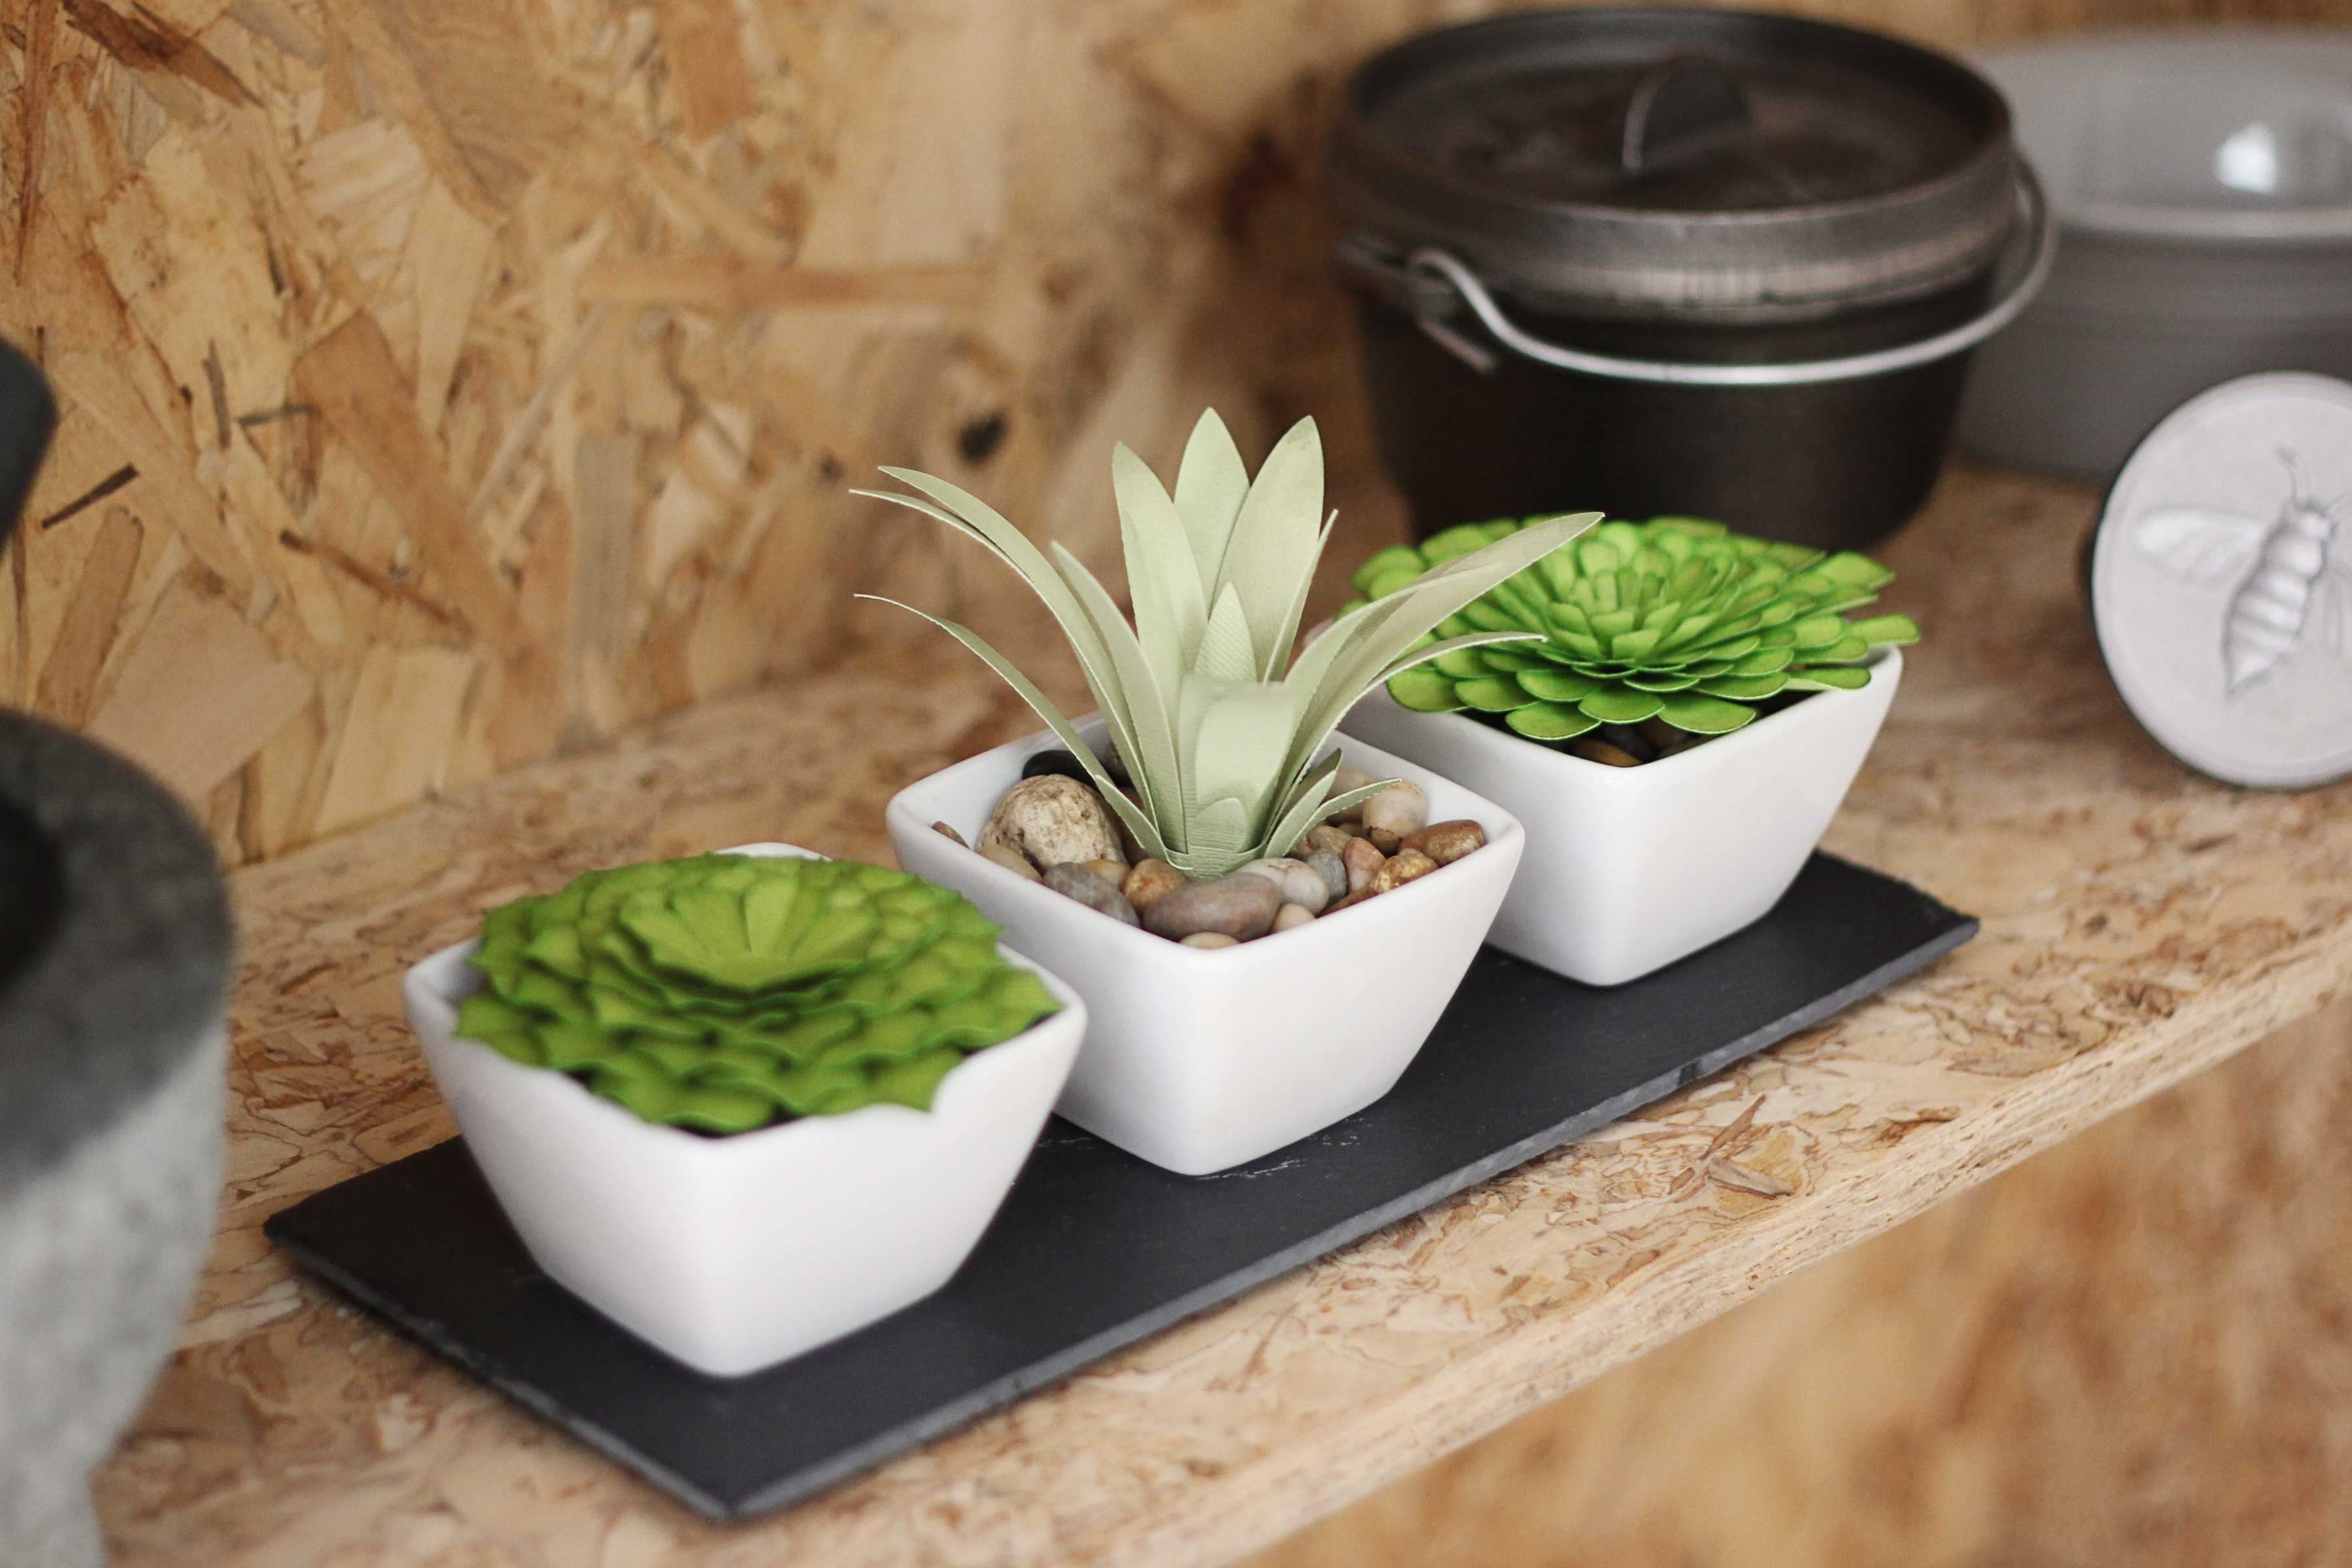
4. Fill your containers with small pebbles and place the finished succulents on top.
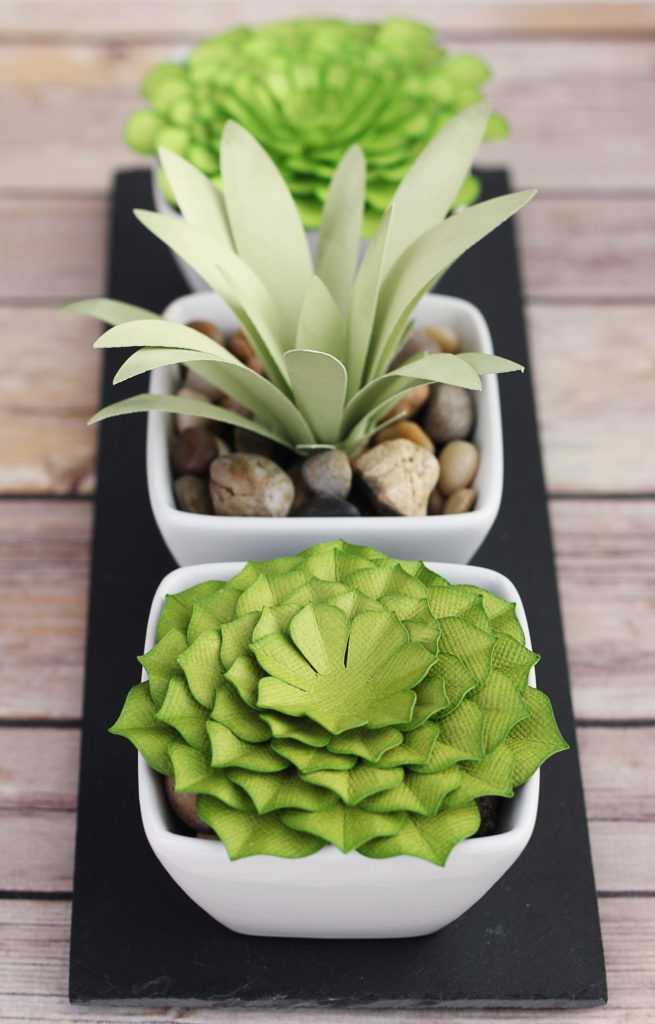
If you need more shaping and assembling tips or want to try flowers instead of succulents, check out this post. I hope you enjoy this project! I love pops of green in my house, and this is an easy way to get it without remembering to water my plants.
 Free Class - Father's Day Apron Set
  Free Class - Custom Graduation Tumbler
Kelly Wayment
June 28, 2024
You can use it with vinyl as long as it is smooth and flat to allow the static charge to hold on to it. Rolled vinyl that wants to go back to its rolled shape will not necessarily work well, and it would need to be trimmed to fit the ES mat cutting area.
Kelly Wayment
June 28, 2024
Yes, you can use the heat pen while using the ES mat. 🙂
Yurii
March 2, 2024
Hello. May it be used with heat pen?
Thanks
Jerome
February 24, 2024
Hi, works this with the normal vinyl foils or only with printer papter etc?
Kelly Wayment
February 16, 2024
Once you’ve pushed the mat up against the rollers, just press the “Load” arrow button (bottom right on the display). Does a regular sticky mat load into the machine for you?
Michelle a goodall
January 24, 2024
Hello! I just got my new electrostatic mat and have watched every video i can find on it. However, what i can t find is why it wont feed into my cameo 5/ it slides right up the rollers but wont go any further. and yes- iam pushing the into button. help!