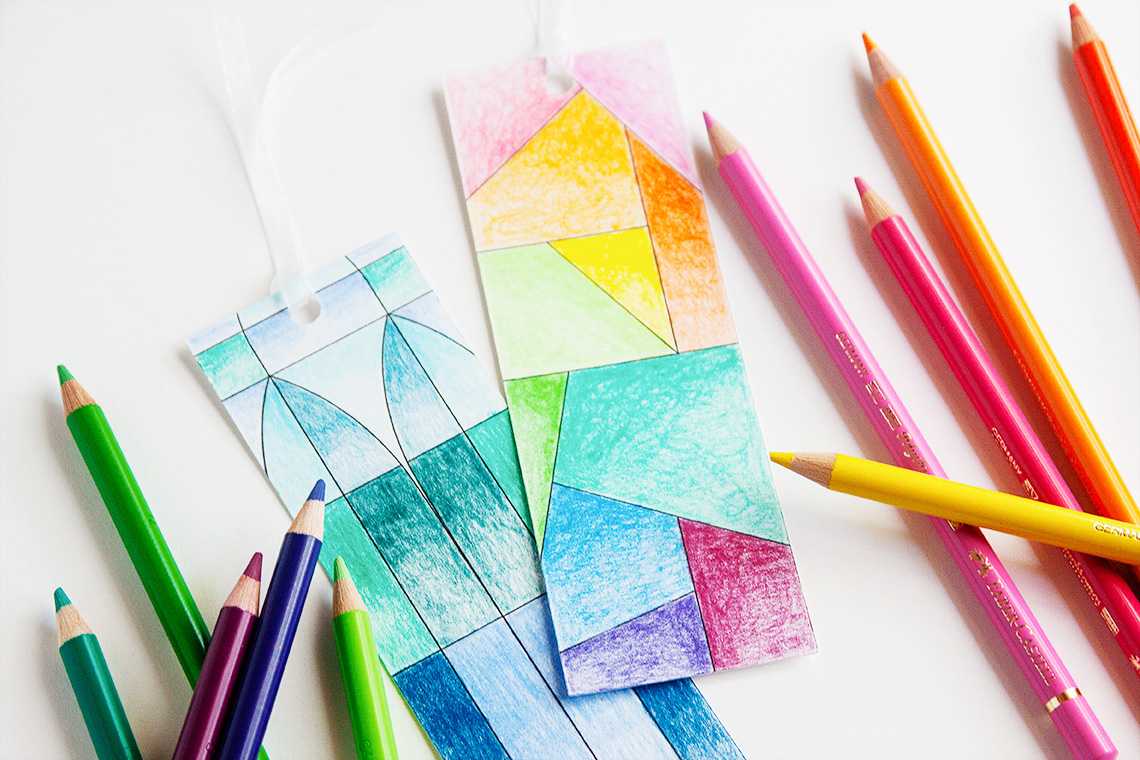
These stained glass patterned bookmarks are a fun coloring project for kids and adults alike. Quickly and easily create the designs using Silhouette’s sketch feature and color to your heart’s content with colored pencils, crayons, and more!
Supplies Needed:
- Silhouette CAMEO®, Silhouette Portrait®, or Silhouette Curio®
- Silhouette Cutting Mat
- Silhouette Cutting Blade
- Silhouette Studio®
- Silhouette Sketch Pen – Black
- Cardstock – White
- Colored Pencils, Crayons, etc.
- 1/4-inch Ribbon (optional)
- Design ID#101574
Step One: Make the Bookmark Base
- Use the Draw a Rectangle tool to make a 2-inch wide by 6-inch tall rectangle. Use the Draw an Ellipse tool to make a .25-inch circle (optional, if you want to add ribbon or twine to the bookmark when it’s finished).
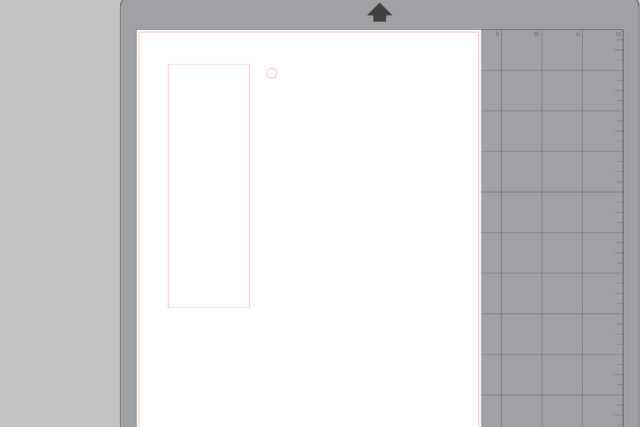
- You can skip this step if you choose not to add the circle hole for the ribbon. Open the Transform panel, select both the rectangle and circle shapes, and center align them horizontally. While both shapes are still selected, press Control or Command + G on your keyboard to group the two shapes together.
Step Two: Open and Recolor the Design
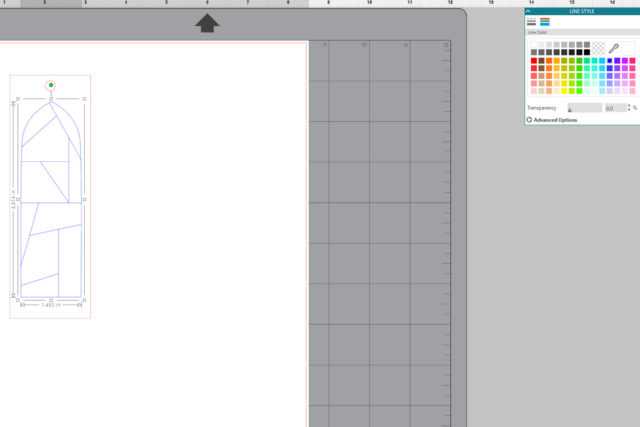
- Open the design that you’ll be using for the bookmark (I used Design ID #101574, which includes sketch versions), ungroup the shapes, select a sketch shape, and press Control or Command + C on your keyboard to copy the shape. Click back over to the document with the bookmark base and press Control or Command + V to paste the shape.
- After pasting the shape, make sure it’s still selected and open the Line Style panel. Click on the tab with the colored lines and select a line color for the shape that’s different than the line color on the bookmark base. I chose a shade of blue.
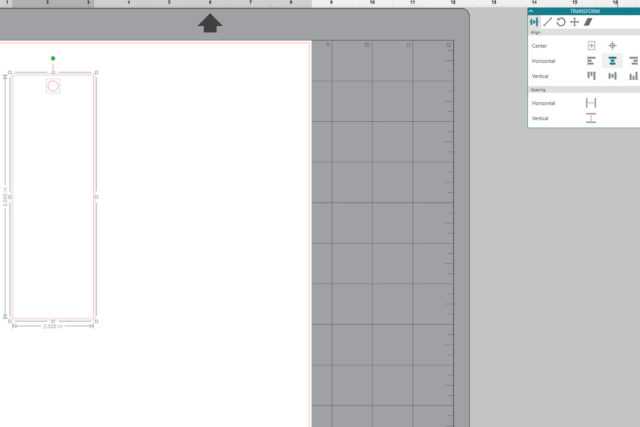
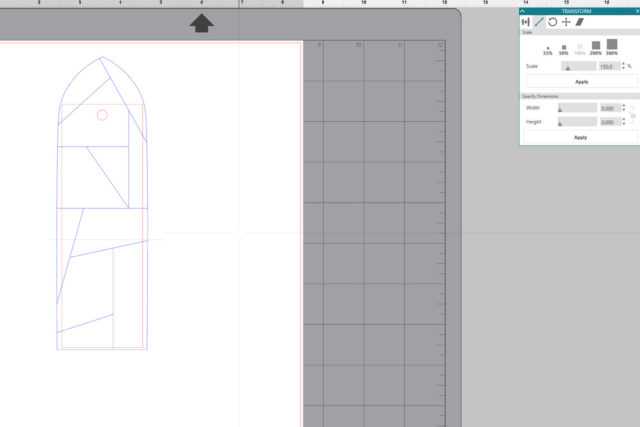
Step Three: Scale the Sketch Shape
- Open the Transform panel and click the second tab from the left (the diagonal, double-sided arrow) to open the Scale panel. Scale the sketch shape to 150% then hit the Apply button to apply the changes. In this case, I made the design slightly bigger than the bookmark. Since we’re sketching, not cutting the stained-glass lines, it doesn’t matter that the design overlaps the bookmark because anything outside the bookmark lines will not be on the bookmark.
Step Four: Prepare to Sketch and Cut
- When all of your bookmarks are ready to sketch and cut, click the Send button, and then go to the Line tab. Change the cut settings for the bookmark base (red line) to match the material that you’re using. Then change the action to Sketch and the tool to Sketch Pen for the sketch shape (blue line) and change the tool to the blue (right) tool.
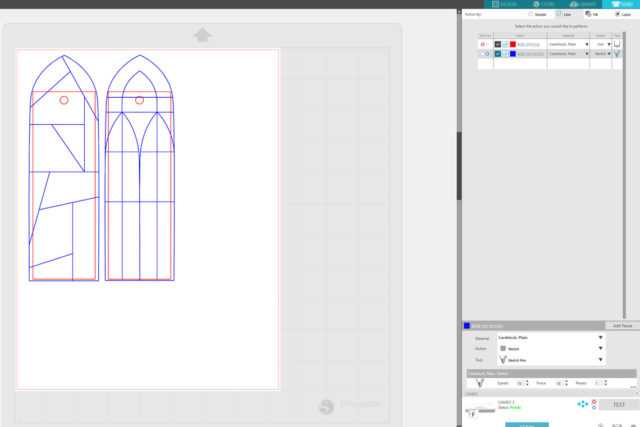
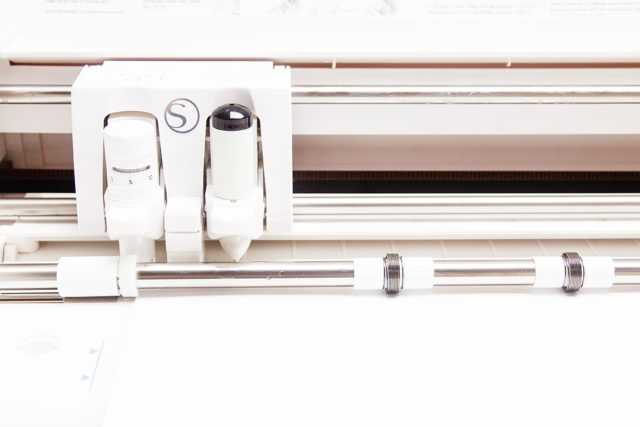
- Place a cutting blade into the red (left) tool slot in the dual-carriage, then place a sketch pen into the blue (right) tool slot. Then press the Send button in Silhouette Studio to cut and sketch the bookmarks.
- If you’re using a machine the doesn’t have a dual carriage, you can make two separate passes with your machine, one with a cutting blade and one with a sketch pen.
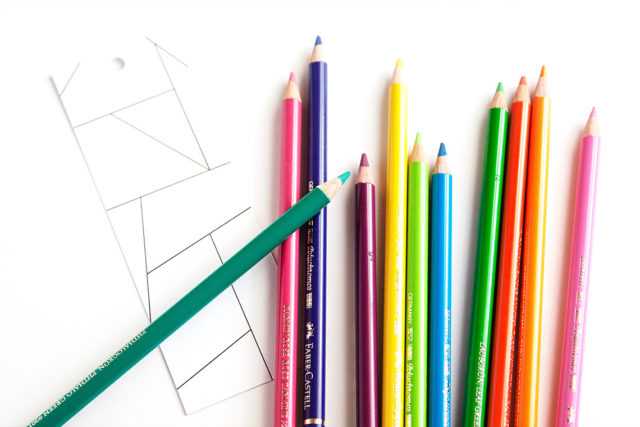
Step Five: Color, Color, Color!
- Color the bookmarks with colored pencils (what I used), crayons, markers, or colored pens. To finish, loop ribbon, twine, or yarn through the hole at the top of the bookmark (optional).
Kelly Wayment
June 28, 2024
You can use it with vinyl as long as it is smooth and flat to allow the static charge to hold on to it. Rolled vinyl that wants to go back to its rolled shape will not necessarily work well, and it would need to be trimmed to fit the ES mat cutting area.
Kelly Wayment
June 28, 2024
Yes, you can use the heat pen while using the ES mat. 🙂
Yurii
March 2, 2024
Hello. May it be used with heat pen?
Thanks
Jerome
February 24, 2024
Hi, works this with the normal vinyl foils or only with printer papter etc?
Kelly Wayment
February 16, 2024
Once you’ve pushed the mat up against the rollers, just press the “Load” arrow button (bottom right on the display). Does a regular sticky mat load into the machine for you?
Michelle a goodall
January 24, 2024
Hello! I just got my new electrostatic mat and have watched every video i can find on it. However, what i can t find is why it wont feed into my cameo 5/ it slides right up the rollers but wont go any further. and yes- iam pushing the into button. help!