
If you are DIY obsessed like I am, this crafty shirt design is made just for you! Remember the song—If you’re happy and you know it, clap your hands! It’s a play on words, and I bet the song is stuck in your head now. LOL! This shirt is a perfect gift and a total conversation starter! I wear mine and people always comment on it! Here are simple instructions on how you can make one for yourself!
Supplies Needed:
- Silhouette CAMEO®, Silhouette Portrait®, or Silhouette Curio™
- Silhouette Cutting Mat
- Silhouette Cutting Blade
- Silhouette Studio®
- Silhouette Heat Transfer – Metallic Gold
- Silhouette Hook Tool
- Iron
- Shirt (we used a black t-shirt)
- Design ID#86685
- Design ID#264616
Step One: Locate Your Design
- Type out your text using both the LW Fancy Font (Design ID#86685) and the Bestlight Script Font (Design ID#264616) in your library and double-click to open the design in Silhouette Studio®.
- Adjust the size of the design by selecting it entirely and dragging the outer corner to make it larger or smaller. According to the size of your shirt, you’ll want to adjust your shape to complement its size.
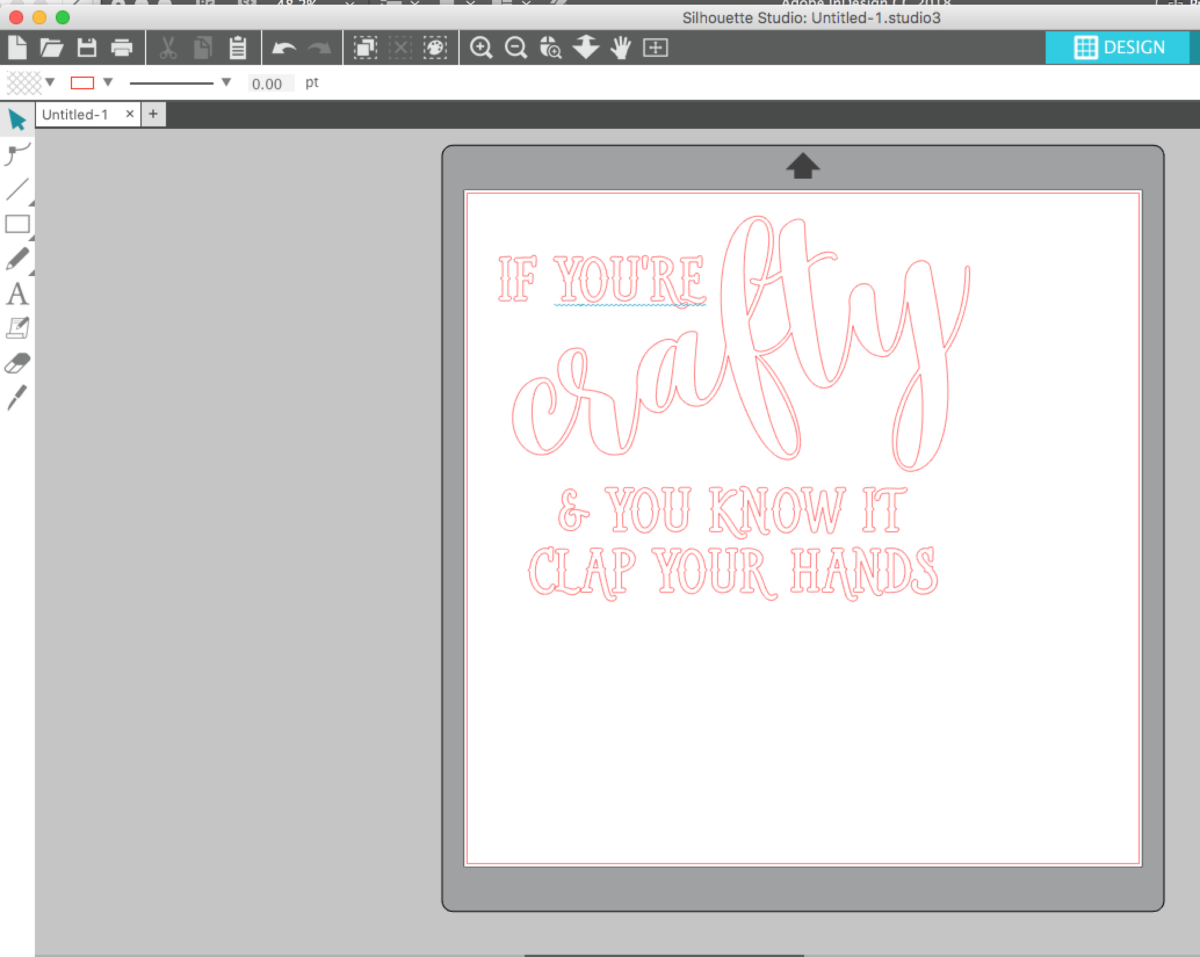
- I used the LW Fancy Font at 95 pt size and put the “crafty” on an angle. Remember to open the Modify panel, select the word “crafty,” and click weld so that your font becomes one graphic.
- Now that your design is ready to go, you are all set to cut your design.
Step Two: Cut and Assemble
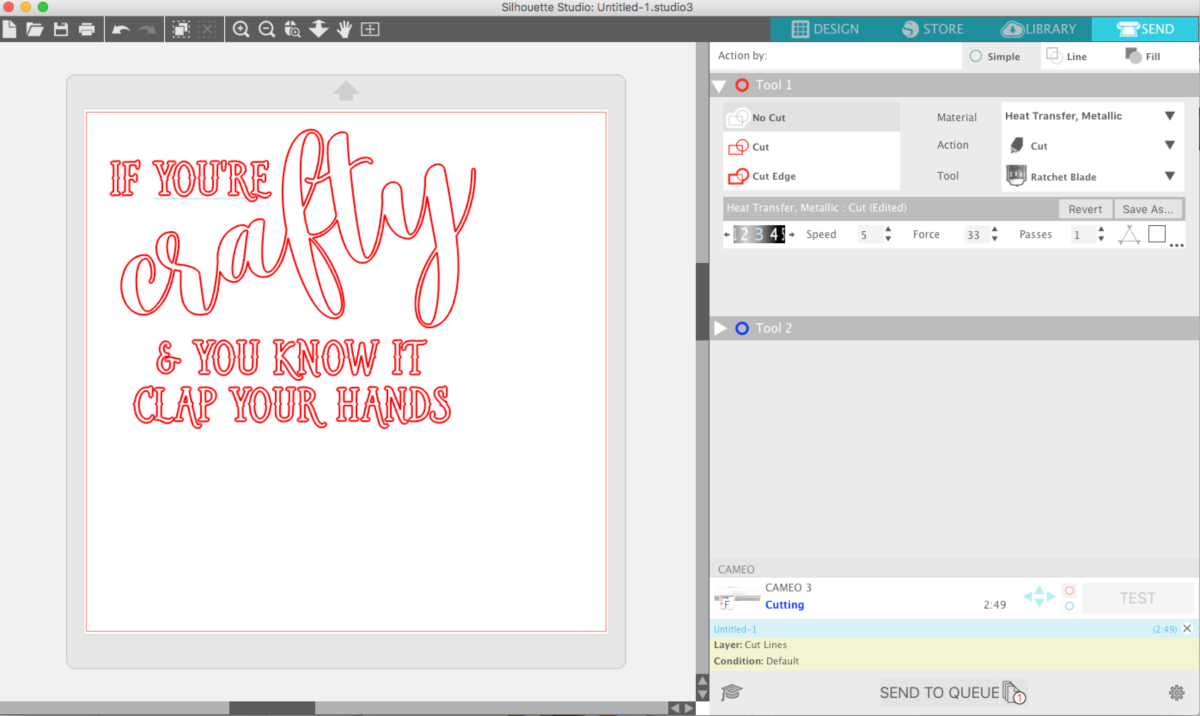
- Whenever you are cutting heat transfer, you want to make sure that you cut it correctly. Remember to mirror your image before you cut it! Thankfully I have the latest version of Silhouette Studio® and the CAMEO 3, and the software asks me BEFORE it sends the cut to the machine if I want to mirror the image. This is PRICELESS.
- Load your heat transfer into your machine or place it on a cutting mat. Then in the Send panel of Silhouette Studio®, make sure to select the correct material (smooth heat transfer, in this case). It will then tell you what to adjust your blade to. If you’ve got an AutoBlade, then you don’t need to adjust your blade.
- Once your design is loaded, send it to cut.
- After your design is cut, weed the excess material away to leave only the phrase. Make sure you also remove the centers of the letters.
- Iron on your design with a cloth pressed between the design and the iron. Use a low-heat setting on your iron or a heat press. I find that if you wait about 60 seconds for the design to cool prior to peeling the plastic sheet off, you will have an easy time removing it from the shirt. If the design has not adhered fully, just repeat the ironing process until it is completely ironed on.
I have to say something about the metallic heat transfer material may be the EASIEST heat transfer material I have ever used. It went on so quickly and transferred perfectly!

I hope you all LOVE this new crafty shirt design and make these shirts too! You can use any color combination but I loved how the black shirt and the gold metallic heat transfer really pop together! Until next time friends!
Jessica Belvedere – Live Like a Mother
Kelly Wayment
June 28, 2024
You can use it with vinyl as long as it is smooth and flat to allow the static charge to hold on to it. Rolled vinyl that wants to go back to its rolled shape will not necessarily work well, and it would need to be trimmed to fit the ES mat cutting area.
Kelly Wayment
June 28, 2024
Yes, you can use the heat pen while using the ES mat. 🙂
Yurii
March 2, 2024
Hello. May it be used with heat pen?
Thanks
Jerome
February 24, 2024
Hi, works this with the normal vinyl foils or only with printer papter etc?
Kelly Wayment
February 16, 2024
Once you’ve pushed the mat up against the rollers, just press the “Load” arrow button (bottom right on the display). Does a regular sticky mat load into the machine for you?
Michelle a goodall
January 24, 2024
Hello! I just got my new electrostatic mat and have watched every video i can find on it. However, what i can t find is why it wont feed into my cameo 5/ it slides right up the rollers but wont go any further. and yes- iam pushing the into button. help!