
A good way to dress up anything up is to put a fun and sparkly sticker on it! With Silhouette’s glitter paper and cutting machines, you can easily create and customize your very own glitter stickers that you can add to a bunch of different surfaces. Follow this tutorial to see how you can make your very own!
Supplies Needed:
- Silhouette CAMEO® or Silhouette Portrait®
- Silhouette Cutting Mat
- Silhouette Cutting Blade
- Silhouette Studio®
- Silhouette Glitter Sticker Paper
- Printer
- Design ID #271648
- Design ID #141917
- Design ID #90593
- Design ID #268207
- Design ID #270409
Step One: Prepare the Design to Cut
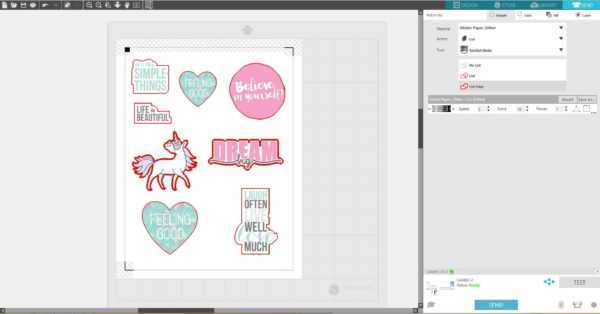
1. Open Silhouette Studio®. In the Page Setup panel, change page size to Letter. Then go to the Registration marks tab and turn on registration marks by setting the style to Type 1.

2. Open the “Feeling Good” design (Design ID#271648) by locating it in your library and resize it. Add other designs and place them on the working space but make sure they don’t overlap the registration marks borders. Also don’t place your designs too close to the corners with the registration marks. Glitter sticker paper has gray corners for the printed registration marks, and part of your design may be printed on the not glittery surface if you put the designs too close to the corners.

Step Two: Print & Cut the Designs
1. Feed the glitter sticker paper into your inkjet or laser printer. Make sure you print on the glitter side.
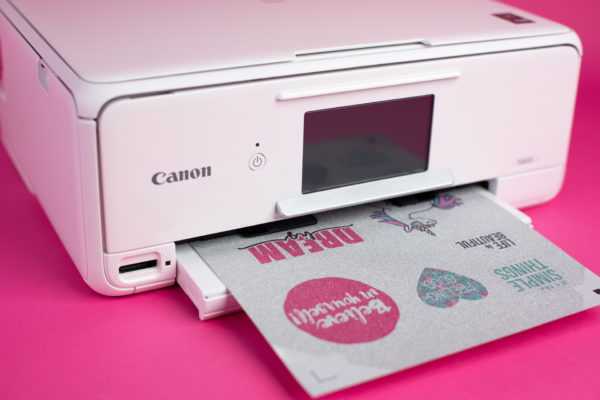
2. Place the printed sheet on your mat and feed it into your Silhouette machine.
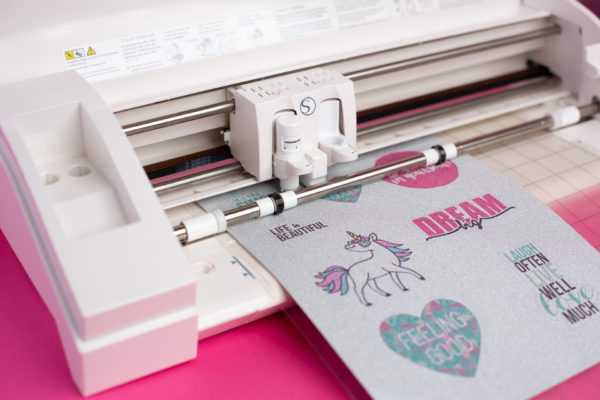
3. In the Send panel, choose “Sticker Paper, Glitter” as your material type. Make sure your Silhouette machine will just cut out the outline of your shapes by selecting the Cut Edge option. You might want to increase blade settings by 2 and keep speed 5, force 10, 1 pass. Adjust your blade if necessary and send your cut job to your Silhouette machine. (Tip: If your machine is having trouble reading the registration marks, try manually moving the blade over the black square using the blue arrows in the Send panel.)
4. Remove your sheet from the cutting mat, and peel away your designs.
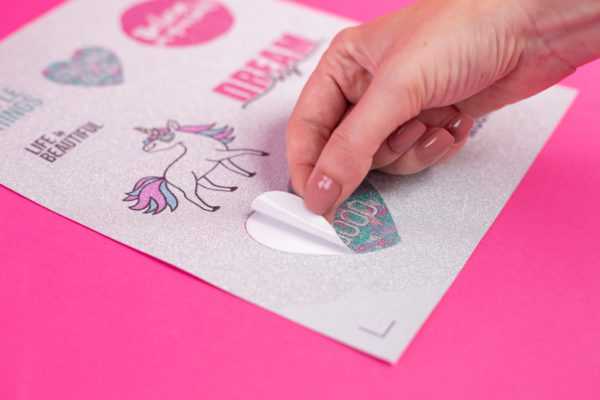
Now you have glitter stickers and you can decorate your laptop, phone case, planner, and more!


What are you going to dress up with your new glitter stickers?
Kelly Wayment
June 28, 2024
You can use it with vinyl as long as it is smooth and flat to allow the static charge to hold on to it. Rolled vinyl that wants to go back to its rolled shape will not necessarily work well, and it would need to be trimmed to fit the ES mat cutting area.
Kelly Wayment
June 28, 2024
Yes, you can use the heat pen while using the ES mat. 🙂
Yurii
March 2, 2024
Hello. May it be used with heat pen?
Thanks
Jerome
February 24, 2024
Hi, works this with the normal vinyl foils or only with printer papter etc?
Kelly Wayment
February 16, 2024
Once you’ve pushed the mat up against the rollers, just press the “Load” arrow button (bottom right on the display). Does a regular sticky mat load into the machine for you?
Michelle a goodall
January 24, 2024
Hello! I just got my new electrostatic mat and have watched every video i can find on it. However, what i can t find is why it wont feed into my cameo 5/ it slides right up the rollers but wont go any further. and yes- iam pushing the into button. help!