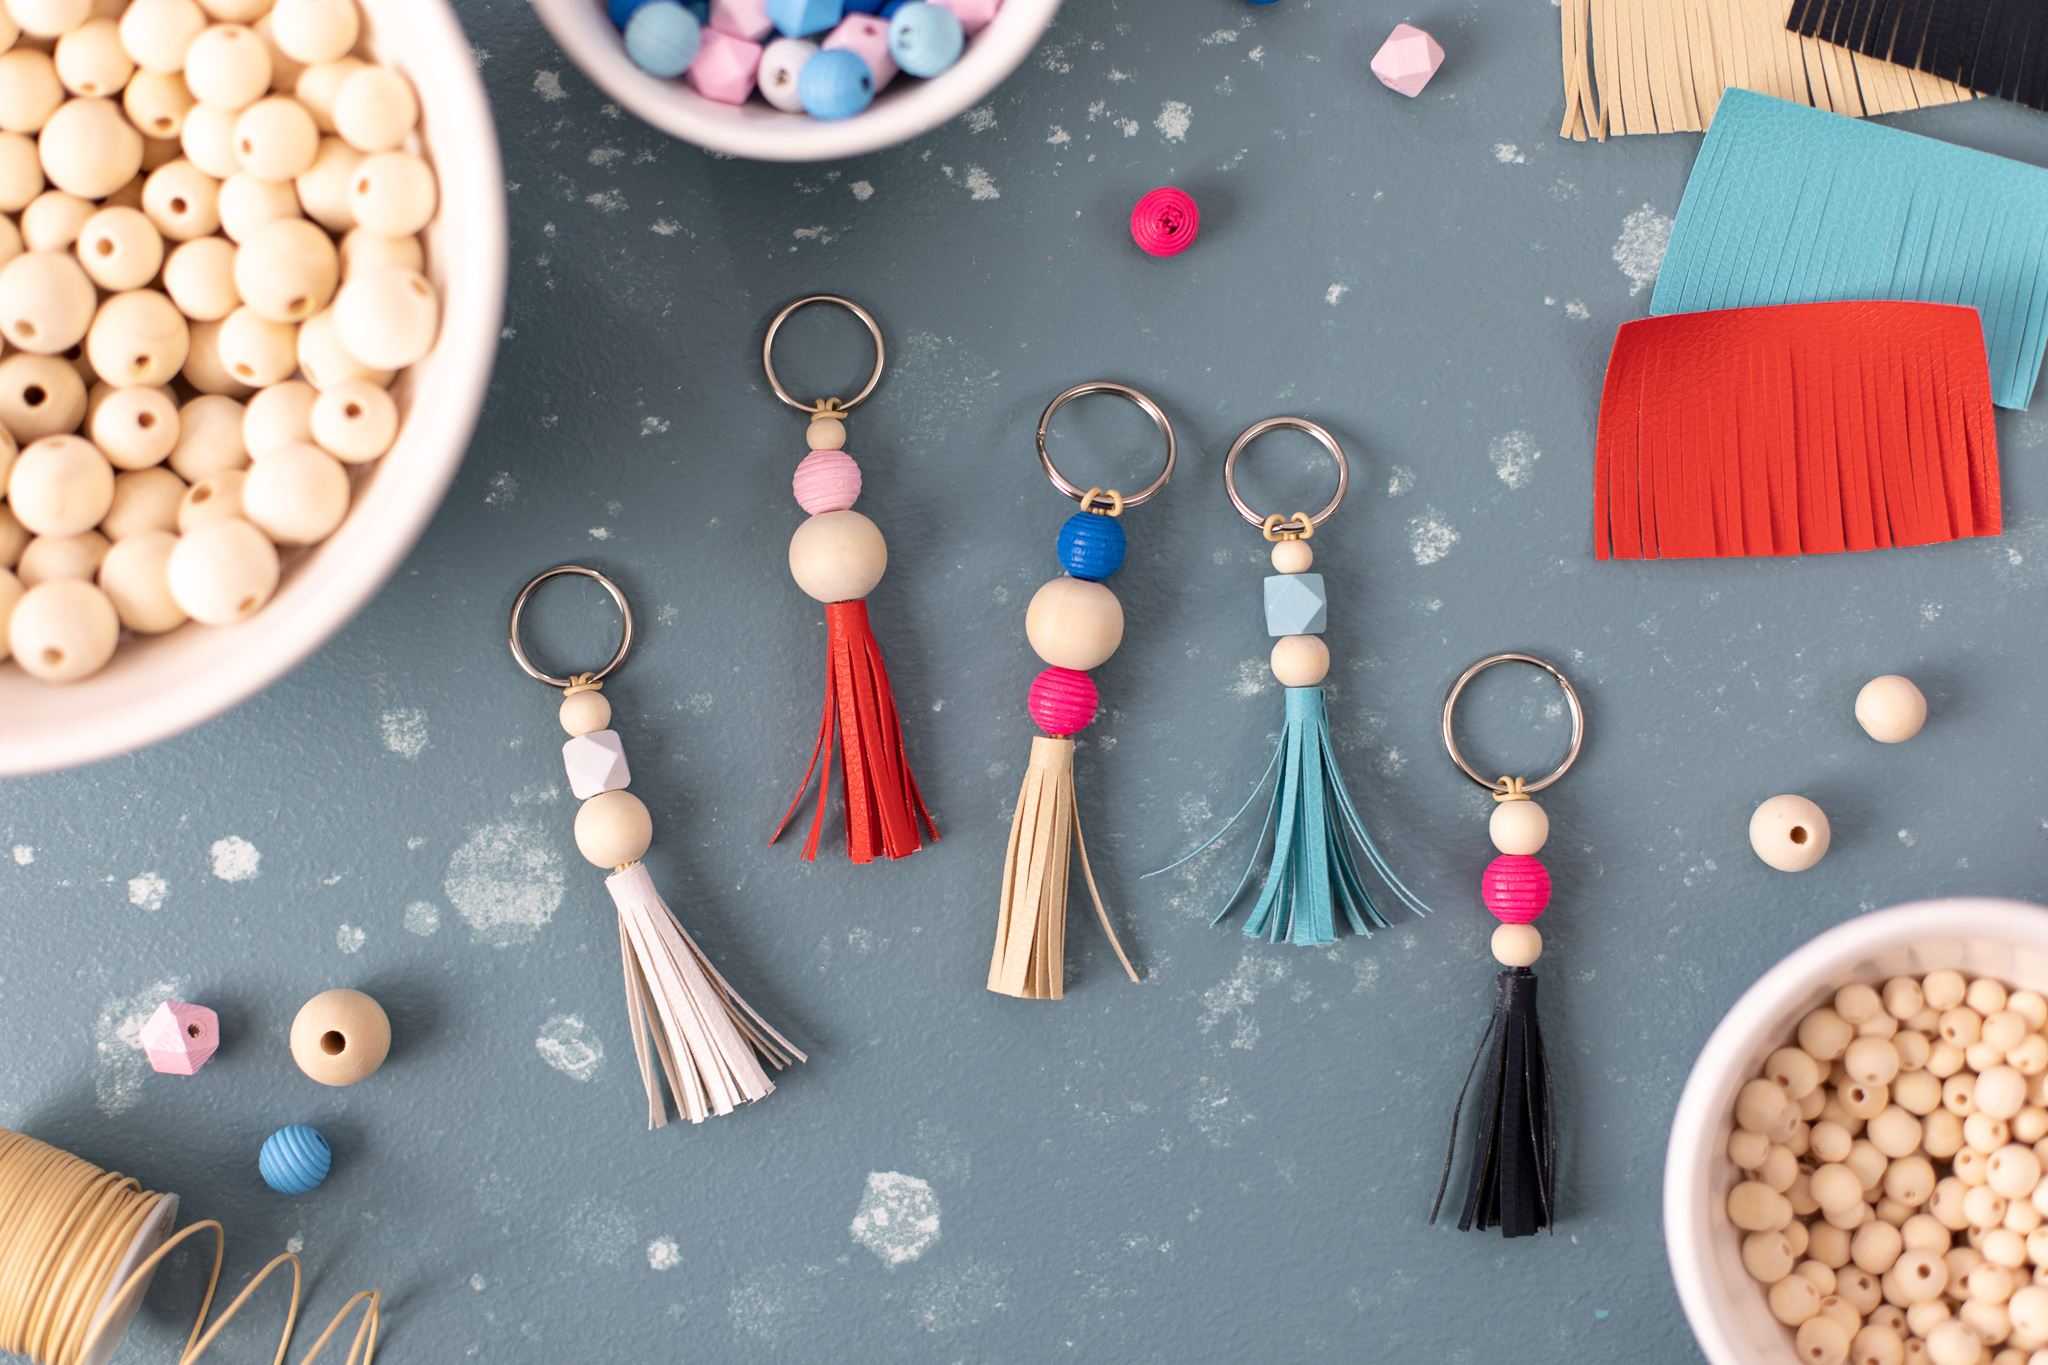
These tassel key chains are a cinch to make and look adorable on your key ring, purse, or backpack! We made these at the Cameo 4 Launch Party (Preorder now!), and they were a hit! You can customize them easily with your beads and leatherette color choices.
Supplies Needed:
- Silhouette Cameo® or Silhouette Portrait®
- Silhouette Studio®
- Silhouette Cutting Mat—Use a high-tack or extra sticky mat
- Silhouette AutoBlade
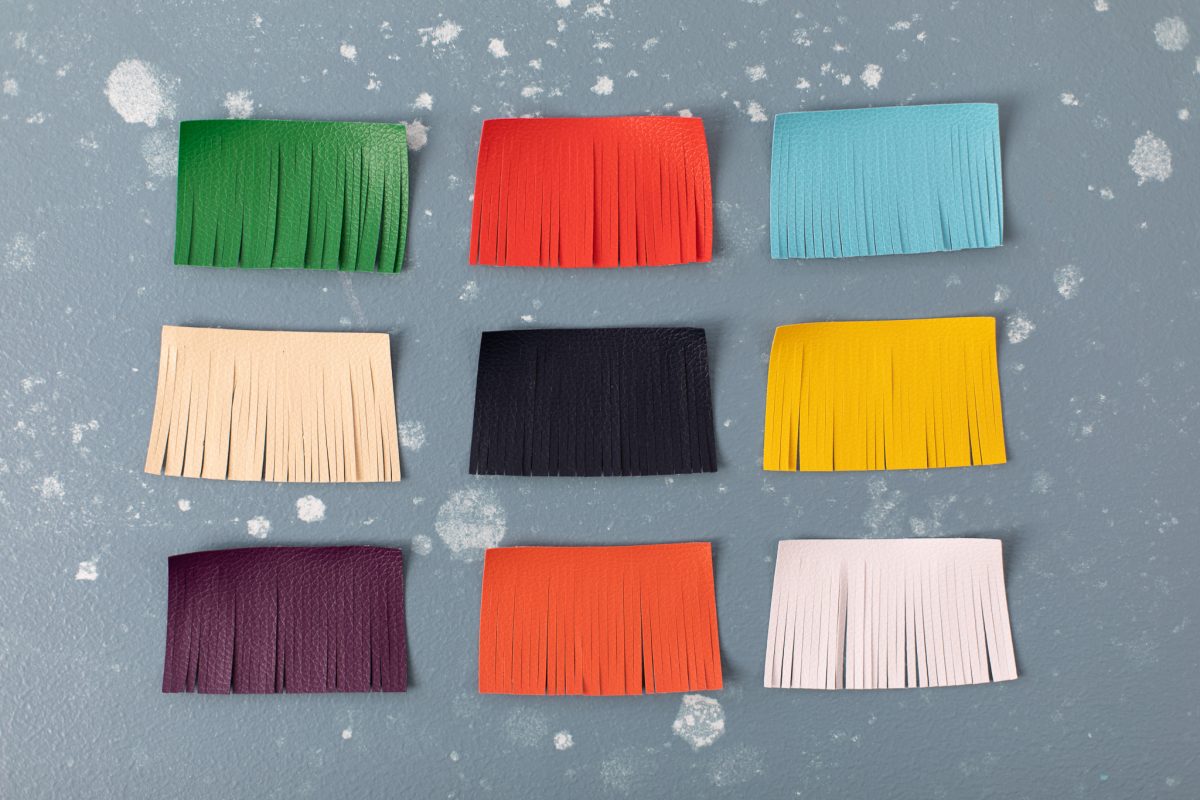
- Leatherette in various colors
- Various wood and colored beads
- Leather cord
- Key rings
- Hot glue gun
- Scissors
Step One: Formatting the Design
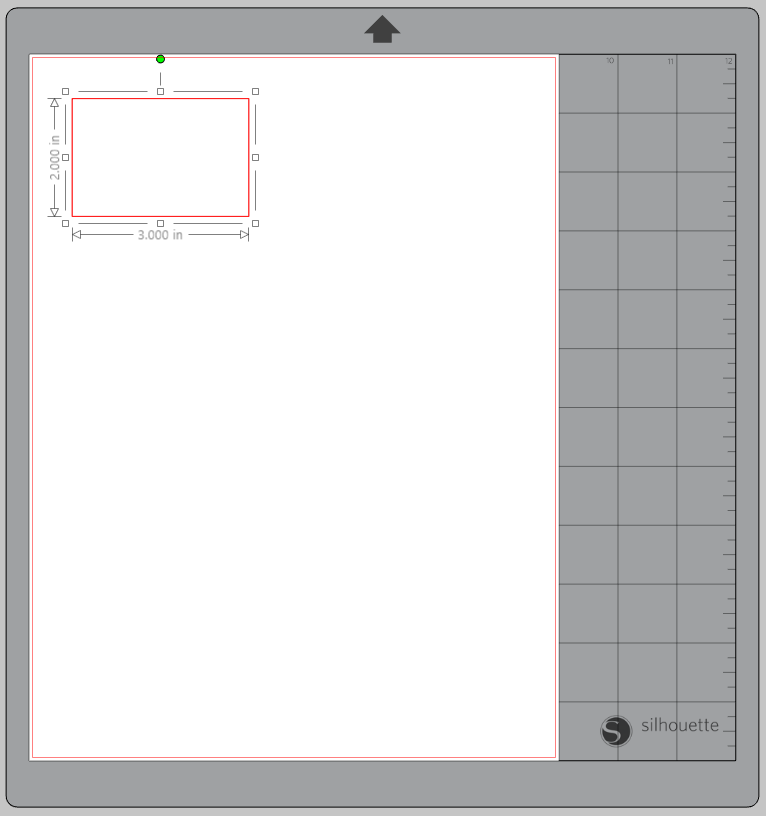
1. Within Silhouette Studio®, create a 3-inch by 2-inch rectangle with the shape tool.
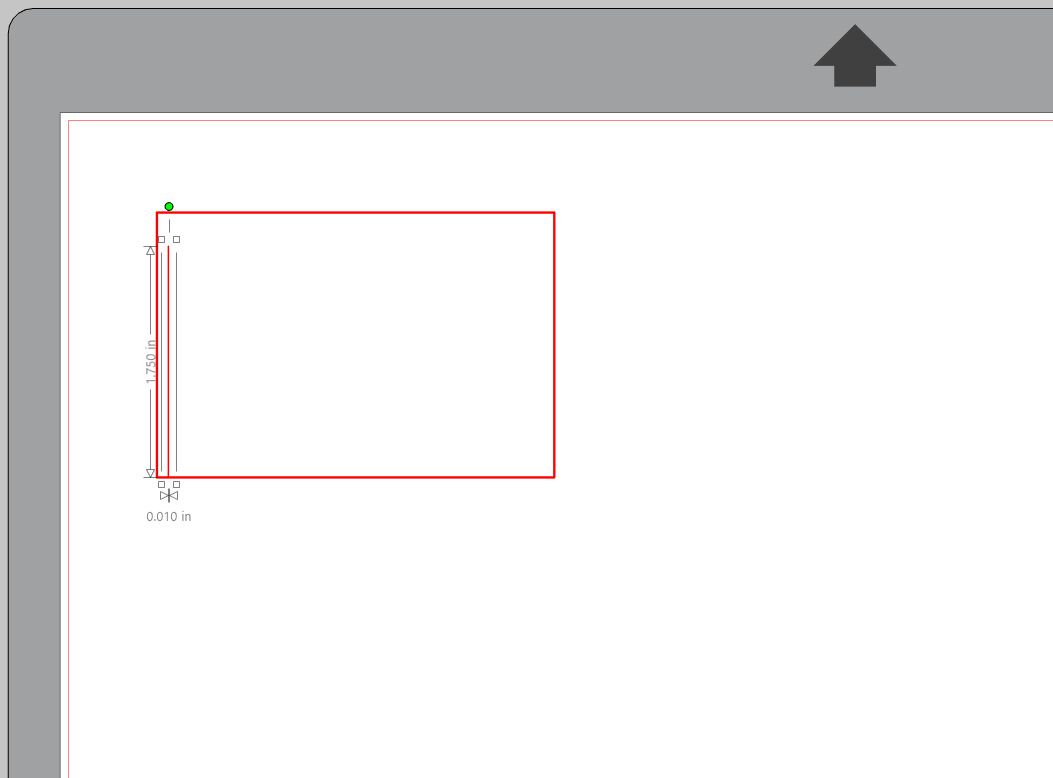
2. Then with the line tool create a 1.75-inch vertical line within your rectangle, leaving a 1/4-inch gap at the top.
3. Use the duplicate tool to create 27 lines total. Use the horizontal spacing tool in the transform panel to evenly space out the lines. This will make 28 individual fringe.
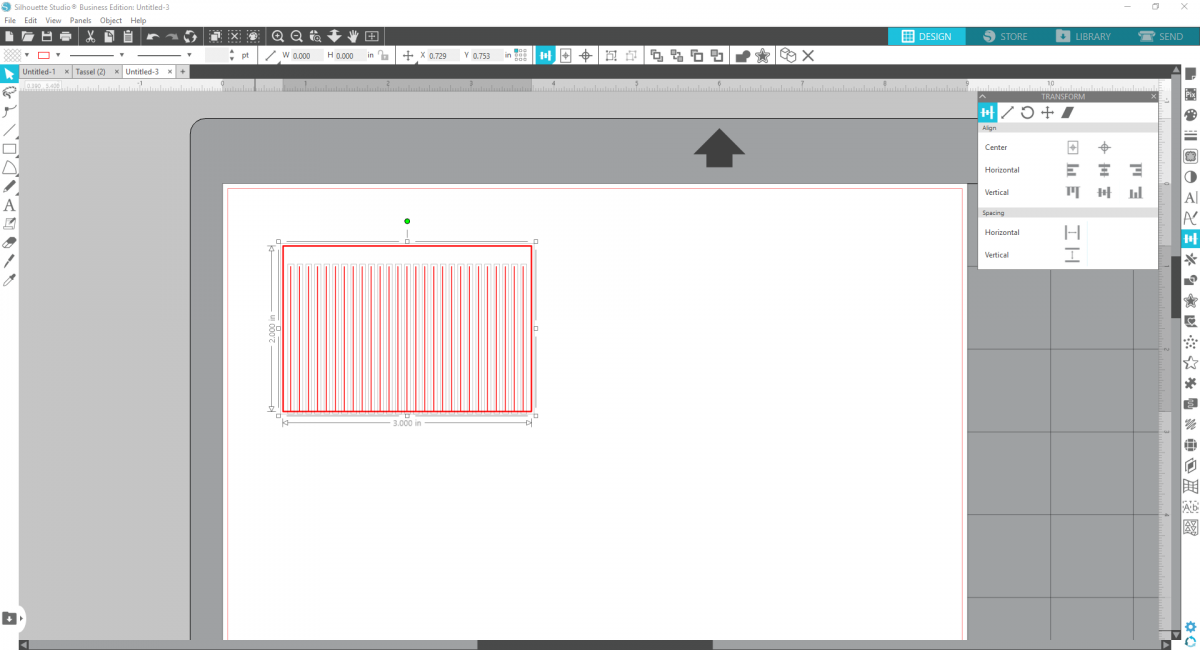
4. Group the design together and duplicate it to create as many tassel pieces that you can fit on your piece of leatherette.

5. Lay your leatherette onto a high-tack cutting mat, load into your machine, and select “Leatherette” as your material in the Send Panel.
Step Two: Finishing the Key Chain
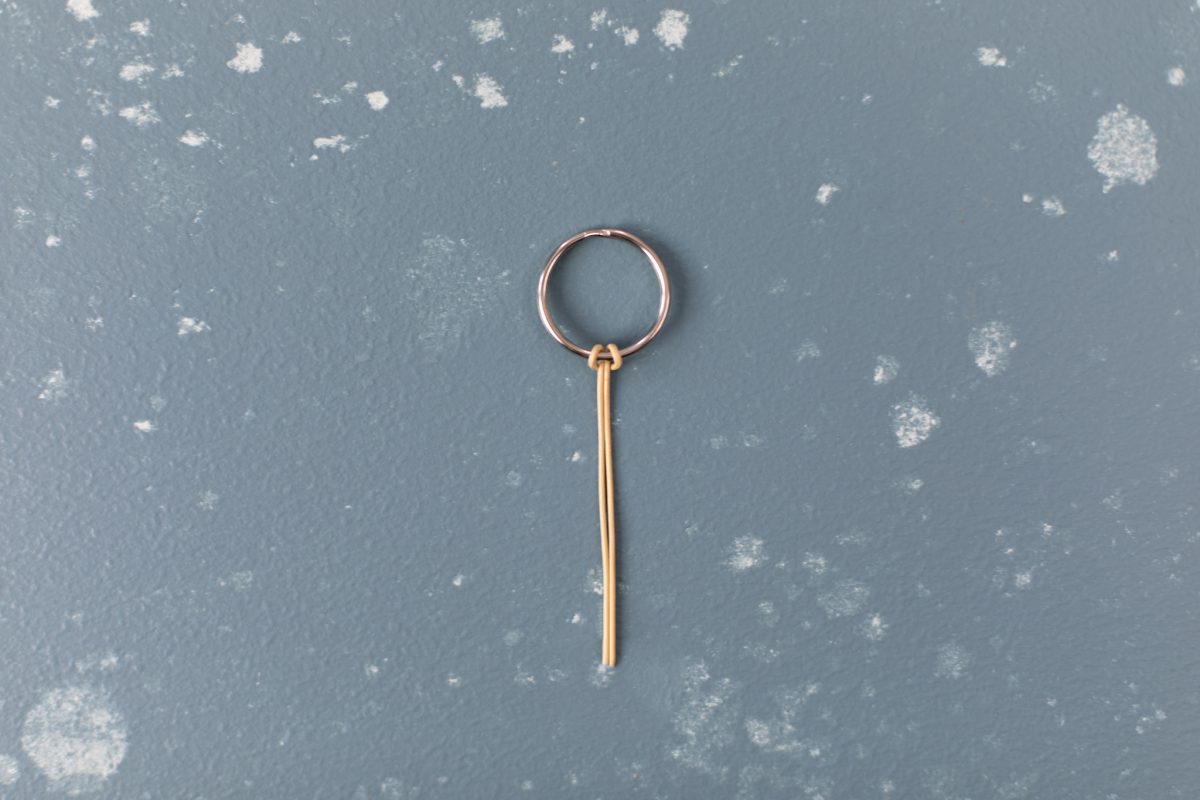
1. Cut a piece of leather cord to a 6.5-inch length. Fold it in half a loop it through your key chain.

2. Thread three beads of your choice onto your leather cord.
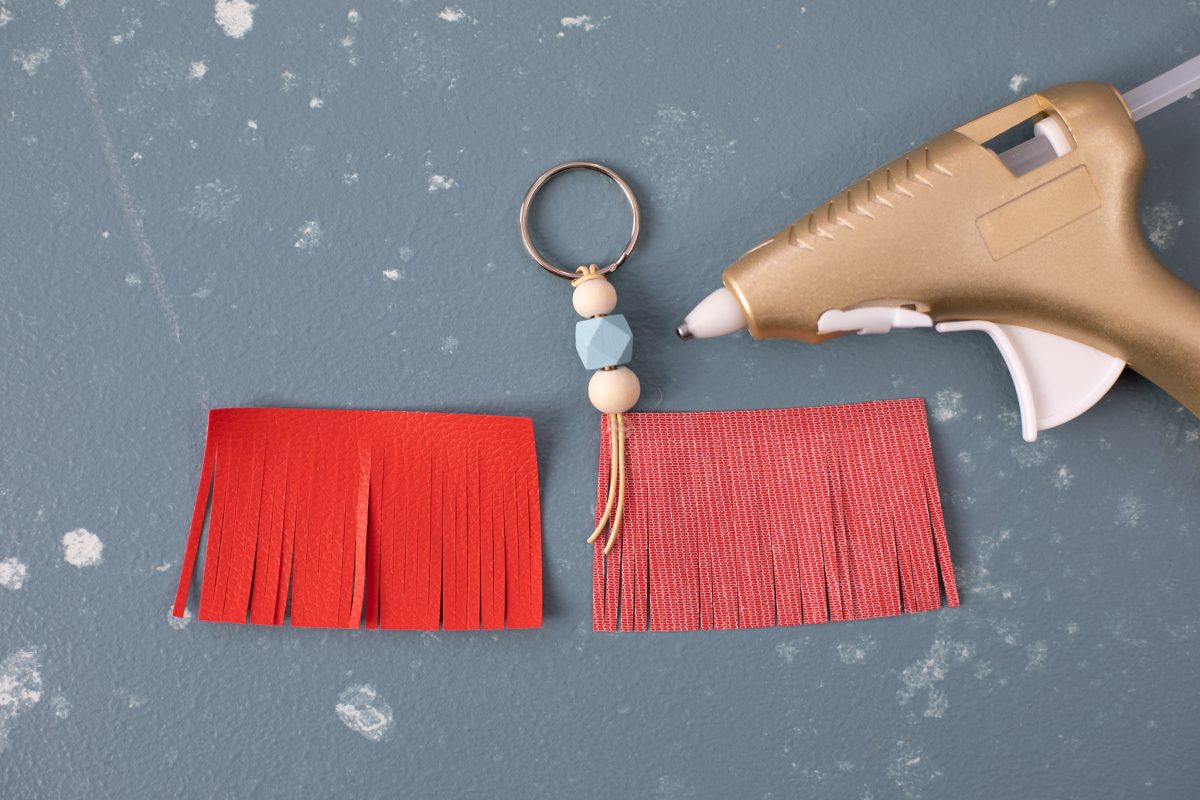
3. Take a tassel piece and flip it to the backside. Place a dab of hot glue onto the upper left-hand corner of the tassel piece and secure your cord to the glue right below your lowest bead.
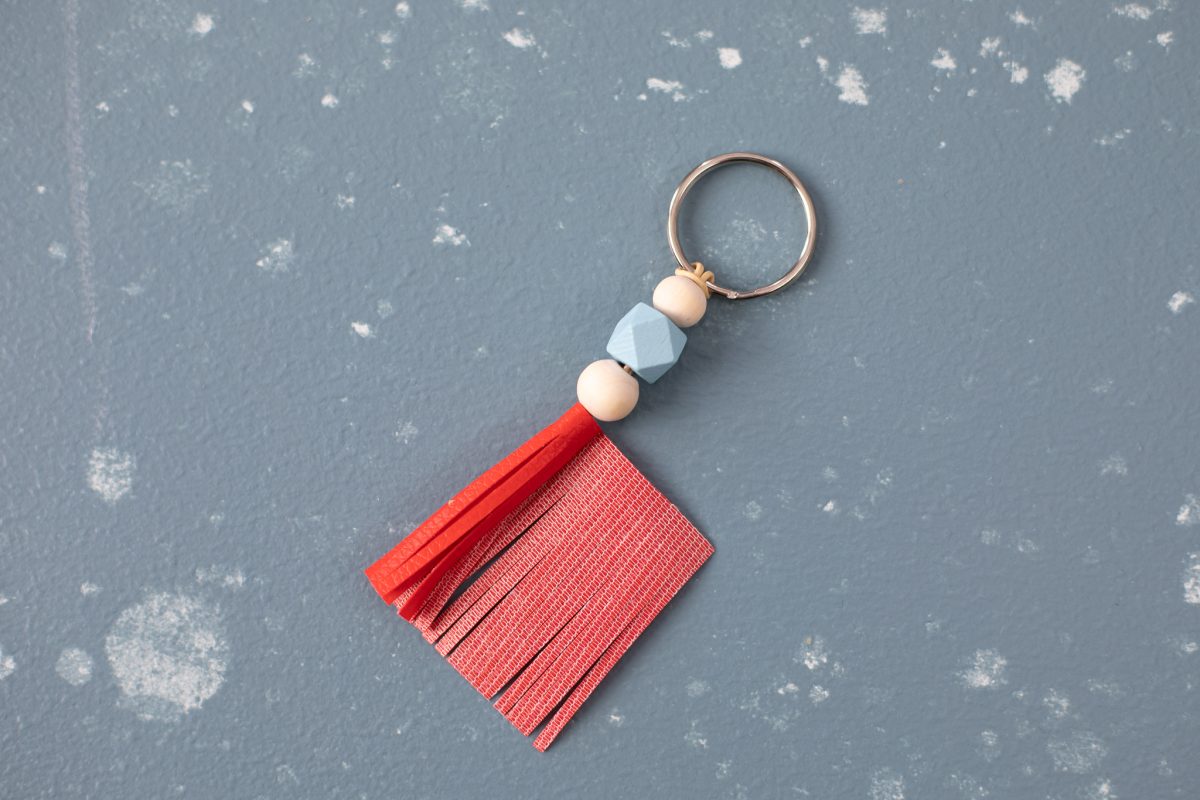
4. Begin to wrap your leatherette tightly around the tails of the cord.
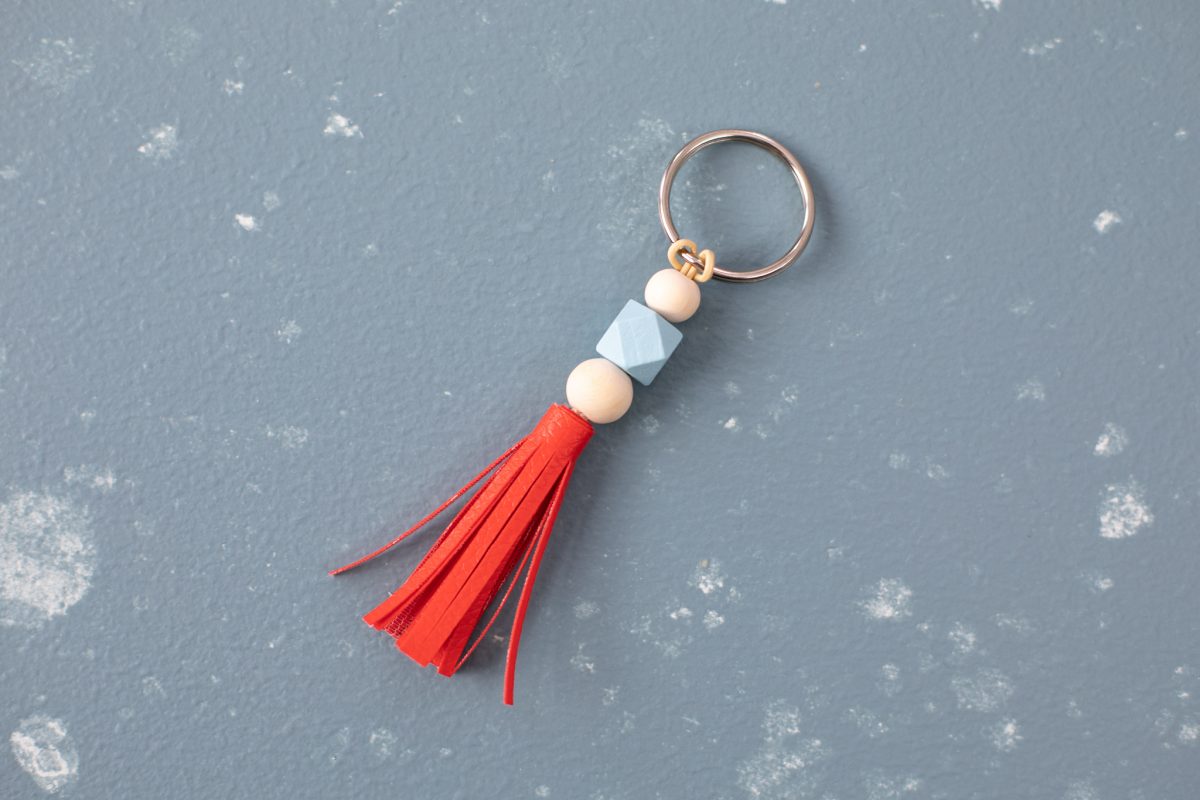
5. Secure the end of the tassel piece with another dab of glue. Make a bunch to give to all your friends!

 Ice Cream Key Chains
  Embossed Leatherette Key Chains
Kelly Wayment
June 28, 2024
You can use it with vinyl as long as it is smooth and flat to allow the static charge to hold on to it. Rolled vinyl that wants to go back to its rolled shape will not necessarily work well, and it would need to be trimmed to fit the ES mat cutting area.
Kelly Wayment
June 28, 2024
Yes, you can use the heat pen while using the ES mat. 🙂
Yurii
March 2, 2024
Hello. May it be used with heat pen?
Thanks
Jerome
February 24, 2024
Hi, works this with the normal vinyl foils or only with printer papter etc?
Kelly Wayment
February 16, 2024
Once you’ve pushed the mat up against the rollers, just press the “Load” arrow button (bottom right on the display). Does a regular sticky mat load into the machine for you?
Michelle a goodall
January 24, 2024
Hello! I just got my new electrostatic mat and have watched every video i can find on it. However, what i can t find is why it wont feed into my cameo 5/ it slides right up the rollers but wont go any further. and yes- iam pushing the into button. help!