

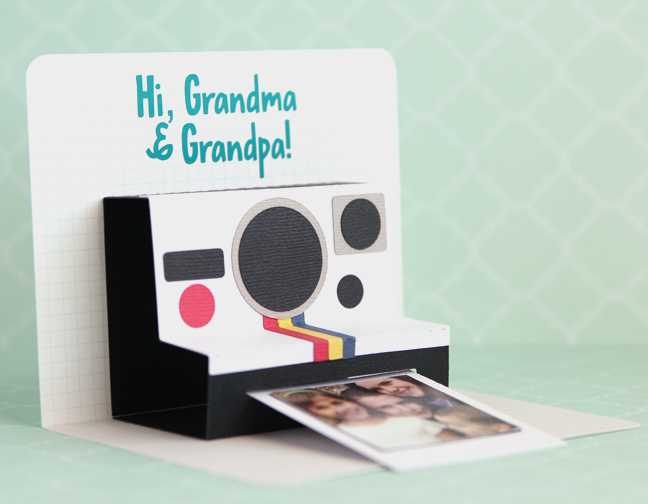
Looking for an eye-catching grandparents’ card? I made these camera pop-up cards for my parents with a picture of their grandkids inside as a surprise.
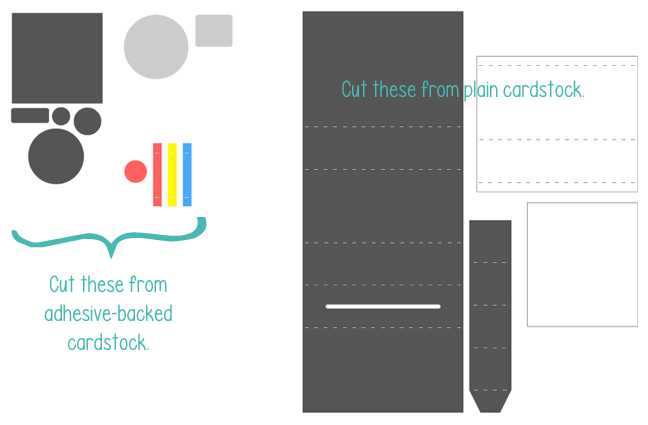
The designer has an assembly video tutorial {here} for assembling this card. If you have adhesive cardstock, it’s nice to cut the smaller pieces from that and save yourself some gluing. Here’s a quick glimpse of which pieces you would cut from adhesive cardstock and which pieces you would cut from regular cardstock:

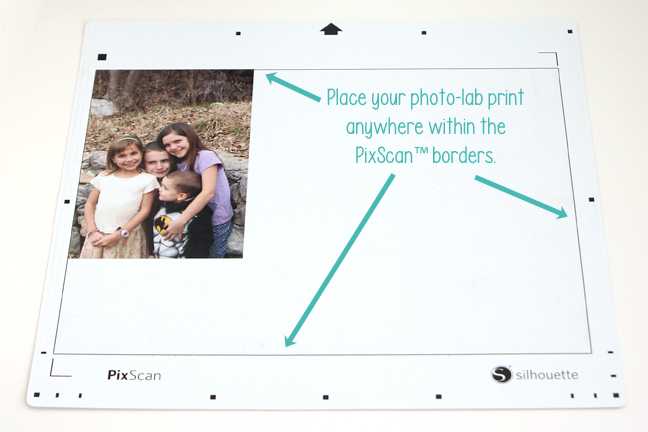
To crop my picture perfectly for the “photo” portion of the card, I turned to my PixScan™ mat. (You could crop the photo directly in Silhouette Studio and print & cut on a full sheet of photo paper from there, but this is how I do it with a photo-lab print.)
1. Place your photo-lab print onto your PixScan™ mat. It doesn’t matter where you put it; just make sure it is within the thin mat borders.
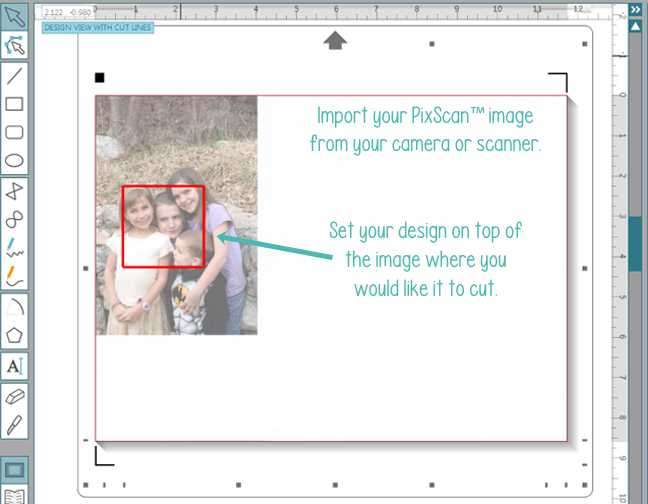
2. Import your PixScan™ image from your camera or scanner. I personally prefer using my scanner. Tip: Always turn off your Grid when working with PixScan™.
Once imported, set your cut shape on top of the image where you would like it to cut. In the image below, the red square is directly from my camera cutting file. It would be hard to position and trim a photo with scissors or a straight trimmer to exact dimensions like 2.061” square, plus this is much more fun! You can use any shape you want to crop a photo-lab print with a PixScan™ mat! So very cool.
3. Load your PixScan™ mat with the photo still in place into your Silhouette machine. Adjust the cut settings (I cut photo-lab prints with my blade on 4, speed 3, thickness 29) and click Send to Silhouette for your machine to cut exactly where you see the cut lines on your virtual mat.

To finish off the card, I cut a large smiley face for the front and used adhesive vinyl for my little greeting inside the card.


Pop-up cards are plentiful in the Silhouette design store. I encourage you to give them a try! This camera card is a nice place to start.
Kelly Wayment
June 28, 2024
You can use it with vinyl as long as it is smooth and flat to allow the static charge to hold on to it. Rolled vinyl that wants to go back to its rolled shape will not necessarily work well, and it would need to be trimmed to fit the ES mat cutting area.
Kelly Wayment
June 28, 2024
Yes, you can use the heat pen while using the ES mat. 🙂
Yurii
March 2, 2024
Hello. May it be used with heat pen?
Thanks
Jerome
February 24, 2024
Hi, works this with the normal vinyl foils or only with printer papter etc?
Kelly Wayment
February 16, 2024
Once you’ve pushed the mat up against the rollers, just press the “Load” arrow button (bottom right on the display). Does a regular sticky mat load into the machine for you?
Michelle a goodall
January 24, 2024
Hello! I just got my new electrostatic mat and have watched every video i can find on it. However, what i can t find is why it wont feed into my cameo 5/ it slides right up the rollers but wont go any further. and yes- iam pushing the into button. help!