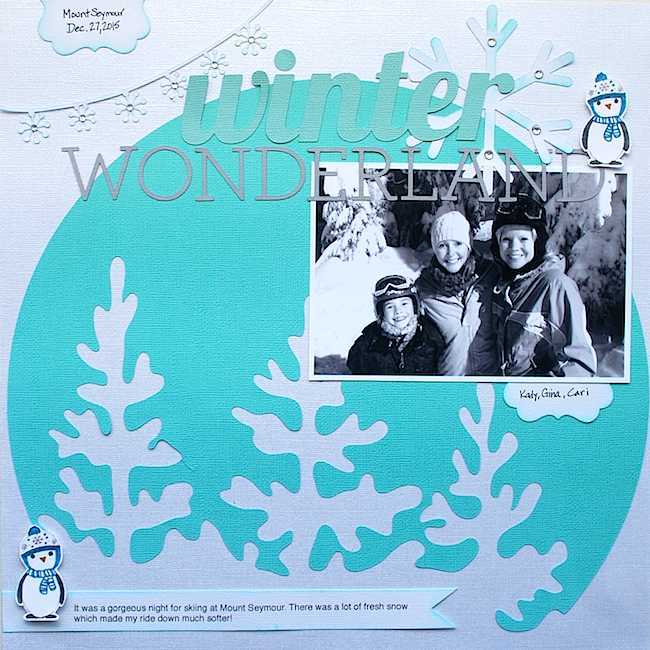
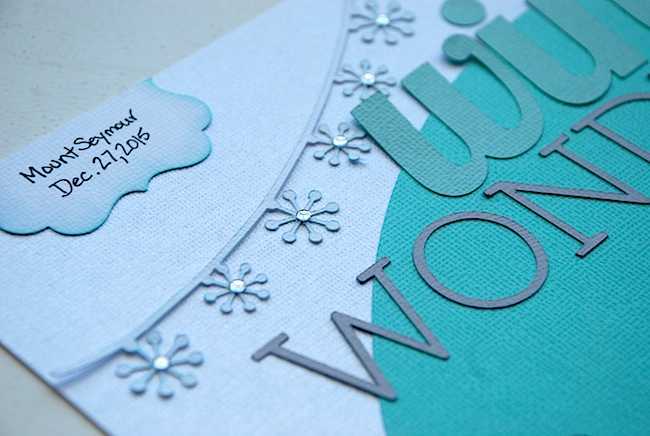
In honor of a recent ski adventure I decided to create a layout and use the Silhouette Mint™ to create an embellishment feature.
Here’s a list of supplies you will need to create this layout:
- Silhouette Adhesive Backed Cardstock (in four colors of your choice)
- Cardstock for the background of the layout (one 12″ x 12″ sheet)
- Ink pad (of your choice—for inking edges of snowflakes and journaling) *optional*
- one 4″ x 6 ” photo
- Silhouette Mint™ Custom Stamp Maker
- 45 mm x 45 mm stamp kit
- Mint ink (Black)
- Optional markers
- Foam squares & adhesives
Step One
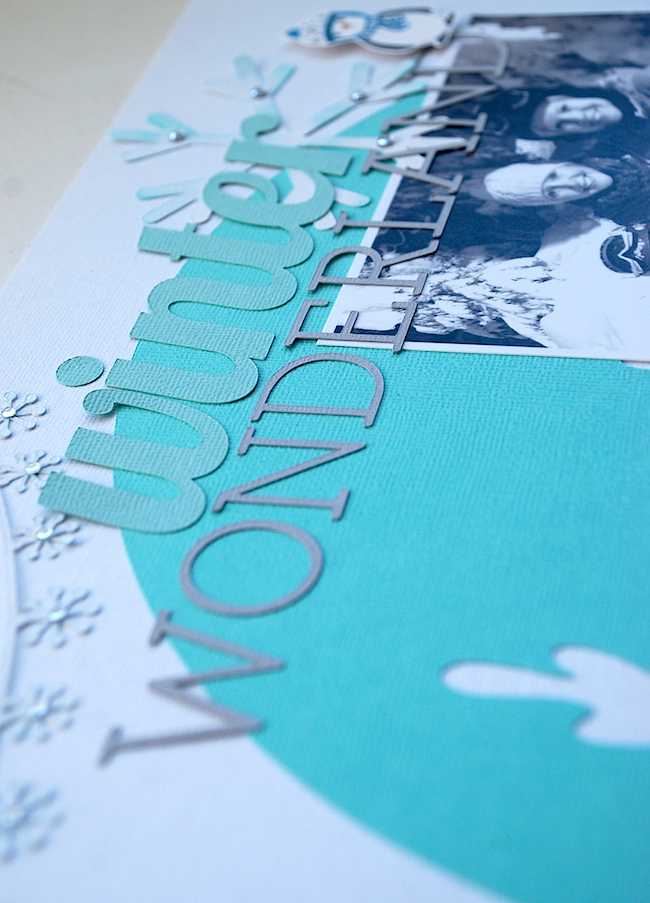
I found some fun designs from the Silhouette Design Store and cut out all my pieces. I then adhered them to my base 12″ x 12″ background paper.
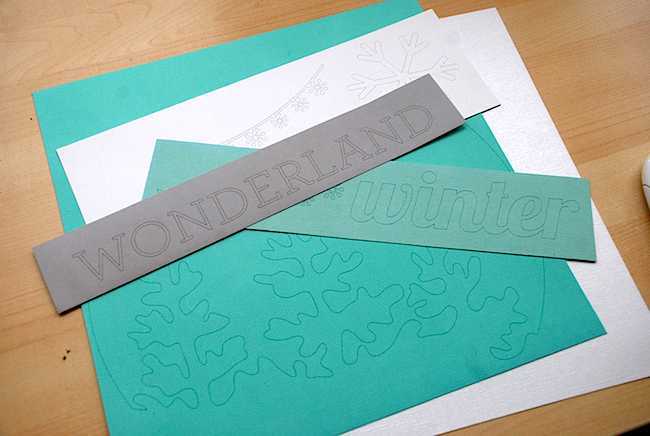
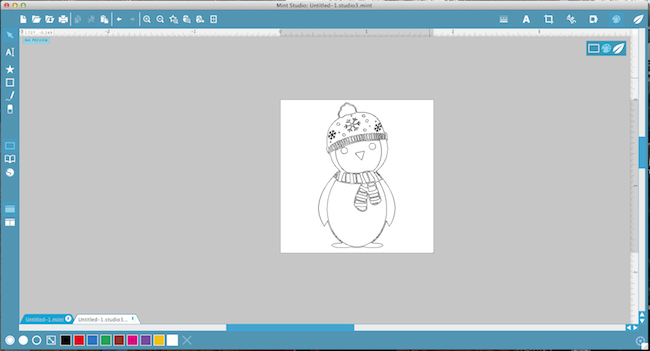
I often create an outline or basic idea of my layout in Silhouette Studio®. Here’s a look at the page I wanted to create. So I used the papers that I cut (in the photo above) and adhered them in place like the picture below.

Step Two
Then comes the fun part—making the stamp! This was my first time using the Mint so I had to upload the software first and followed all of the procedures to get started.
I found a cute little penguin design that I wanted to make a stamp with. So I uploaded the design into Mint Studio™.
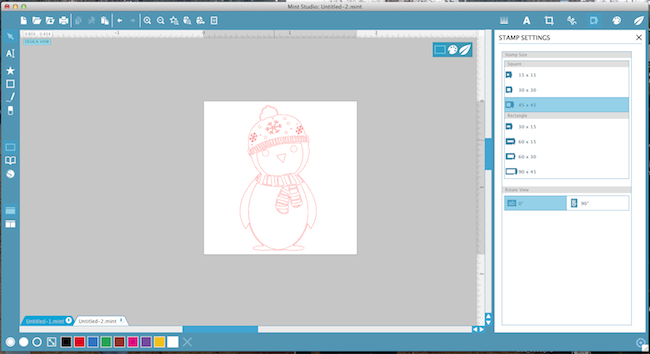
Step Three
Then select the size of stamp you want to use by clicking on the stamp icon at the top right menu bar. For this one I used 45 mm x 45 mm (1.7 in x 1.7 in).
You can then size your image to fit in the box.
Step Four
Plug in the Mint machine using the cords provided and then click on the leaf icon to send it to the Mint machine. Once you click on that icon this image will show up and you will notice that your design has been reversed. Simply follow the instructions on the right side bar.
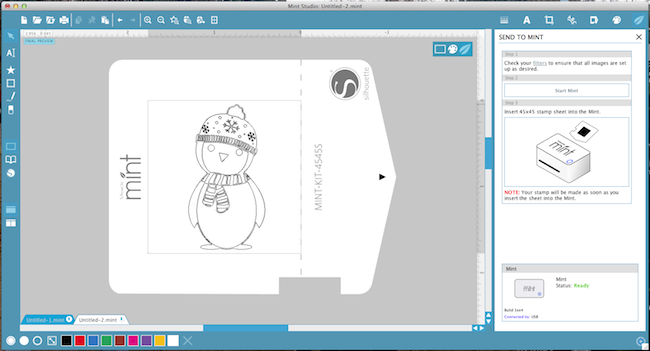
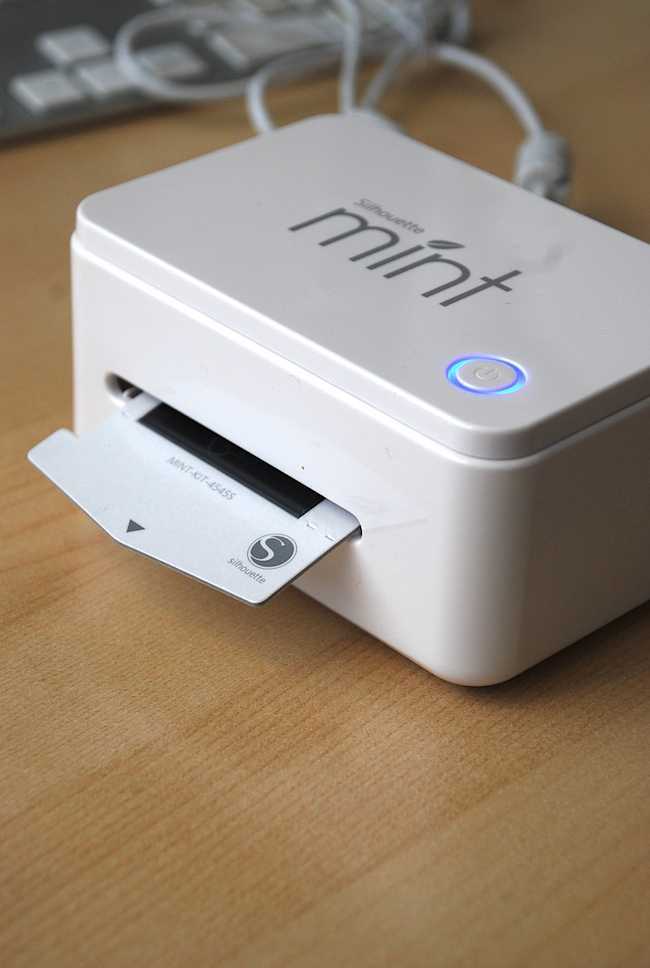
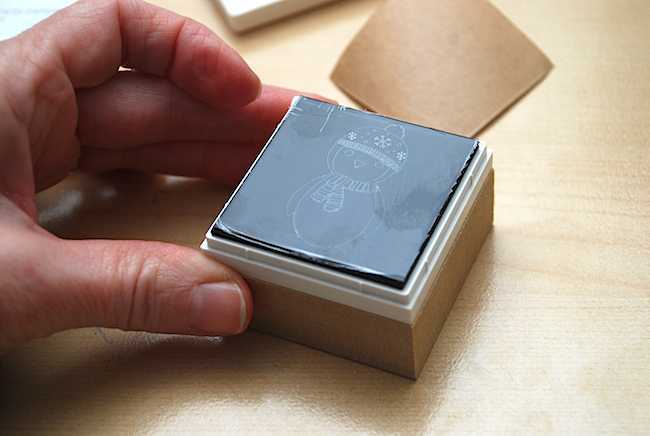
Step Five
You will click Send to Mint and then insert the stamp card through the slot in the back of the machine.
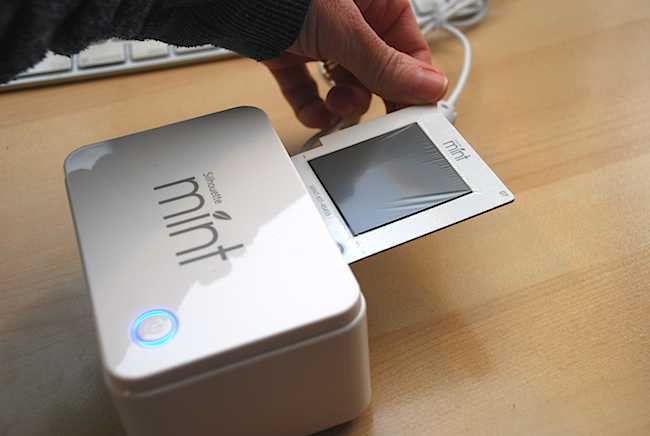
It only takes a few seconds for the stamp card to go through the machine and it is done!
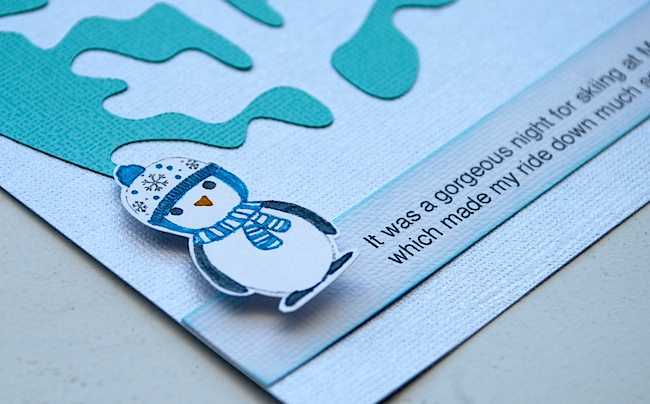
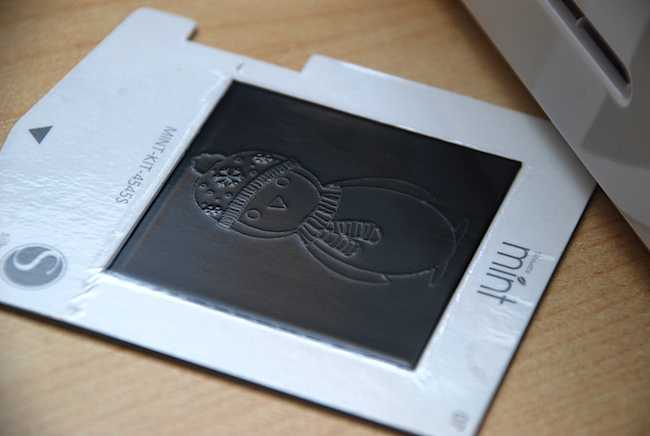
Here’s a look at the image. Isn’t he cute?
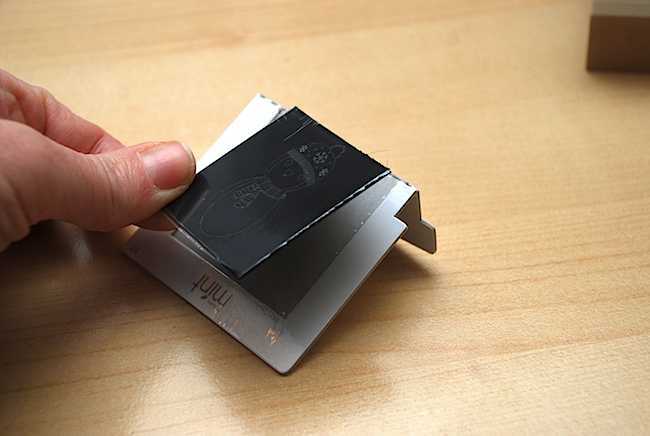
Step Six
Now you will fold the perforated edge of the card and you can tear it off to remove the black stamp part.
Slide the stamp base onto the appropriately sized wood block. Remove the kraft colored paper.
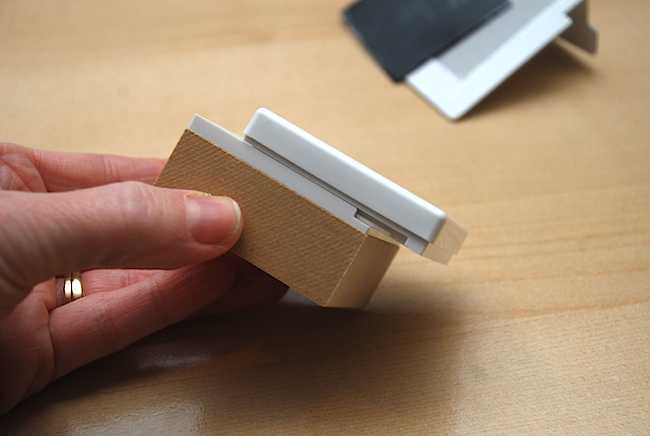
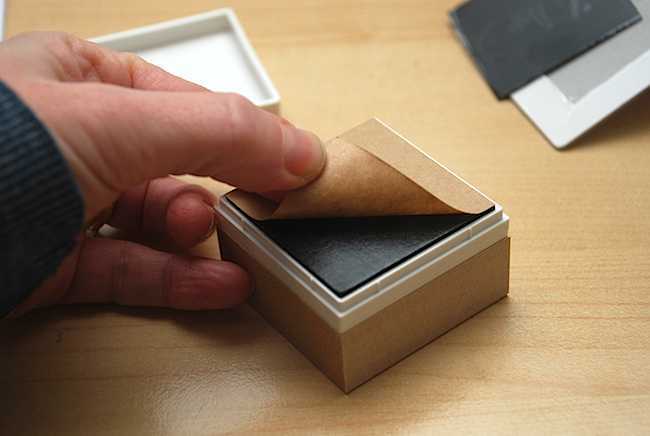
Now carefully adhere your stamp on top of the block.
Step Seven
You can then ink the raised lines of the image. Let this sit for approx. five to ten minutes so that the ink can sink into the stamp. This will allow you to stamp many images before having to re-ink the image again.
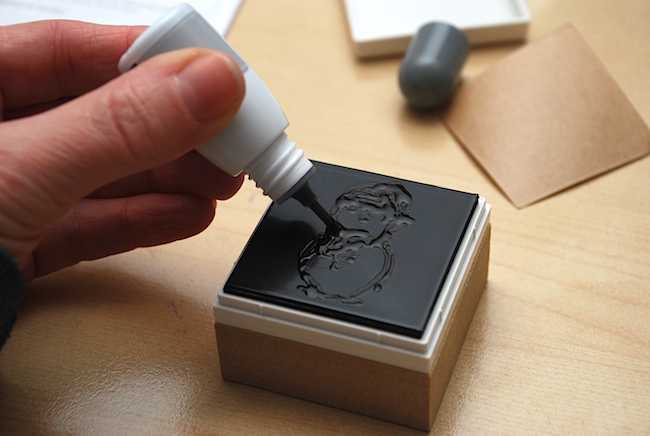
After a few minutes stamp a few times on a separate sheet of paper to get rid of any excess ink. You are then ready to stamp your design! You will notice that I used black ink and then markers to give the design some color.

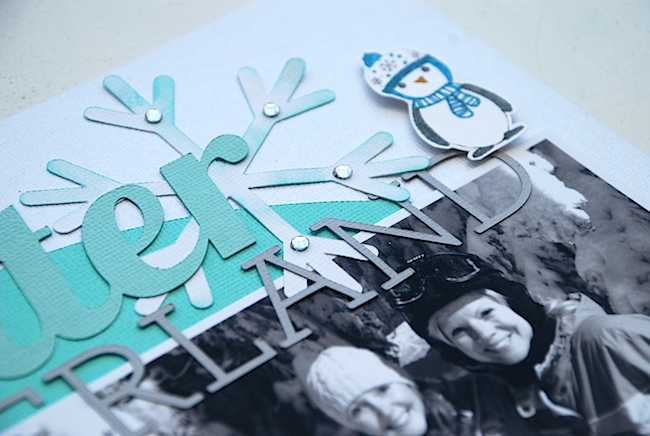
I adhered some rhinestones.
I originally was only to use the stamp design once on my layout but I thought that he was too cute so I used it two times.
I hope that I’ve encouraged you to try out the Mint stamp machine to create your own stamps. It’s so easy and fun!
Kelly Wayment
January 4, 2016
Love it, Cari! I think if I had that penguin stamp I’d be stamping him all over the place. 🙂
Cari
January 4, 2016
Thanks so much Kelly! He is kinda cute isn’t he? 🙂
Terrie
January 5, 2016
What a great layout! And the penguin is adorable! So fun that it’s a stamp you can color in 🙂
Cari L
January 13, 2016
Thank you. He is cute and fun to colour in different ways.
Analisa
January 7, 2016
I missed seeing your layouts on here Cari. Gorgeous as usual! That penguin is such a cutie too!
Cari L
January 13, 2016
Thanks Analisa.
Alyson
January 12, 2016
I love the layout. I am a newbie and am trying to do some of this. Did you cut on a mat for the words wonderland? Also how did you place them on the page with the same spacing as you cut them? Thanks for the help!
Cari
February 15, 2016
HI Alyson,
Yes, I could the words on a mat. I tried to keep the spacing the same as the way they were cut. It doesn’t always turn out exactly the same.
But here’s a tip: Place the bottom section of each letter on a clear ruler. This way you can space them properly and then when you’re ready you lay the ruler over top of your layout and gently press the letters into place. They will always be straight and centered if you use this tip. 🙂