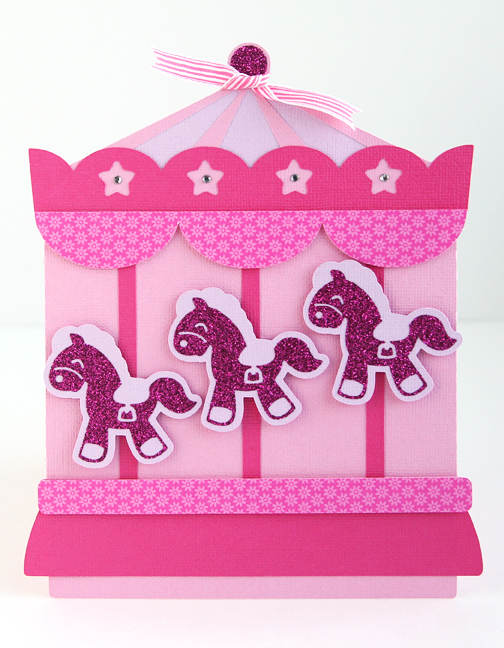
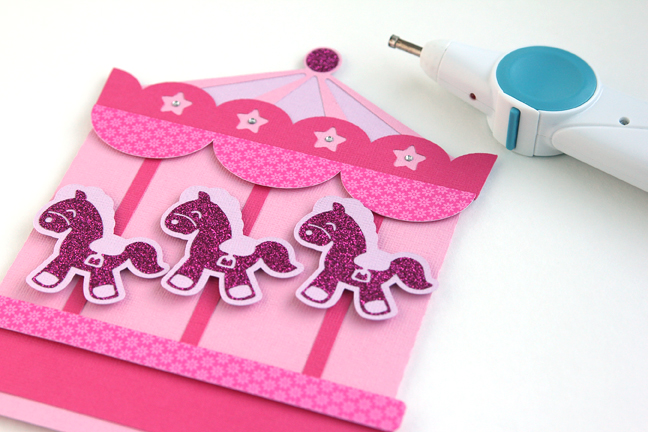
This design is a cute carousel card that was designed by Daniela Moscone. I decided to “bling it up” a bit with some glitter heat transfer material and rhinestones. Yes, you can use glitter heat transfer on paper!
For you card makers out there, this will be a review (or you may pick up a few tricks). For those who don’t know your Silhouette machine can help you become a master card maker, there’s no time like the present to try it out with this free design!
Here is what you need to create a card like mine:
- This week’s free carousel card design
- A selection of coordinating cardstock and pattern paper
- Glitter heat transfer material
- Foam adhesive dots and other adhesive
- Silhouette rhinestones and rhinestone setter
- Ribbon or other embellishments
- Any Silhouette cutting machine (CAMEO, Portrait, or Curio)
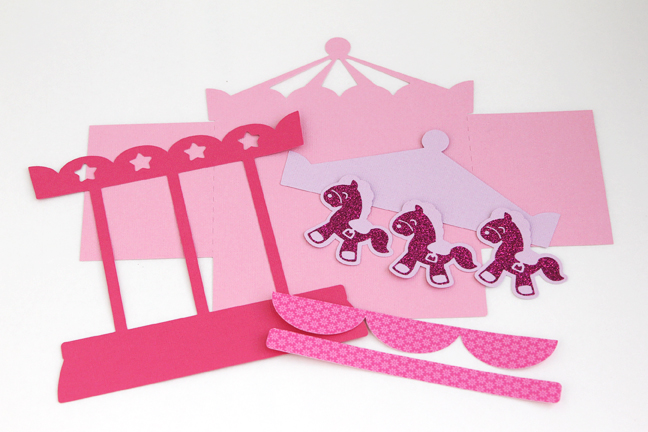
Step One: Cut the Card Pieces
The final card size is quite large at its default (about 7.5” tall x 6.5” wide), so keep that in mind if you want to resize before cutting. It would certainly get lots of ooh’s and aahh’s at a baby shower. I chose three shades of pink, a lavender, and hot pink glitter heat transfer.
You can see I’ve already ironed on the heat transfer to the lavender paper layer. Always remember to flip your image before cutting heat transfer, and cut with the glossy side down.
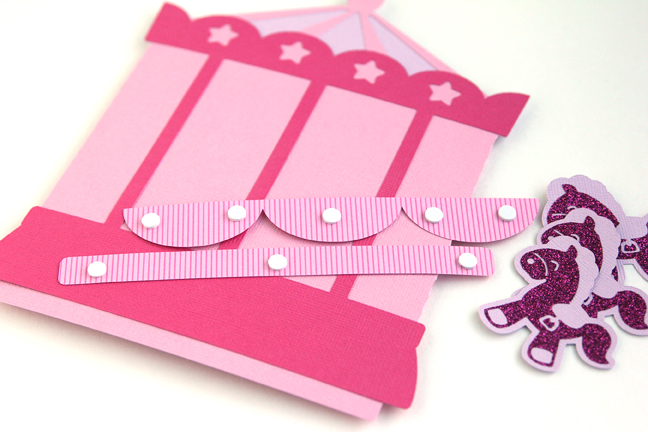
Step Two: Assemble
After the pieces are cut, it’s time to assemble the card. The card flaps open on the back side of the card.
The key to an eye-catching card is adding little details and dimension. One of the great ways to do this is to add depth with foam adhesive. This card already has several layers, but you can put some foam adhesive dots or squares under some of the upper layers to “pop” them off the page.
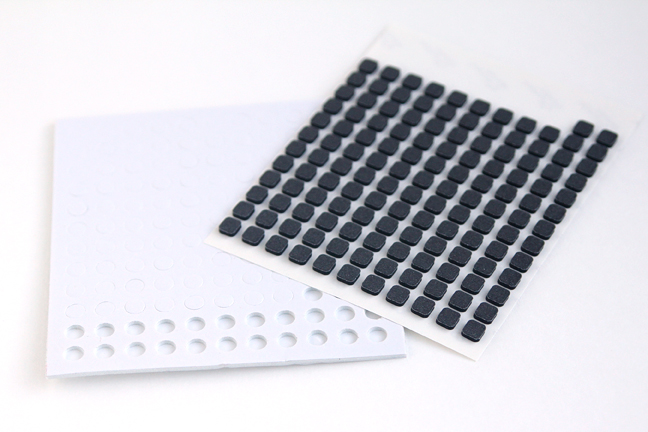
I added foam adhesive to the back of these pink accent pieces and to the back of each pony.
Step Three: Embellish
I decided to add just a little more bling to this card by adding some heat-activated rhinestones with the rhinestone setter, and a scrap of ribbon at the top “tied” it all together nicely!
There you have it! The prettiest card at the party. I’m excited next time to make this card in shades of blue. Anyone having a boy? 😉
 Free Class - Father's Day Apron Set
  Free Class - Custom Graduation Tumbler
Kelly Wayment
June 28, 2024
You can use it with vinyl as long as it is smooth and flat to allow the static charge to hold on to it. Rolled vinyl that wants to go back to its rolled shape will not necessarily work well, and it would need to be trimmed to fit the ES mat cutting area.
Kelly Wayment
June 28, 2024
Yes, you can use the heat pen while using the ES mat. 🙂
Yurii
March 2, 2024
Hello. May it be used with heat pen?
Thanks
Jerome
February 24, 2024
Hi, works this with the normal vinyl foils or only with printer papter etc?
Kelly Wayment
February 16, 2024
Once you’ve pushed the mat up against the rollers, just press the “Load” arrow button (bottom right on the display). Does a regular sticky mat load into the machine for you?
Michelle a goodall
January 24, 2024
Hello! I just got my new electrostatic mat and have watched every video i can find on it. However, what i can t find is why it wont feed into my cameo 5/ it slides right up the rollers but wont go any further. and yes- iam pushing the into button. help!