Hello happy crafters! Brittany here. Today, instead of a tutorial, we’re gonna be doing things a little differently and go through the differences between creating a stamp using the Silhouette Mint® vs using Silhouette’s Stamp Material. I’ve used both and can say there are quite a few differences (even down to the software), but don’t worry, we’re gonna cover it all!
Let’s first talk about the contents that come with the Silhouette Mint™, and what comes in the Stamp Material Starter Kit.

Silhouette Mint™
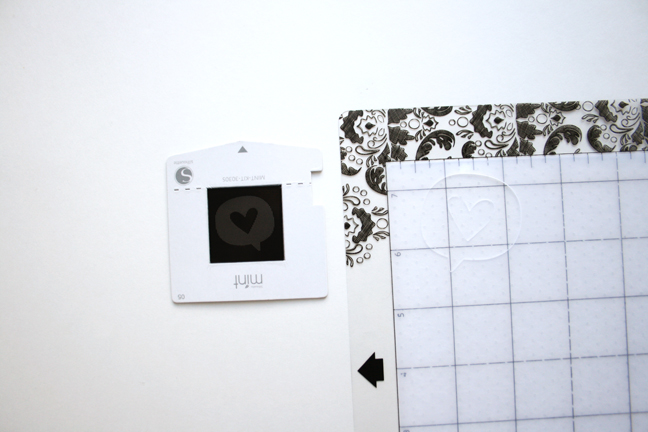
When you purchase a Silhouette Mint™, the following will come in the box with the machine itself. Note, not all products are photographed above.
- (1) Silhouette Mint™ (w/ Mint Studio™ Software)
- (4) Ink Bottles (Red, Yellow, Blue, Black)
- (1) 15 mm x 60 mm Stamp Kit
- (1) 30 mm x 30 mm Stamp Kit
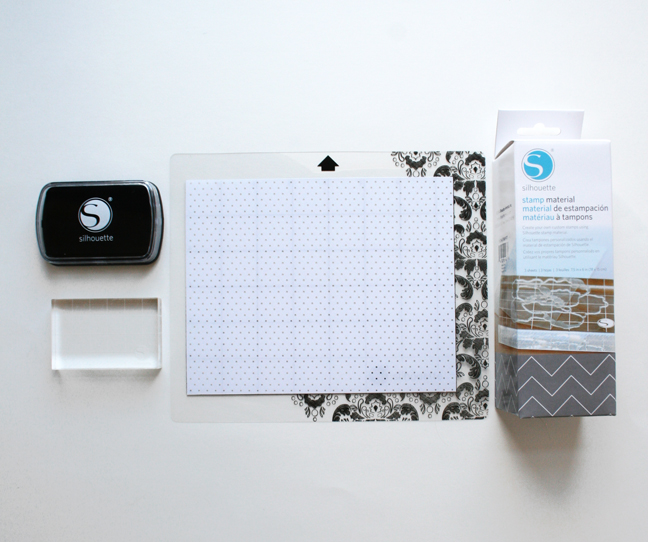
Stamp Material Starter Kit
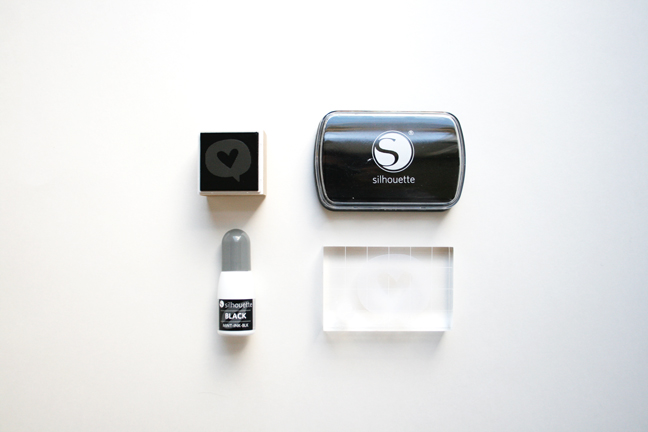
When you purchase the stamp material starter kit, the following will be included. Note, not all products are photographed above.
- (3) Sheets of stamp material
- (1) Cutting mat for stamp material
- (1) Black ink pad
- (3) Acrylic Blocks (varying sizes)
Software
One of the huge differences between creating a stamp via Silhouette Mint vs the stamp material is the software used to create the design.

- Mint™: When you purchase your Silhouette Mint™, you will need to download Mint Studio™. This software is only compatible with the Silhouette Mint™, and is the only software capable of creating a stamp using this machine.
- Stamp Material: For the stamp material, you can create your design right in Silhouette Studio®. Just be sure to adjust your page settings and cutting mat to both say stamp.
Detail + Patterns
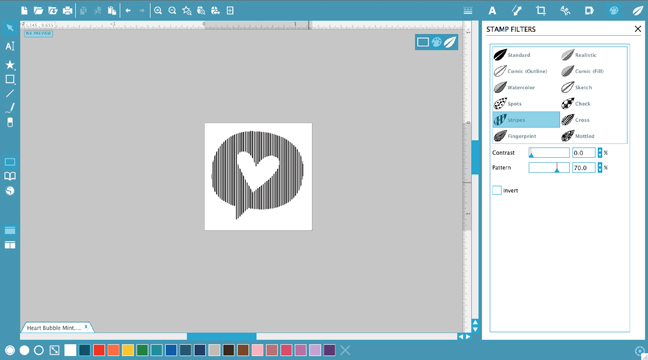
- Mint: In Mint Studio™, before you send your stamp to be made, you have the option of adding filters to your stamp design. This will add texture or pattern to your stamp. Some choices include standard, spots, and stripes. These details will all be encased as a solid stamp once it is made.
- Stamp Material: Since the stamp material is being directly cut, shapes with too fine of detail, or disconnected bits (text) will not work with the stamp material. Solid shapes that can be removed from your cutting mat in once piece are recommended. Unlike the Mint, no additional texture or pattern can be added using the stamp material.
Machine used create stamp
- Mint: Stamps designed in Mint Studio™ can only be created using your Silhouette Mint™, and no other machinery.
- Stamp Material: The stamp material on the other hand can be sent through your Silhouette Portrait® or CAMEO.
Creating your stamp
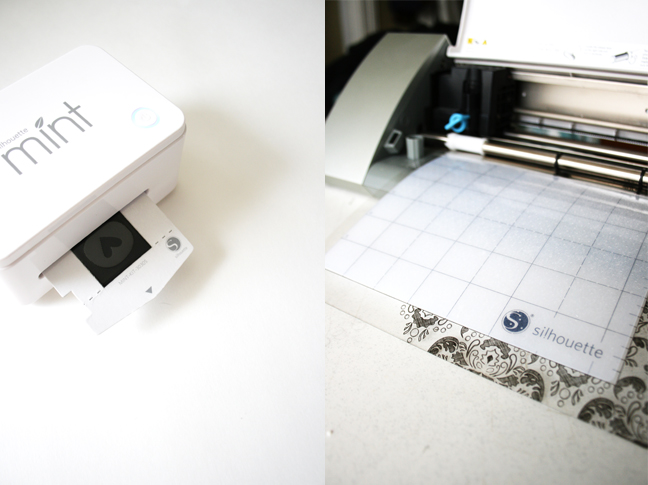
- Mint: I’m pretty convinced the Mint is made of magic. I still don’t quite grasp how it creates a full self-inking stamp so quickly, but no complaints here. Using the send to mint window in Mint Studio, follow the guided illustration and simply insert the desired size stamp sheet into the back of the Silhouette Mint.
- Stamp Material: The stamp material has a specific stamp material mat that you will need to use to send your design through your Portrait or CAMEO. With your stamp material atop your cutting mat for stamp material, insert the mat in your machine. Be sure to adjust the rollers accordingly so that they fit the width of the stamp material cutting mat. Also adjust the ratchet blade manually. The recommended setting for stamp material is a setting of 9.
Adhering stamp to base

- Mint Once your stamp sheet has run completely through the Mint, you can remove the black square from the cardboard casing. The wooden stamp grip that comes with your stamp sheet has an adhesive side, which your design will be stuck directly to. Once your stamp is on the stamp grip, you can remove the entire stamp mount, but not the actual stamp pad itself.
- Stamp Material: The stamp material cuts a shape, which will need to be removed from the cutting mat. You can then stick your design directly onto the appropriate sized acrylic block. You will be able to remove the stamp from your acrylic block for cleaning and storage.
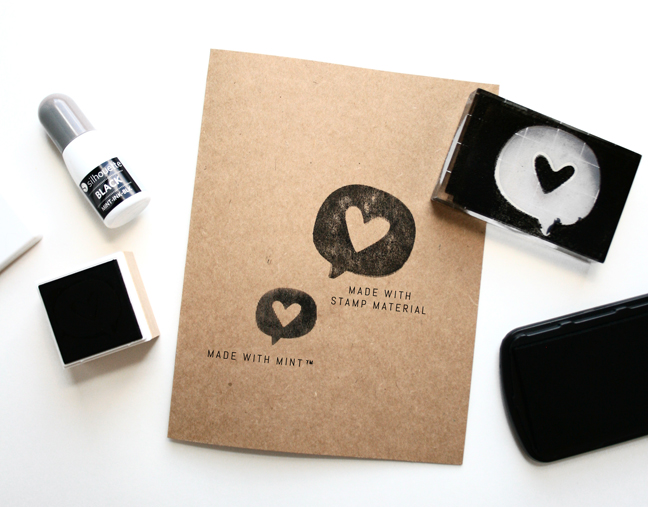
The design used here is the Heart Conversation Bubble (ID #65103) by Kristen Magee.
Inking your stamp
- Mint: Stamps created using your Silhouette Mint™ are meant to be self stamping for up to 50 stamps. To make this happen, ink is applied from the ink bottle directly to the face of your stamp. Multiple colored inks can be applied to different portions of the stamp directly. Once ink is applied, changing colors is not recommended until all of the applied ink runs out. Ink pads are not used. After you let the ink sit on your stamp for a couple minutes, you will need to stamp off all the excess ink until a clean design is stamped.
- Stamp Material: The stamp material kit comes with a black ink pad that can be used as any standard stamp is used. The acrylic block allows you to see your design clearly as you’re stamping. Wipe your stamp clean and you can immediately use a different colored stamp pad right away. Stamps made with the stamp material are not self inking and usually need ink to be reapplied in between each use.

There you have it!
If you’re looking for a more in-depth tutorial on either of these, you can search Silhouette Mint™ or Stamp Material on the blog and it will pull up all the projects that have been made in the past!
Kelly Wayment
June 28, 2024
You can use it with vinyl as long as it is smooth and flat to allow the static charge to hold on to it. Rolled vinyl that wants to go back to its rolled shape will not necessarily work well, and it would need to be trimmed to fit the ES mat cutting area.
Kelly Wayment
June 28, 2024
Yes, you can use the heat pen while using the ES mat. 🙂
Yurii
March 2, 2024
Hello. May it be used with heat pen?
Thanks
Jerome
February 24, 2024
Hi, works this with the normal vinyl foils or only with printer papter etc?
Kelly Wayment
February 16, 2024
Once you’ve pushed the mat up against the rollers, just press the “Load” arrow button (bottom right on the display). Does a regular sticky mat load into the machine for you?
Michelle a goodall
January 24, 2024
Hello! I just got my new electrostatic mat and have watched every video i can find on it. However, what i can t find is why it wont feed into my cameo 5/ it slides right up the rollers but wont go any further. and yes- iam pushing the into button. help!