Hi guys! It’s Aki and I’m so excited to share my first post on the Silhouette blog with you all.
I just love the variety of boxes available for download on the Silhouette Design Store. I mean, there are tons of options and you’re sure to find something that would suit your needs. I actually wish I had a lot of people to give gifts too, ’cause I honestly want to create all those boxes I see. There’s just something magical about being able to make your own box!
Today we have a fabulous modern printable from Silhouette as the free shape of the week. I decided to use this to embellish the gift box I needed to make for my aunt-in-law, since she’s a lady who loves patterns like this (My husband has even said he’s seen a pattern similar to this on one of her leggings!).
You Will Need:
- Silhouette Printable Adhesive Backed Cardstock
- Silhouette Premium Adhesive Vinyl in Gold
- Silhouette Transfer Paper
- Silhouette Spatula
- Silhouette Studio®
- Cardstock (different colors)
- Jute twine
- Glue gun
- Printer
Step One: Resize Design in Silhouette Studio®
Another thing I love about these boxes is the ability to make them bigger or smaller to suit your needs—I resized the box I used and made it smaller to fit on a letter-sized cardstock piece.
To ensure that everything is sized the same:
(1) Select all the components and resize as needed, using the page space in Silhouette Studio® as your guide to resize the cut file.
(2) Drag the nodes on the corners of the group up or down to make it smaller or bigger to keep the shape proportional.

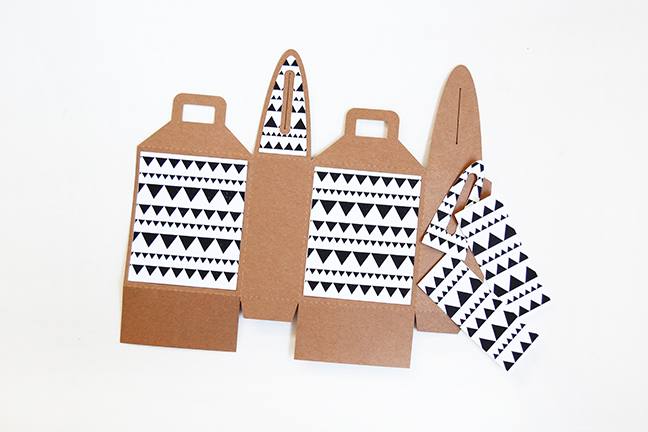
Step Two: Cut Out Design
(1) Ungroup your design and cut the pieces that coordinate with each other together.
In my case, I cut my main box piece on colored cardstock using my Silhouette Portrait®.

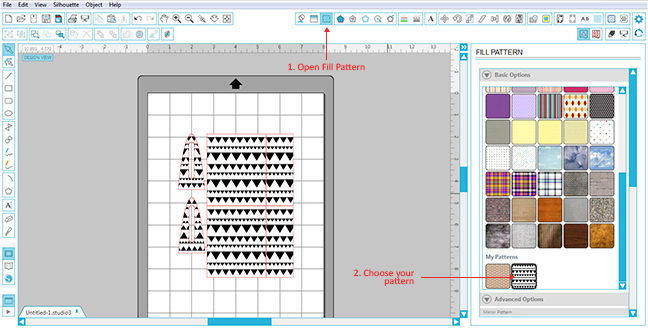
Step Three: Fill Shape with Pattern
(1) Open the Fill Pattern panel.
(2) Choose the pattern you like (in my case the Free Pattern of the Week from Silhouette).
You can further modify it using the Advanced Settings—like scaling the pattern up or down to make it smaller or bigger depending on your needs.
I made sure my pattern faced the same way on all the components on my box—so before printing anything, make sure all the components that you’re using are all in the same direction. Nothing’s more annoying than printing and cutting everything only to find out one side isn’t the right way! 🙂
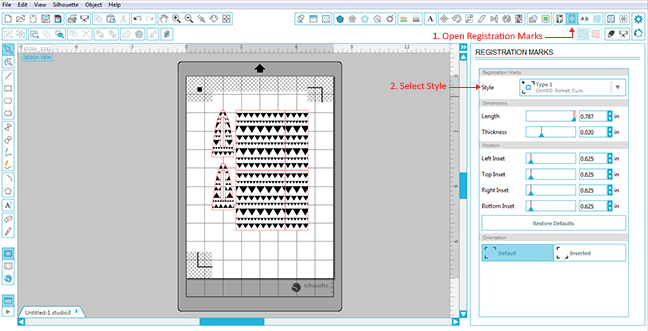
Step Four: Print & Cut
Now it’s time to Print & Cut! To do this:
(1) Turn the “Registration Marks” on.
(2) Select the “Style” settings according to the machine you have.
(3) Send the design to your handy printer to print.
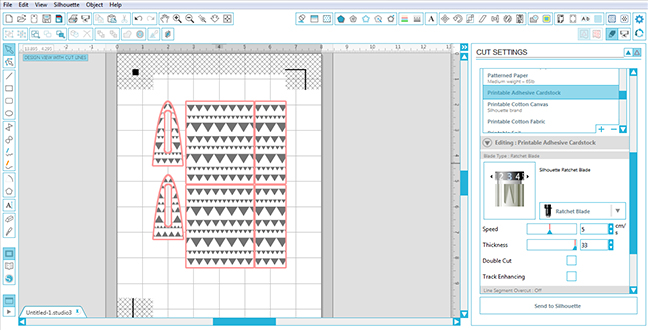
(4) Load it into your Silhouette Portrait® or Silhouette Cameo®, using the cutting mat to cut.
Make sure to use the recommended settings for the media you are using. For Printable Adhesive Cardstock, it will tell you to set your ratchet blade to 3, your speed to 5 and your thickness to 33.
Step Five: Assemble Box
Time to assemble your box! In this case, my box is pretty easy to assemble—the fold lines are already perforated for you to follow.
For layering pieces such as this, you should definitely use some Silhouette Printable White Adhesive Cardstock to make it easier for yourself. And for this type of box, I find it easier to:
(1) Attach the components first.
(2) Assemble the box assembling.
NOTE: It’s easier to apply pressure on it when it’s flat.

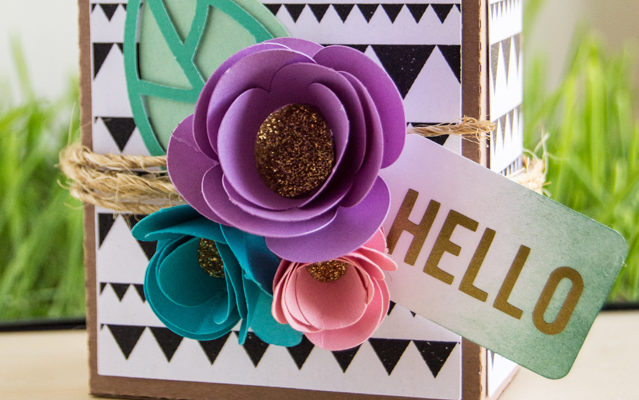
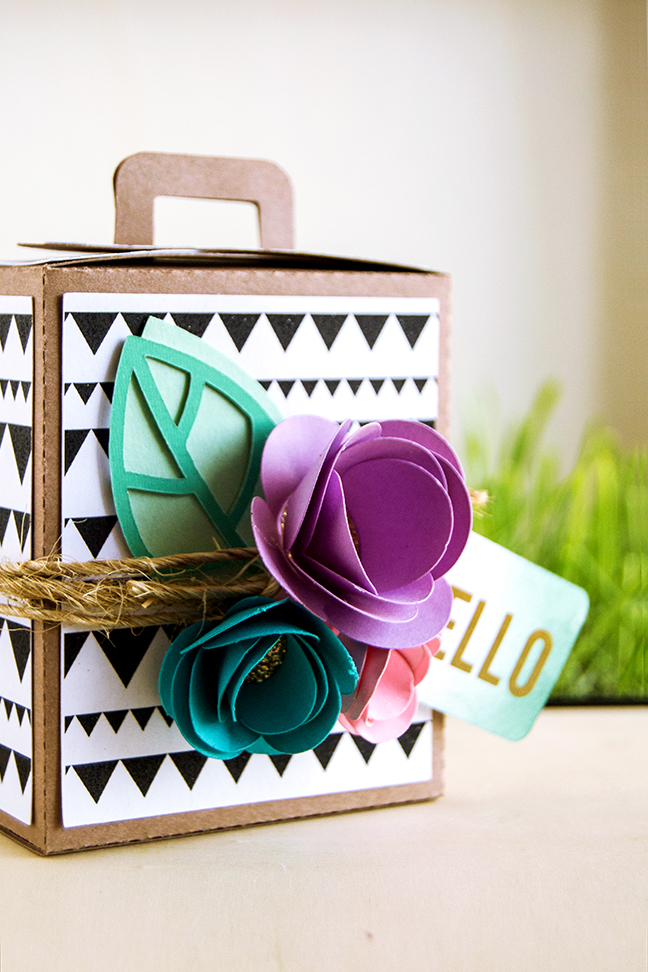
Step Six: Embellish
I love embellishing my boxes. Here’s how to make embellishments like the ones on my box:
(1) Cut some paper flowers and leaves to give it a girly, spring feeling—it’s Spring, after all!
(2) Add a glitter center to them to make them more eye-catching.
(3) Use jute twine instead of ribbon to add a natural feel.
(5) Adhere the rolled flowers onto a square cardstock base to make it easier to attach to the box.

And finally . . .
(6) Add a small tag which I adhered a small gold vinyl-cut word to, just for a glint of gold metallic—I do love gold after all.
You can see a detailed tutorial on how to apply vinyl to cardstock here.
And you are done. It seems like there’s a lot of steps but it’s seriously really easy to make—and very cute!
Kelly Wayment
June 28, 2024
You can use it with vinyl as long as it is smooth and flat to allow the static charge to hold on to it. Rolled vinyl that wants to go back to its rolled shape will not necessarily work well, and it would need to be trimmed to fit the ES mat cutting area.
Kelly Wayment
June 28, 2024
Yes, you can use the heat pen while using the ES mat. 🙂
Yurii
March 2, 2024
Hello. May it be used with heat pen?
Thanks
Jerome
February 24, 2024
Hi, works this with the normal vinyl foils or only with printer papter etc?
Kelly Wayment
February 16, 2024
Once you’ve pushed the mat up against the rollers, just press the “Load” arrow button (bottom right on the display). Does a regular sticky mat load into the machine for you?
Michelle a goodall
January 24, 2024
Hello! I just got my new electrostatic mat and have watched every video i can find on it. However, what i can t find is why it wont feed into my cameo 5/ it slides right up the rollers but wont go any further. and yes- iam pushing the into button. help!