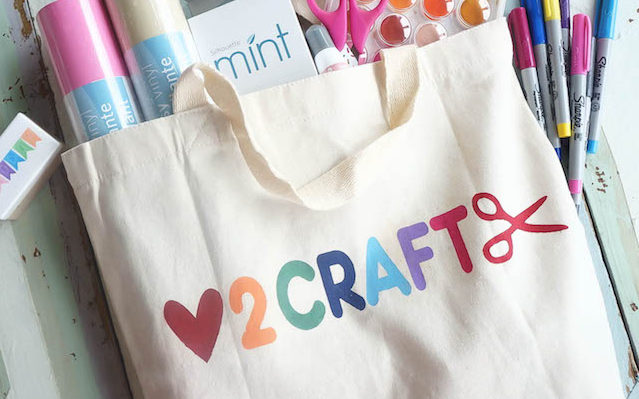
Crafting + rainbows are my two favorite things! So, I combined them into one and created this ah-mazing tote bag using Silhouette fabric inks and stencil vinyl. Stay a while and let me show you how to make one for yourself!
You Will Need:
- Silhouette CAMEO® (or Portrait)
- Silhouette Studio®
- Stencil vinyl
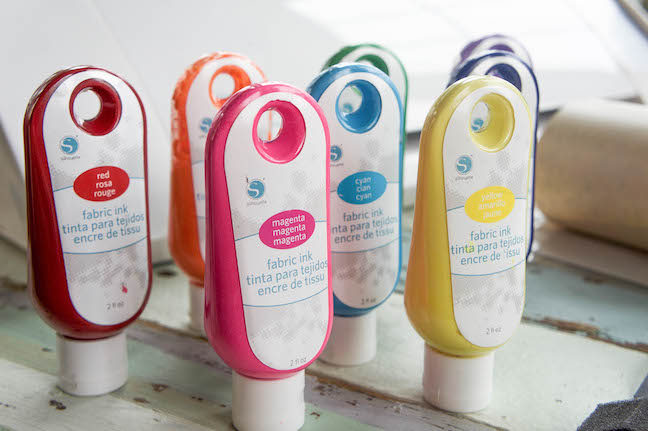
- Fabric ink
- Cutting mat
- Ratchet blade
- Hook Tool
- Scraper Tool
Silhouette fabric inks come in a variety of colors, which means you can pretty much make anything your crafty little brain can think up!
I’m always on the hunt for a cute bag to hold my craft supplies and when I can’t find one that strikes my fancy, I just make my own!
Let’s get started.
Step One: Edit and Cut Stencil Vinyl
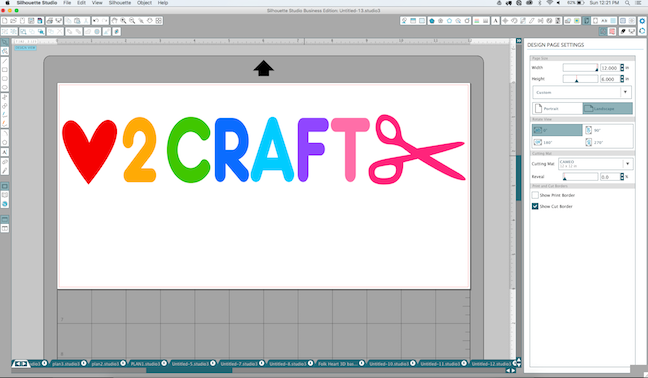
I always start by playing around with my design in Silhouette Studio®. I like to apply colors so I can really get a good idea of how my final design will look.
Once you get your design exactly how you want it:
(1) Go to the Cut Settings panel and select your media.
Keep in mind that stencil vinyl is different from stencil material: it’s thinner and not reusable. When you’re in the cut settings window you will need to select “Stencil Vinyl” as your media.
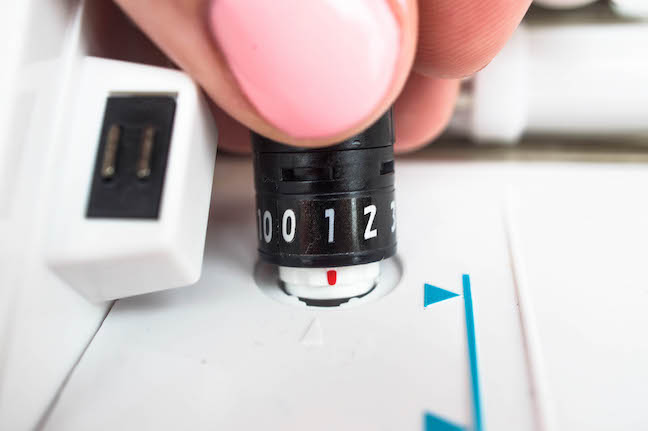
(3) Set Ratchet blade to 1.
(4) Send to Silhouette
Step Two: Create Stencil
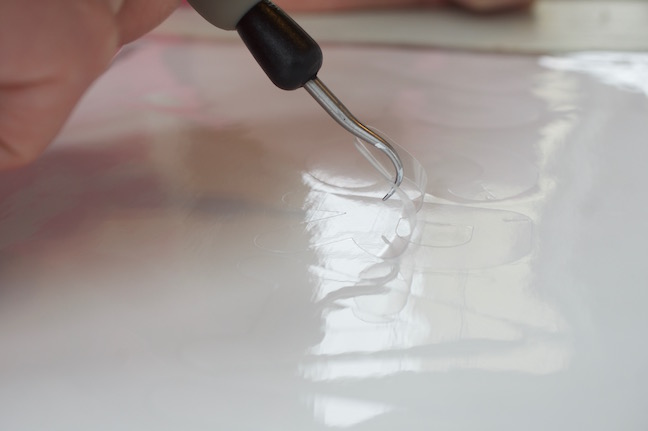
Normally, when you’re working with vinyl you remove the negative space, leaving the design in tact. Since we’re creating a stencil we’ll need to remove the design and leave behind the negative space. Make sense?
To create the stencil:
(1) Use the Hook Tool to remove the letters and shapes. Be mindful of the centers of letters such as A, B, D etc. They like to sneak away with the rest of the letter!
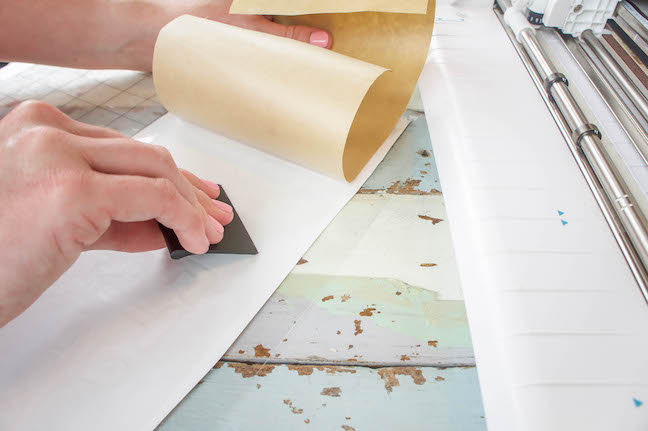
(2) Apply the transfer tape to the design and smooth over it really well with your scraper tool.
I like to go in all four directions a few times just to make sure I get every crack and crevice! It’s easiest if you start on one end and slowly peel away the backing while smoothing the transfer tape down at the same time.
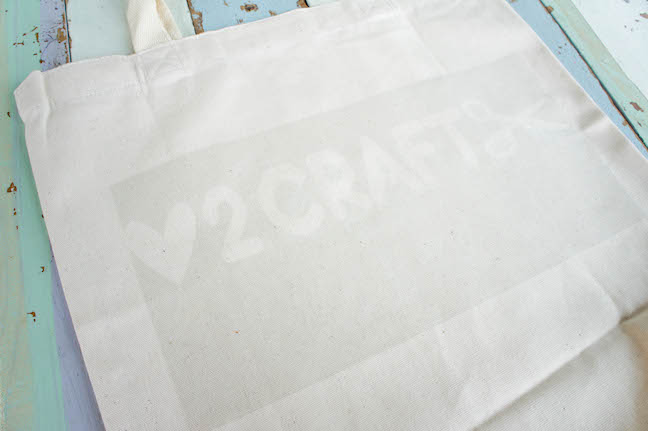
Step Three: Apply Stencil to Bag
Now you can apply the stencil and transfer tape to your bag! Repeat Step Two, but this time apply the stencil to your bag.
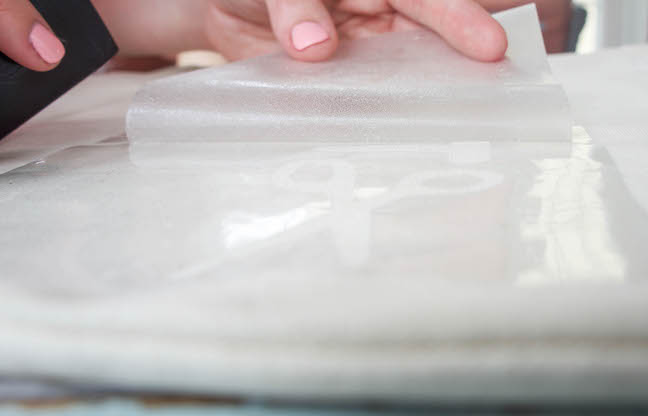
You’ll have to use the Scraper Tool again and a little bit of elbow grease. When you carefully pull away the transfer tape, just the stencil is left behind.
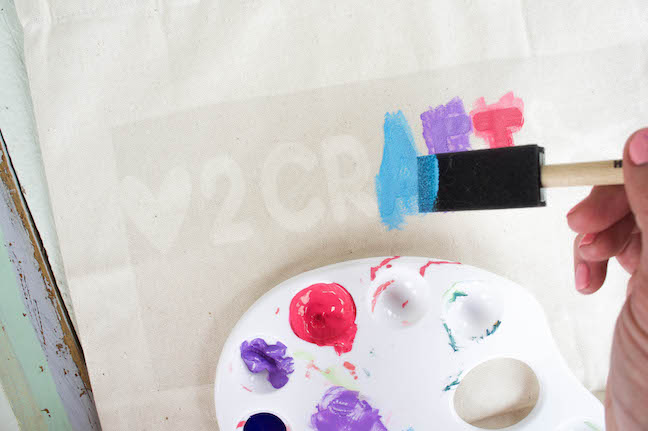
Step Four: Rainbow-ize with Fabric Paint
Time to get rainbow-ized!
(1) Grab a sponge brush
NOTE: You can even use a paintbrush for this step, just use a dabbing motion instead of a painting motion so that you aren’t pushing the ink underneath the stencil.
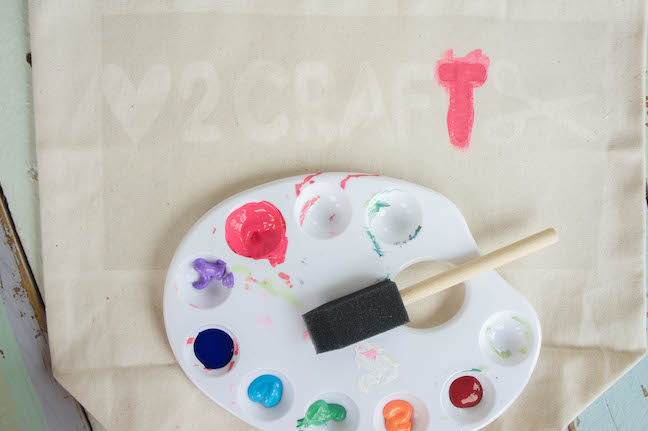
(2) dab your colors onto your design however you want. Get crazy with it! 🙂
Allow the ink to dry completely before removing the stencil. I know, it’s hard to wait but you’ll thank me later.

30 minutes later….
Step Five: Use Iron to Set Ink
Okay, now that your inks are all nice and dry you can peel away that messy stencil and reveal the magic!!!
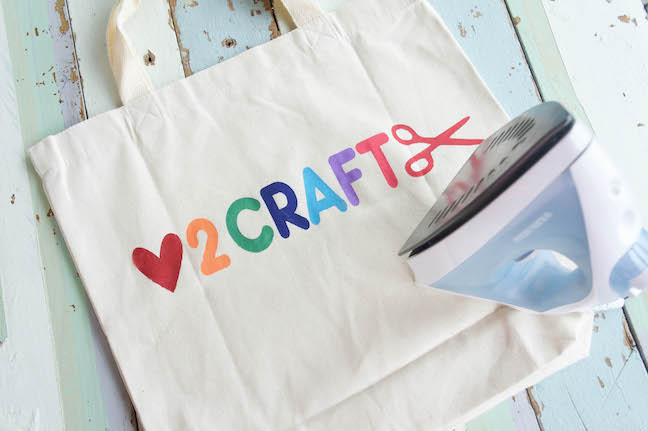
To set your inks and make them permanent:
(1) Cover design with a press cloth.
(2) Iron over the design.
NOTE: I left my iron on the cotton setting and it worked perfectly.
That’s it! Now you can fill that cute little sucker up with all of your crafty goodies and everyone will want to know where you got your adorable tote bag!

Happy crafting!!
Kelly Wayment
June 28, 2024
You can use it with vinyl as long as it is smooth and flat to allow the static charge to hold on to it. Rolled vinyl that wants to go back to its rolled shape will not necessarily work well, and it would need to be trimmed to fit the ES mat cutting area.
Kelly Wayment
June 28, 2024
Yes, you can use the heat pen while using the ES mat. 🙂
Yurii
March 2, 2024
Hello. May it be used with heat pen?
Thanks
Jerome
February 24, 2024
Hi, works this with the normal vinyl foils or only with printer papter etc?
Kelly Wayment
February 16, 2024
Once you’ve pushed the mat up against the rollers, just press the “Load” arrow button (bottom right on the display). Does a regular sticky mat load into the machine for you?
Michelle a goodall
January 24, 2024
Hello! I just got my new electrostatic mat and have watched every video i can find on it. However, what i can t find is why it wont feed into my cameo 5/ it slides right up the rollers but wont go any further. and yes- iam pushing the into button. help!