So, my girl wants to travel the world. But since she’s still in high school (and one of six kids), she hasn’t had the opportunity to leave the country just yet. She is, however, much more traveled than I was at her age, having visited many more areas of the US.
The city currently at the top of her bucket list is New York City. So, until she can get there, I will just have to bring it to her!
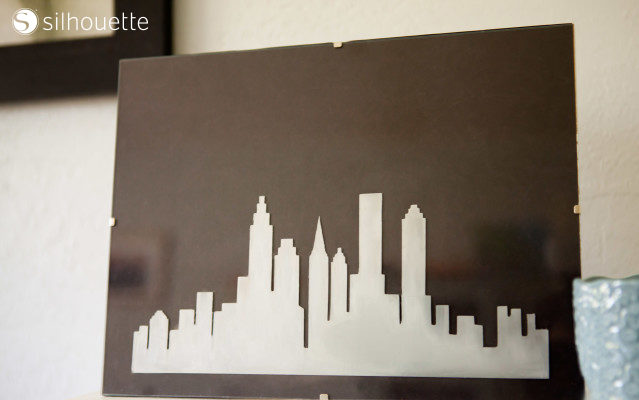
Follow along to see how to make this cool etched glass NYC skyline. 🙂
You Will Need:
- Silhouette CAMEO®
- Silhouette Studio®
- Stencil vinyl
- Transfer tape
- Glass and picture frame (frame is optional)
- Hook Tool
- Scraper Tool
- Silhouette Etching Cream
Step One: Edit Design in Silhouette Studio®
(1) Measure the space on the glass you will be etching.
Be sure to allow for a mat and/or frame if you will be framing the finished product. Use this measurement to change the page size in your “Design Page Settings” menu.
(2) Select your downloaded design (I chose Skyline by Hero Arts).
(3) Size it to fit your Design Page by selecting it and dragging a corner to make it bigger or smaller.
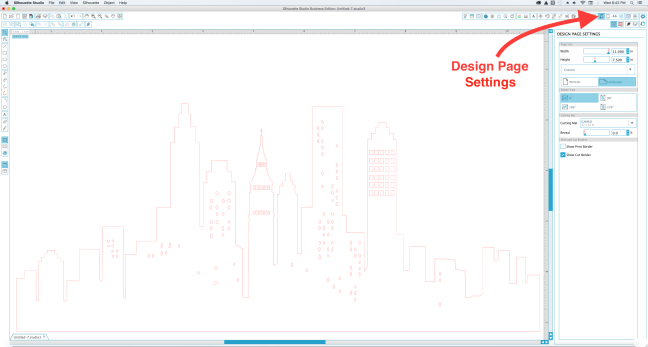
I wanted my design to be a little taller than the original design so I stretched it just vertically by “pulling” it up using the top center tab.
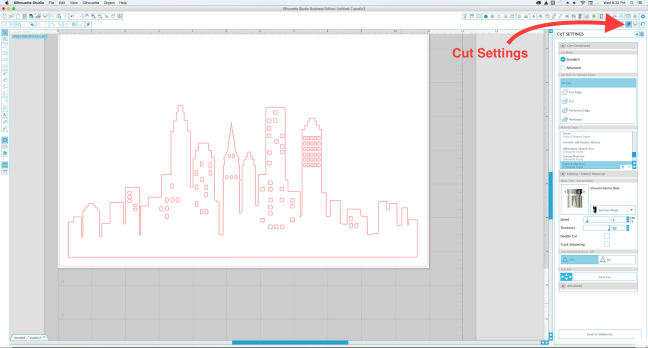
In the “Cut Settings” menu:
(1) select “Stencil Vinyl” as your material type.
(2) Load your cutting mat with your stencil vinyl cut to size and placed on the mat.
(3) Change your blade setting to the recommended number.
When you’re ready, go ahead and click “Send to Silhouette.”
Step Two: Apply Stencil to Glass
After your design is cut:
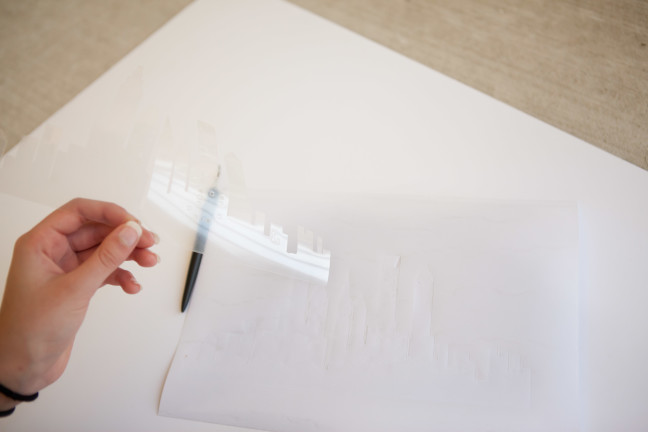
(1) Weed out the part of the design that will be etched onto your glass.
From experience, I know that those teeny tiny windows will be really hard to keep from shifting during etching so I went ahead and weeded those out too. It wasn’t worth the risk and we’ll still get a great skyline.
Another way would have been to delete them in Silhouette Studio® before cutting. 🙂
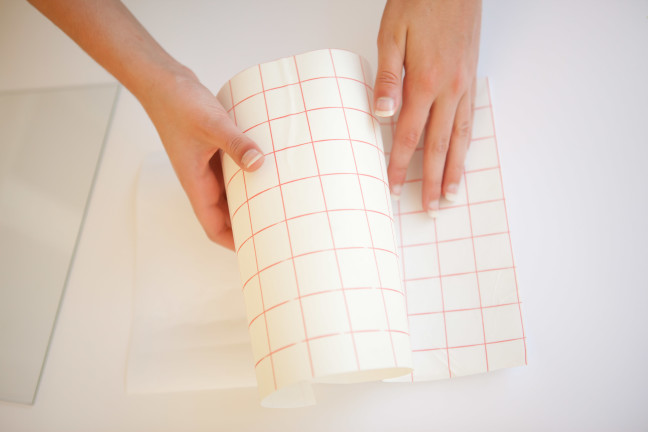
(2) Cut a piece of transfer paper the same size as your stencil vinyl.
(3) Carefully peel the backing off one side of the transfer paper and apply the transfer paper to your stencil, pulling the paper off and smoothing as you go.
Now you can apply the stencil where you want it on the glass.
Once you have transferred the stencil and firmly pressed it onto the glass:
(1) Pull the paper backing off.
(2) Use the scraper tool to smooth out any air bubbles and to prevent etching cream from getting underneath the stencil.

Step Three: Apply Etching Cream
When it comes to using the etching cream:
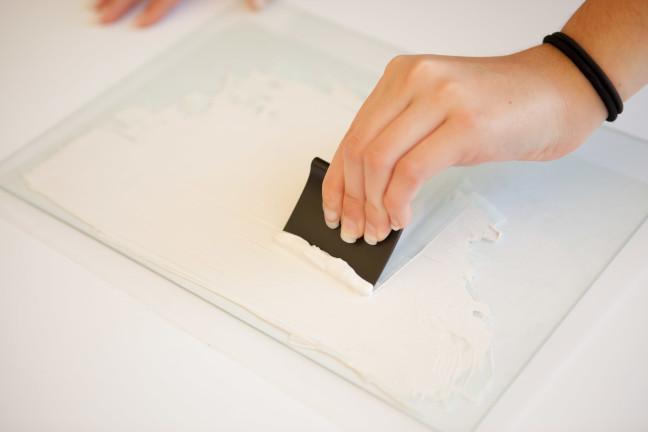
(1) Make sure to stir the etching cream, as it tends to separate when it sits for a while.
(2) Brushing it on with a foam brush is the easiest way to apply it.
It doesn’t take long to etch the glass, but I wait a few minutes to be sure.

The etching cream can be reused so be sure to scrape off the excess and put it back in the jar! One jar will go a long way if you do this every time.
Step Four: Rinse Off Etching Cream
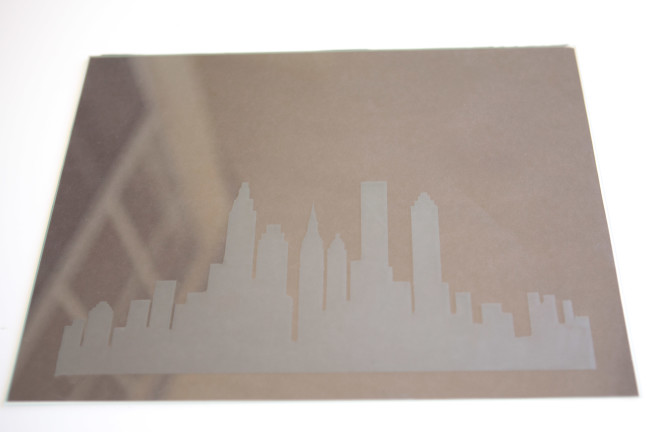
(1) Rinse the remaining etching cream.
(2) Peel off the stencil and dry the glass.
(3) Show everyone how awesome you are!
We could stop there and it would be great, but I wouldn’t be a true crafter if I didn’t consider adding something special to it, would I?
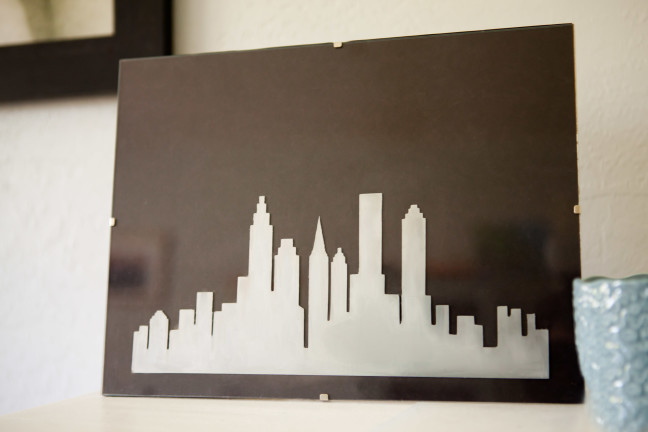
So, I rubbed a silver wax metallic finish into the etched area. The finish rubs off the non-etched, glass but not the etched glass. Convenient, huh?
Kelly Wayment
June 28, 2024
You can use it with vinyl as long as it is smooth and flat to allow the static charge to hold on to it. Rolled vinyl that wants to go back to its rolled shape will not necessarily work well, and it would need to be trimmed to fit the ES mat cutting area.
Kelly Wayment
June 28, 2024
Yes, you can use the heat pen while using the ES mat. 🙂
Yurii
March 2, 2024
Hello. May it be used with heat pen?
Thanks
Jerome
February 24, 2024
Hi, works this with the normal vinyl foils or only with printer papter etc?
Kelly Wayment
February 16, 2024
Once you’ve pushed the mat up against the rollers, just press the “Load” arrow button (bottom right on the display). Does a regular sticky mat load into the machine for you?
Michelle a goodall
January 24, 2024
Hello! I just got my new electrostatic mat and have watched every video i can find on it. However, what i can t find is why it wont feed into my cameo 5/ it slides right up the rollers but wont go any further. and yes- iam pushing the into button. help!