One of the first projects I think every proud new CAMEO owner should do when you get a new Silhouette machine is to customize your CAMEO dust cover. I love having a matchy-matchy workspace—I try to do a little custom work on everything to make it fit right in with my décor. The covers are made from a sturdy canvas material so they will hold up to lots of different methods of personalization. They come in a few different colors, too! For today’s post, I came up with five quick and easy ways to inspire you to customize your dust cover. Some of these are done on my Portrait® cover, but you can easily apply the same ideas to CAMEO-sized ones. Ready to see? Let’s get to it!
Rhinestones
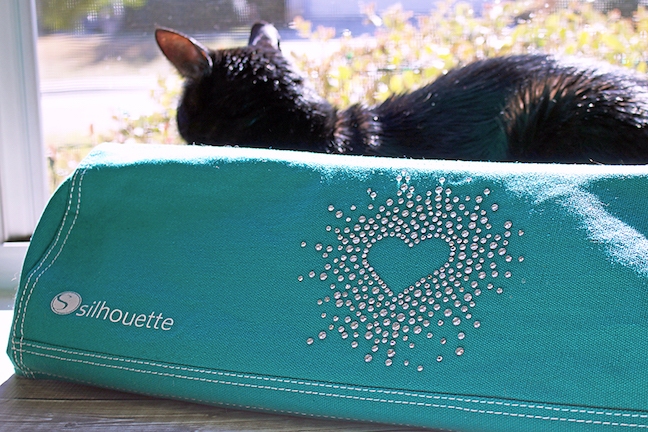 First up, rhinestones. They are sparkly, they show up on any shade of background, and they come in a ton of different colors. You just can’t go wrong with this option. I did clear rhinestones on my teal CAMEO cover. If you need a few pointers, Kelly has a great post here that explains how to add rhinestones to fabric. All versions of Silhouette Studio™ are capable of cutting the rhinestone patterns in the Design Store, but if you’d like to design your own, you’ll need to upgrade to the Designer Edition.
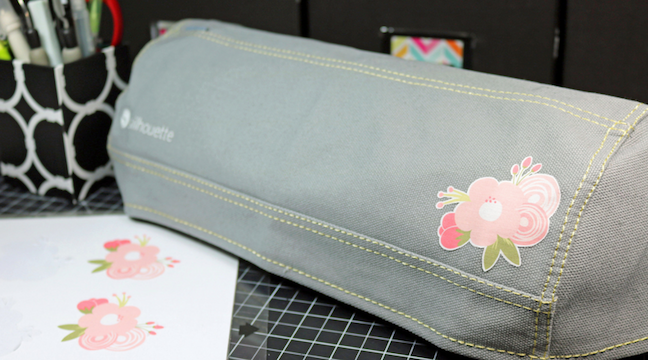
Printable Cotton Fabric
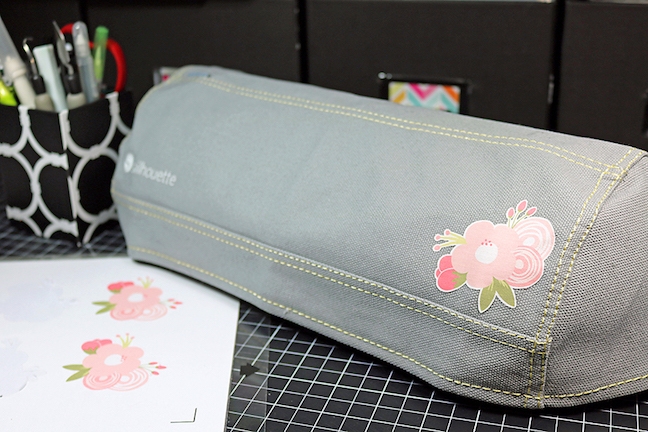 Printable Cotton Fabric is an excellent way to customize your cover if you’d like to keep everything in the fabric realm. You can print designs from the Design Store, or even use your own designs on this specialty media. To adhere your image once you have printed and cut it, use Heat’n Bond as the adhesive and iron your design to your dust cover. Be sure to remove the liner on the back of the cotton sheet first before you adhere the Heat’n Bond—it’s there solely to help the Printable Cotton Fabric stick properly to the mat and allow it to cut cleanly.
Adhesive Stencil Sheets
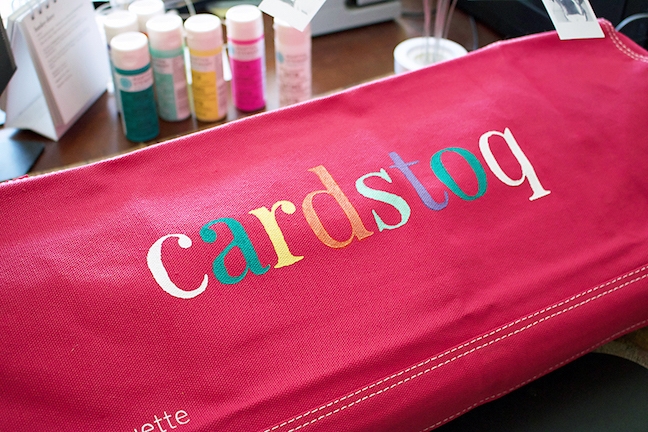 I’ve been waiting for the Stencil Material sheets since they were announced earlier this year, and I finally got to try them out a couple of weeks ago. SO excited! The Adhesive Stencil Material Sheets were easy to use on the canvas since they didn’t move around as I was applying the craft paint. Because the letters in my blog title are all different colors, using a stencil and craft paint was a simpler (and super FUN) way to customize my CAMEO dust cover. Plus, it saved me the time it would have taken to line up letters cut from Heat Transfer Vinyl. You can find the post for this stencil project here.
Felt Shapes
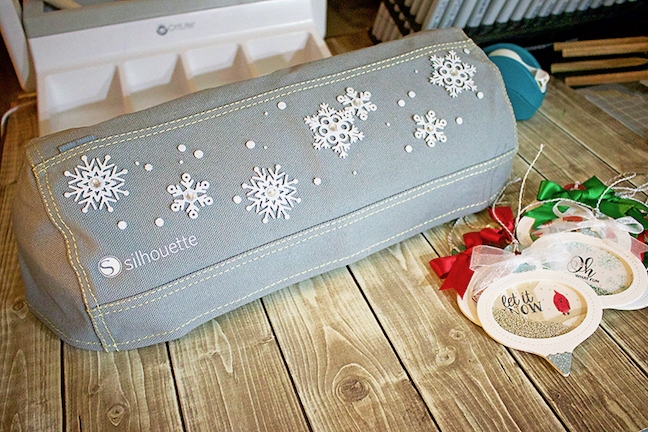 Next up—felt! Who says you can only have a single dust cover for your machines? Why not have one for each season? This is my Christmas dust cover for my Portrait®. I like using the gray ones to customize since any color embellishment shows up wonderfully on them. For this cover, I purchased felt pieces and created the design using fabric glue to attach them to the cover, since I wanted the edges of the snowflakes to be able to lift up. You could just as easily iron them on if you’d like a very secure bond. Cutting felt with your CAMEO can be a little tricky, but there are several methods available online to help you adjust your machine settings. Martha has some ideas and tips for cutting felt in her puppet tutorial, here.
Heat Transfer Vinyl
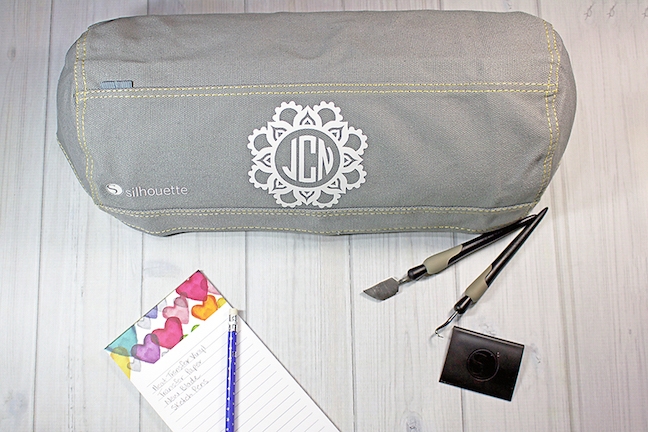 Last, but certainly not least is Heat Transfer Vinyl. If you are looking for clean, crisp designs, this is the method of choice for customizing your dust cover. You can get some really intricate detail when using this material. And once it’s on there, it’s machine washable, to boot! I love using heat transfer vinyl for monogramming items. Cari discusses how to apply Heat Transfer Vinyl in her throw pillow tutorial, here.
What other ways can you think of to customize your CAMEO dust cover? Comment below and share what you come up with. I can’t wait to read your ideas!

Kelly Wayment
June 28, 2024
You can use it with vinyl as long as it is smooth and flat to allow the static charge to hold on to it. Rolled vinyl that wants to go back to its rolled shape will not necessarily work well, and it would need to be trimmed to fit the ES mat cutting area.
Kelly Wayment
June 28, 2024
Yes, you can use the heat pen while using the ES mat. 🙂
Yurii
March 2, 2024
Hello. May it be used with heat pen?
Thanks
Jerome
February 24, 2024
Hi, works this with the normal vinyl foils or only with printer papter etc?
Kelly Wayment
February 16, 2024
Once you’ve pushed the mat up against the rollers, just press the “Load” arrow button (bottom right on the display). Does a regular sticky mat load into the machine for you?
Michelle a goodall
January 24, 2024
Hello! I just got my new electrostatic mat and have watched every video i can find on it. However, what i can t find is why it wont feed into my cameo 5/ it slides right up the rollers but wont go any further. and yes- iam pushing the into button. help!