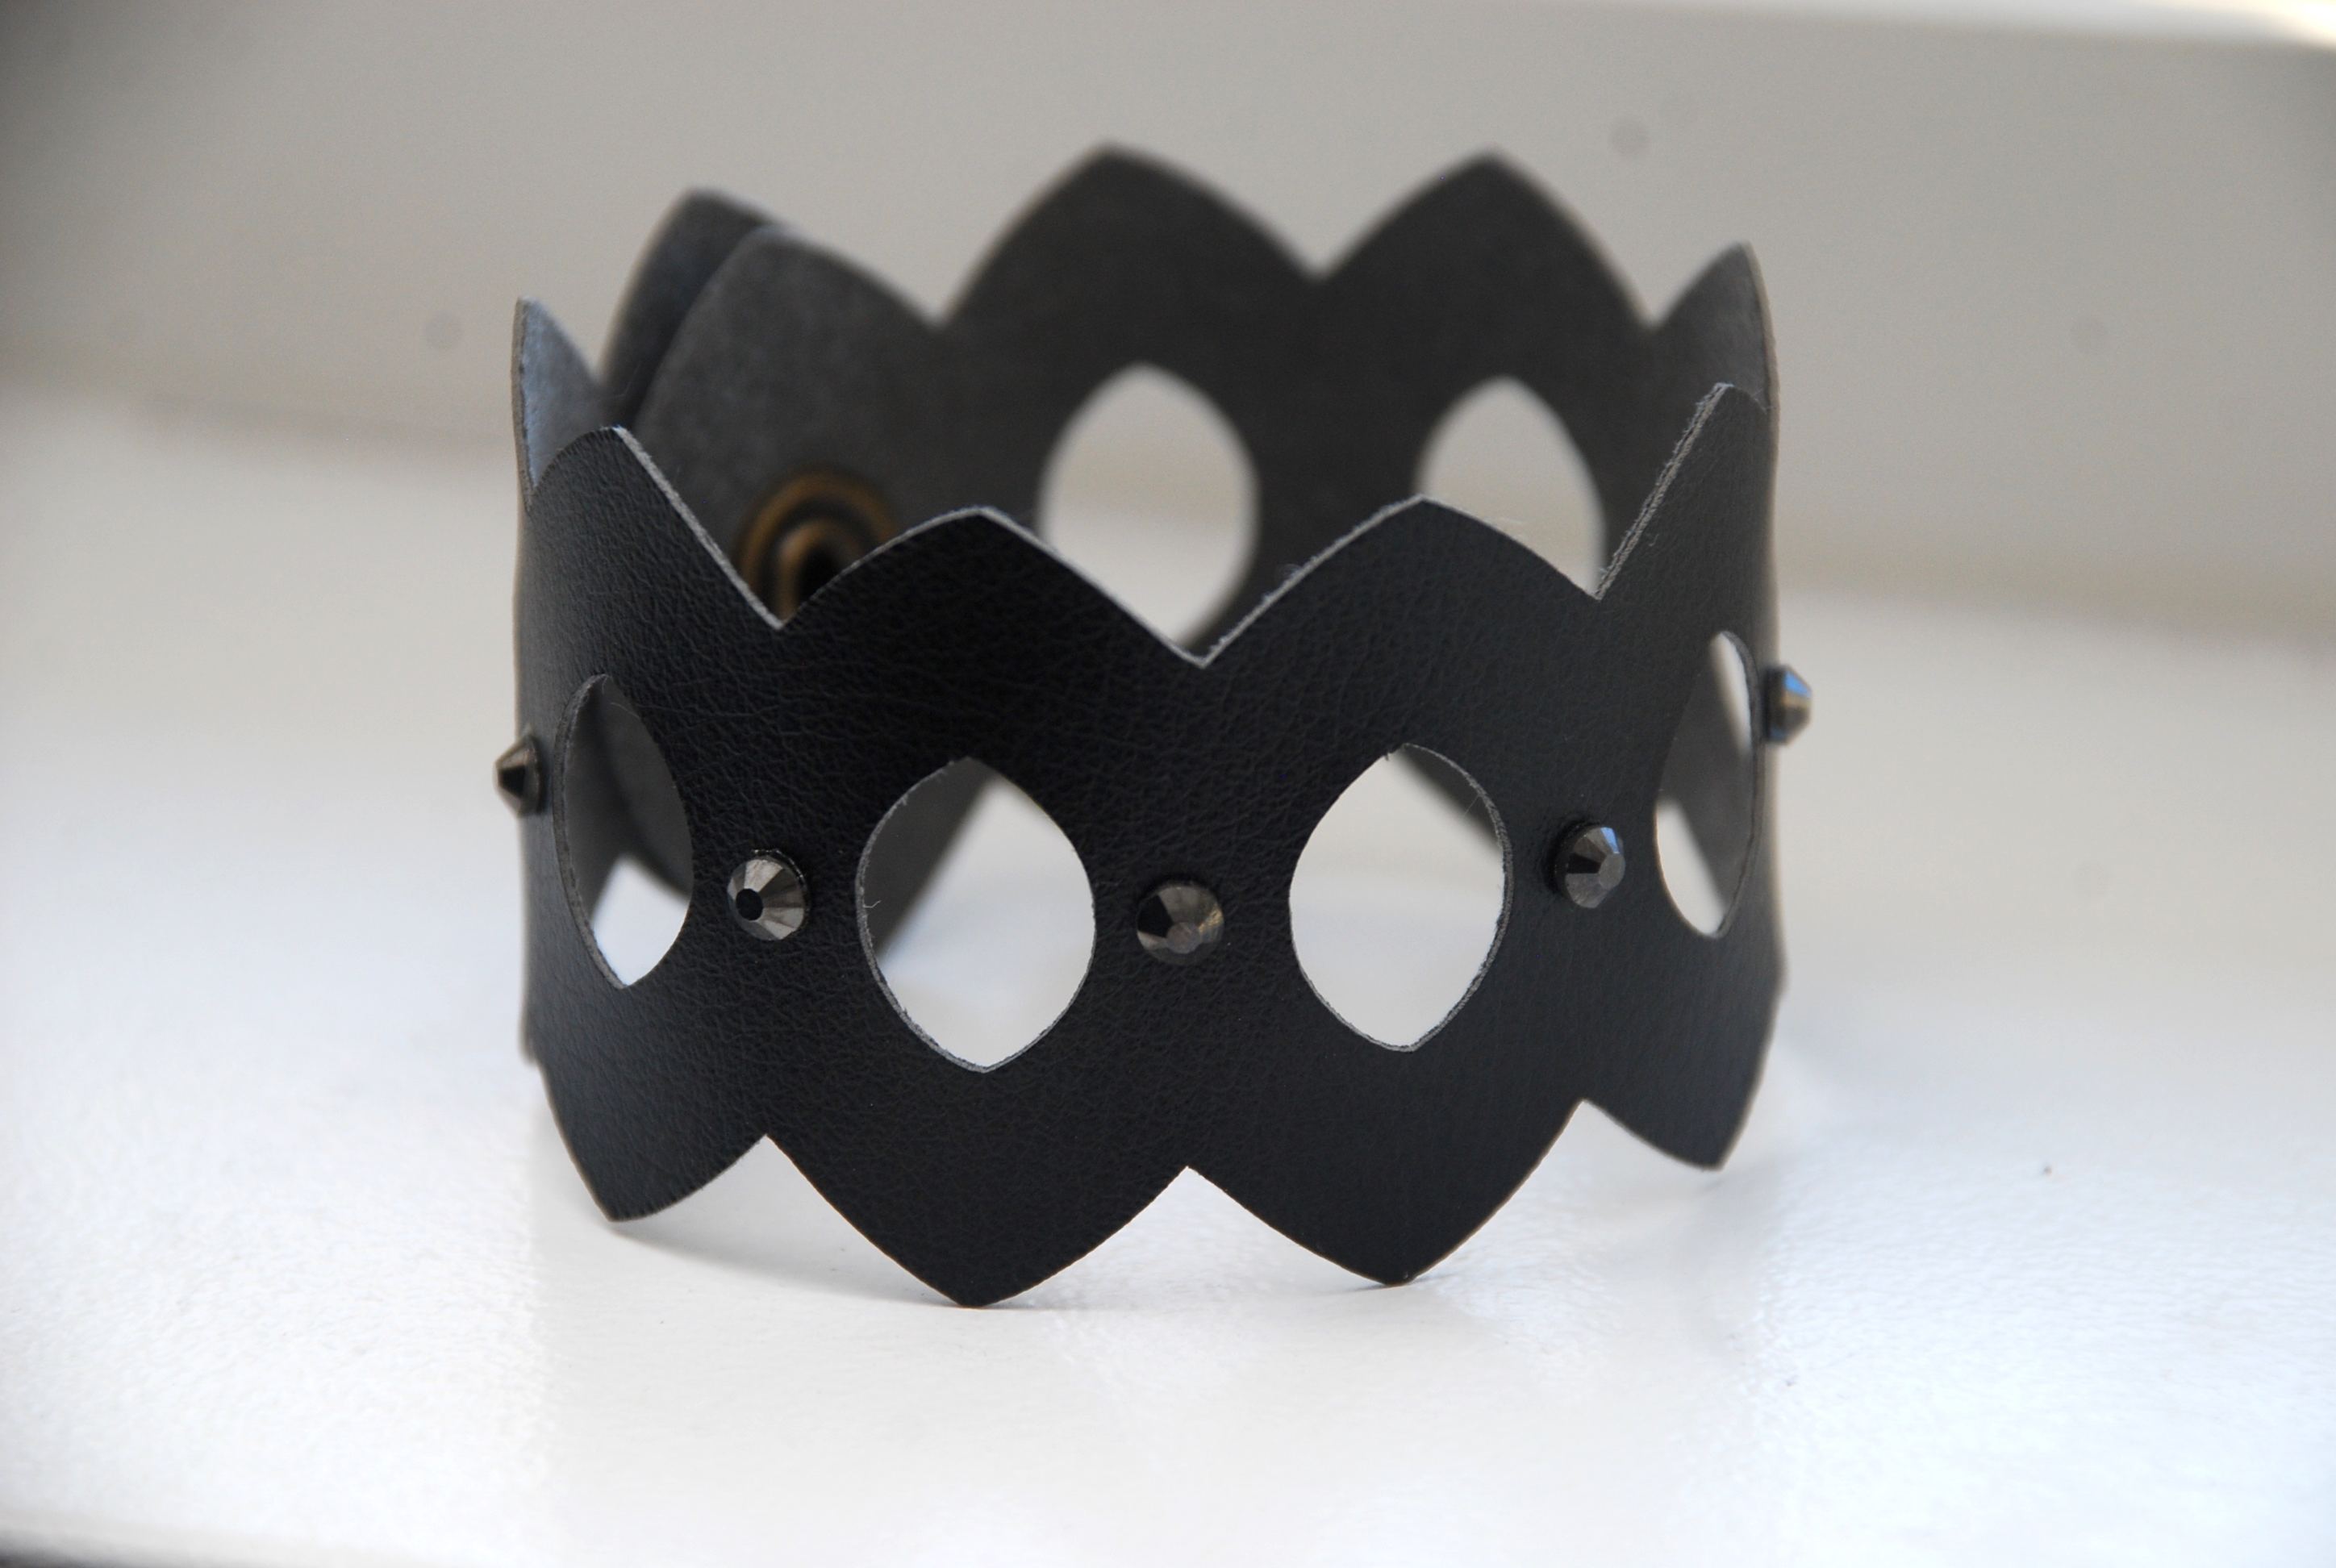
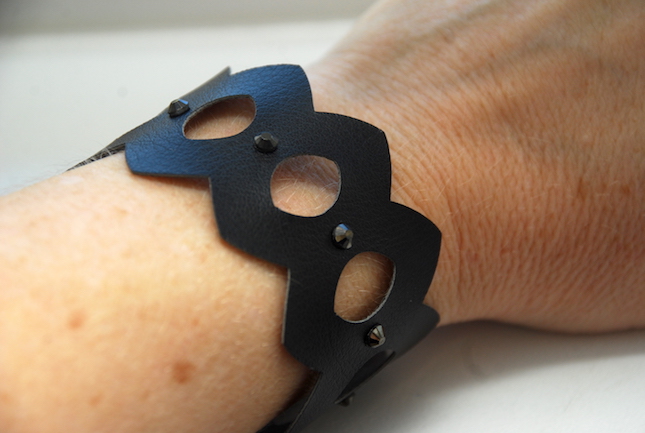
Ever since I was a young girl, I have loved jewelry. Lately, I’ve been admiring the beautiful wide leather cuffs that have been made by some very talented designers on social media. They inspired me to create my own cuff for today’s post.
Supplies needed:
- Silhouette Curio™
- Silhouette Leatherette Sheets
- Silhouette Rhinestones & rhinestone setter
- Design ID #25955
STEP ONE: DESIGN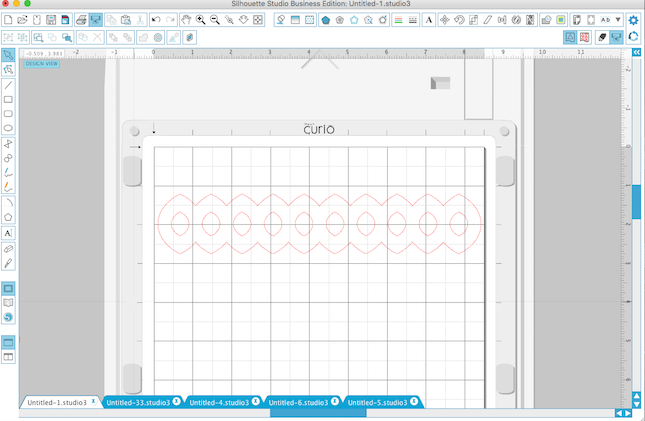
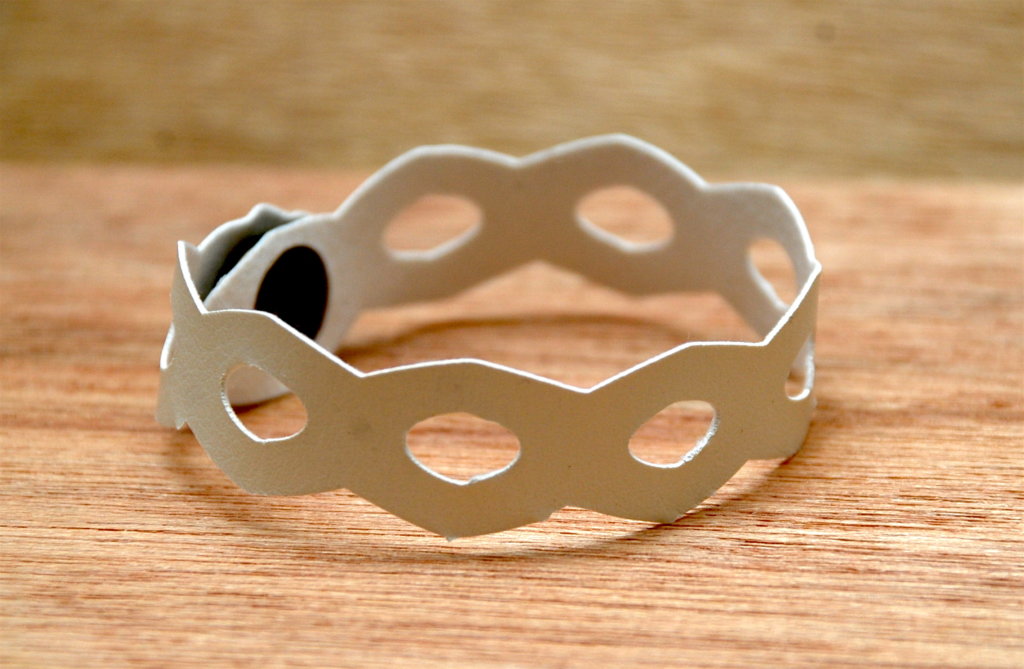
I chose to stick with something simple because this was my first time making a cuff and my 1st time using the leatherette sheets.
Open Silhouette Studio® and choose your design. I stretched this design out a bit in order to fit the dimensions that I was going for.
STEP TWO: ALTER DESIGN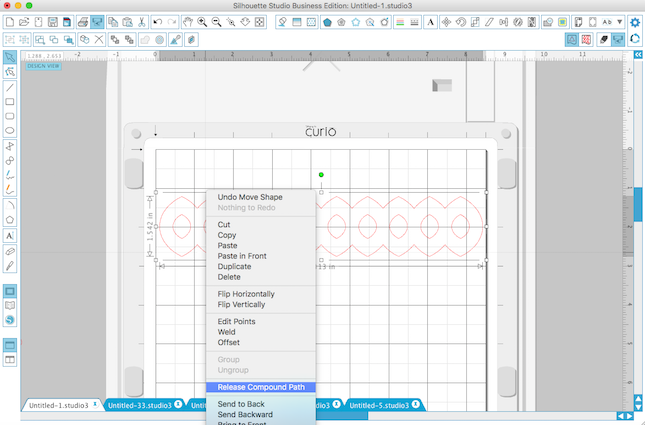
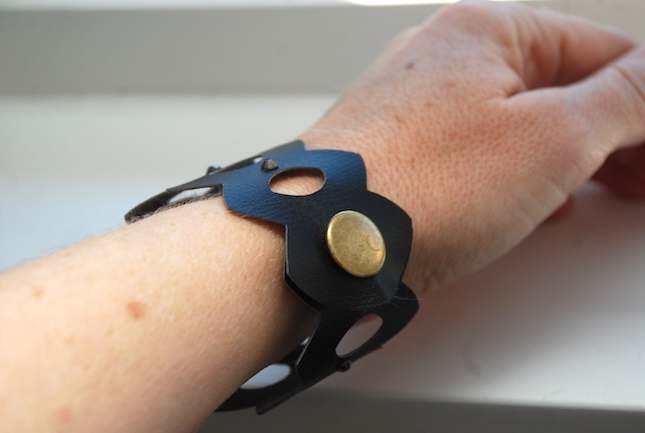
In order for me to add some metal snaps for closure of the cuff, I needed to change the design a little bit.
So I clicked Release Compound Path—this lets me click on individual parts of the design.
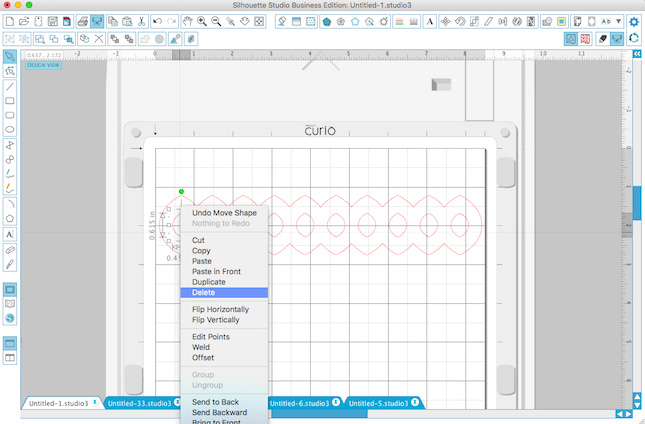
Then I clicked on the circles at each end of the design and deleted them.
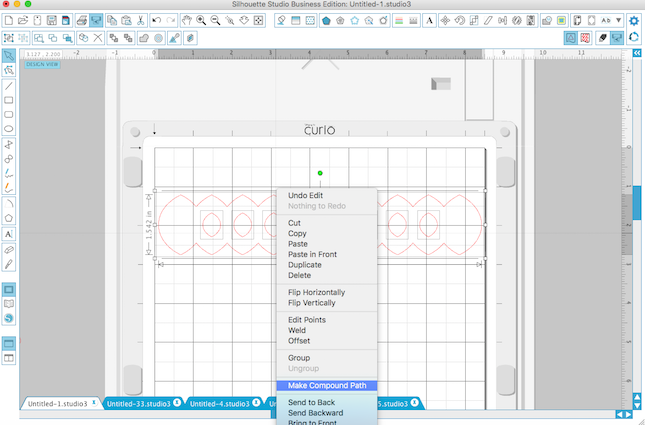
Once they were deleted, I clicked on Make Compound Path.
STEP THREE: CUT DESIGN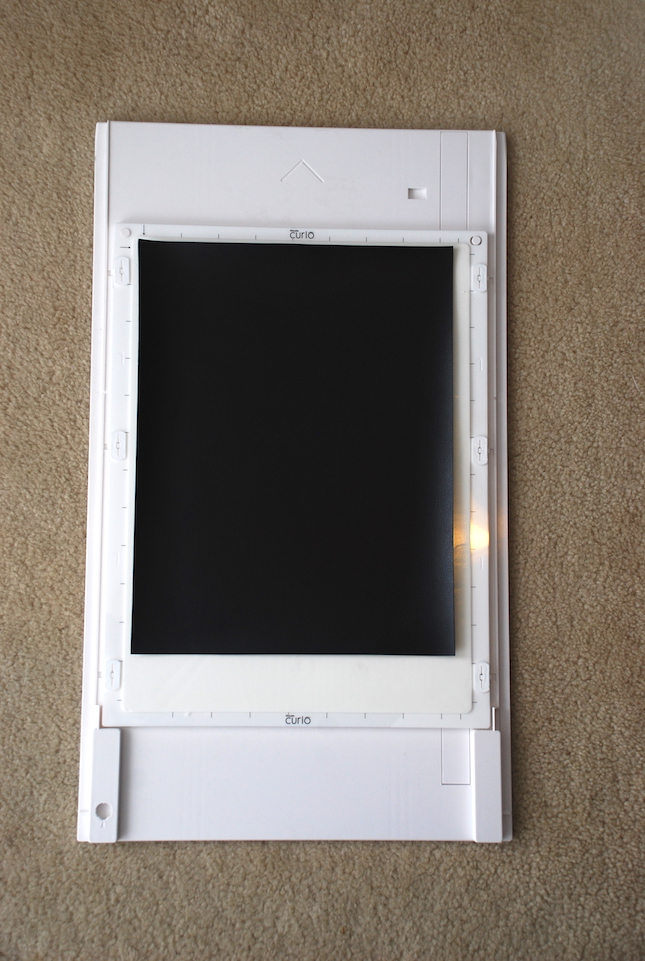
Now is the fun part! I placed the black leatherette sheet onto the mat and stacked the various plates together (following the set up shown in Silhouette Software).
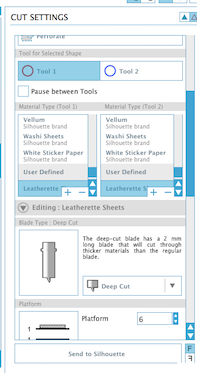
I used the Deep Cut Blade, at a setting of 20, speed of 3 and thickness of 33 mm. I also made sure to click on the Double Cut box just to make sure it cut through nicely.
STEP FOUR: ADDING SOME BLING!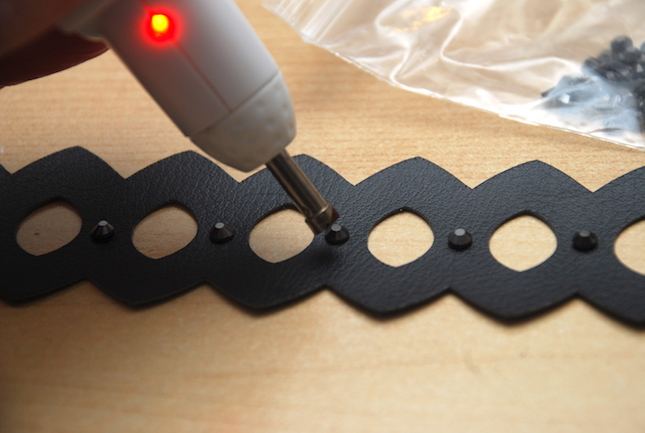
Once the cuff was cut out, I decided to add some black rhinestones with the rhinestone setter.
Then I added a brass colored snap enclosure and voila! My new cuff was made!!
I had so much fun making these that I decided to make a couple more using the other colors of leatherette sheets.
I used my wood burning tool to gently emboss/melt a chevron design into the leatherette and then adhered some teal colored rhinestones.

Thanks for stopping by! I hope that I’ve inspired you try something fun like making your own jewelry items. The possibilities with this beautiful Silhouette Leatherette are endless and my mind just can’t stop thinking of ideas!

Kelly Wayment
June 28, 2024
You can use it with vinyl as long as it is smooth and flat to allow the static charge to hold on to it. Rolled vinyl that wants to go back to its rolled shape will not necessarily work well, and it would need to be trimmed to fit the ES mat cutting area.
Kelly Wayment
June 28, 2024
Yes, you can use the heat pen while using the ES mat. 🙂
Yurii
March 2, 2024
Hello. May it be used with heat pen?
Thanks
Jerome
February 24, 2024
Hi, works this with the normal vinyl foils or only with printer papter etc?
Kelly Wayment
February 16, 2024
Once you’ve pushed the mat up against the rollers, just press the “Load” arrow button (bottom right on the display). Does a regular sticky mat load into the machine for you?
Michelle a goodall
January 24, 2024
Hello! I just got my new electrostatic mat and have watched every video i can find on it. However, what i can t find is why it wont feed into my cameo 5/ it slides right up the rollers but wont go any further. and yes- iam pushing the into button. help!