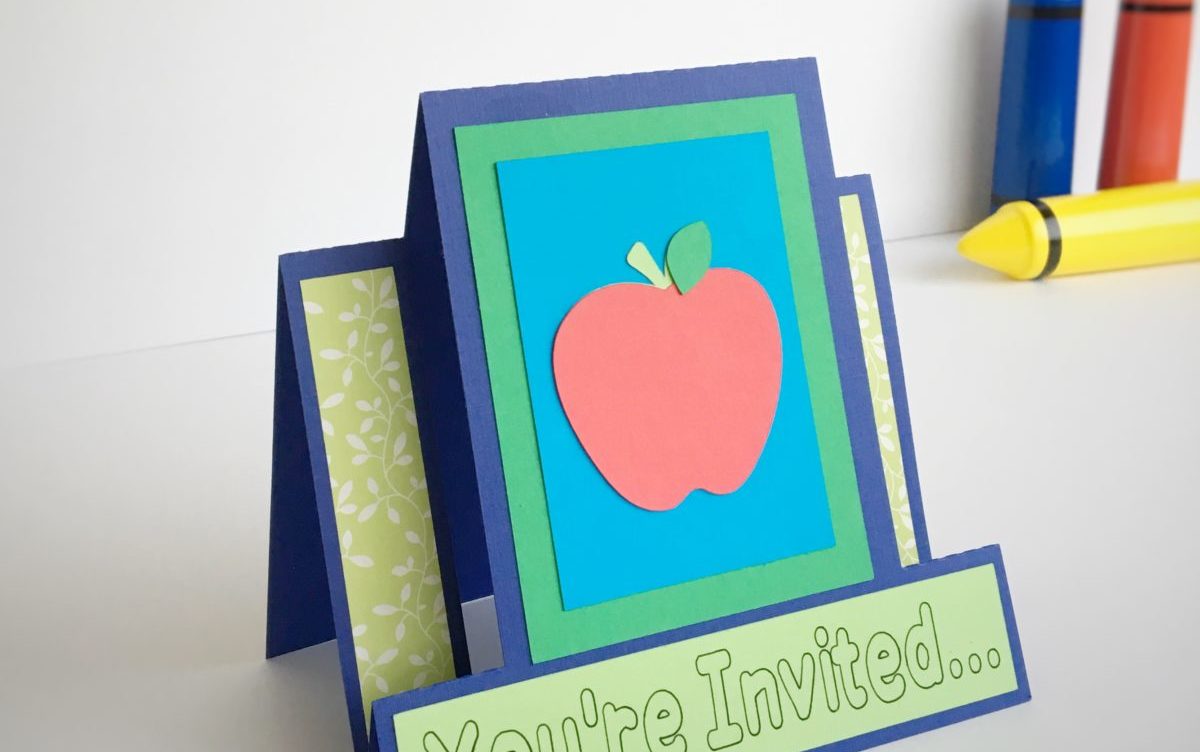
You know it’s that time of year again when you see store shelves stocked with notebooks, folders, and pencils! It’s time to send the kids back to school. At my house, we’re always looking for a reason to throw a themed party and “Back to School” fits the bill! This is a great opportunity to let your kids reconnect with their school friends and get them excited about another year of learning. The first step to throwing a party, invitations! This tutorial will get you started.
Supplies Needed:
· Silhouette Studio®
· Silhouette CAMEO® or Portrait®
· Silhouette Adhesive Cardstock (optional)
· Design #64598
· Back to School Font, Design #89309
· Silhouette Sketch Pens
· Cardstock
· Glue
Step One: Open and Cut Your Design in Silhouette Studio®
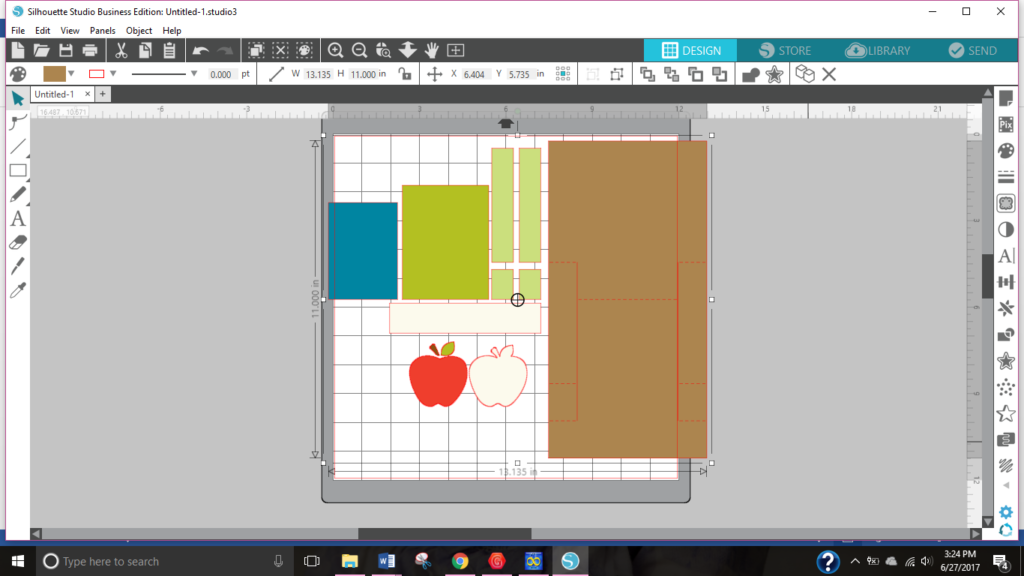
1. Download Design #64598 from the Silhouette Design Store and open it in Silhouette Studio®.
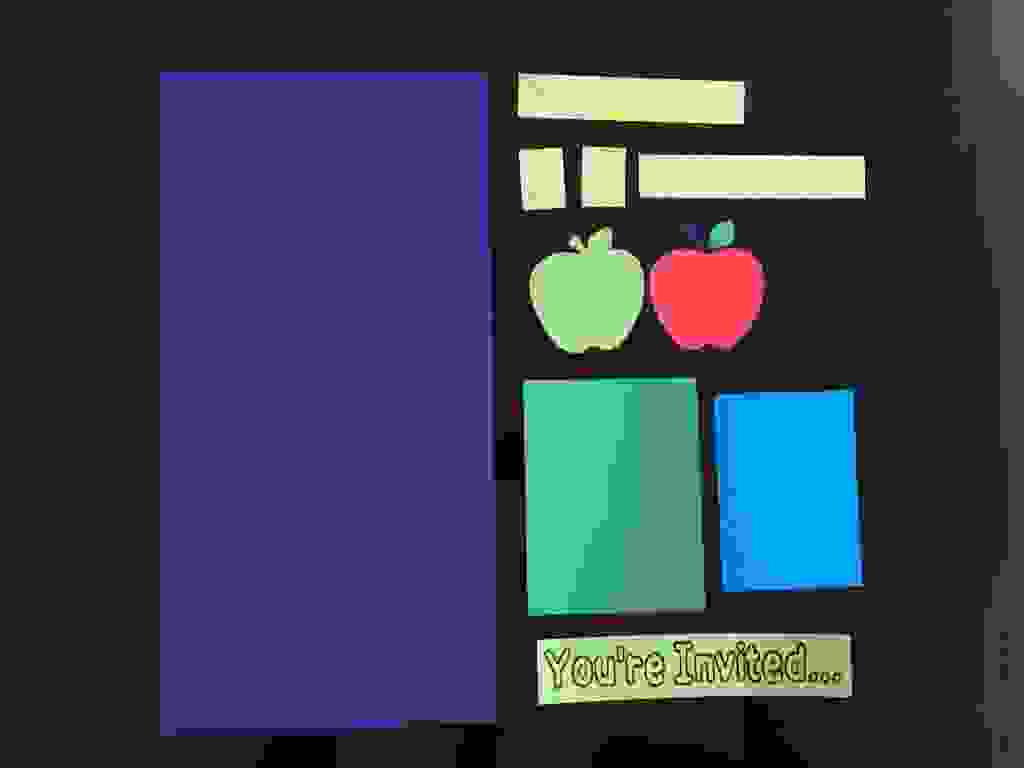
2. The design is color coded so you know which pieces should be cut from the same color.
3. Right click and “Ungroup” the design.
4. Place one part of the design on your cut page at a time.
5. Cut out each piece of the design on the color of your choice. Do not cut out the white rectangle yet.
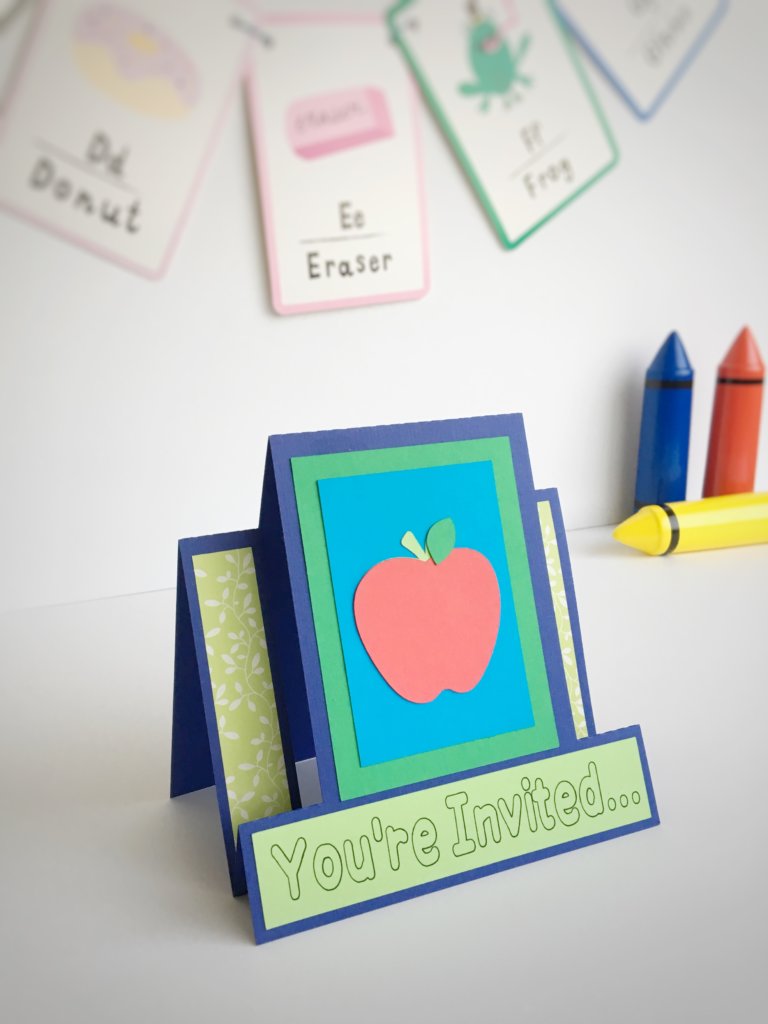
Step Two: Sketch and Cut “You’re Invited”
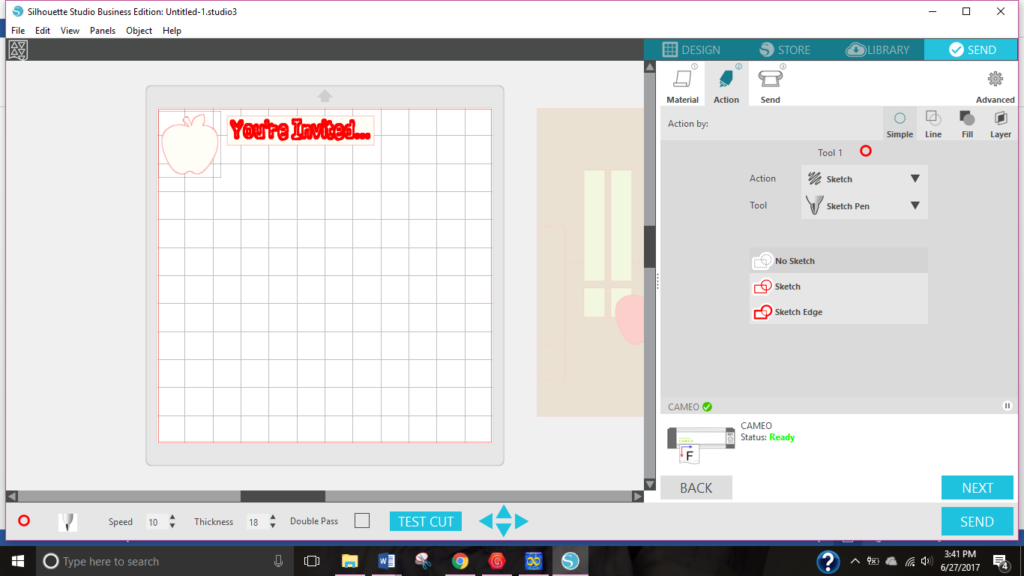
1. Using Font #89309, type “You’re Invited…”
2. Use the white rectangle as a reference of how big your words should be.
3. Open the “Send to Silhouette” page and select “Action”.
4. Make sure your words are selected, then change the drop down menu from “cut” to “sketch”. We don’t want to sketch the outside of the rectangle, so select the rectangle and choose “no sketch”. Place your sketch pen in place of the blade and click “send”!
5. After your sketch is completed, do not unload your cutting mat. Change the settings back to “cut”. Make sure to select “no cut” for the words this time. Replace the blade into your CAMEO® or Portrait® and click “send”.
Step Three: Glue Card Together
Putting this card together is easy as pie!
1. Fold on the perforated lines.
2. If you are using Silhouette Adhesive Cardstock, you just peel and stick the pieces together! If you are using regular cardstock, you could use rubber cement, glue dots or a glue stick to complete your invitation.
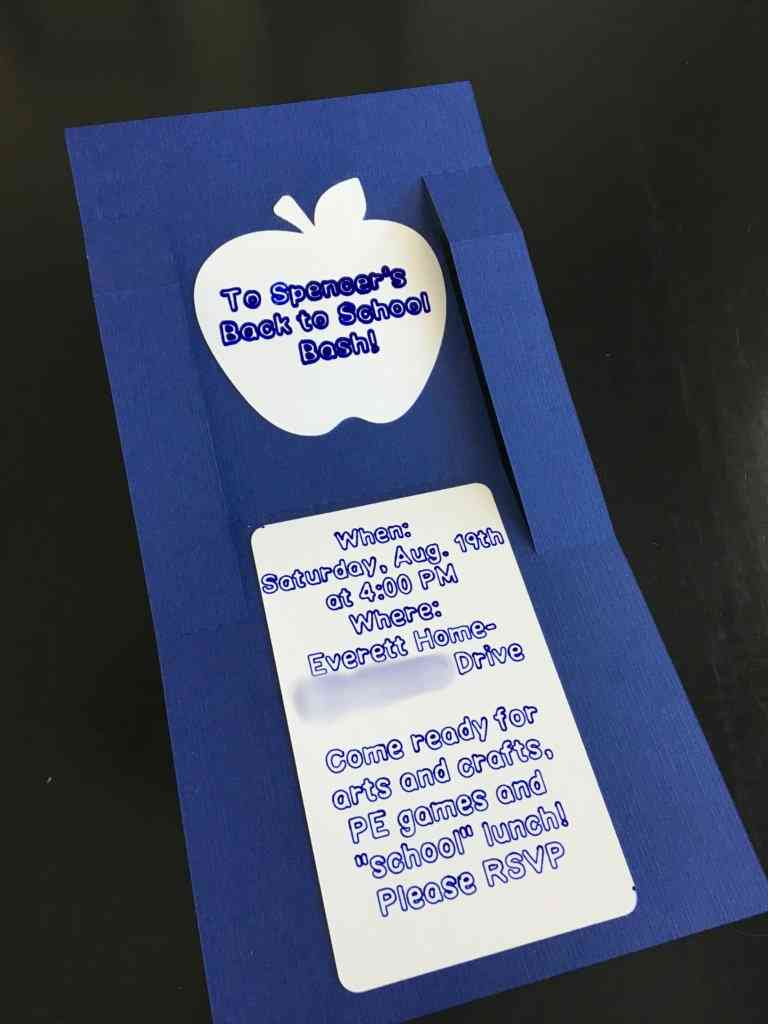
Step Four: Sketch and Cut the Inside Info

1. Using the text tool, type out what you want your invitation to say.
2. Use the original design to see how big to make your words so they will fit inside the invitation. I cut my words out in the shape of a rectangle and apple, you could find a fancy border or another shape to cut our your words!
3. Follow the directions from step two to use the sketch and cut feature.
4. Glue or stick the information into your invitation.
I was so pleased with how easily this invitation came together. The CAMEO® is so slick that you could whip out 15 invitations in no time! It was easy to put together, especially with the Silhouette Adhesive Cardstock! I hope you enjoy making it as much as I did.
Now, what “Back to School” decorations will you make for your party?
Kelly Wayment
June 28, 2024
You can use it with vinyl as long as it is smooth and flat to allow the static charge to hold on to it. Rolled vinyl that wants to go back to its rolled shape will not necessarily work well, and it would need to be trimmed to fit the ES mat cutting area.
Kelly Wayment
June 28, 2024
Yes, you can use the heat pen while using the ES mat. 🙂
Yurii
March 2, 2024
Hello. May it be used with heat pen?
Thanks
Jerome
February 24, 2024
Hi, works this with the normal vinyl foils or only with printer papter etc?
Kelly Wayment
February 16, 2024
Once you’ve pushed the mat up against the rollers, just press the “Load” arrow button (bottom right on the display). Does a regular sticky mat load into the machine for you?
Michelle a goodall
January 24, 2024
Hello! I just got my new electrostatic mat and have watched every video i can find on it. However, what i can t find is why it wont feed into my cameo 5/ it slides right up the rollers but wont go any further. and yes- iam pushing the into button. help!