
A week ago, we posted the first part of our tutorial about the 3D fall flowers bouquet and explained how to prepare the flower designs and cut them out. Today, we will continue with an explanation on how to shape and assemble the flowers and arrange them in a bouquet.
Let’s get started!
Supplies Needed:
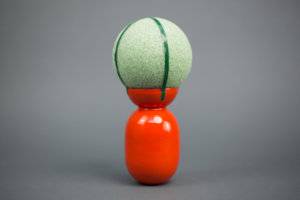
- Dry foam ball (color – green; diameter – 5 in.)
- Floral tape
- Super glue
- Vase
- Ribbon
- Tools to shape flowers and leaves:
- Silhouette Spatula Tool
- Wood skewer
- Flower-shaping tool
- Embossing mat
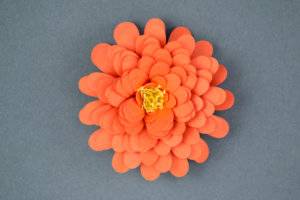
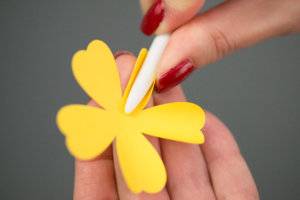
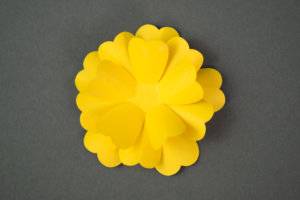
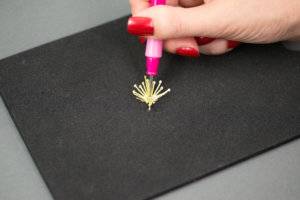
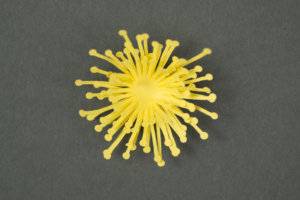
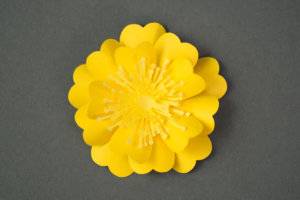
Step One: Assembling The Chrysanthemum
To shape the chrysanthemum:
1. Wrap the petal around the handle of the spatula tool and roll to create a crease.

2. With your fingers, bend the petals up.

To shape the chrysanthemum center:
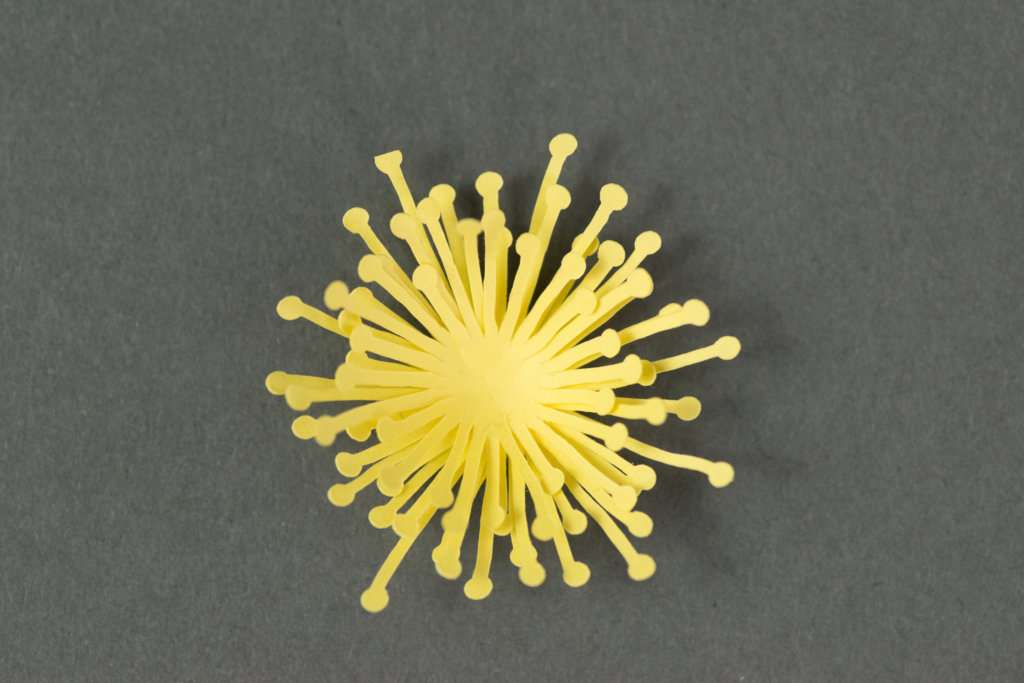
1. Using the wood skewer, curl the chrysanthemum center as shown below.

2. Glue the chrysanthemum layers together. Fit the smaller layer over the top of the larger layer; repeat this process with each layer of the chrysanthemum. Glue the flower center to the center of the flower.

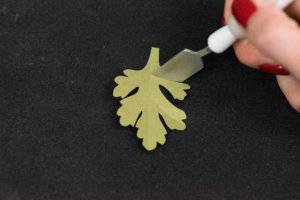
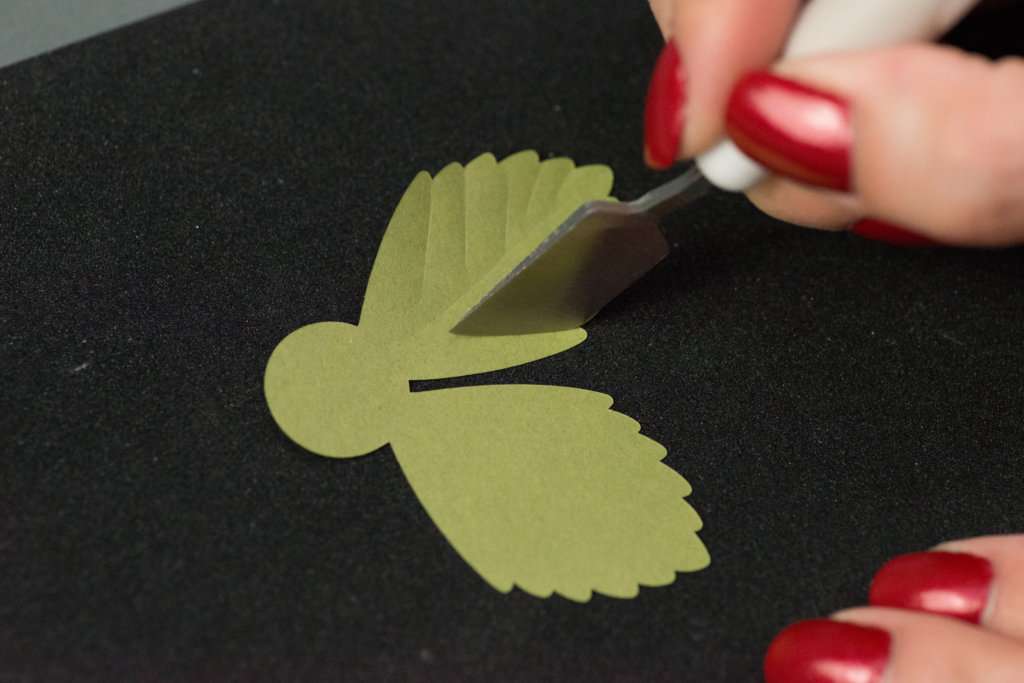
To shape the chrysanthemum leaf:
1. Place the green chrysanthemum leaf on the embossing mat. Using the spatula tool, add relief (or create a raised pattern) to the leaf as shown below.
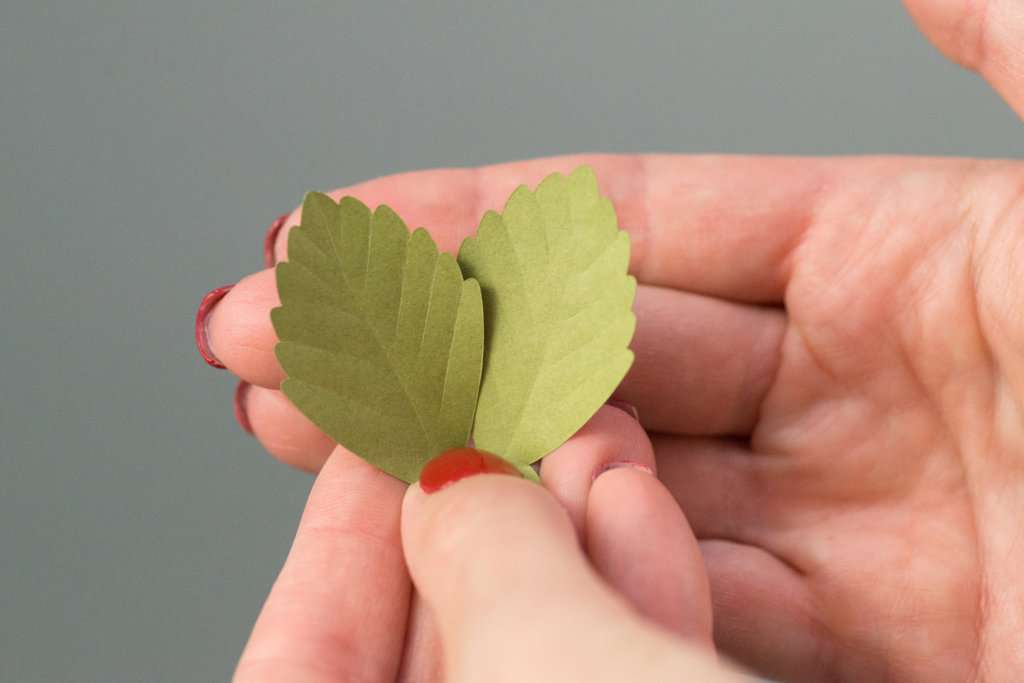
2. Glue leaves to the bottom of the flower. Take a piece of floral wire two inches long, bend the top, and glue it to the bottom of the flower using super glue.

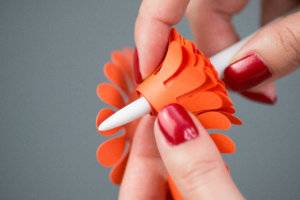
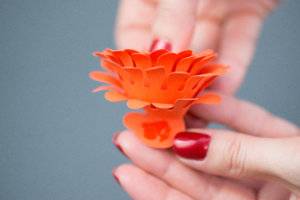
Step Two: Assembling The Aster
To shape the aster:
1. Using the handle of the Silhouette spatula, curl the aster petals as shown below.

2. Roll the flower on the spatula.
3. Remove the spatula and slightly loosen the flower. Put glue on the bottom circle of the flower and glue the rolled flower to the bottom piece.
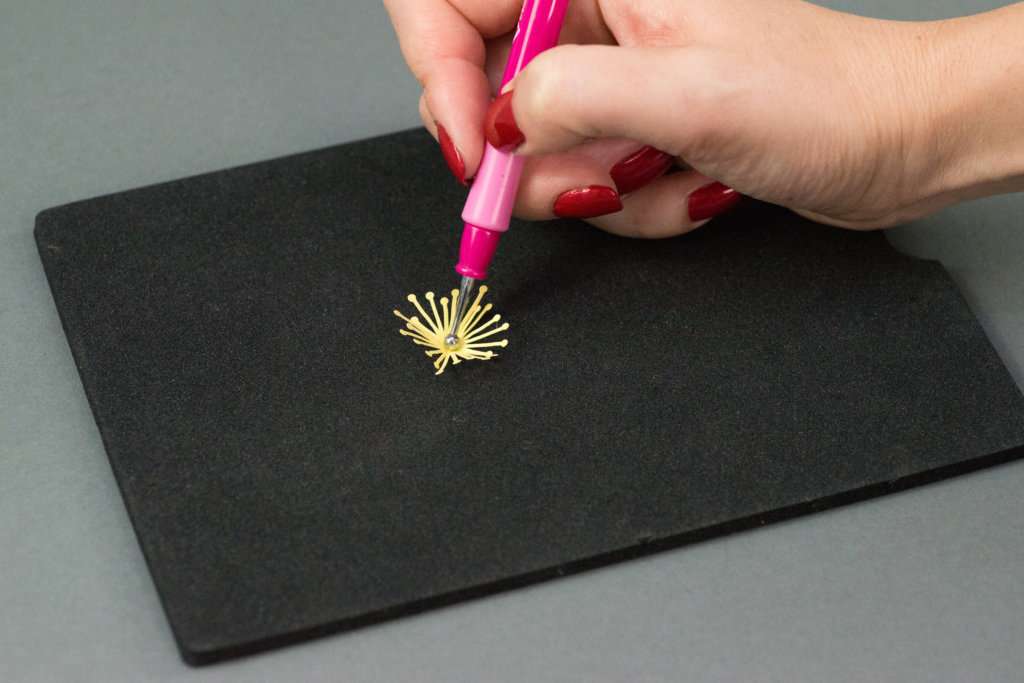
To shape aster center:
1. Place the aster center on the embossing mat, press in the middle with the shaping tool, and spin in circles until the center curls in.
2. Glue each layer of the flower center on top of each other and end with the smallest layer.
3. Glue the flower center to the center of the flower.
To shape the aster leaf:
1. Place the aster green leaf on the embossing mat. Using the spatula tool, add relief (or create a raised pattern) to the leaf as shown below.
2. With your fingers, bend the leaves up.
3. Glue leaves to the bottom of the flower. Take a piece of floral wire two inches long, bend the top, and glue it to the bottom of the flower using super glue.

Step Three: Assembling The Japanese Rose
To shape the rose:
1. Wrap the petal around the handle of the spatula tool and roll to create a crease.
2. Bend petals up as shown below and glue each layer of the flower on top of each other. End with the smallest layer on top.
To shape the rose center:
1. Place the rose center on the embossing mat, press in the middle with the shaping tool, and spin in circles until the center curls in.
2. Glue each layer of the flower center on top of each other and end with the smallest layer.
3. Glue the flower center to the center of the flower.
4. Take a piece of floral wire two inches long, bend the top, and glue it to the bottom of the flower.
Step Four: Arranging The Flowers In A Bouquet
1. Tape the dry foam ball to a vase using floral tape.
2. Arrange the flowers around the dry foam ball in a desired pattern and poke the wires into the ball.

3. Tie a ribbon in a bow around the vase.

Congratulations on finishing your bouquet! Enjoy it as a decoration for your home or give it as a gift to friends or family.
Kelly Wayment
June 28, 2024
You can use it with vinyl as long as it is smooth and flat to allow the static charge to hold on to it. Rolled vinyl that wants to go back to its rolled shape will not necessarily work well, and it would need to be trimmed to fit the ES mat cutting area.
Kelly Wayment
June 28, 2024
Yes, you can use the heat pen while using the ES mat. 🙂
Yurii
March 2, 2024
Hello. May it be used with heat pen?
Thanks
Jerome
February 24, 2024
Hi, works this with the normal vinyl foils or only with printer papter etc?
Kelly Wayment
February 16, 2024
Once you’ve pushed the mat up against the rollers, just press the “Load” arrow button (bottom right on the display). Does a regular sticky mat load into the machine for you?
Michelle a goodall
January 24, 2024
Hello! I just got my new electrostatic mat and have watched every video i can find on it. However, what i can t find is why it wont feed into my cameo 5/ it slides right up the rollers but wont go any further. and yes- iam pushing the into button. help!