Hello fellow crafters! Audrey here today and I’m so excited to be posting for my VERY first time here on the Silhouette Blog.
Let me guess, you’ve used heat transfer material before to create onesies for your littles, a tote bag, or maybe an adult t-shirt with some kind of custom text, am I right? Well if you’ve limited yourself to just fabric surfaces for your heat transfer material, boy are you missing out! Heat transfer material is much more versatile than you might think. Hopefully after this post you’ll get creative and try at least one new surface listed here and really up your crafting game!
1. Wood
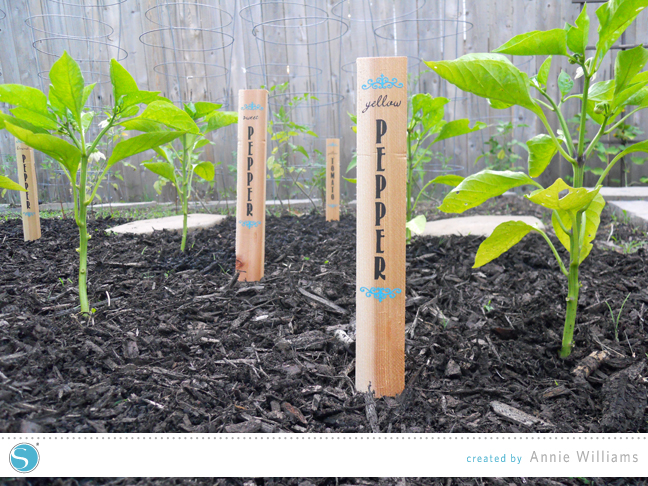
Yeah, you read that right, WOOD! Wood provides a great surface for heat transfer because it’s often flat, hard, and can take the heat! Not to mention it’s probably my favorite surface to use because the heat transfer material forms to the wood’s texture without looking like plastic. And in case you’re thinking about going and tagging all of the trees in your backyard, let me give you a little more direction: coasters, blocks, wooden crates, picture frames, wood signs, chairs, and on and on and on… Like on custom made gardening sticks!
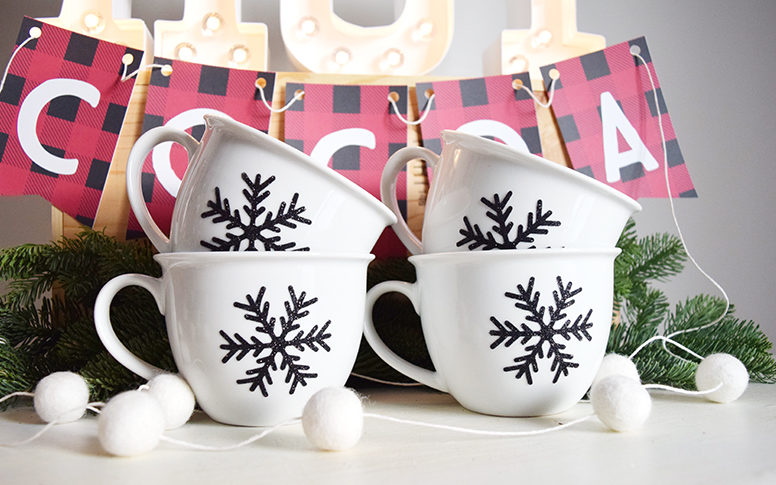
2. Mugs
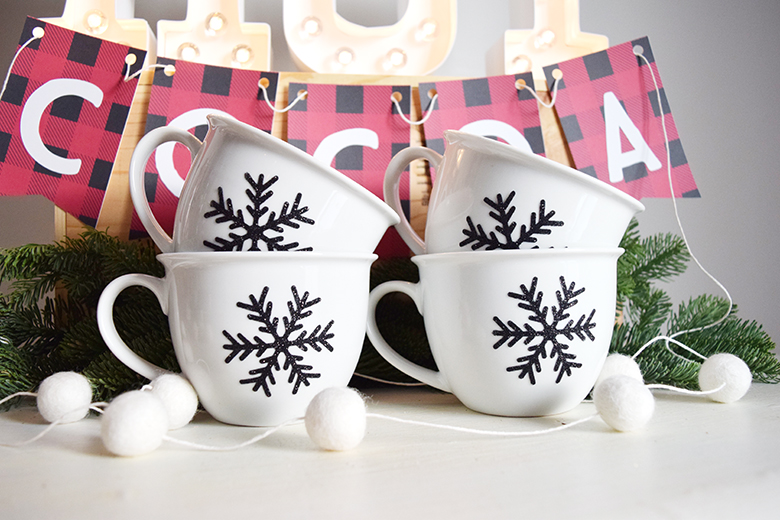
Imagine a set of custom Christmas mugs for your whole family, or an adorable mug for your kid’s teacher that has her name on it, all made with HEAT TRANSFER MATERIAL! I mean, talk about an inexpensive gift in minutes! Here’s some eye candy from Felicity Jane to help you get inspired.
3. Flip Flops
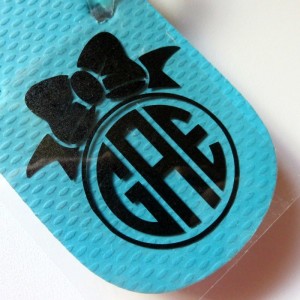
What?!?! Yeah. I just blew your mind, didn’t I? Apologize to your husband on my behalf for enabling your flip-flop-buying addiction even more. (Because you know you already bought five new pairs this season at Old Navy . . .)
The thing to be careful with flip flops is obviously monitoring the heat very carefully, starting at a very low temperature and working your way up as needed. Also, flip flops with less texture tend to work better so look for ones with a nice smooth surface.
4. Books/Paper
So I know you’re probably wondering why you’d ever use heat transfer material on books or paper projects . . . but that’s why I’m here friends!
These are great surfaces because they’re easy to adhere to and won’t melt (although they can burn, so as with any project, test your heat setting in an inconspicuous place first—because the last thing my career needs is a bunch of crafters going around telling people I taught them how to burn books!)
I often find myself wanting to customize notebooks, cookbooks, and even recover old books and make them look new. Choosing heat transfer as your material for these projects is perfect because it’s so easy to work with and you get to skip all of the glue, mod podge, and spray adhesive—which to me, makes it totally worth trying!
Less mess and clean up means more playtime for this mama!
5. Ribbon
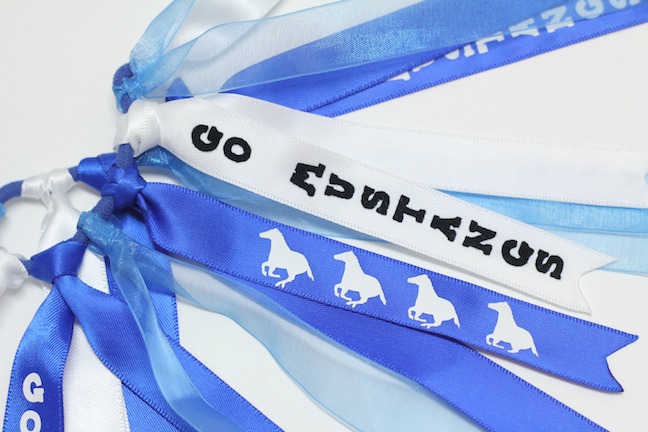
Summer is fast approaching which means you might be spending a good portion of your time sitting in the stands or bleachers cheering on your kids at their soccer, baseball, fastpitch, (fill in the blank) games. And you both need some custom, game-day ribbons to show your team spirit!
Or, think custom ribbon for wrapping gifts: buy some cheap, plain ribbon that you find in some clearance bin and make it a party-stopper piece with a custom design or message!
6. Bonus Surface—Fabric!
I know, I know, this post is supposed to be about unexpected surfaces for heat transfer material, but I’m adding this bonus section because you’re probably thinking of fabric uses too narrowly as well!
Don’t forget that shoes, backpacks, strollers, curtains, lampshades, cloth napkins, table runners, rugs, toiletry travel bags, luggage, sewn quiet books, beach towels, fabric-covered ice chests, and insulated lunch bags are all fabric surfaces too!
You don’t have to get stuck making just onesies and shirts with all of your awesome heat transfer (although don’t stop making those, either!). But the next time you’re walking through Target, or Ross, or a yard sale, ask yourself, “Could I use heat transfer material on that?”
And you’ll be surprised what you walk away with!
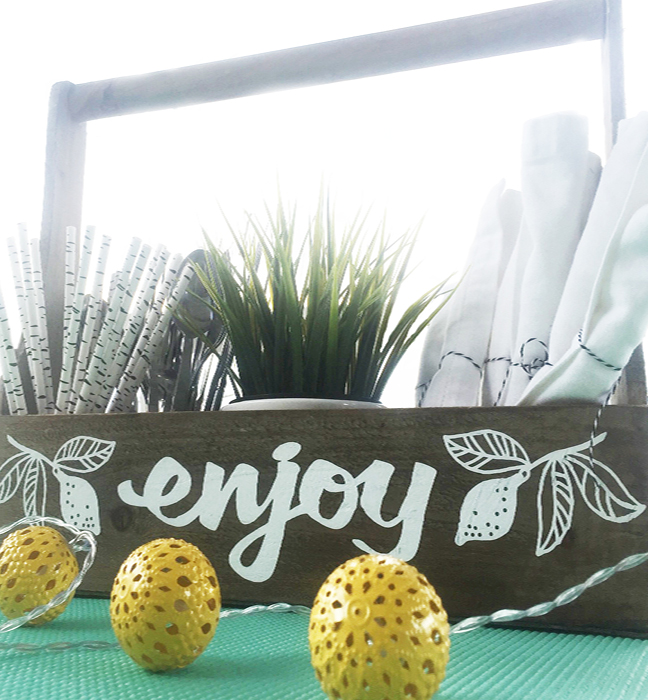
DINING CADDY TUTORIAL

Now here’s a quick tutorial on how I used heat transfer material on wood to create this adorable dining caddy—which I plan to use now that it’s heating up and we’ll be eating out on the deck a lot more!
Here’s what I used:
- Silhouette CAMEO®
- Smooth heat transfer material (white)
- Iron
- Paper cutter
- Scissors
- Wood caddy
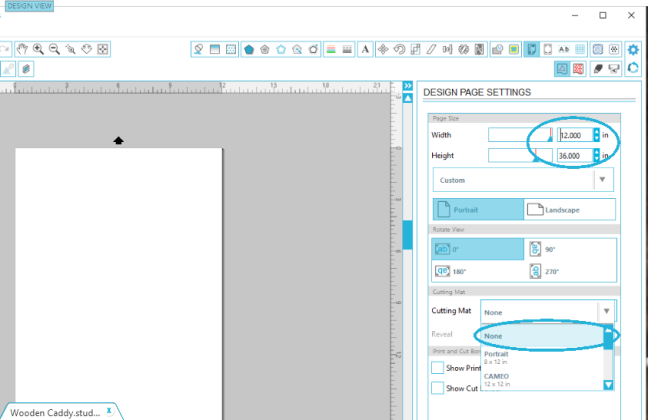
Step One: Set Up and Edit in Silhouette Studio®
To set up your page for the smooth heat transfer:
(1) Adjust page settings to 12 in. x 36 in.
(2) Change the “Cutting Mat” settings to “None,” since heat transfer material can be fed directly into your CAMEO with no mat.
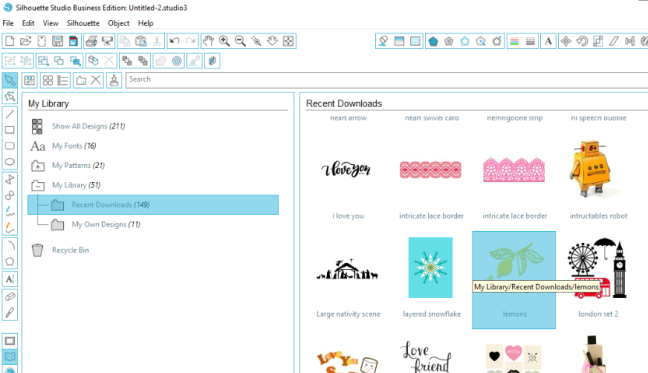
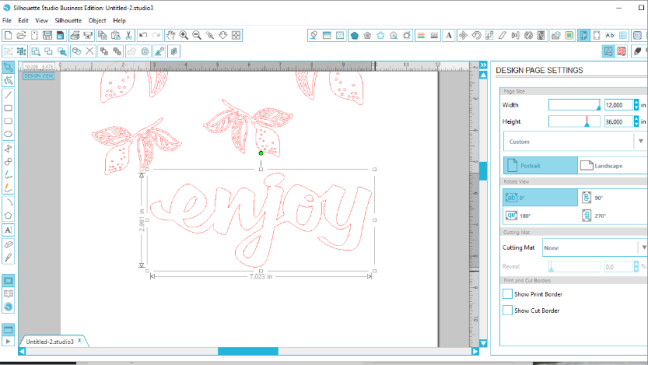
I knew I wanted something simple and clean but also a little summery, so I selected this “Lemons” design from the Silhouette Design Store (Design ID #90141).
To edit the design in Silhouette Studio®:
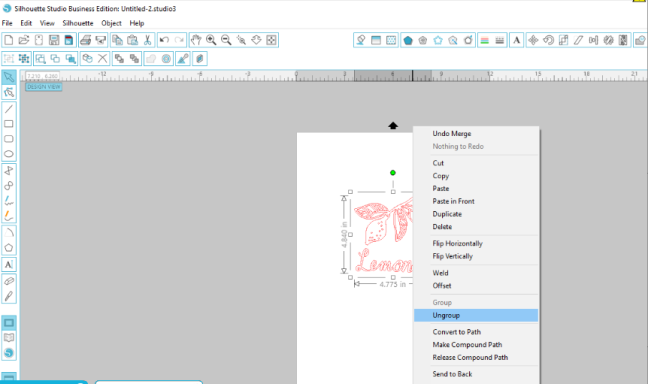
(1) Double-click the design to open it in your workspace.
(2) Right-click the design and ungroup so you have only the lemon branch on your page.
(3) Delete the text.
(4) Size the lemon branch to about 4 in. x 2.5 in. by dragging the corner of the design.
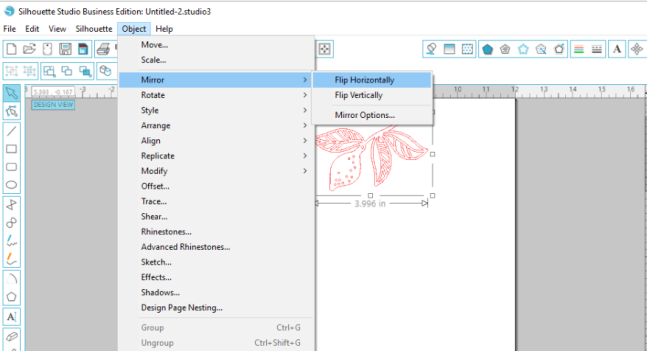
(5) Duplicate the branch (“Replicate Window > Duplicate Right”).

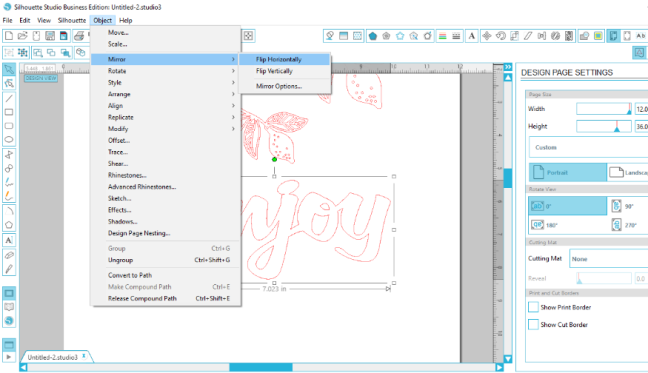
(6) Mirror the duplicate horizontally (“Object > Mirror > Flip Horizontally”).
I now had two branches to flank the phrase I would put in the middle but I also wanted a smaller version that I could place on the sides of my wooden caddy.
To add more branches:
(1) Select two branches.
(2) Duplicate branches.
(2) Resize duplicates.

In total I created four lemon branches; two large lemon branches and two small ones.
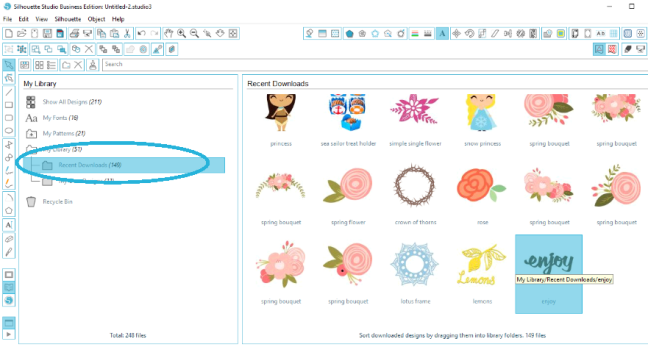
Instead of using a font, I purchased the word “enjoy” from the Silhouette Design Store. I liked the font and the fact that the dot over the “j” was already connected to the word (and not a loose dot I’d have to keep track of while weeding my piece later).
To use the design, repeat the process for editing designs in Silhouette Studio® (mentioned above).
And instead of sizing for the branch design, I dragged the corners of the “enjoy” design and sized it to be about 7 in. x 3 in. to span a good portion of the wood caddy.
***At this point it’s VERY IMPORTANT that you mirror your text because you will have to cut it out backwards in order to iron it on properly.
To mirror your text:
(1) Select your text.
(2) Flip horizontally (“Object > Mirror > Flip Horizontally”).
NOTE: I don’t need to do this for my lemon branches because I already have one facing in each direction so there’s no “wrong direction” to be facing in this case.
Step Two: Adjust Cut Settings (and CAMEO Rollers)
In the Cut Settings panel:
(1) Select all objects on the page.
(2) Choose “Cut Edge.
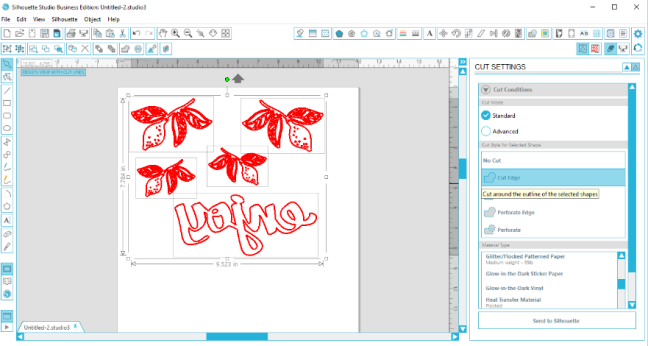
(3) Select “Heat Transfer Material Smooth” from the “Material Type” options.
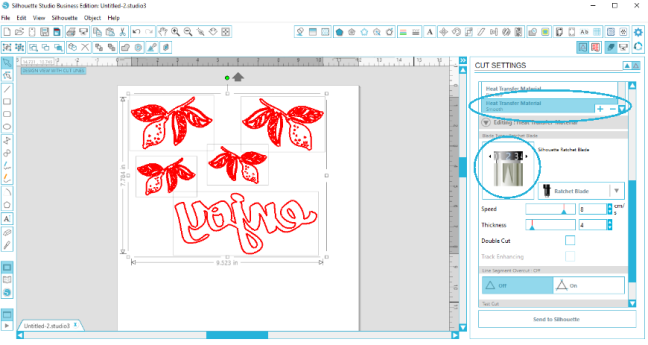
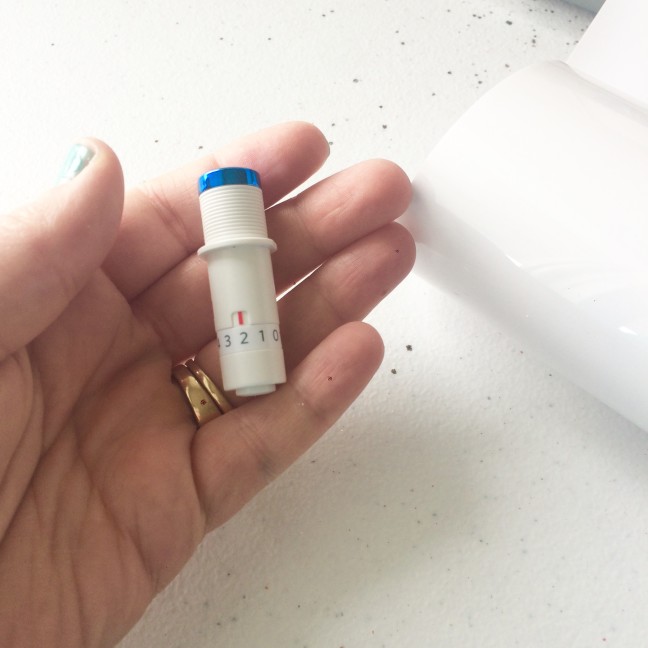
By double clicking on my material type, I can see that I need my blade set at a two and I can leave all of the other default setting as they are.
Because I’m using 9-inch heat transfer with my CAMEO, I have to move the right roller in to the next setting in order for the rollers to be able to grab my heat transfer. (If you are using a Portrait or 12-inch heat transfer vinyl, you can skip this part and move right on to loading your Silhouette.)
To adjust your CAMEO rollers for 9-inch media:
(1) Lower the blue lever on your CAMEO to raise the metal bar.
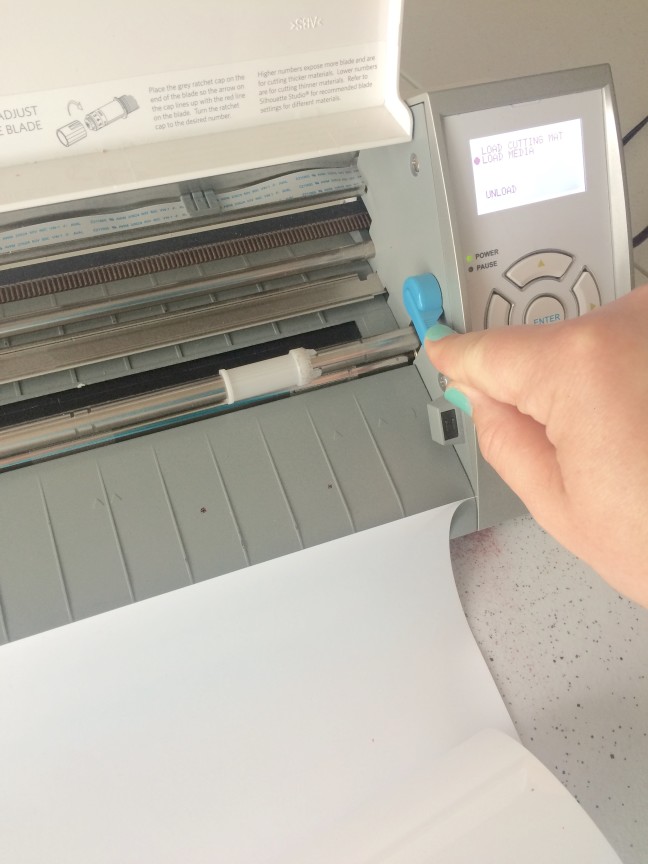
(2) Rotate the white roller.
(2) Slide the roller left until it clicks into place.
(3) Return the blue lever to its original position.
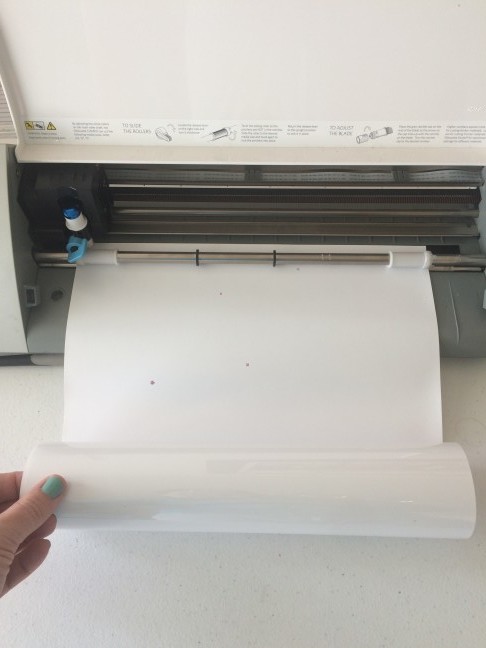
To correctly load your heat transfer material:
(1) Feed heat transfer into your Silhouette, glossy side facing down.
(2) Choose the “Load Media” option (NOT “Load Mat”).
You are now ready to “Send to Silhouette” (from Silhouette Studio®) and let the magic happen!
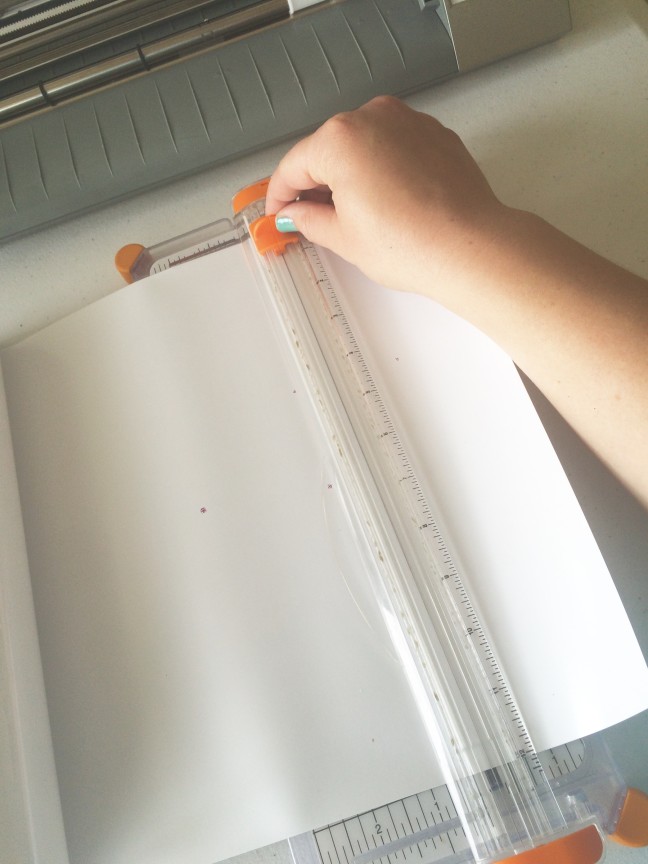
Step Three: Trim, Weed, and Prep
After it’s done cutting and I unload my design, I want to make it easier to work with by trimming it down. I do this so that I’m only working with the part of the material that has my design on it.
Using your hook tool:
(1) Weed out all of the negative space, leaving the word and lemon branches on the backing.
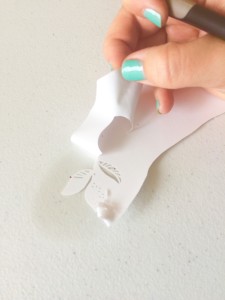
(2) Remove everything else around them.

Silhouette Pro Confession: In the past, I never used the Hook Tool and opted for a quilting pin to help me weed. And now I’m here to tell you that I got a hook and it was the BEST decision. This thing is worth every penny because it’s so much easier to hold and the angle of the Hook is ideal for weeding. So there’s my two cents—BUY THE HOOK!!!
After weeding the design:
(1) Cut five pieces of your design into smaller sections.
This will let you place the design wherever you want.
Step Four: Add Some Heat
Now for the ironing!
For this particular wood caddy:
(1) Set iron to the cotton setting and no steam.
(2) Iron directly onto the wood.
As I mentioned in my post already (like one hundred times), you should try to play around with your iron and the material you’re ironing to find the sweet spot for temperature. I tried to keep the iron from touching the wood directly, using the plastic covering on my heat transfer as a barrier. You can also use a press cloth if you prefer.
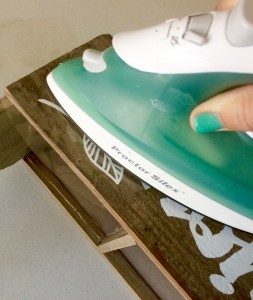

I used the tip of my iron to really press on my design, especially around the edges since my box was really rough and bumpy.
(3) Hold the iron on your design until you can peel up the plastic sheet without the design coming up with it.

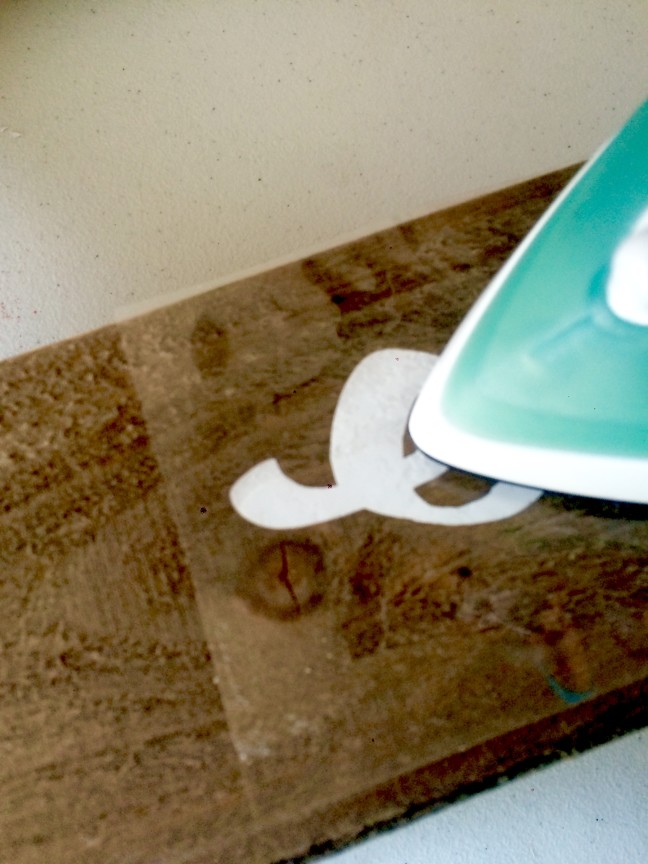
Repeat this procedure on all of your cut out designs and VOILA! Custom design on wood that looks so amazing.
I love the texture that comes through and the crisp white on this rustic caddy. It will be the perfect little accessory to our summer dinners on the deck!
Nasze Naturalne
September 3, 2025
Your authentic voice really shines through in everything you create and share
Naszenaturalne
September 2, 2025
Really love your style
Kelly Wayment
June 28, 2024
You can use it with vinyl as long as it is smooth and flat to allow the static charge to hold on to it. Rolled vinyl that wants to go back to its rolled shape will not necessarily work well, and it would need to be trimmed to fit the ES mat cutting area.
Kelly Wayment
June 28, 2024
Yes, you can use the heat pen while using the ES mat. 🙂
Yurii
March 2, 2024
Hello. May it be used with heat pen?
Thanks
Jerome
February 24, 2024
Hi, works this with the normal vinyl foils or only with printer papter etc?