Hi All, Happy New Year!
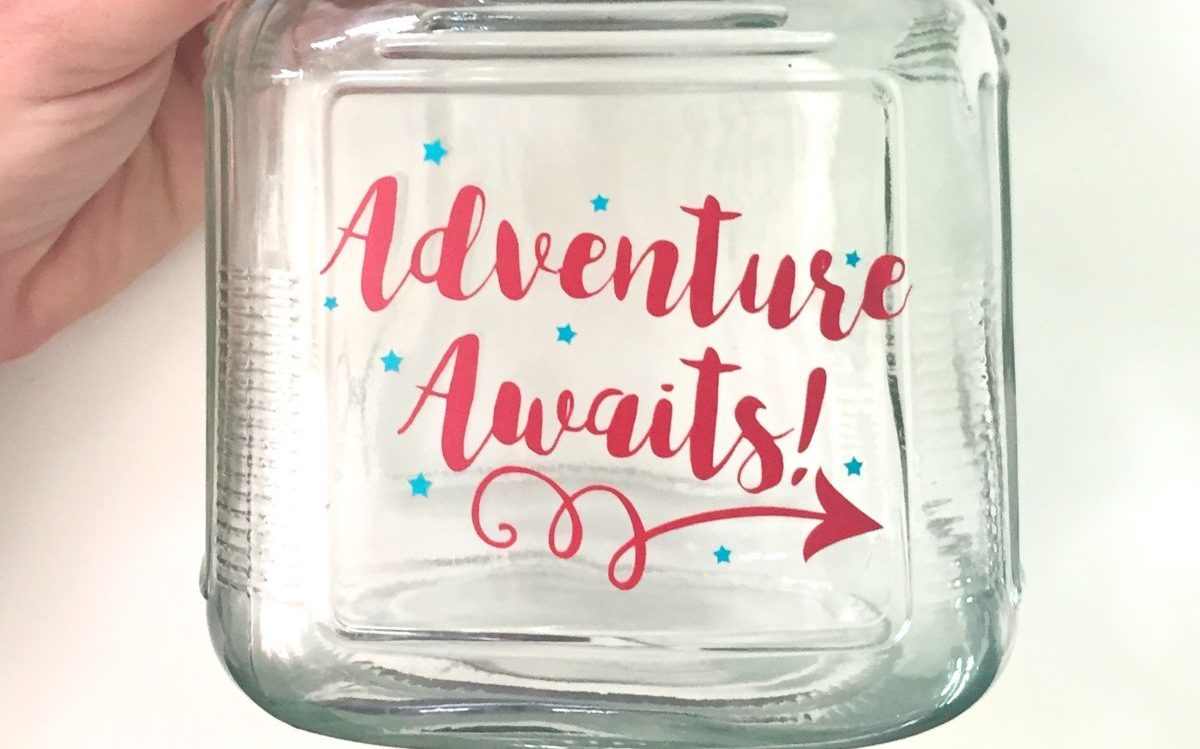
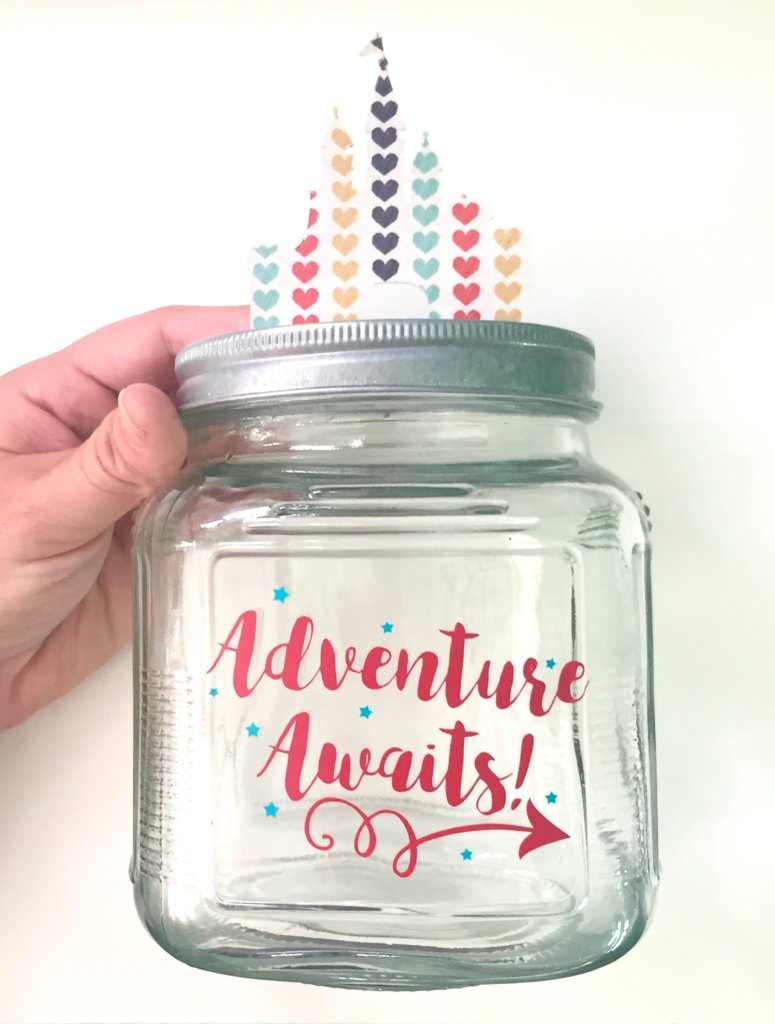
Emily here to show you how to make an adorable “Savings” Jar for any adventure you’re saving for this year. It certainly will make saving towards your goal a lot more fun!
Supplies Needed:
- Any glass or plastic Jar with Lid
- Silhouette Chipboard
- Silhouette Adhesive Washi Sheets
- Silhouette Vinyl
- Silhouette Transfer Paper
- Glue of your choice
- Silhouette Hook & Scraper
- Adventure Awaits (Design ID #144269)
- Castle (Design ID #80537) *Or any other design that fits with your jar’s theme!*
Step 1: Cut the Jar Topper
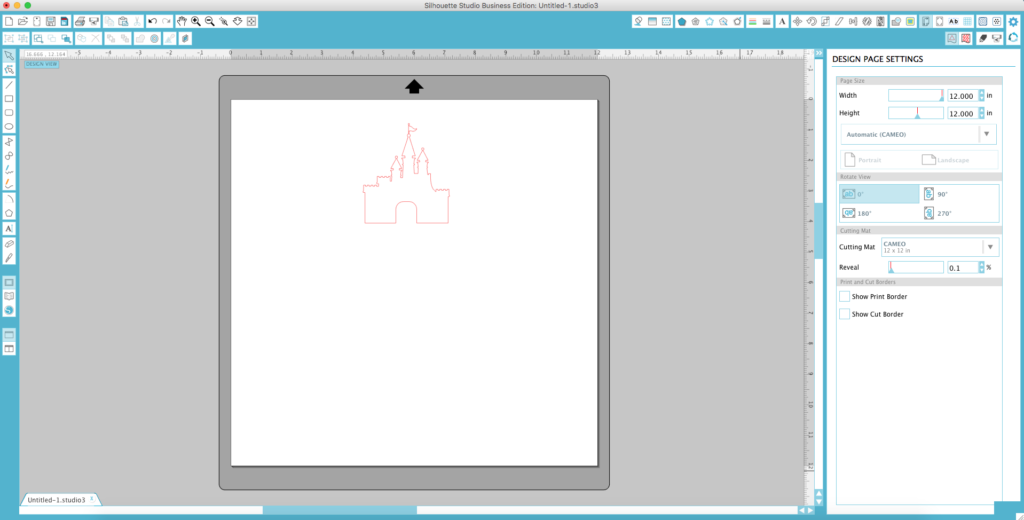
Open Silhouette Studio™.
In the Design Page Settings window select Automatic (CAMEO) and Cutting Mat (CAMEO 12 x 12 in.)
Open the Castle (Design ID #80537) and resize to fit atop your jar.
Place your chipboard sheet on a Silhouette Cutting Mat (if using a cutting mat that measures less than 12 in. wide trim the chipboard to fit your mat.)
Load the cutting mat and chipboard into the Silhouette CAMEO® 3.
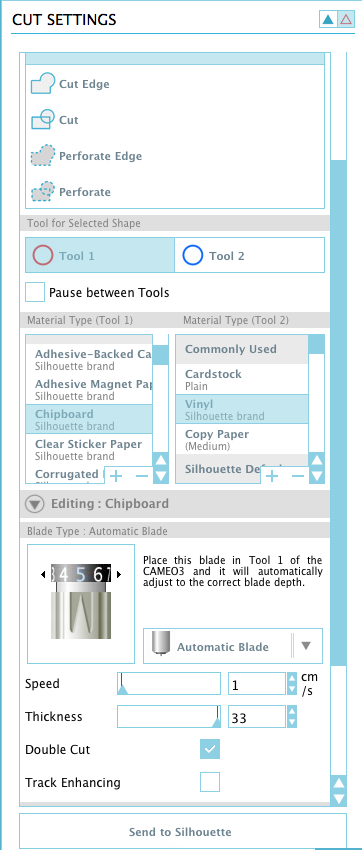
In the Material Type menu under “Tool 1” of the Cut Settings tab, select “Chipboard” and proceed to cut your design.
The awesome part about the CAMEO 3 is that you won’t need to change your blade depth manually. The CAMEO 3 will automatically adjust it to the correct blade depth. Just make sure in the Blade Type dropdown box you select “Automatic Blade.”
Set Chipboard aside.
Step 2: Cut Your Adhesive Washi Sheets
In the Design Page Settings window select Automatic (CAMEO) and Cutting Mat (None.)
Keep your Castle (Design ID #80537) open. Copy and paste the Castle.
With the second castle selected, select Object, Mirror, Flip Horizontally. This second castle will cover the back of your castle.

Load your Adhesive Washi Sheet into your CAMEO 3.
In the Material Type menu under “Tool 1” of the Cut Settings tab, select “Washi Sheets” and proceed to cut your design.
Again, the Silhouette CAMEO 3 will automatically adjust the blade depth for you. Even though you are using drastically different material for this cut you won’t have to worry if your blade is on the correct setting.
Set Washi aside.
Step 3: Cut Your Vinyl
In the Design Page Settings window select Automatic (CAMEO) and Cutting Mat (None.)
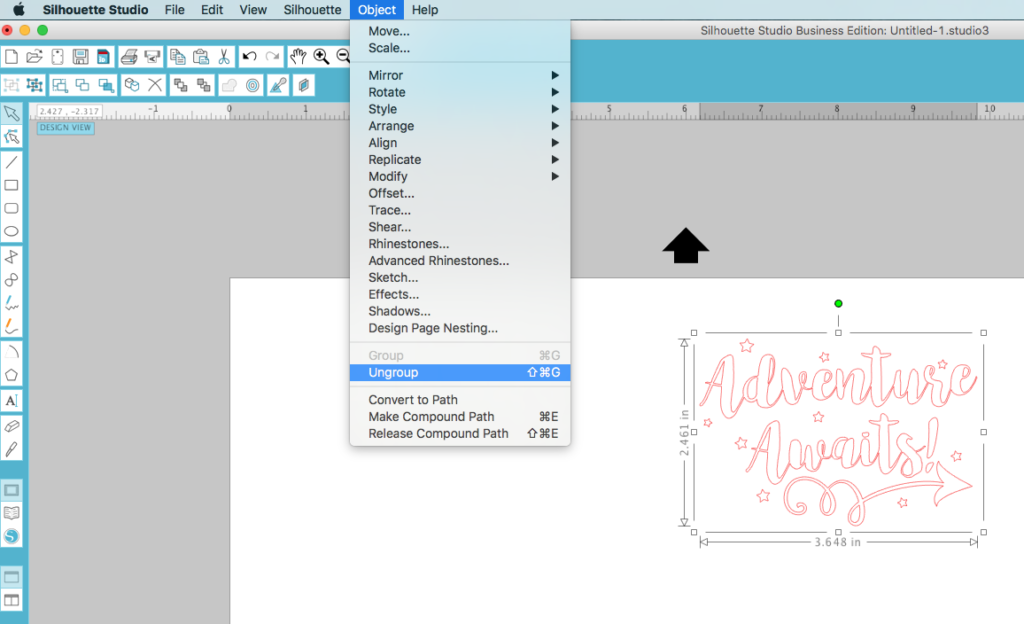
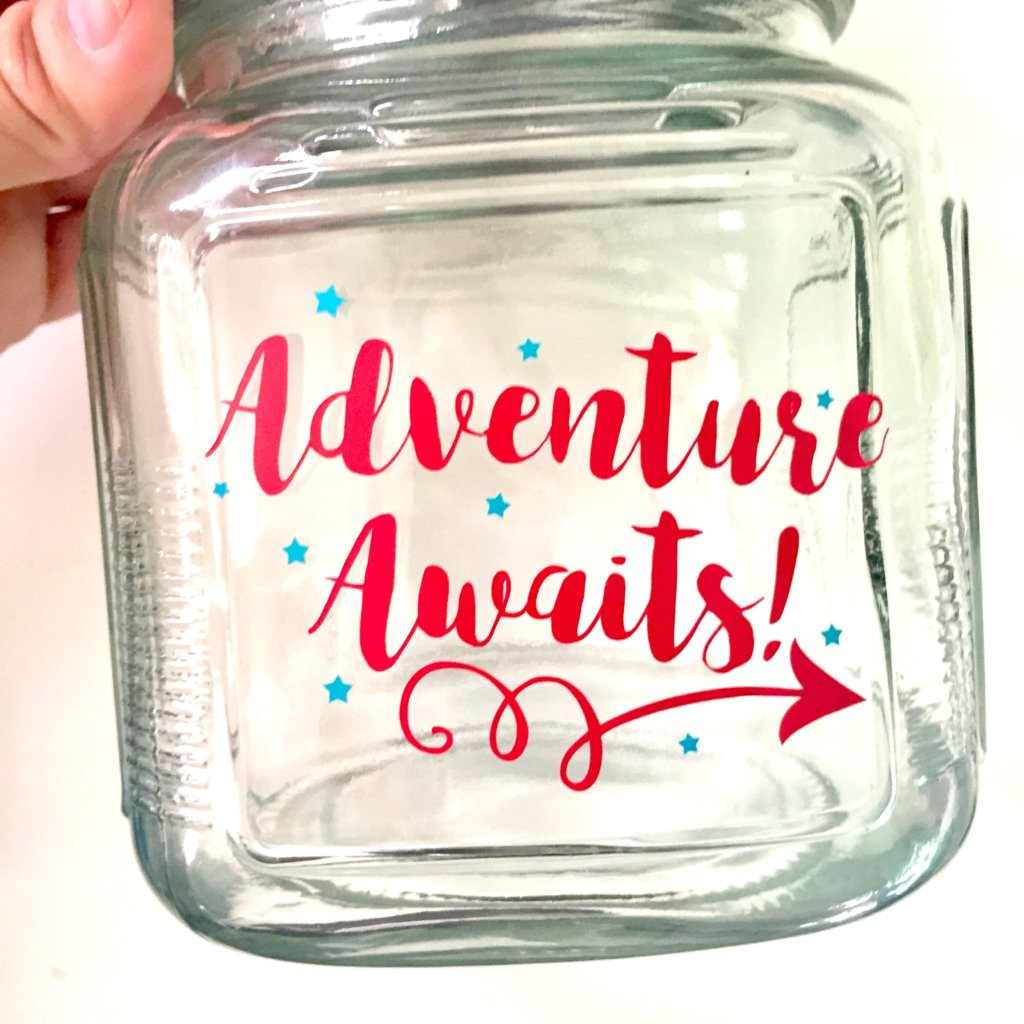
Open Adventure Awaits (Design ID #144269) and resize to fit the front of your jar.
If you’d like your vinyl design to be multiple colors, with your design selected, select Object, Ungroup. Separate the colors you’d like. In this case I wanted the words “Adventure Awaits” in red vinyl, and the stars surrounding in teal vinyl.
With your first color ready on the page, insert the first color of vinyl into your Silhouette CAMEO® 3.
In the Material Type menu under “Tool 1” of the Cut Settings tab, select “Vinyl” and proceed to cut your design.
The CAMEO 3 will work it’s magic again to automatically adjust your blade.
Step 4: Assemble
Now that you have all of your pieces cut, it’s time to assemble.
Peel the Washi from its backing and stick on the chipboard Castle, don’t forget to do the back too!
Weed and peel the negative from the vinyl using your Hook tool.
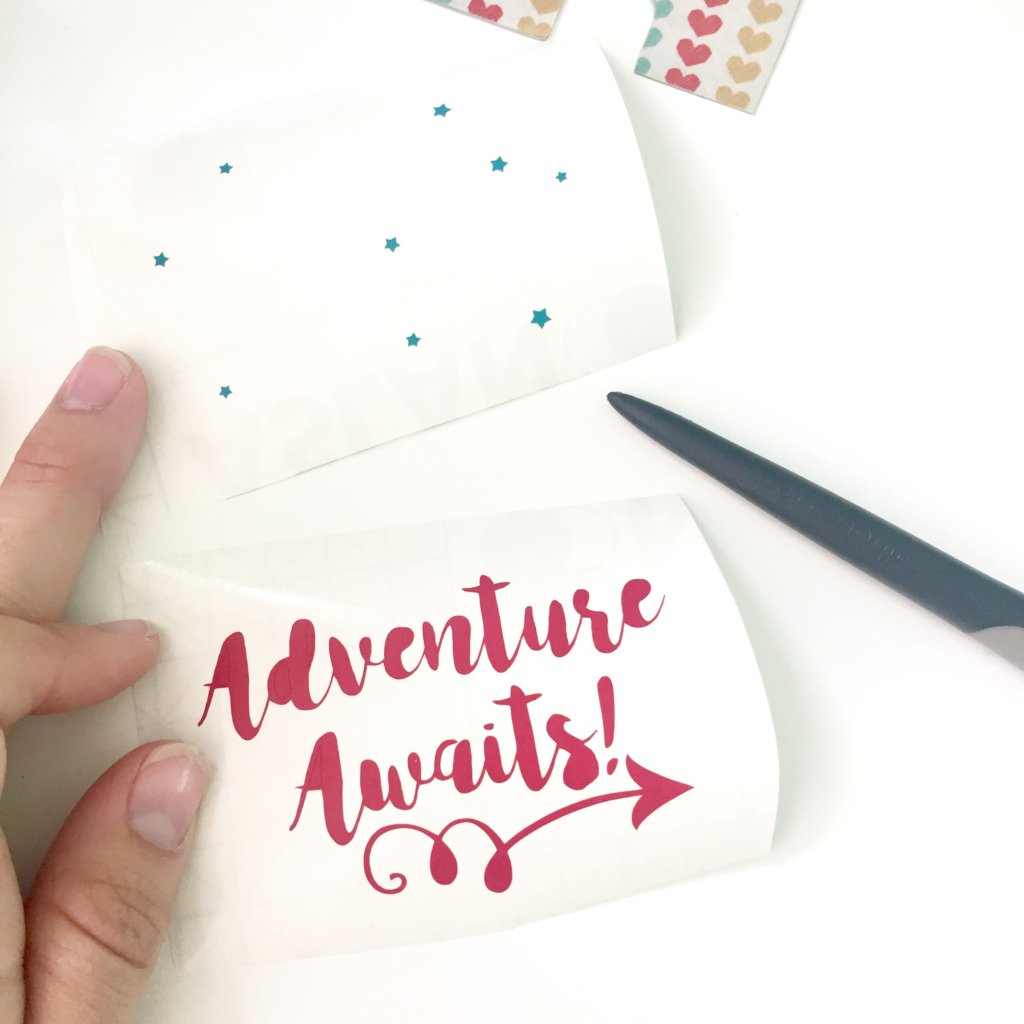
Apply the transfer tape to your vinyl and smooth with your Scraper tool. Peel off the vinyl backing and adhere to your jar. Smooth the vinyl onto your jar with your Scraper tool. Peel off the transfer tape. Repeat that process with your second colored vinyl.
Last, glue on your castle chipboard shape onto the lid of your jar.
Some other ideas to incorporate things you are saving for:
Tropical Vacation = Palm Tree topper, Blue & Green vinyl
Camping Trip = Bear topper, Brown & Green vinyl
What trip will you make a savings jar for?