Silhouette Studio® Mobile works in tandem with Silhouette Link™ to put our powerful Silhouette software in the palm of your hand. For help downloading and installing, check out our video here.
Logging In
Log into your account using your Silhouette login and password. Logging in will give you access to your designs in your Library, Silhouette Cloud, and, for non-iOS devices, the Silhouette Design Store.
Connecting your Machine, Mobile Device, and Computer
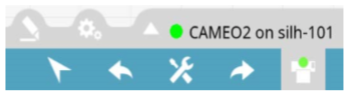
![]() The red dot on the cut icon at the bottom of the screen indicates there is not a machine attached and you will not be able to cut. Attach your Silhouette machine to your computer via the USB cable just like you would while using the desktop version of Silhouette Studio® on your computer. Then, check that your mobile device is wirelessly attached to Silhouette Link on your computer through your wireless network. The dot will turn green indicating you are ready to cut. You are still able to use the app to create designs and to browse the Design Store when your device isn’t attached to your network.
The red dot on the cut icon at the bottom of the screen indicates there is not a machine attached and you will not be able to cut. Attach your Silhouette machine to your computer via the USB cable just like you would while using the desktop version of Silhouette Studio® on your computer. Then, check that your mobile device is wirelessly attached to Silhouette Link on your computer through your wireless network. The dot will turn green indicating you are ready to cut. You are still able to use the app to create designs and to browse the Design Store when your device isn’t attached to your network.
Dual Screens
![]()
There are two screens in the Silhouette Mobile app. The home screen is the design screen, which looks similar to the design screen in the desktop version of Silhouette Studio®. To access the second screen, tap the Silhouette logo in the bottom corner. From this second screen you can access your Library, a collection of free designs, and, for non-iOS devices, the Silhouette Design Store. To return to the design screen, tap the Silhouette logo again.
Navigation
Zoom in and out by pinching screen. Swipe with two fingers in any direction to pan your work area.
Adjusting your Settings
![]() Adjust your settings by clicking the icon at the bottom right of the screen. A menu will appear with five options: Help, File, Page Settings, Options, and Exit.
Adjust your settings by clicking the icon at the bottom right of the screen. A menu will appear with five options: Help, File, Page Settings, Options, and Exit.
Help
File
File has the basic options to create a New Document and to Save or Save As your current document. Your saved files are placed in the User Designs folder within the Cloud.
Page Settings
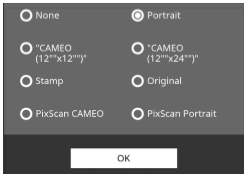
In the Page Size feature choose which size you want the page to appear on your screen. In Media Type choose which material you will be cutting with your Silhouette. In the last option, Cutting Mat, choose which cutting mat you are using.
Options
In the Options menu, change your preferred language, adjust your default settings, change user, and deregister your device.
Exit
This will take you completely out of the app.
Accessing your Library
Begin by accessing the second screen in the app by clicking the Silhouette logo.
It will open into a new page with two icons at the bottom: your Library and your Silhouette Cloud. For non-iOS devices, you will also find the Silhouette Design Store here. To access the Design Store on iOS devices, you will need to visit http://www.silhouettedesignstore.com/ via a Web Browsing application e.g. Safari.
![]()
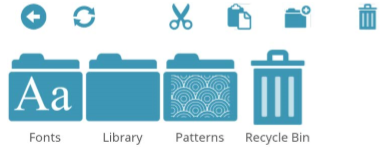
Your Library will have your recently downloaded items from the Silhouette Design Store.
Silhouette Cloud will have all of your saved files. You can also create new folders to keep your files sorted and you can cut, copy, delete files.
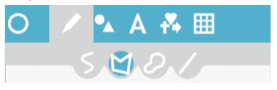
Using Tools Along the Top
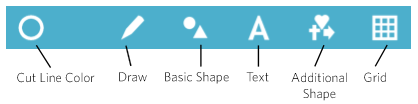
The tools along the top create lines, shapes, and text. Each icon opens into sub menu with additional options. Simply click the shape you would like and then tap and drag on to the design page. For Polygons and Curved Shapes, tap on to the document preview and then continue tapping at the points you wish your lines to be created. To finalize your design tap again in the Creation Origin circle. Stretch the shape with your fingers to make it your desired size.
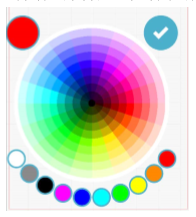
Cut Line Color
You can select which color to make your different cut lines.
Draw Tool
There are four options under the draw tool: Freehand, Polygon, Curved Shape, and Line.
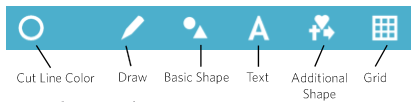
Basic Shape Tool
The shape options are the square, circle, hexagon, and star shapes.

Text Tool
Once you click in the design area, a keyboard will appear for you to type.
Additional Shape Tool
In the additional shape tool, select special shapes, arrows, banners, and speech bubbles.
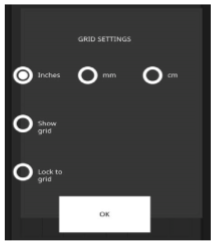
Grid
Under Grid, you can adjust your settings and show or hide a grid on the design screen.
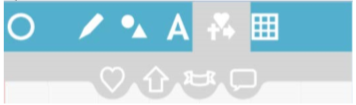
Using Tools Along the Bottom
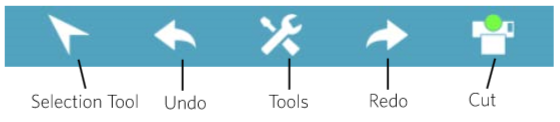
Once you have created a design or selected one from your Library or the Silhouette Design store, use the tools along the bottom to adjust and position your design.
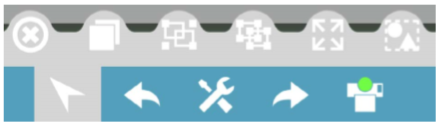
Selection Tool
Within the Selection Tool, there are six options: Delete, Duplicate, Group, Ungroup, Zoom to Page, and Select All.
Undo
You can undo the last action you performed.
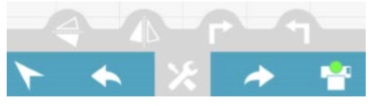
Tools
In the Tools option, your can Flip Horizontally, Flip Vertically, Rotate 90 degrees right, and Rotate 90 degrees left.
Redo
You can redo the last action you performed.
Cut
See Sending Designs (below) to your Silhouette for more details.
Sending Designs to your Silhouette
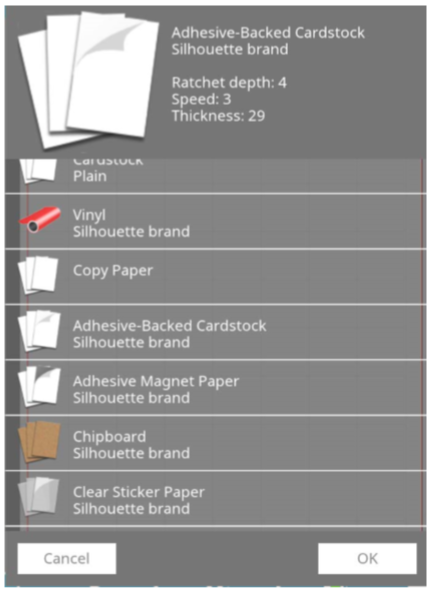
Before sending your design to your Silhouette, you must choose your material type from the Page Settings menu on the left hand side of the page. Under Page Settings, select Media Type. Once you have your media selected, the screen with give recommended rachet depth, speed, and thickness settings.
Cut
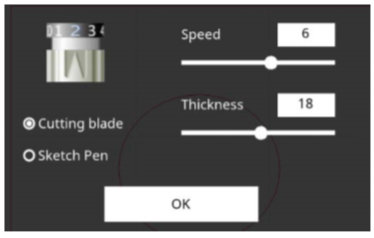
 The Cut Settings window is used to edit the blade depth, speed, thickness and tool type. The recommended settings will be automatically loaded depending on which type of media you selected.
If you have multiple Silhouette machines, the option on the right is where you can choose which connected Silhouette to send your design to.
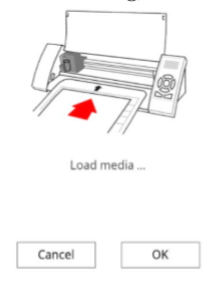
 The icon on the left, the blade icon, sends your design to your Silhouette. A screen will appear that will prompt you to load your media. Make sure you do, because once you select ‘Okay’ your machine will start cutting, even if you haven’t loaded your media yet.
We are so excited that we can now design on the go and then remotely send our files to our Silhouette cutting machines! Please let us know if you have any questions in the comments below.
Kelly Wayment
June 28, 2024
You can use it with vinyl as long as it is smooth and flat to allow the static charge to hold on to it. Rolled vinyl that wants to go back to its rolled shape will not necessarily work well, and it would need to be trimmed to fit the ES mat cutting area.
Kelly Wayment
June 28, 2024
Yes, you can use the heat pen while using the ES mat. 🙂
Yurii
March 2, 2024
Hello. May it be used with heat pen?
Thanks
Jerome
February 24, 2024
Hi, works this with the normal vinyl foils or only with printer papter etc?
Kelly Wayment
February 16, 2024
Once you’ve pushed the mat up against the rollers, just press the “Load” arrow button (bottom right on the display). Does a regular sticky mat load into the machine for you?
Michelle a goodall
January 24, 2024
Hello! I just got my new electrostatic mat and have watched every video i can find on it. However, what i can t find is why it wont feed into my cameo 5/ it slides right up the rollers but wont go any further. and yes- iam pushing the into button. help!