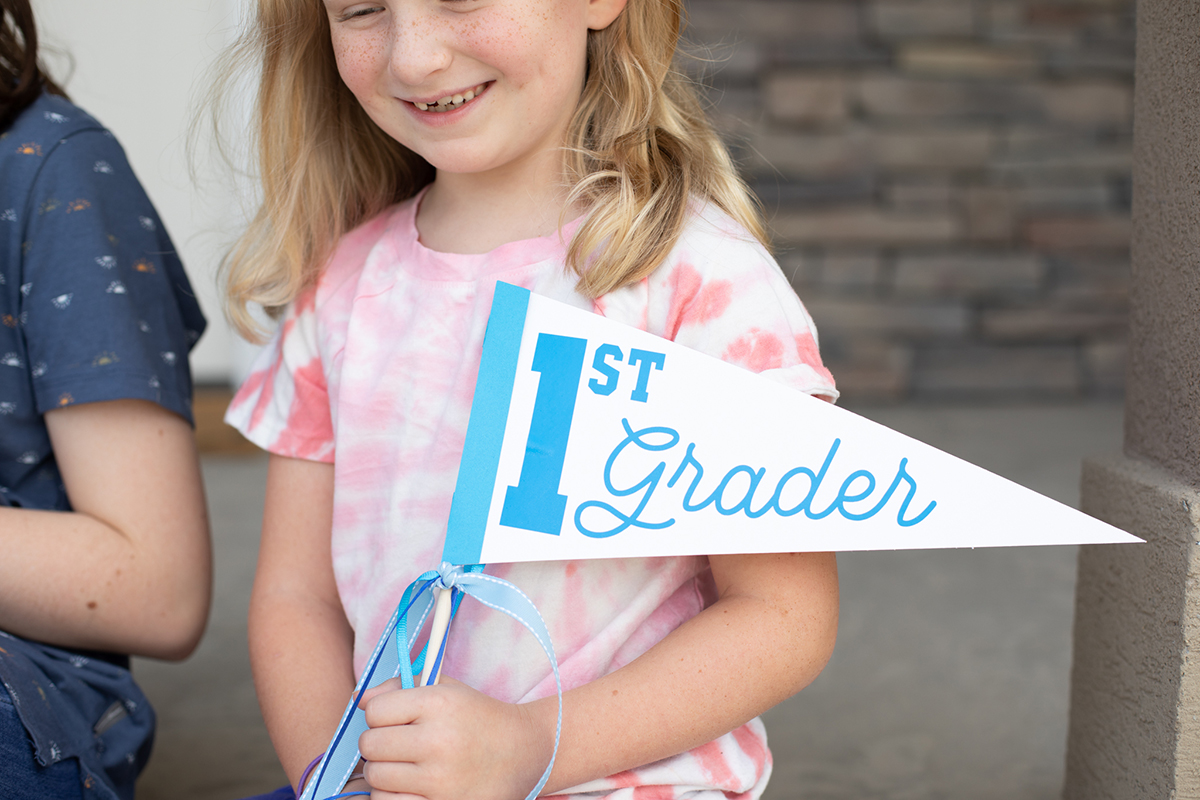
We’re saying hello to August, which means that it’s almost time to head back to school! Take charge of one of these last summer afternoons and spend some time creating these back to school pennant flags. This project was created with a blank flag design, so you can customize it however you’d like. In this post, we’ll show you how to add your own words to a design using the text tool. You’ll use the text flag over and over again as you create your own projects, so this flag is great for beginners learning the basics of Silhouette Studio.
We loved making this project because we could use materials that we already had on hand. We are willing to bet you have some paper, vinyl scraps and embellishments laying around. If not, this project is 100% customizable to what you have in your home. You could use fabric, paper, craft foam, and so many other materials. Let’s get started!
Supply List:
- Silhouette Cameo 4
- Silhouette Studio Basic Edition
- White 12 x 12 in. cardstock
- Colored 8.5 x 11 in. cardstock
- Colored vinyl (scraps work great!)
- Transfer tape
- Wooden dowels
- Hot glue gun
- Design ID #380135
- Design ID #274417 by Lori Whitlock
- Design ID #282974 by Micromove
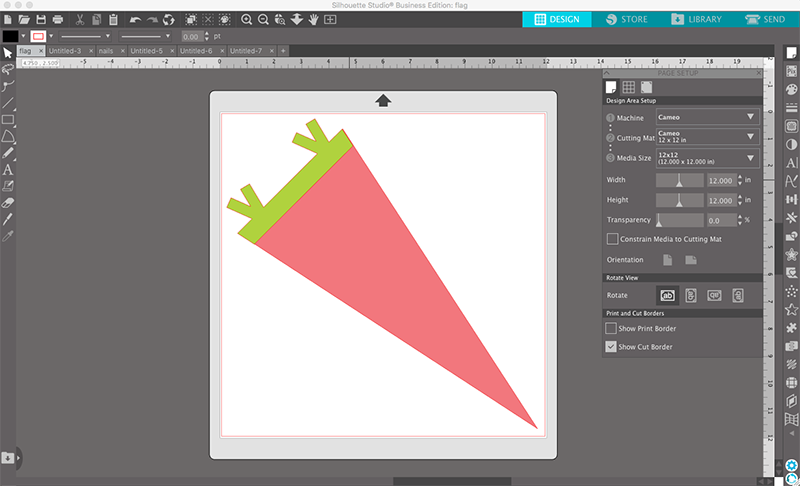
Step One: Scale the Flag File
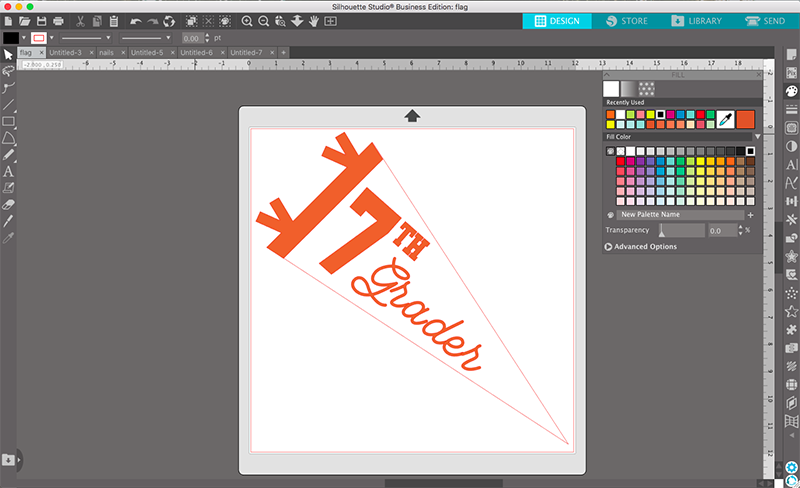
Once you’ve downloaded the pennant design, it’s time to open the file and scale the design in Silhouette Studio. We love the versatility of the blank pennant flag because you can shrink it down to make a banner or make it larger to create a flag. Because it is blank, you can use it over and over again for different projects. For our flags, we want to scale the design up as large as it can go. Since we are cutting with the Cameo 4, our mat is 12 x 12 in. If we turn the design on a diagonal, we can make it a little bit larger! We held down the Shift key and dragged the corners of the design to make it as large as possible while still fitting on our cutting mat.
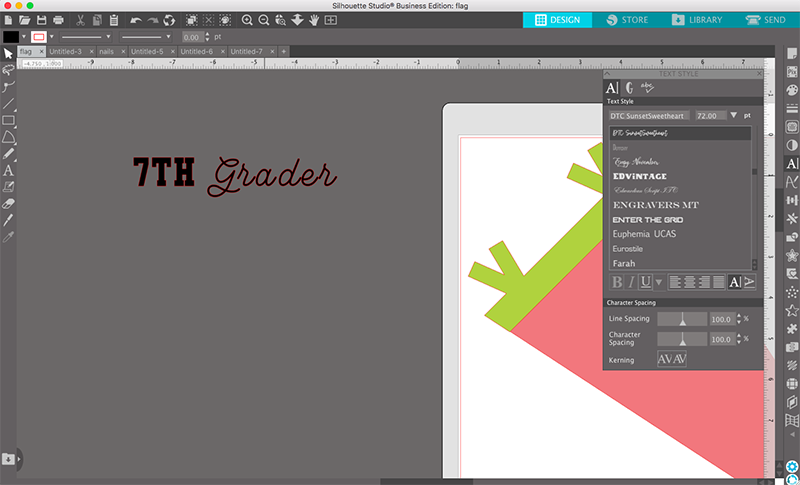
Step Two: Add Text Using the Text Tool
Adding text to a design is one of the simplest and most important skills you can learn in Silhouette Studio. One of the best parts about adding text is that you can use any font you have installed on your computer. We used the fonts Vontage and Coach from the Silhouette Design Store. Feel free to purchase these fonts to recreate our flags or use fonts you already have installed.
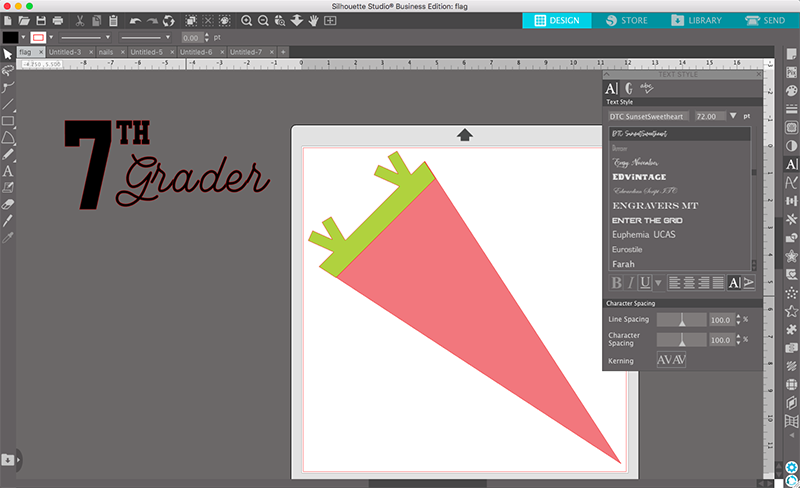
Begin by typing the words you’ll put on your flag. We used the phrase “7th Grader.” Next, we changed the fonts for the different words by selecting the text we want to reformat and changing the fonts to ones we liked by using the Text panel. We used Coach for the word “7th” and Vontage for the word “Grader.” Then, we ungrouped all of the letters so we can regroup and arrange them the way we want to.
After ungrouping all of the letters, group together the text that you want to scale to the same size. We grouped together the word “grader” and the “th” in “7th.” Now, play with the scaling of the rest of your design until you’re happy with it. We liked making the number really large and moving the other aspects of the design to complement it. Once you’re finished arranging your design elements, group all of the pieces together. Rotate the group slightly and move it over the flag to make sure it fits.


Step Three: Change Colors of the File
Because this isn’t a Print & Cut project, changing the colors within Silhouette Studio is optional. However, we like changing the colors so that we can get a small preview of what the final design will look like. It also helps us remember what pieces we need to cut out of different colors and materials.
To change your design’s colors, click the icon that looks like a paint palette. Once you’ve opened this panel, you will see a lot of default color options. Simply select your different elements and then click the color that you want to make them. This is a simple way to get a quick preview of the color combination you are creating.
Step Four: Cut Paper Pieces
Once you have connected your cutting machine, load your white 12 x 12 in. cardstock onto the mat. In Silhouette Studio, move all of the pieces besides the back triangle onto the gray holding area. Now, send this piece to cut. We used the default cut settings for cardstock, but you may want to perform a test cut using these settings to make sure the blade cuts all the way through the paper. If you perform a test cut and your design still hasn’t cut all the way through, send it back into the machine for another pass. Once you’re certain the cut is clean, unload the mat, flip it over, and carefully peel off your pieces. We like to flip the mat over to avoid curling.
After cutting the white piece, return to Silhouette Studio. Remove the white piece from the cutting mat area and drag the orange piece of the flag onto the mat. This is a fairly small piece, so you can use a scrap piece of paper, or save your leftovers for another project. Load the mat into the machine and repeat the same cutting process.

Step Five: Cut Vinyl Pieces
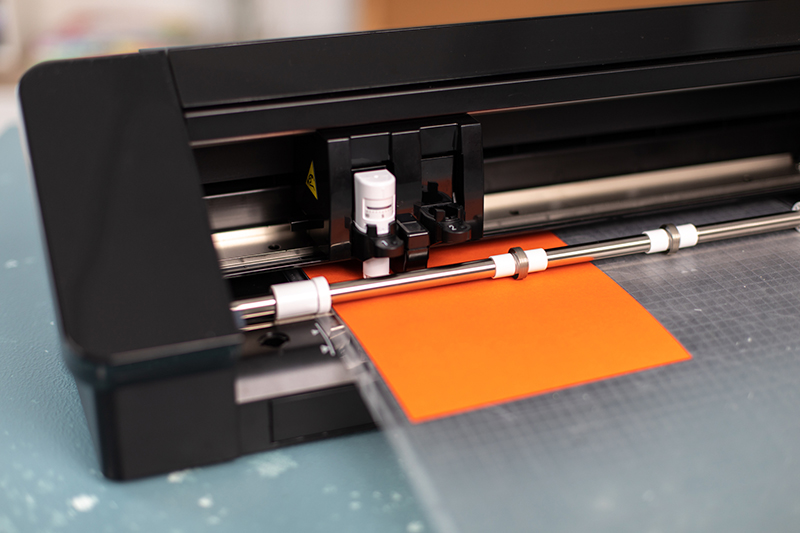
Now it’s time to cut your lettering out of vinyl. We’re using a leftover scrap, so we placed it onto our cutting mat. If you are using a roll, you can cut your vinyl without a mat. In Silhouette Studio, make sure your file is set to your cutting mat size, or change it to cut without a mat, depending on what you’re doing.
Clear your cutting area of the flag pieces and move your words onto the mat. We recommend rotating them so they are totally vertical. This is the most effective and efficient way to cut them! Load your mat into the machine and change your cut settings to the type of vinyl you are using. We adjusted our depth setting to 2, but play around with test cuts to find cut settings that work for your vinyl. Send the piece to your Cameo for cutting.
Step Six: Assemble the Flag
Use a tape runner or glue to adhere the top orange paper piece to the white triangle. They should line up nicely and be simple to put together. If you’re using glue, allow the flag to dry completely.
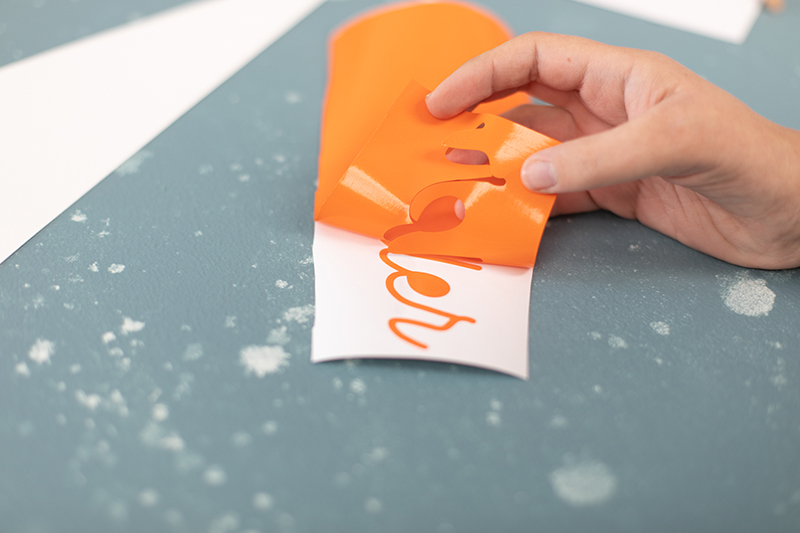
Now, weed out your unwanted pieces of vinyl, leaving only the letters you want to place onto your flag. Remove the back piece of your transfer tape and lay the transfer tape directly on top of the letters. Press down firmly and carefully remove the back of the vinyl material, making sure that every piece of vinyl sticks to the transfer tape.
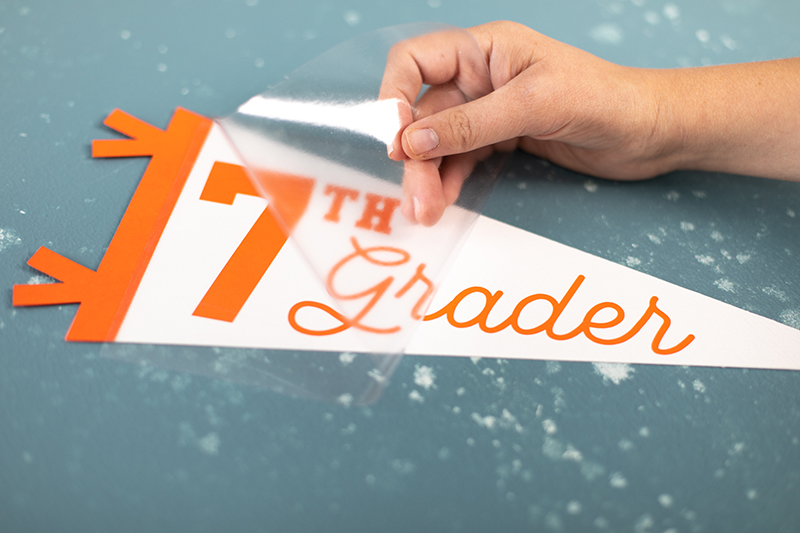
Place your transfer tape with the vinyl letters directly on top of the paper, making sure you position it where you want the letters to be. Press down lightly; you don’t want the transfer tape to stick to the paper, just the vinyl. Once the letters are secure, slowly remove the transfer tape. Your vinyl should be stuck to the paper nicely, completing your flag.
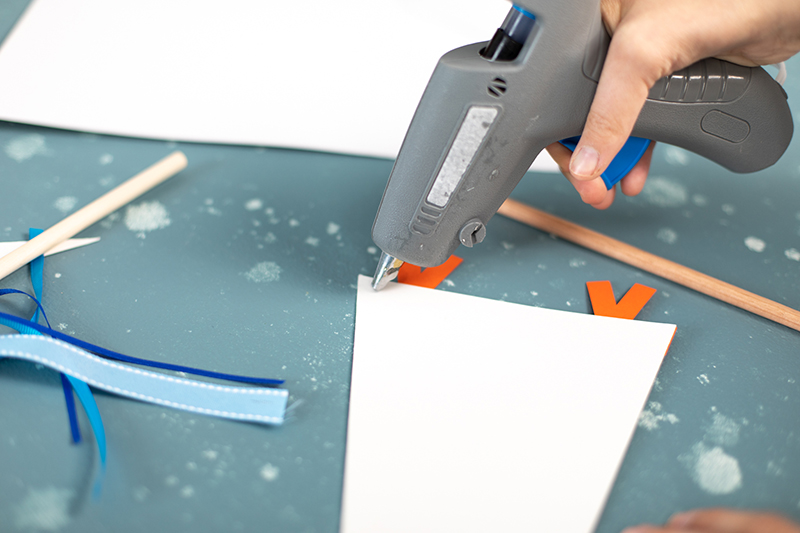
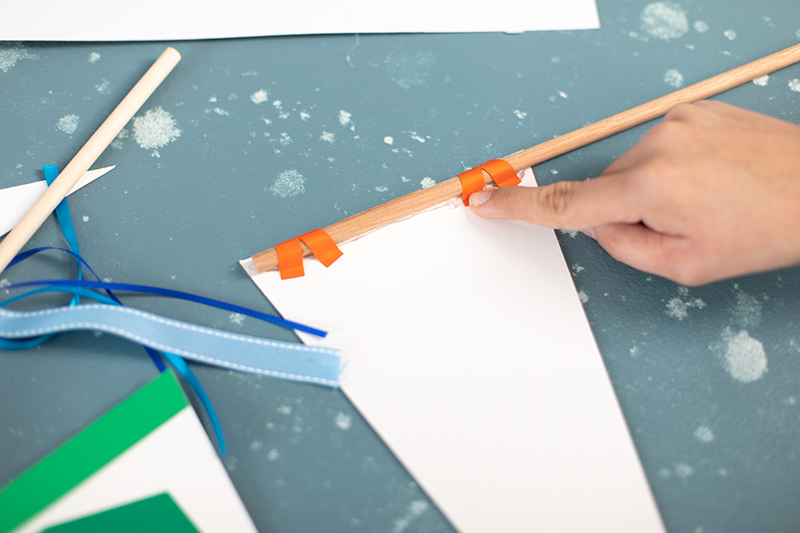
Step Seven: Attach the Wooden Dowel
If you don’t have any wooden dowels, you can end the project here! These would make lovely photo props or classroom decorations. We wanted to turn ours into a flag, so we hot glued a dowel to the back of the triangle. Once the dowel is fully dried and secured, we folded the orange tabs over the back of the dowel. Hold them in place while they dry.
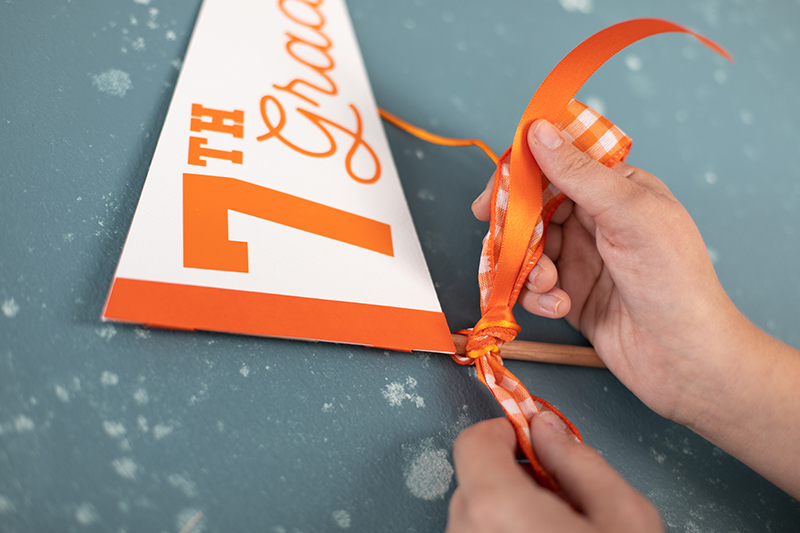
Step Eight: Add Embellishments
Now is the time to get creative and add whatever embellishments you’d like! We chose to tie a trio of orange ribbons to the base of our flag. You could also add glitter, jewels, buttons, paint, and so much more.
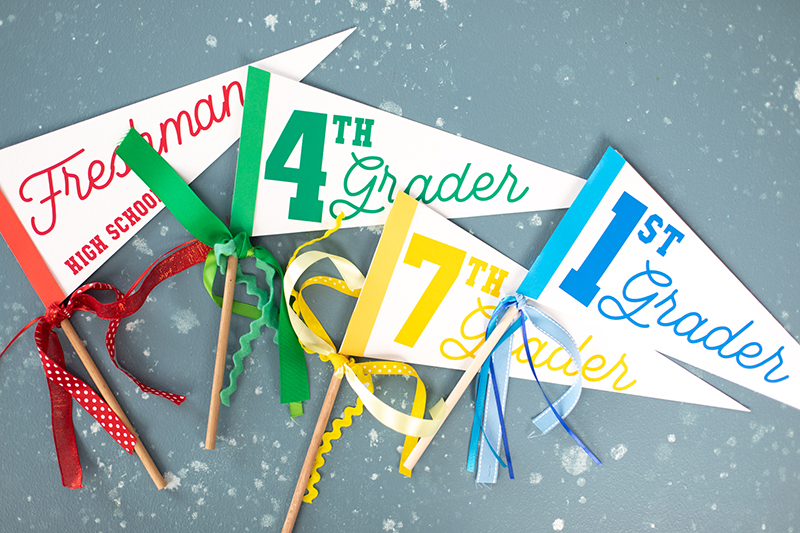
We love how this project turned out. It would be so easy to make an entire set to use year after year as your children grow up! Make sure to tag us in all of your back to school projects. You can find us @silhouette.inc on Instagram. Good luck as your families head back to school—may this year be the best year yet!
 Free Class - Father's Day Apron Set
  Free Class - Custom Graduation Tumbler