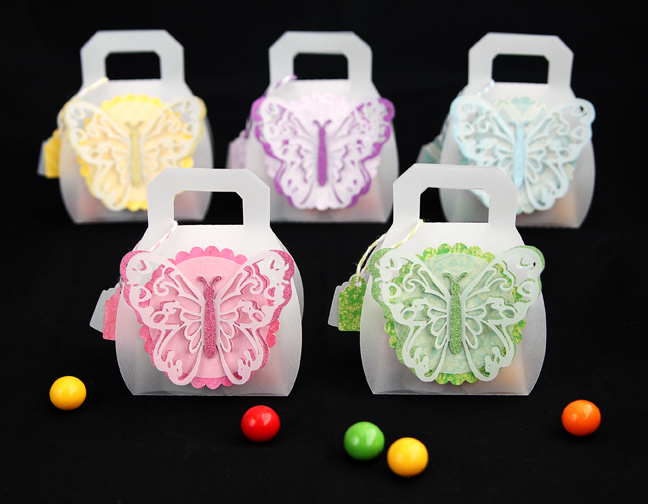
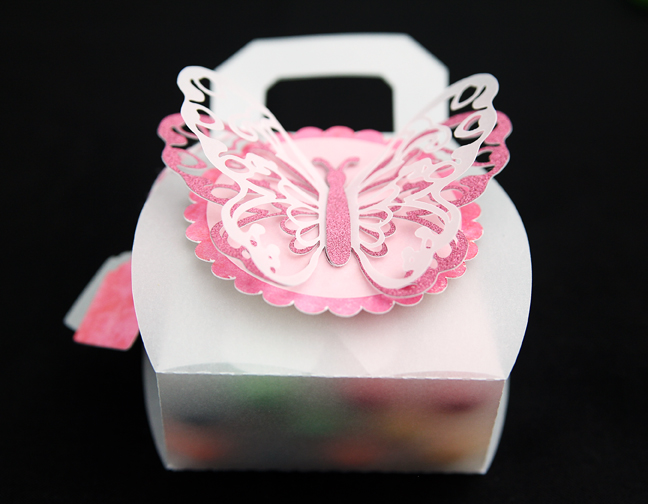
This design by Sweet Afton is a real treat! I’m a big fan of making boxes, containers, and purses with my CAMEO and my Curio, and you may be shocked to see how many butterfly designs I have in my Silhouette Studio® library. I chose to make these purse boxes into little vellum treat containers. The butterfly is pretty delicate, so I’ll also be sharing my tips on cutting intricate shapes.
Here are the supplies and tools you’ll need for this project:
- Vellum
- Selection of pattern paper and glitter paper
- Silhouette CAMEO®, Silhouette Curio™, or Silhouette Portrait®
- Spatula tool
- Free purse design released 3/15/16
- Travel tag charms (design ID #16806)
Step 1 – Cut Shapes
Cutting and assembling the purse is pretty straightforward. If you are resizing the box, be sure to select all the pieces so the resizing happens all together. I recommend cutting the box and butterfly as large as your media allows. (This finished purse cut as large as possible on letter-size paper is about 3.25 in. x 2.75 in. x 1.5 in.)
After resizing to fill the entire letter-size page, ungroup and regroup the purse pieces as necessary so you can move the pieces on and off the cutting mat for the various papers you’ve chosen. For each purse, I cut my pieces from the following materials (I duplicated some pieces for extra layers):
- Vellum: purse, butterfly, circle piece, and tag
- Pattern paper: scalloped circle and tag
- Glitter paper: butterfly and butterfly center
Tips for cutting intricate shapes:
I like to push my machine to the limits, so I’ve had a lot of success in cutting intricate shapes. This is built on working past a lot of failures along the way. I’ve got a few tips below for cutting intricate shapes. Not all of them are applicable every time, but you might find some of them helpful.
- Choose a medium you trust that generally cuts well for you.
- Slow down! Reduce the Speed to 1, if necessary.
- Use a sharp blade and a sticky mat. I don’t necessarily mean a brand new mat, but one that is free of debris and still clings well to your materials.
- Perform practice cuts to see if your intricate design will cut well in that material, especially as you make adjustments to your settings.
- Decrease the Thickness setting. Sometimes less pressure is better.
- Enlarge the entire design, if that’s an option.
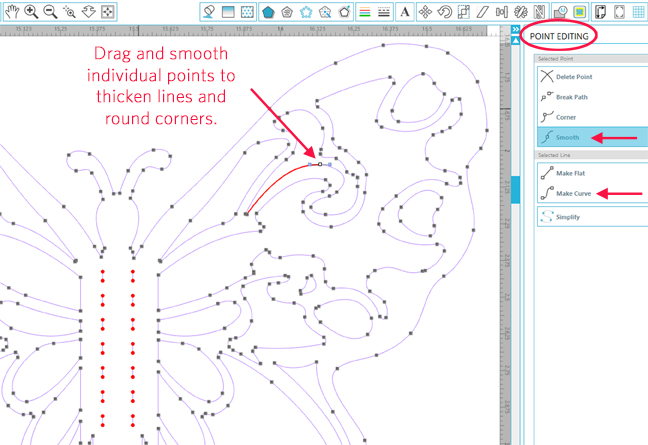
- Fix troublesome areas with point editing. Make the design a compound path (right click>make compound path), then double click to enter Point Editing. Individual points can be moved, and their curve properties can be changed. (See image below.)
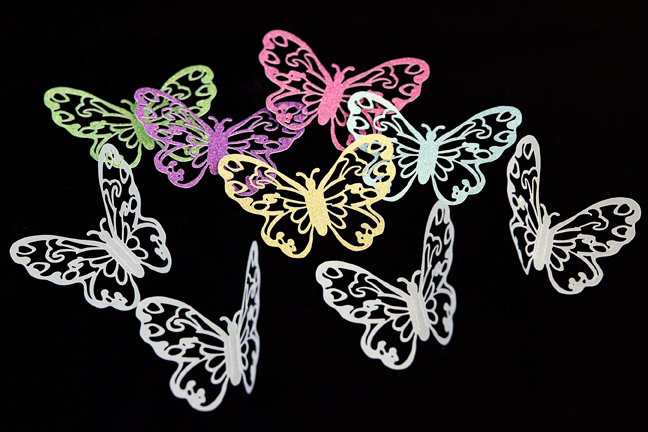
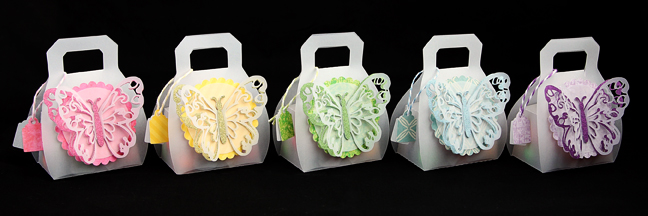
When you’re done, hopefully you can cut a stack of beautiful butterflies like this.
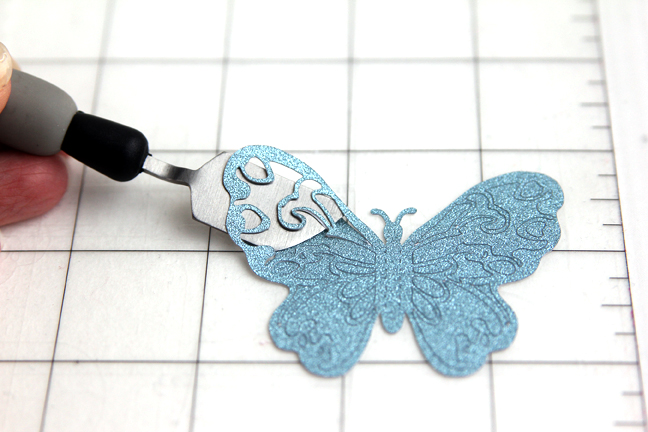
Be careful when removing the intricate shapes from the mat. Go slowly and use a spatula tool to help pry the shape away from the mat.
Step 2 – Assemble Purse
Once all the pieces are cut, you’re ready to assemble the purse.
With the vellum cutout, fold upwards on all the perforations.
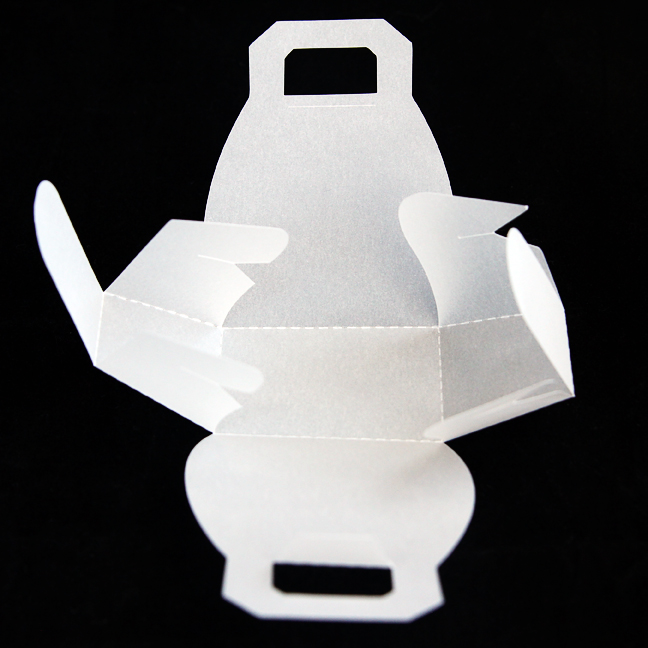
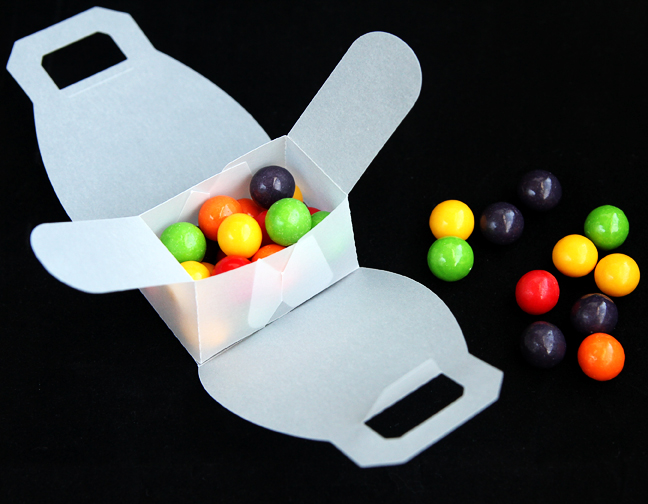
Slide the flaps with slots in place so the short tabs stay inside the box. It’s hard to tell which part is inside with the translucent vellum, so here is an example with solid paper. The odd-shaped ends should be hidden inside the compartment. Adhesive is not required to hold the purse together.

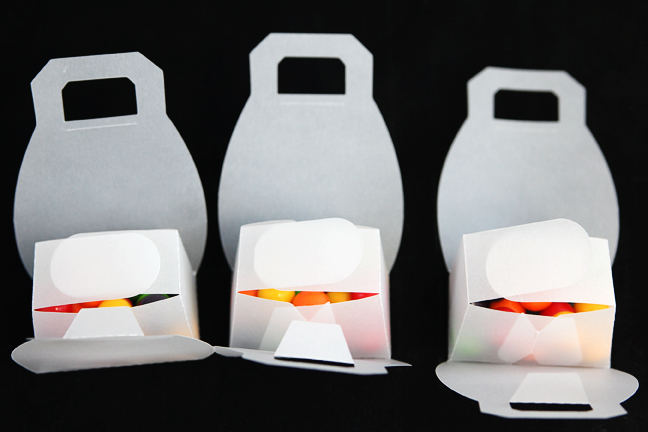
Fill the center compartment of the purse with colorful candy. The vellum is fun here, because you can get a little peak of what’s inside through the translucent sides of the purse, even when it’s closed up.
Close the flaps over the compartment.
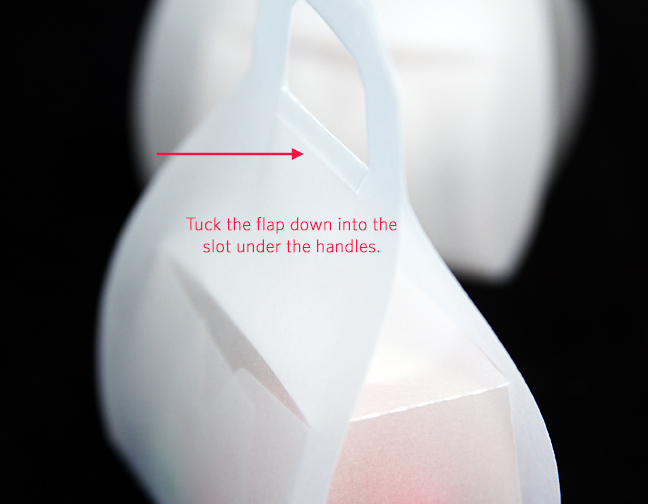
Then put the top tab through the hole of both handles and down into the slot on the opposite side.
Step 3 – Add Embellishments
Assemble the butterfly embellishment from the bottom up and attach to the purse:
- Scalloped circle
- Vellum circle
- Glitter butterfly
- Vellum butterfly (wings bent upwards)
- Glitter butterfly center
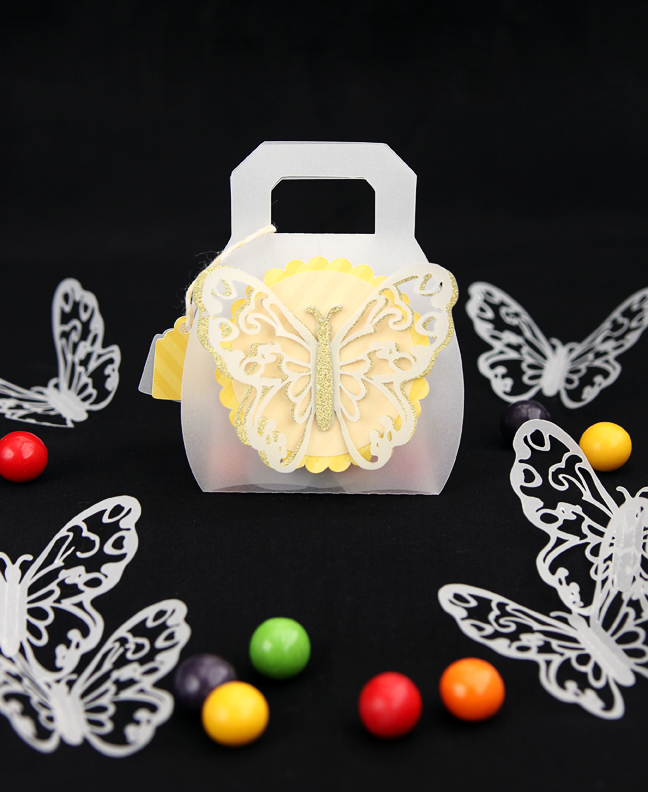
Add a little tag with some twine and admire how pretty these purses are!
 Free Class - Father's Day Apron Set
  Free Class - Custom Graduation Tumbler
Kelly Wayment
June 28, 2024
You can use it with vinyl as long as it is smooth and flat to allow the static charge to hold on to it. Rolled vinyl that wants to go back to its rolled shape will not necessarily work well, and it would need to be trimmed to fit the ES mat cutting area.
Kelly Wayment
June 28, 2024
Yes, you can use the heat pen while using the ES mat.
Yurii
March 2, 2024
Hello. May it be used with heat pen?
Thanks
Jerome
February 24, 2024
Hi, works this with the normal vinyl foils or only with printer papter etc?
Kelly Wayment
February 16, 2024
Once you’ve pushed the mat up against the rollers, just press the “Load” arrow button (bottom right on the display). Does a regular sticky mat load into the machine for you?
Michelle a goodall
January 24, 2024
Hello! I just got my new electrostatic mat and have watched every video i can find on it. However, what i can t find is why it wont feed into my cameo 5/ it slides right up the rollers but wont go any further. and yes- iam pushing the into button. help!