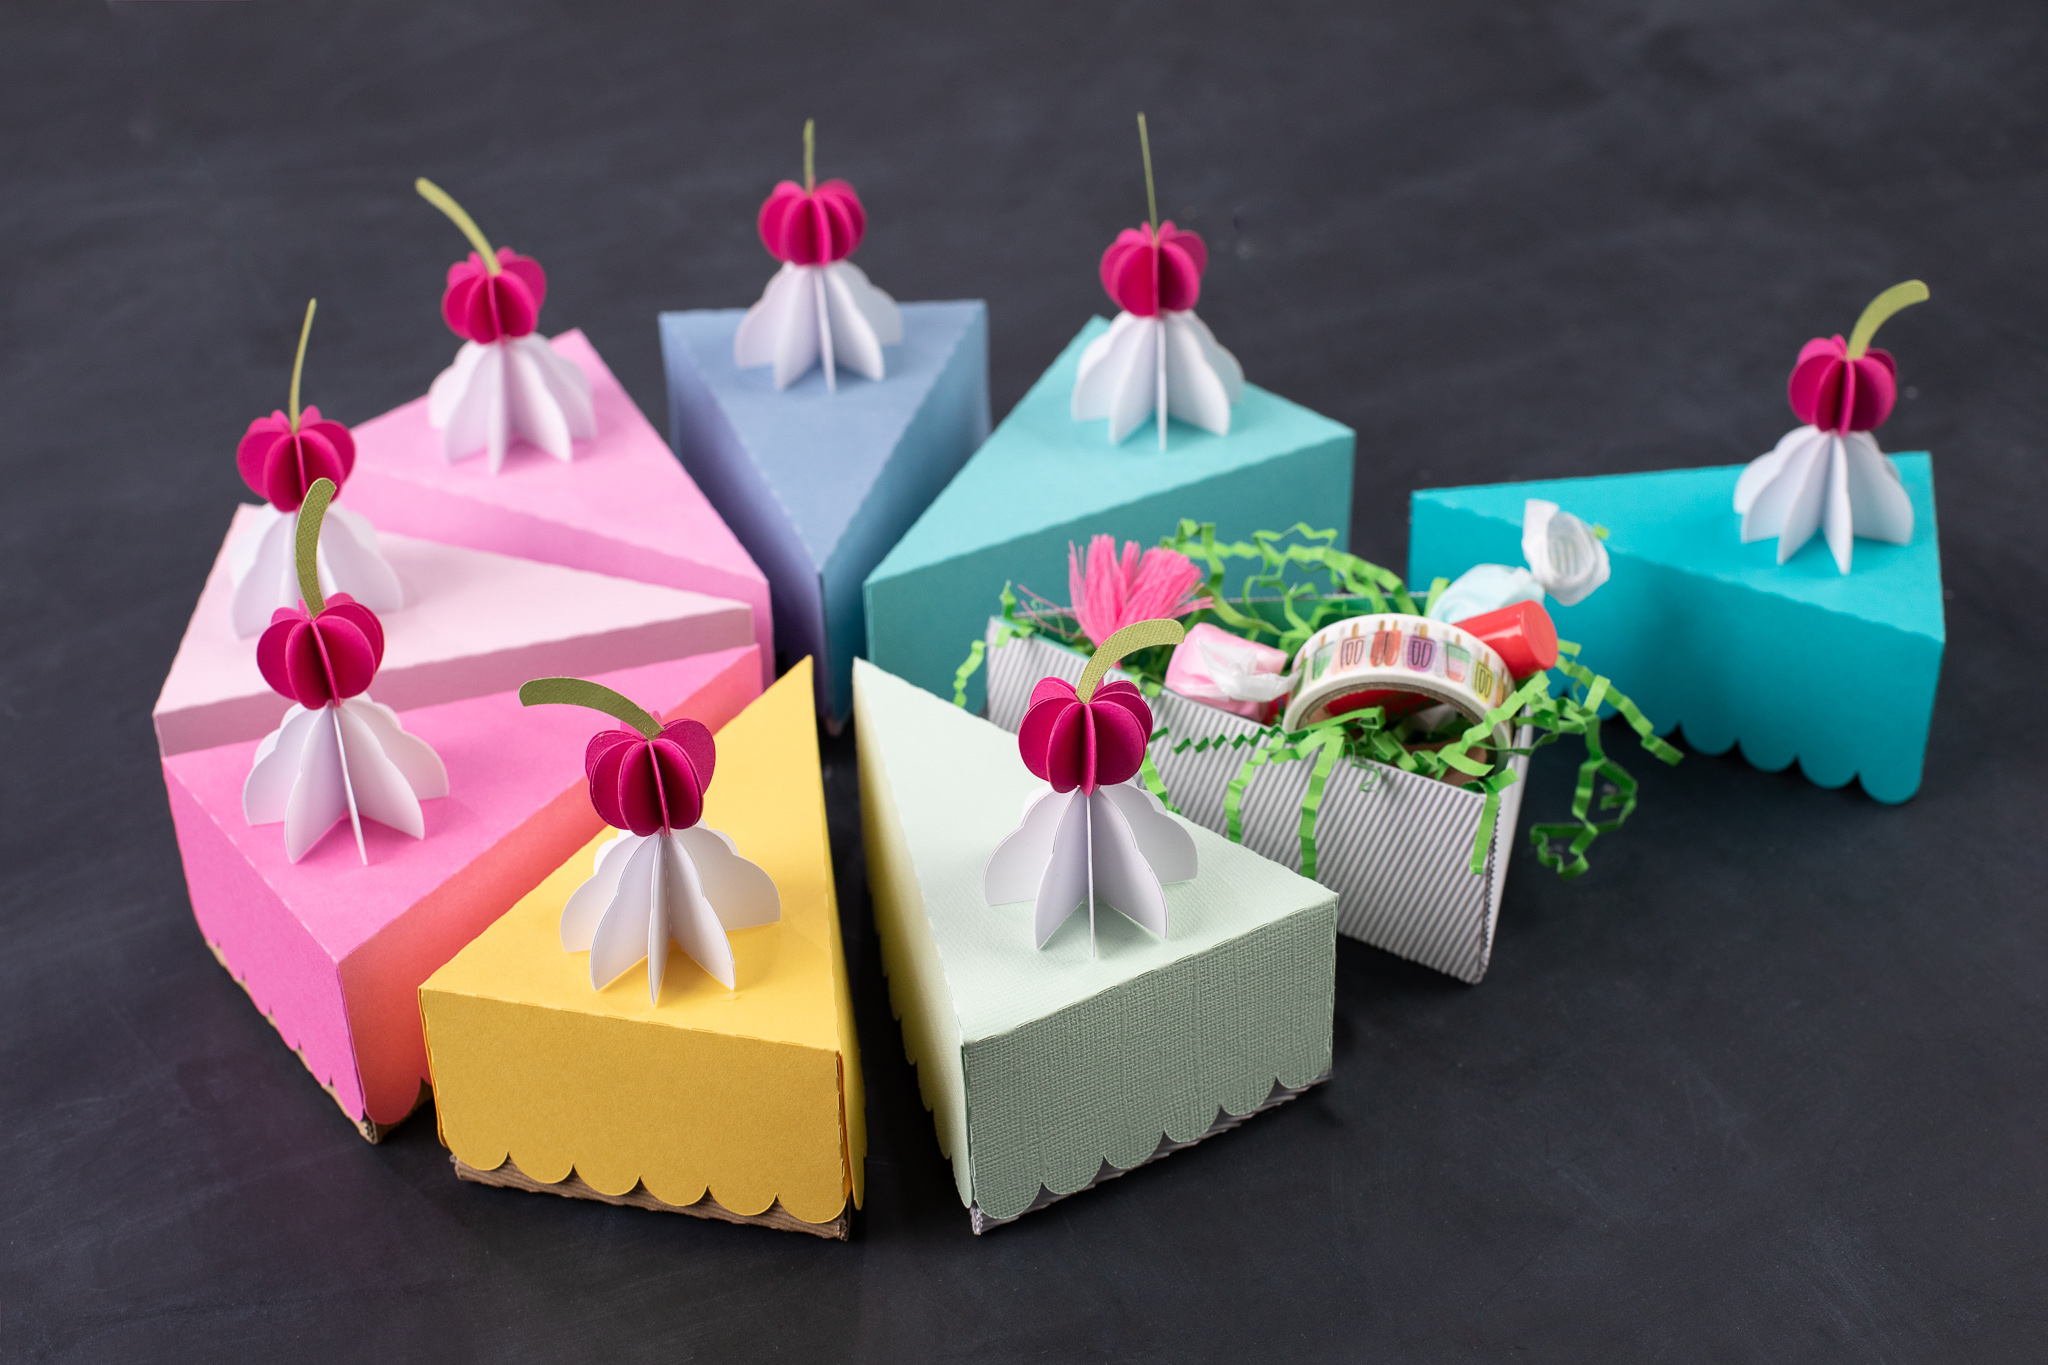
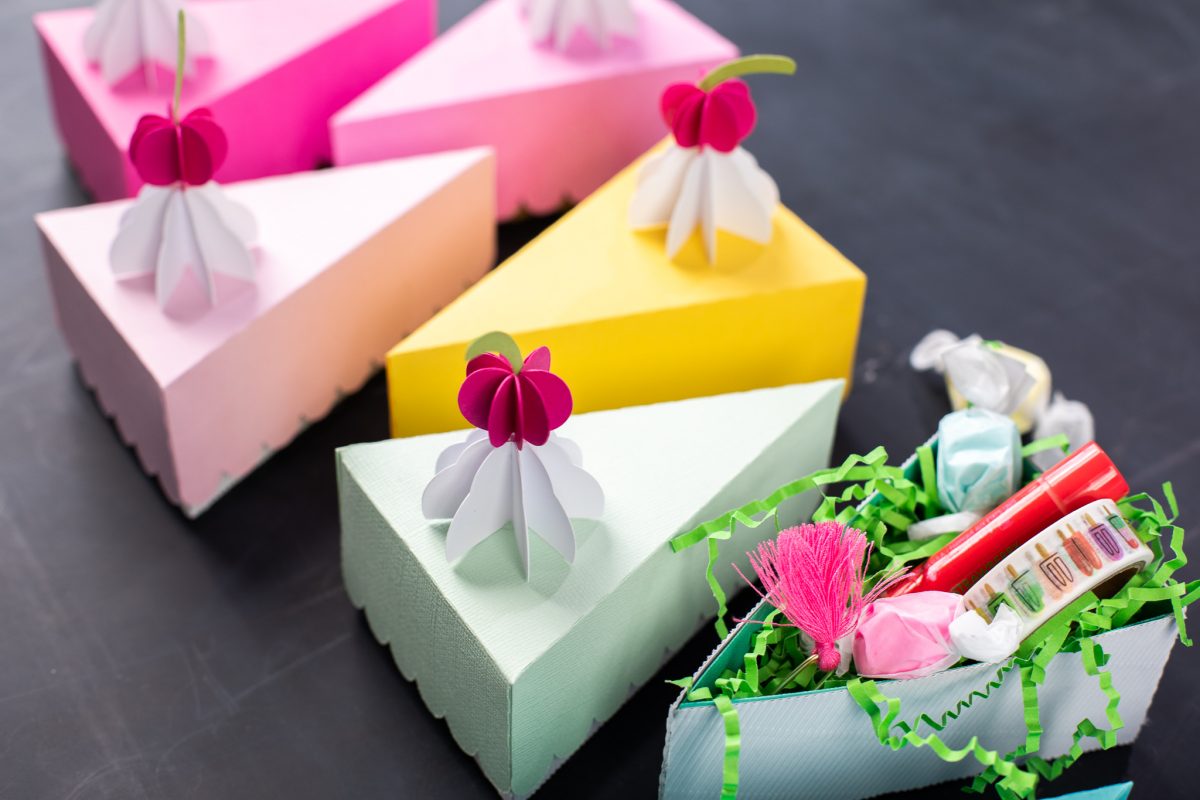
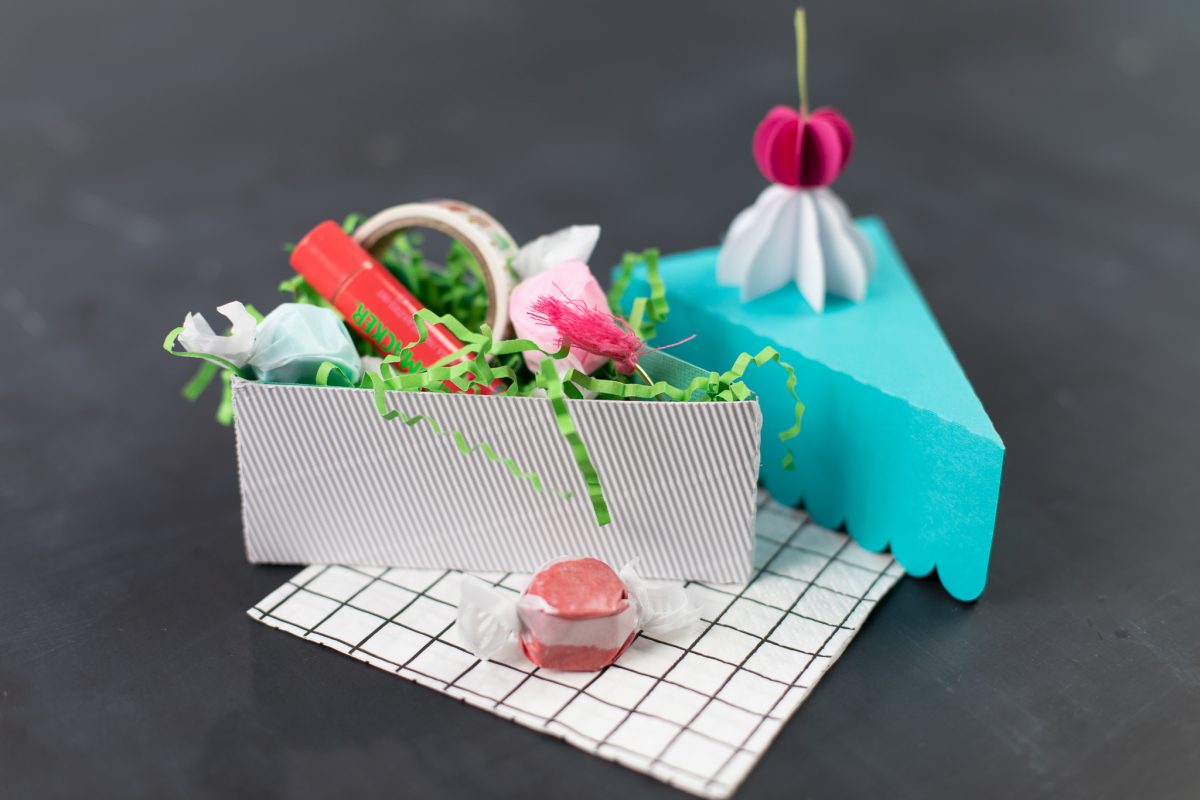
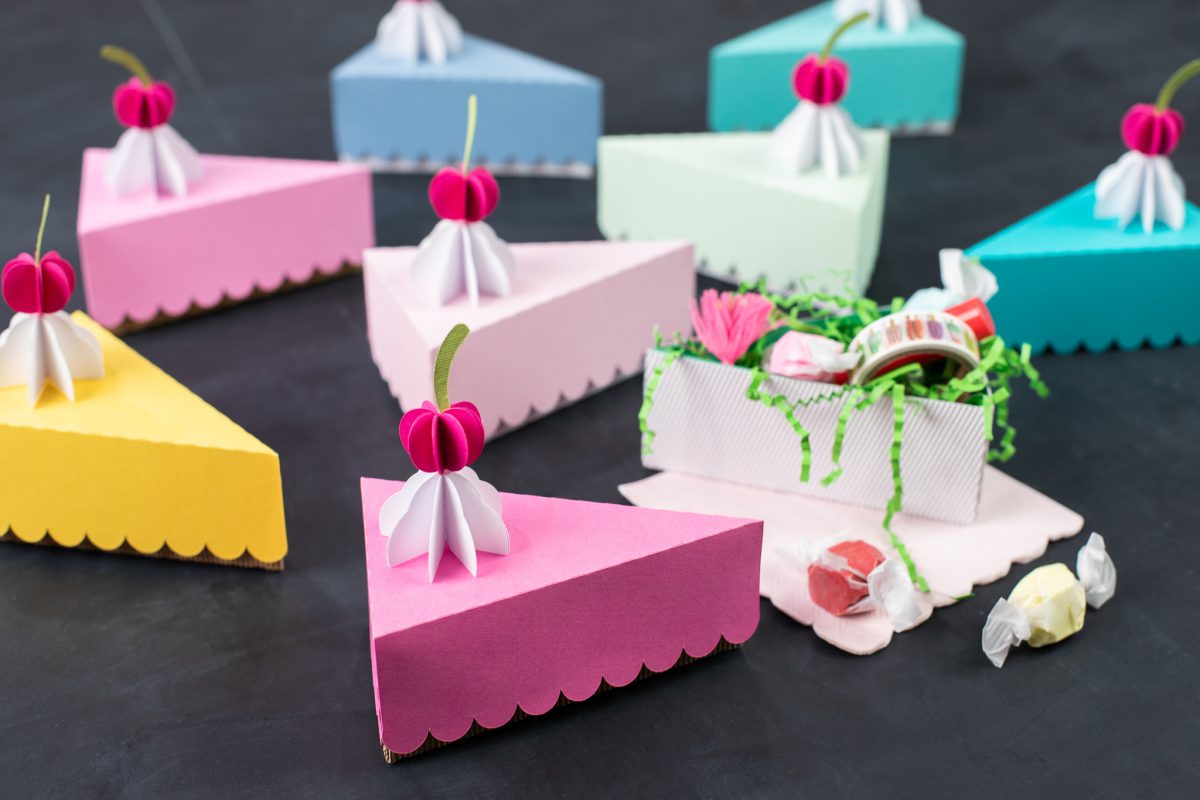
Goodie bags and party favors are a sweet way to end a special celebration, and these Cake Slice Favor Boxes take it to a whole new level! Using corrugated paper, each box has enough structure to fill it with all sorts of treats and trinkets!
Supplies Needed:
- Silhouette CAMEO® or Silhouette Portrait®
- Silhouette Studio®
- Silhouette Cutting Mat
- Silhouette Cutting Blade
- Corrugated Paper
- Cardstock in various shades
- Hot Glue Gun
- Design ID #226350
Step One: Format the Design
1. Open Design ID #226350 in Silhouette Studio®. Ungroup the design by right-clicking on it. We didn’t use the frosting lines, so you can delete those unless you’d like to include them!
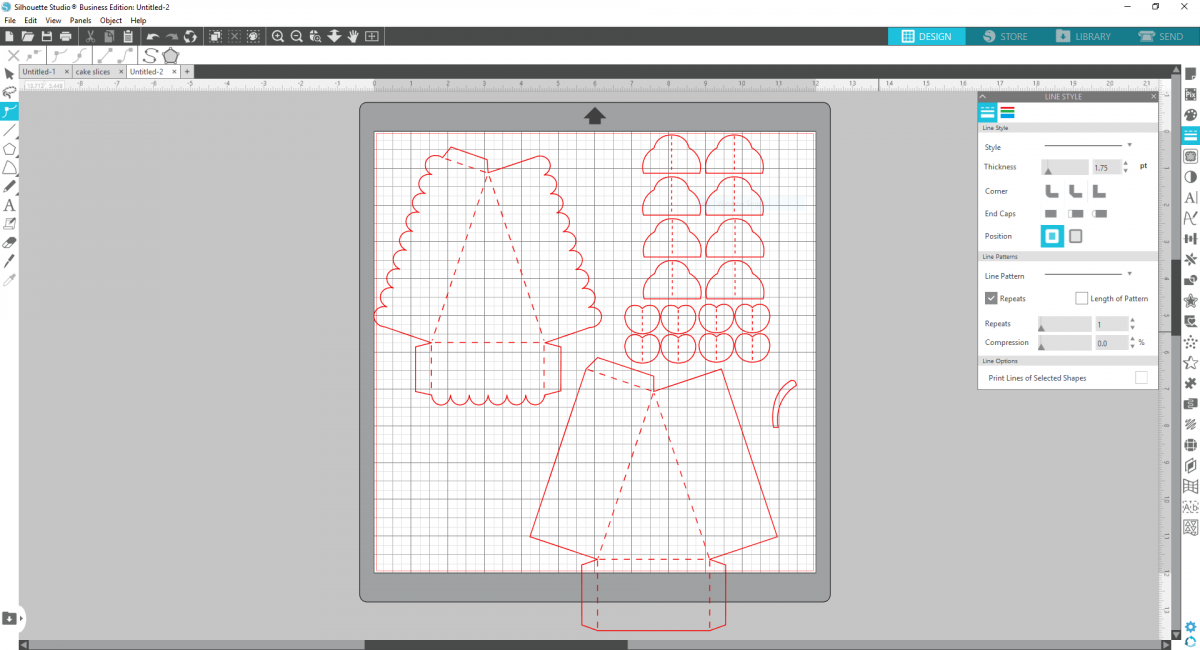
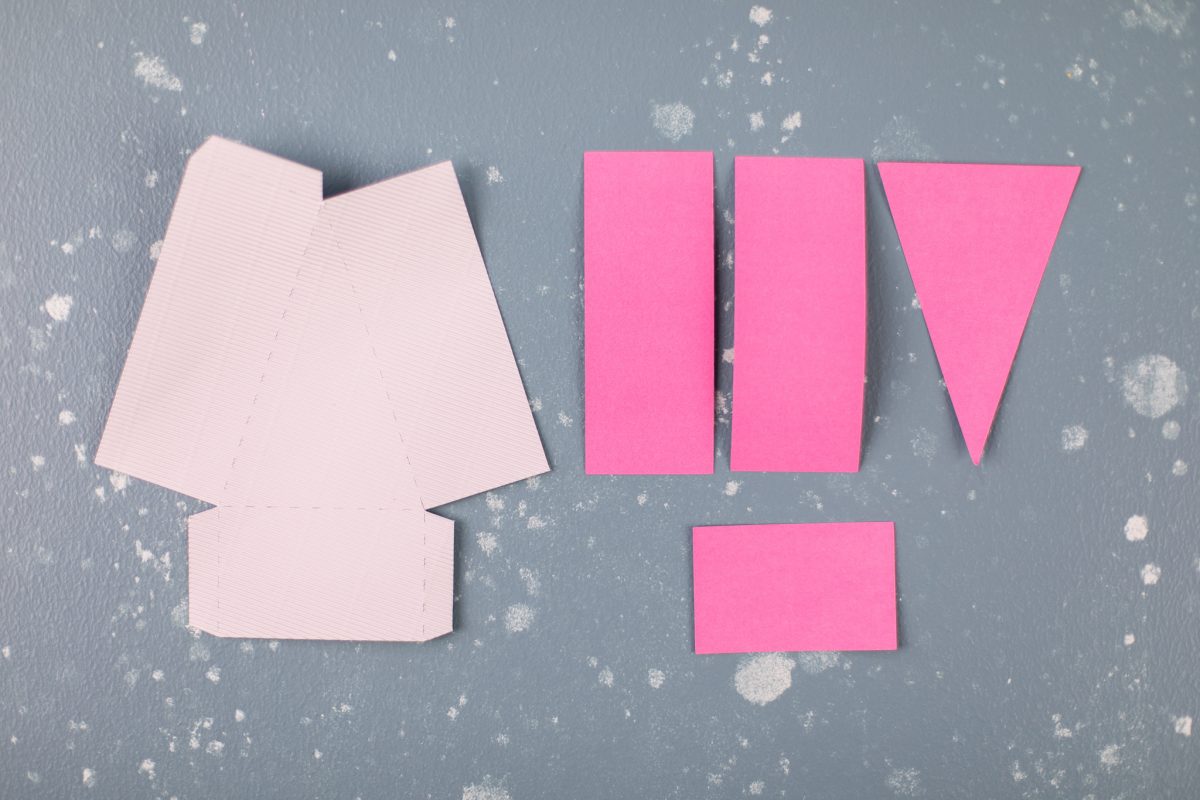
2. Cut out the bottom portion of the box out of corrugated paper. The paper dimensions at 8.5 inches by 11 inches, so set those in your Page Setup panel. Move the other parts of the design off to the side.
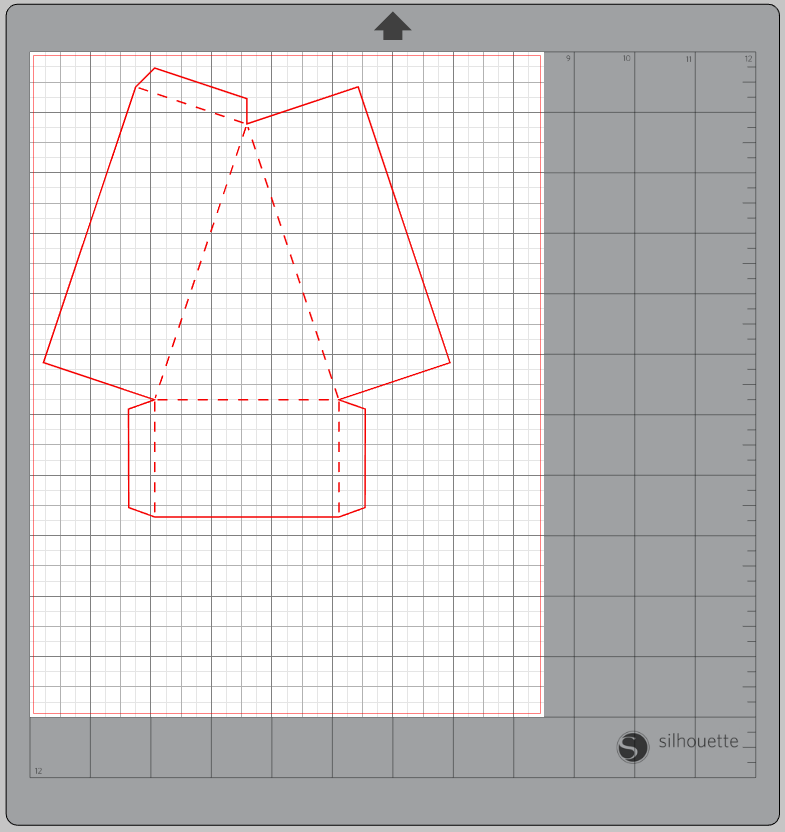
3. Since the corrugated paper is adhesive on the other side, we want to line the box with paper. Use the shape tool to create shapes just slightly smaller than all four sides of the bottom box.

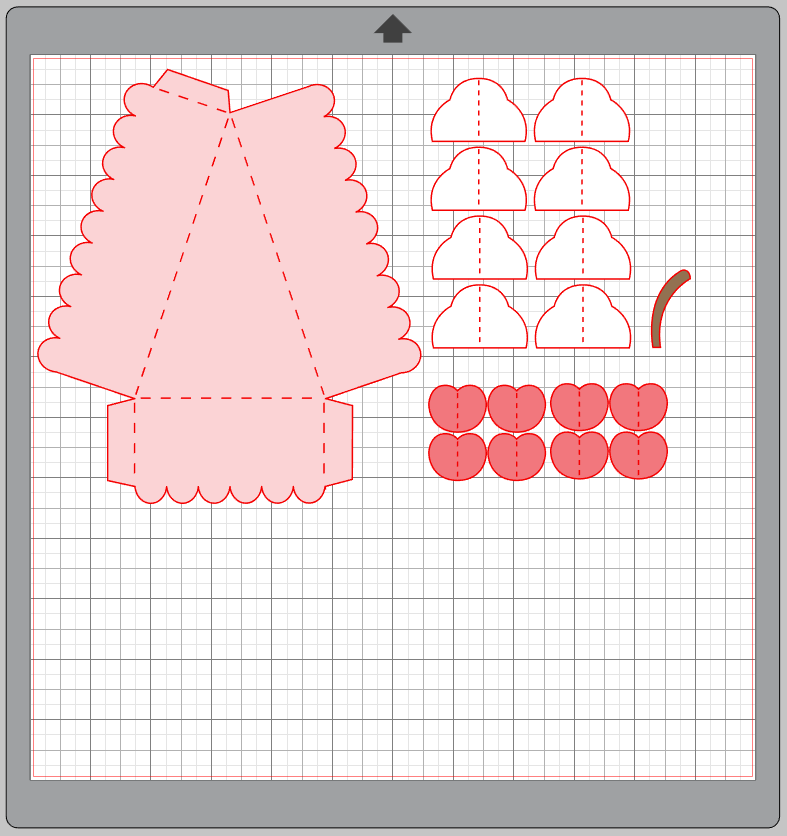
4. Increase the size of the top of the cake box just slightly so that the paper will fit over the corrugated paper. Now cut out your other pieces in various colors of cardstock.
Step Two: Assemble the Cake Slices
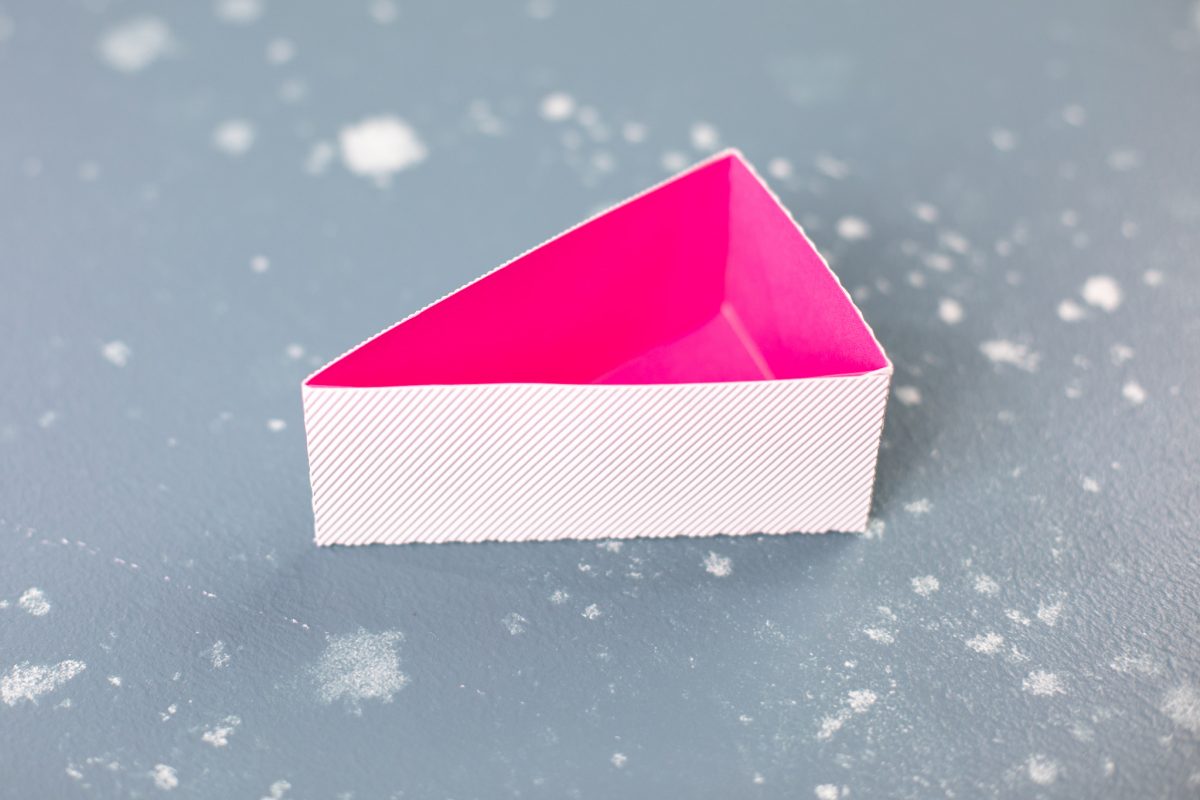
1. Form the bottom of the box with the corrugated paper shape and the paper to line the box.
2. Place all the paper pieces onto the adhesive side of the box.
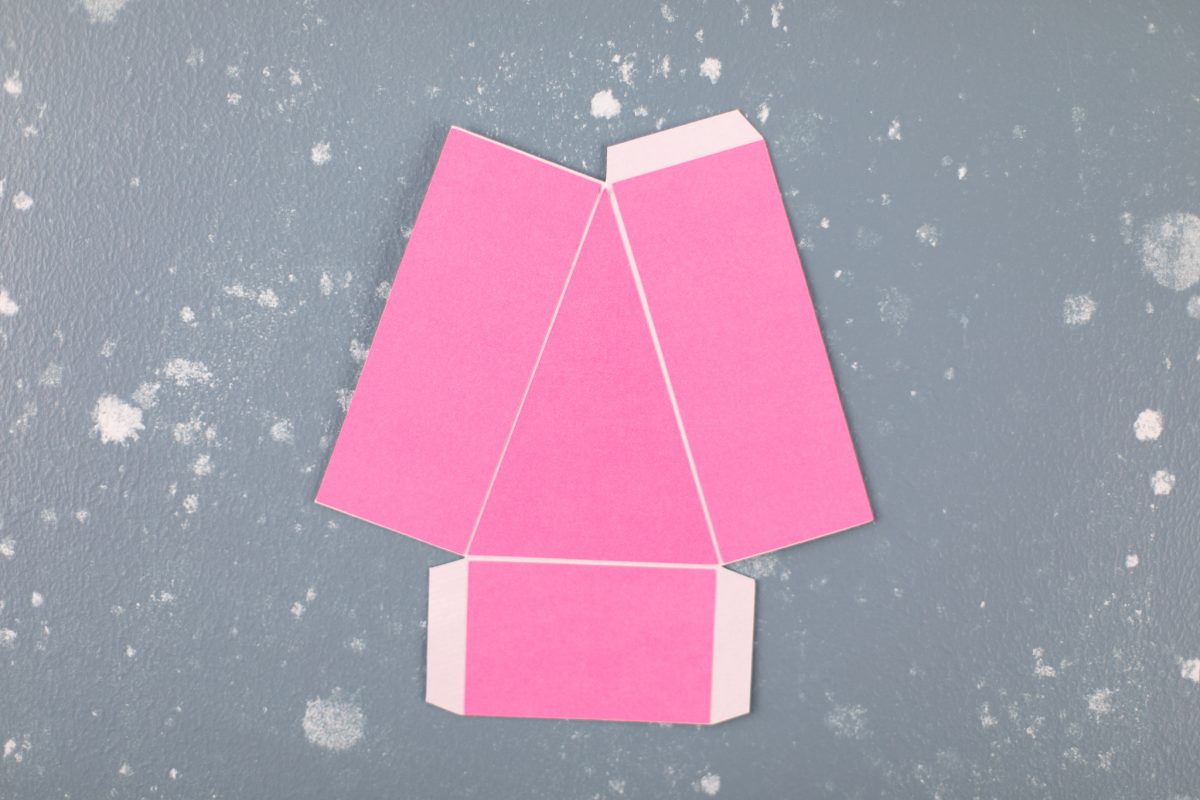
3. Fold the sides of the box up and fold in the tabs. Slip under the paper pieces to use the adhesive to secure the tabs.
4. Gather all your remaining pieces of the top of the box: 1 box top, 8 whipped cream pieces, 8 cherry pieces, and 1 stem.
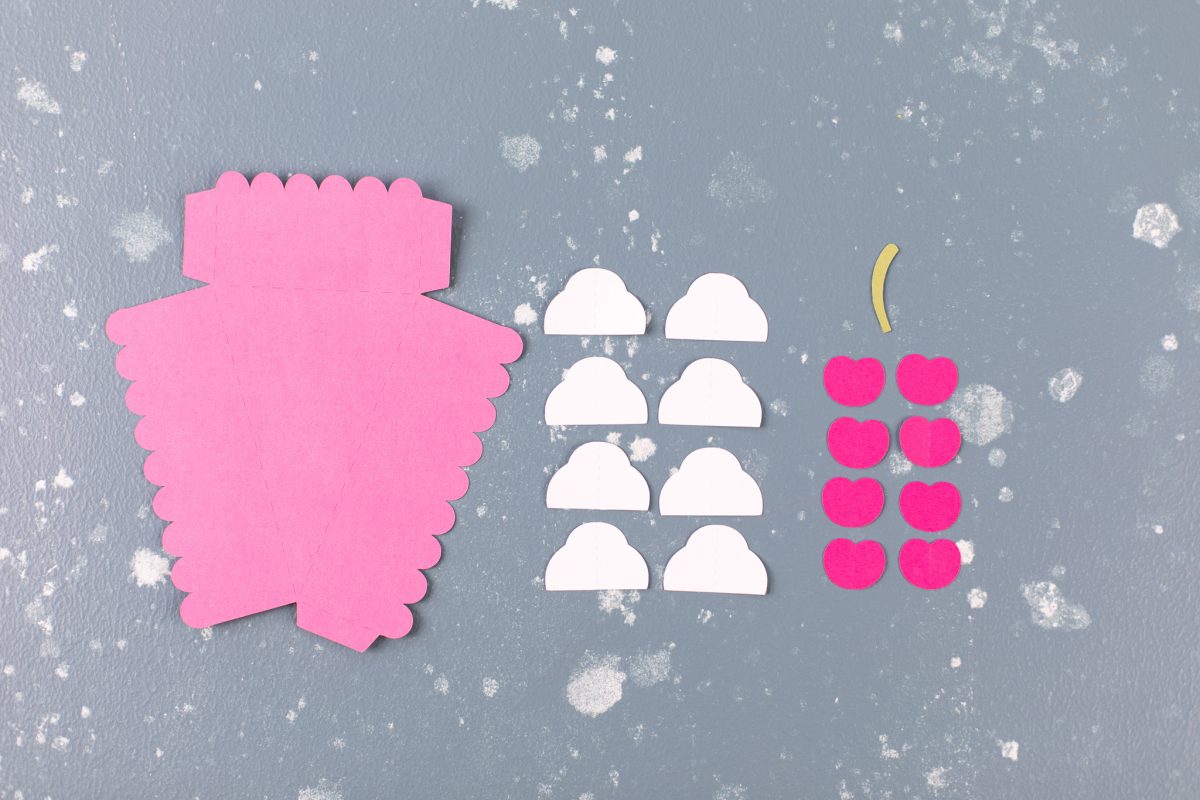
5. Fold all the pieces along the scored lines.
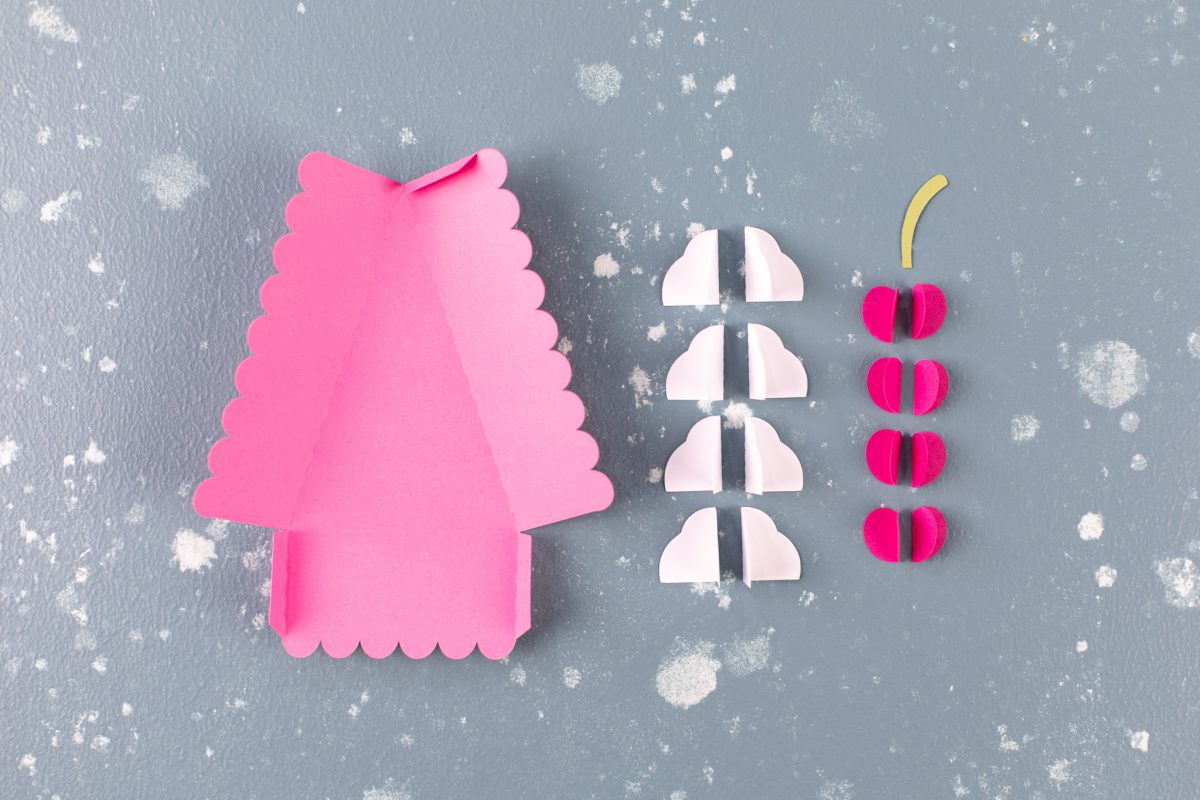
6. Glue the pieces together with adhesive.
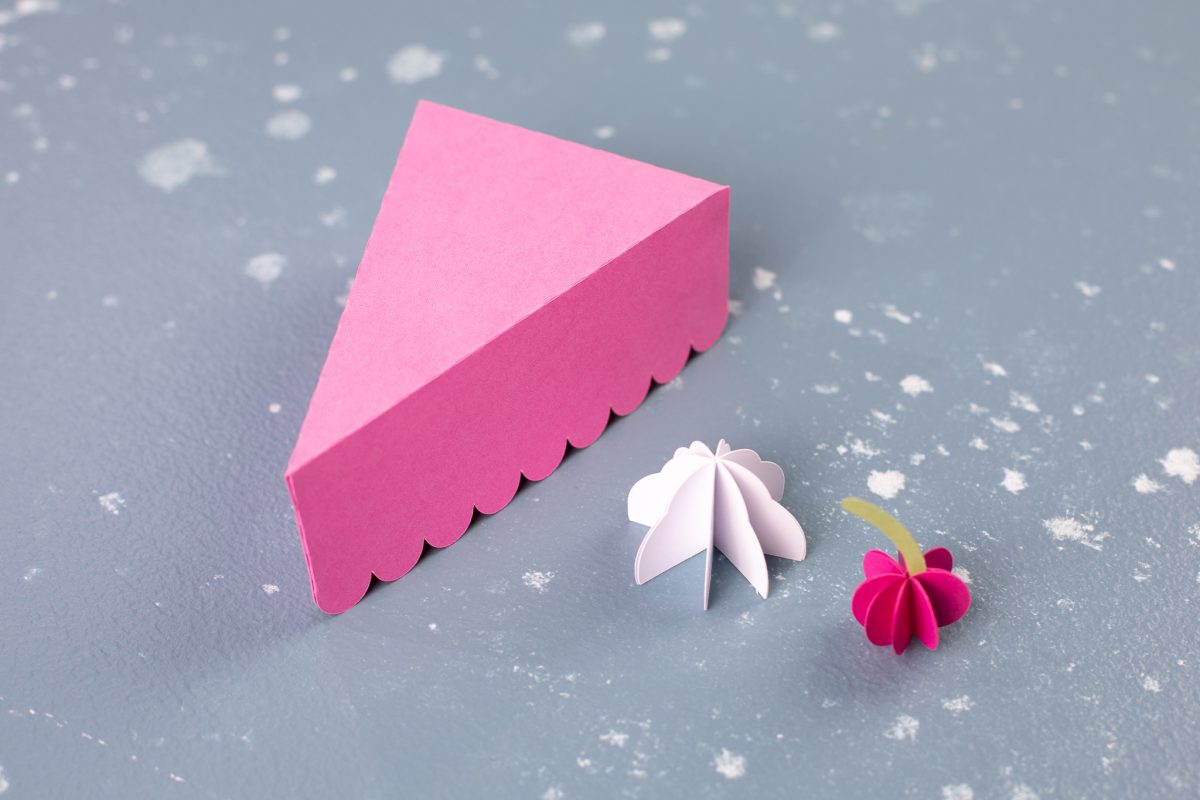
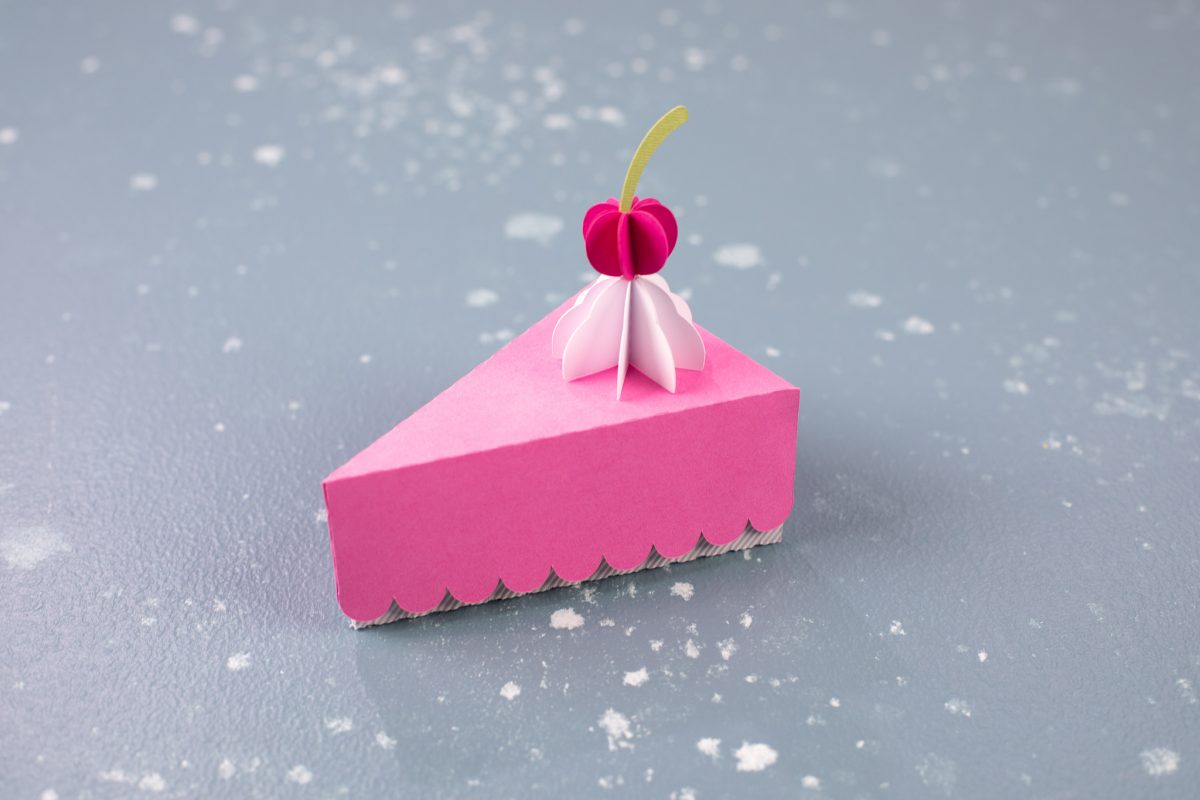
7. With hot glue, glue the cherry to the cream and the cream to the top of the box. Next place the top onto the bottom.
8. Fill your boxes with candy, toys, or even slices of pie for your guest to take home!
 Free Class - Shaker Card with the ES Mat
  Free Class - Foiled Gift Tags with the Heat Pen