
With the Christmas season coming up, it’s time to start thinking about decorations. Silhouette has some great materials, like shrink plastic and glitter vinyl, that you can use to create custom ornaments. Follow along with this tutorial to see how you can make your own!
Supplies Needed:
- Silhouette CAMEO® or Silhouette Portrait®
- Silhouette Studio®
- Silhouette Cutting Mat
- Silhouette Cutting Blade
- Silhouette Glitter Vinyl – green, red, gold, white, silver, and black
- Silhouette Shrink Plastic – white
- Silhouette Strong Tack Transfer Tape
- Silhouette Hook
- String
- Design ID #277389
- Design ID#276752
- Design ID #276798
- Design ID #106447
Step One: Preparing the Designs
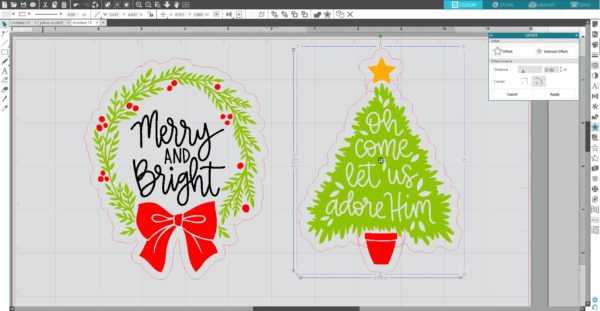
1. Download the Oh Come Let Us Adore Him design (Design ID #277389) from the Silhouette Design Store. Open it in Silhouette Studio® by locating it in your Library and resize it. Repeat the same steps for the Merry and Bright Wreath (Design ID#276752), the Snowman, (Design ID #276798) and the Snowflake (Design ID #106447) designs.

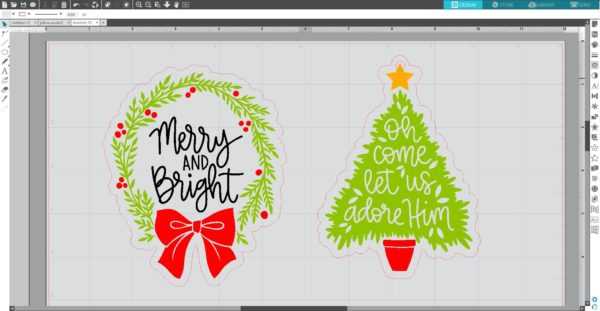
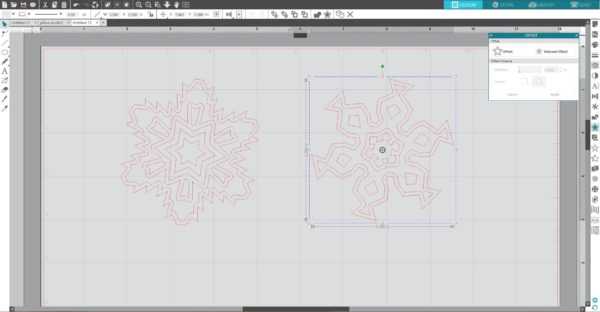
2. Now we need to add offset lines to our wreath and tree designs. To do so, go to the Offset panel. Select the shape and click Offset. Adjust distance and click Apply. If you have inner parts of the offset line, use the eraser tool to erase them or select the offset line > right-click > select Release Compound Path > delete inner parts.
3. Draw little circles and place them to the top of the designs.
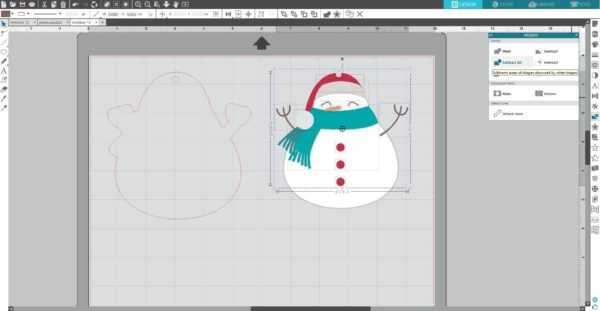
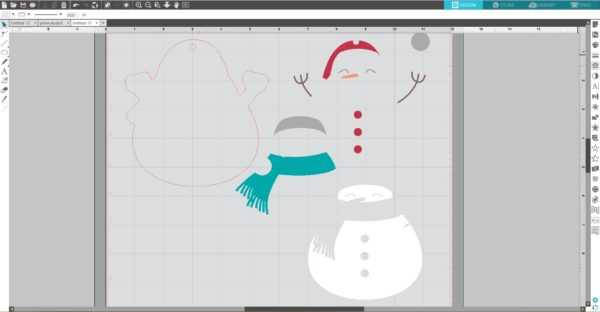
4. Add a circle to the top of the snowman. Make a copy of the design and place it in the holding area. Because we don’t want to have one layer of the vinyl overlap another, we need to adjust the snowman design. Start by ungrouping the design. Place the outer line with the circle aside. Go to the Modify panel. Select all parts of the snowman and click Subtract All.
Now if you place parts apart, you will see that they are subtracted. This means that you won’t have any of the vinyl pieces overlapping each other, and the vinyl will be flat against the base.
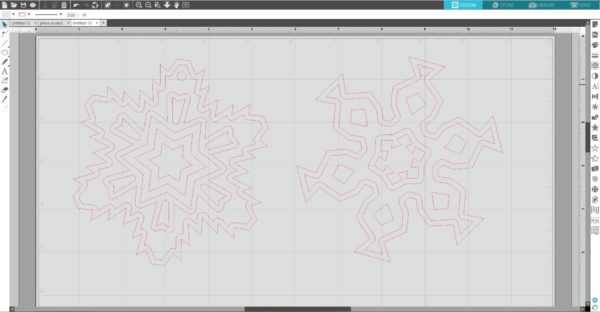
5. Now let’s add inner offset lines to the snowflakes. Go to the Offset panel. Select the shape and click Internal offset.
6. Add circles to the top of the snowflakes.
Step Two: Baking the Shrink Plastic Ornament Bases
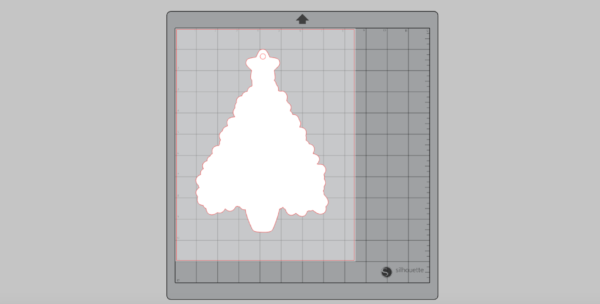
1. In the Page Setup panel, change the page size to Letter. Make a copy of the Christmas tree base with a circle and place them on the working space. Resize the design. Keep in mind that a baked piece will be approximately two times smaller than a cut one.
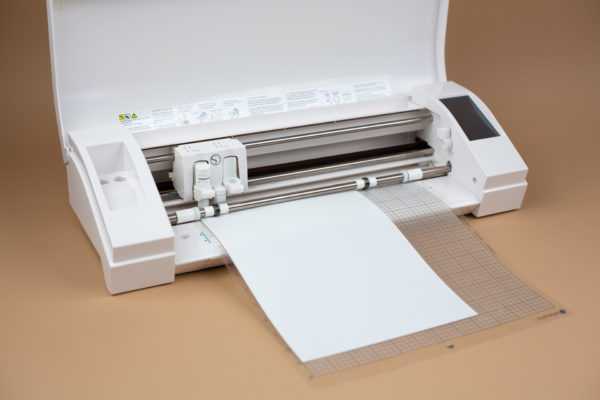
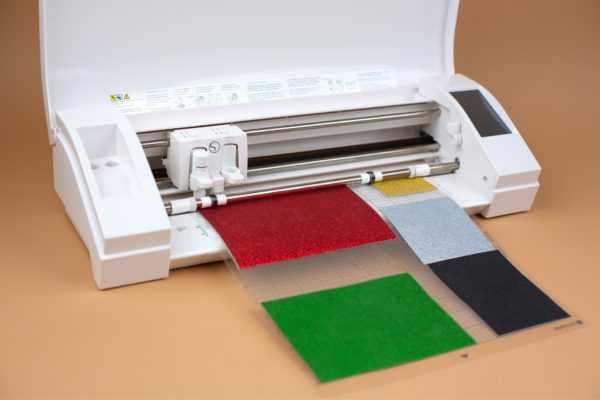
2. Place a white shrink plastic sheet on your cutting mat and feed it into your Silhouette machine.
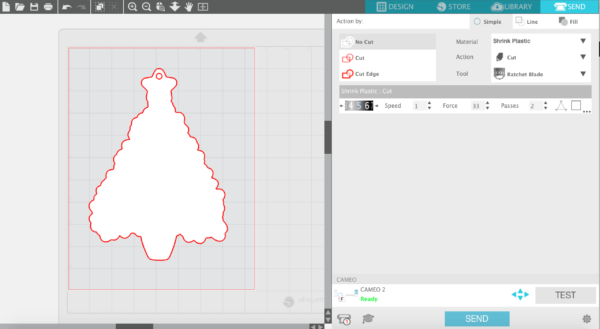
3. In the Send panel, choose “Shrink Plastic” as your material type. Adjust your blade if necessary and send your cut job to your Silhouette machine.
4. After cutting the designs, remove the designs from the cutting mat. Repeat the same steps for all five designs.
5. Preheat the oven to 290–325° F (140–160° C). We suggest testing your oven temperature first by baking a test piece of the shrink plastic. For some ovens, 325° F (160° C) is normal for shrink plastic baking, but for other ovens, 290° F (140° C) is the perfect temperature because it’s not too hot.
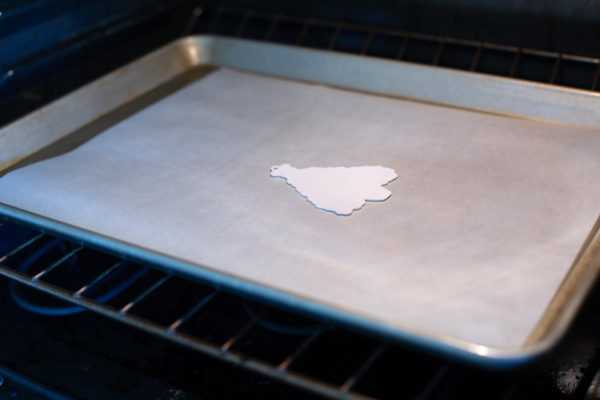
6. Place the shape matte side up onto a parchment-lined cookie sheet.

7. The baking process takes approximately two minutes. Watch as the piece shrinks (it will curl and move and then lay flat again). The shapes will be much smaller and thicker than the shapes you started with.
8. When you see that your piece is flat (or almost flat if you bake a bigger piece), quickly but carefully remove the cookie sheet from the oven. Right away, gently press the piece flat using a flat tool. You have a couple of seconds to flatten the piece because it cools down pretty quickly. The piece may stay slightly curled if you don’t flatten it fast enough.
9. Remove the piece from the cookie sheet, and repeat the process with each piece you have.
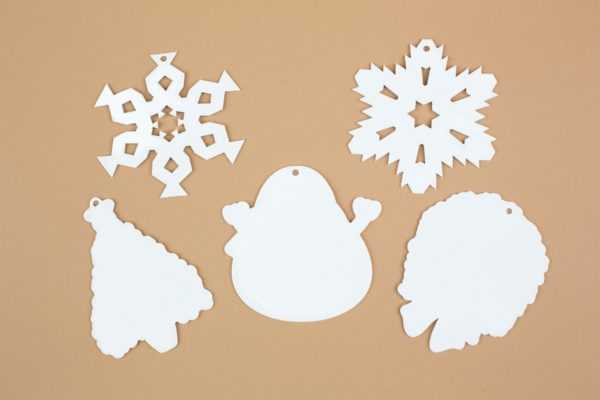
Step Three: Applying the Vinyl
1. After baking the shrink plastic, measure the actual size of the ornament bases and resize your designs accordingly so that they will fit on the ornament bases.
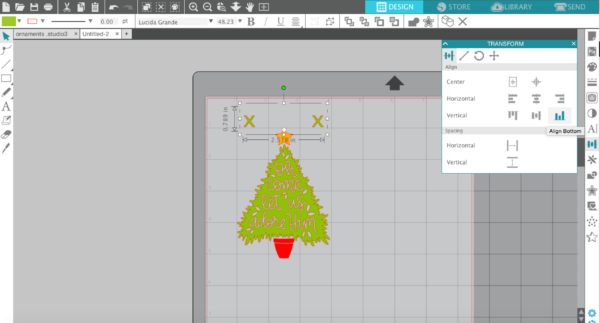
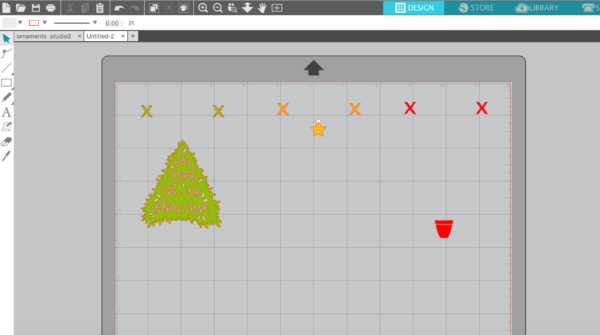
2. Our design has several colors, and we need to make sure we can line everything up after cutting the vinyl. To do this, we’ll create registration marks. Registration marks for a vinyl cut design are simply a couple of shapes that we’ll put above the design to cut with every layer. We will type a lowercase x and make a duplicate by holding the Alt key while clicking and dragging a copy of the x over to the other side. Select both of the x letters and line them up by going to the Transform panel and clicking on the Vertical alignment option.
3. Group both of the x letters together and make a copy of them. Place copied x letters on top of the original ones. Holding Shift, select the copies of the x letters and the tree, and then place all those pieces aside. Repeat the same steps for the star and pot. Group each set together.
4. Repeat the same steps for wreath design.
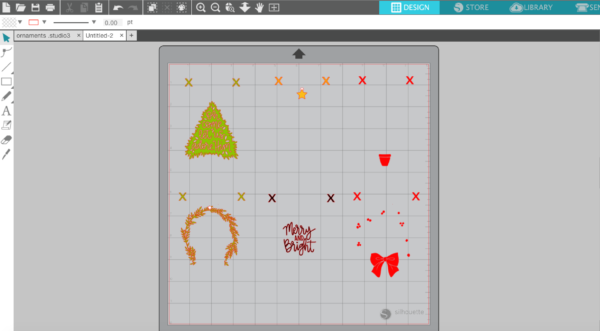
5. Group each of the colored groups together and place them on the working space.
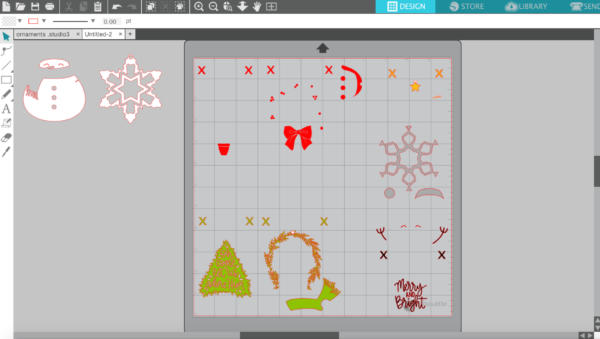
6. Place pieces of red, gold, silver, green and black glitter vinyl on the cutting mat on the same spots as you placed designs on the working space in the Silhouette Studio®. Make sure the pieces of vinyl are not smaller than your designs. Adjust the rollers if needed, and feed the mat into the cutting machine.
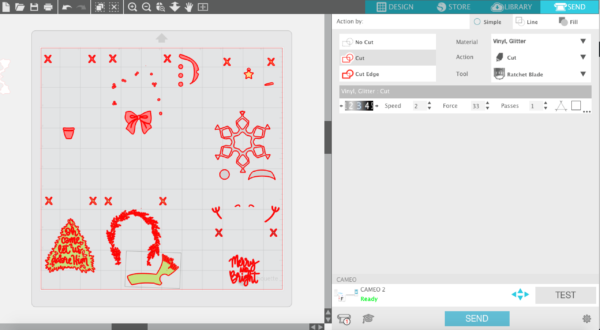
7. In Silhouette Studio®, go to the Send tab, add as new material “Vinyl, Glitter” with the following settings: Blade: 3, Speed: 2, Force: 33, Passes: 1 (watch this video to learn how to add a new material in Silhouette Studio®). Adjust the blade as indicated (unless you use a machine with an AutoBlade) and click “Send.”
8. Weed (peel away) the negative space so all that remains on the vinyl backing is your design.

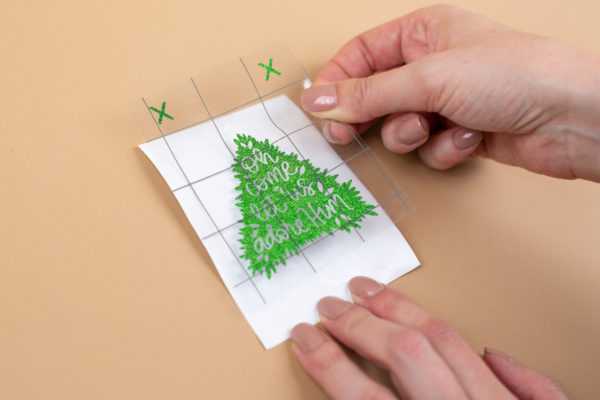
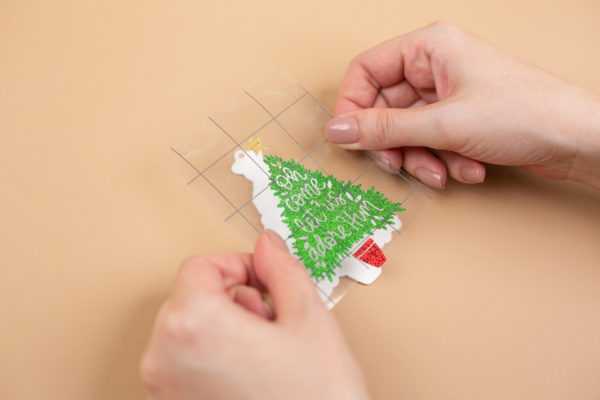
9. We’ll use the strong tack transfer tape to pick up the top layer first, including the registration marks. Now place it back on the vinyl backing to cover everything but the registration marks, and this lets us place our design on the next layer without accidentally touching it to the layer below it before we’re ready.

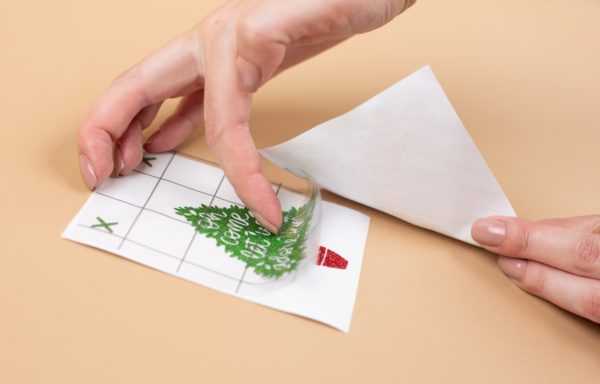
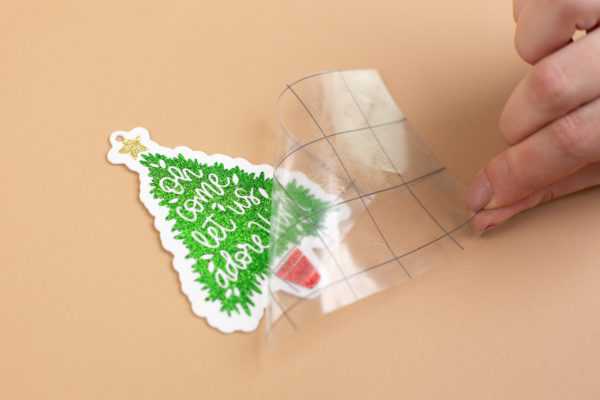
10. Line up the registration marks, and then peel the backing away. Repeat for each color.

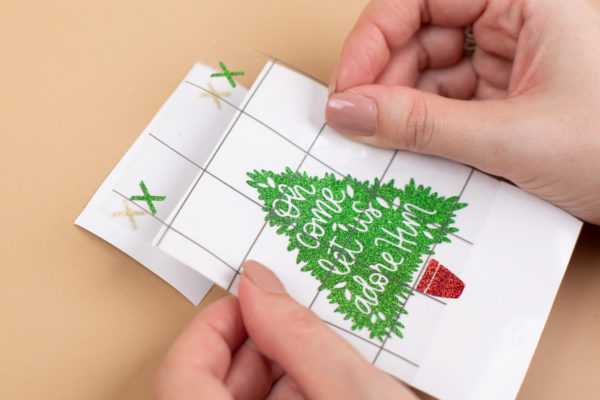
11. Now our design is ready to apply to the ornament base. You can remove the registration mark cutouts before applying the vinyl since we don’t need them any more.
12. Apply vinyl to all four remaining ornament bases. Add string, and our ornaments are ready!


We love these ornaments! They are perfect for decorating your tree or handing out as gifts to friends and neighbors, and the glitter vinyl adds a really fun and festive touch.
Nasze Naturalne
September 3, 2025
Your authentic voice really shines through in everything you create and share
Naszenaturalne
September 2, 2025
Really love your style
Kelly Wayment
June 28, 2024
You can use it with vinyl as long as it is smooth and flat to allow the static charge to hold on to it. Rolled vinyl that wants to go back to its rolled shape will not necessarily work well, and it would need to be trimmed to fit the ES mat cutting area.
Kelly Wayment
June 28, 2024
Yes, you can use the heat pen while using the ES mat. 🙂
Yurii
March 2, 2024
Hello. May it be used with heat pen?
Thanks
Jerome
February 24, 2024
Hi, works this with the normal vinyl foils or only with printer papter etc?