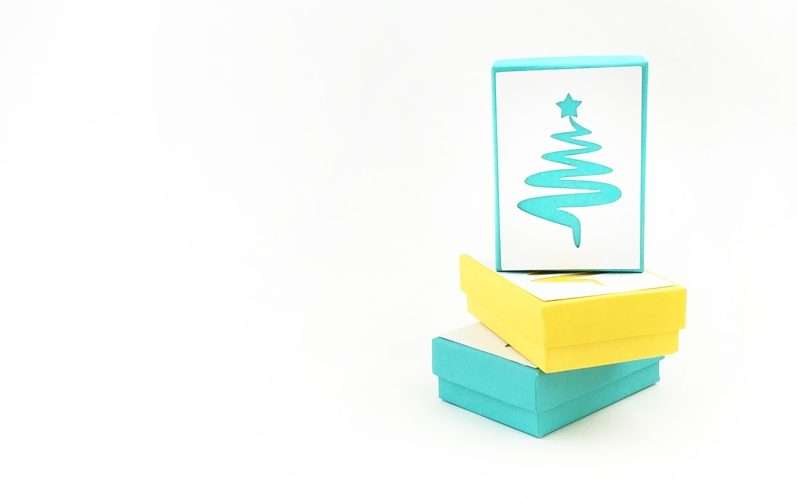
I downloaded this cute Christmas Tree shape from Silhouette today and played around with a few ideas on how to use it. Since I needed a couple of small gift boxes, I thought using it for this Christmas tree gift box would be a perfect DIY to share with you. You can use bigger boxes in terms of size, and you can use silver and gold foil to add a little shine too. I kept my boxes simple and small, but I’d love to hear how you made yours. Because my project was small, I decided to use my Curio, but you can use your CAMEO or Portrait.
Supplies Needed:
- Silhouette CAMEO® or Silhouette Portrait® or Silhouette Curio™
- Silhouette Cutting Mat
- Silhouette Cutting Blade
- Silhouette Studio®
- Gift Box
- Cardstock
- Glue
- Design ID #104140
Step One: Setup the Design
- In Silhouette Studio®, go to the Page Setup icon in the upper right-hand corner and choose the appropriate cutting mat.
- Download and open Design ID #104140 in Silhouette Studio®.
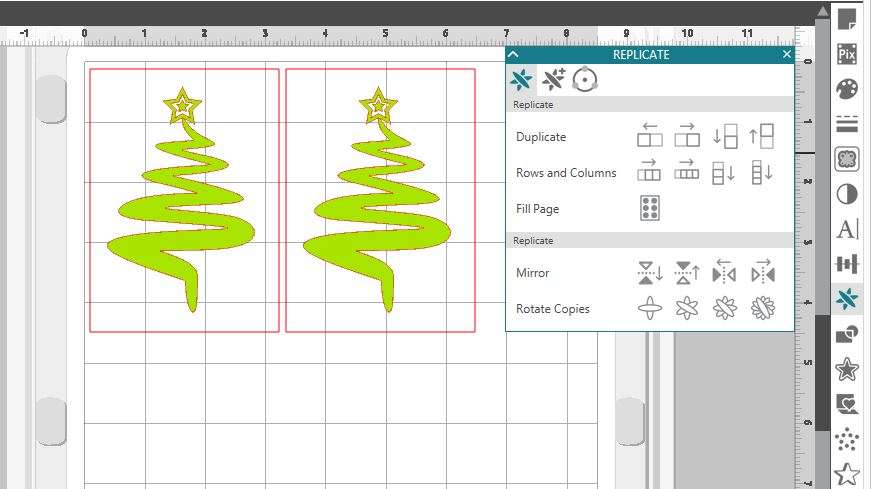
- Ungroup the shape and move the star so that it lays on top of the tree.
- Measure your gift box and resize your Christmas tree shape so that it can fit on the top lid.
- Create a rectangle around the tree shape that is the size of your gift box.
- Replicate your shape for as many gift boxes you have.
Step Two: Cut and Assemble
- Set your blade to the Cardstock settings suggested by Silhouette Studio®.
- Load your cardstock onto your mat (Tip: peel the blue protective sheet off first).
- Load your mat and, if you are using the Curio, other platforms onto the tray. In the settings, you will see that 6 platforms are required. These are the platforms that come with your Curio bundle. Each one is labeled with a 1 or 2 (which counts as the number of platforms). Your mat counts as 1. So you will need two 2s, one 1, and then your mat (2+2+1+1=6).
- Load your tray onto your machine, and send to cut using the Cardstock settings.
- Once your design is cut, remove the cardstock from the mat.
- Glue your Christmas trees onto your gift boxes.


Did you use cardstock or gold or silver foil?
Nasze Naturalne
September 3, 2025
Your authentic voice really shines through in everything you create and share
Naszenaturalne
September 2, 2025
Really love your style
Kelly Wayment
June 28, 2024
You can use it with vinyl as long as it is smooth and flat to allow the static charge to hold on to it. Rolled vinyl that wants to go back to its rolled shape will not necessarily work well, and it would need to be trimmed to fit the ES mat cutting area.
Kelly Wayment
June 28, 2024
Yes, you can use the heat pen while using the ES mat. 🙂
Yurii
March 2, 2024
Hello. May it be used with heat pen?
Thanks
Jerome
February 24, 2024
Hi, works this with the normal vinyl foils or only with printer papter etc?