
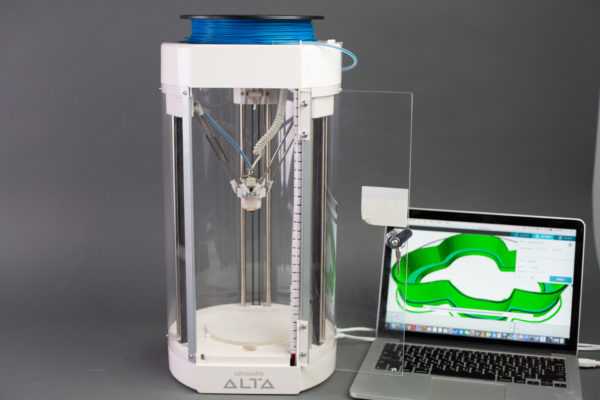
One of the awesome things you can do with the Silhouette Alta® is create custom cookie cutters. There are a few different ways you can find and use designs to create 3D printed objects, and we’re going to walk you through them all! Just follow along with the tutorial below.
Supplies Needed:
- Silhouette Alta®
- Silhouette 3D™
- Alta platform
- Alta platform tape
- Alta filament – blue, green, red, pink, black, and yellow
- Design ID#267551
- Design ID#267538
- Design ID#229292
- Design ID#275660
- Cloud design (free with your Alta)
- Jigsaw design (free with your Alta)
Step One: Opening Free Designs
1. Install the Silhouette 3D™ software on your computer.
2. Once the Silhouette 3D™ software is installed, connect the Silhouette Alta® to the power supply. Then connect the Silhouette to your computer with the included USB cable. Turn the machine on by pressing the power button. 3. Open Silhouette 3D™. Make sure to register your Alta to get your 25 free designs. To find your free Alta designs, go to the Library > “Free with Machine” folder. Click on the “Cloud Dough Cutter” design. Be sure your design is small enough to fit within the red circle, which is the print margin.
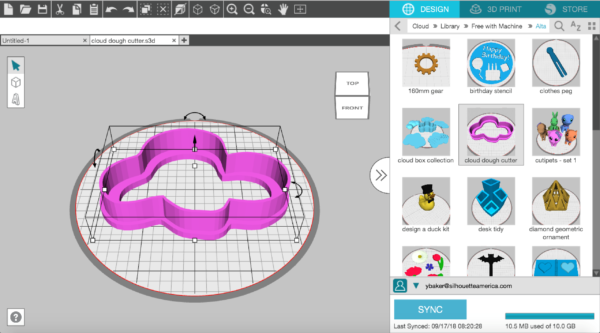 4. When you click the 3D Print tab in the upper right area of your screen, the software will automatically center your object in the print space. You’ll notice a “Slicing” progress bar appear at the bottom of the screen. Slicing means that the software breaks down your shape into the layers it needs to print with PLA filament. The progress will take longer for larger or higher-quality prints.
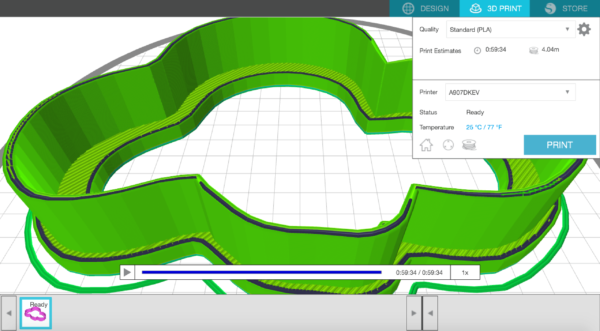 5. You have three preset quality settings: Draft, High, and Standard.
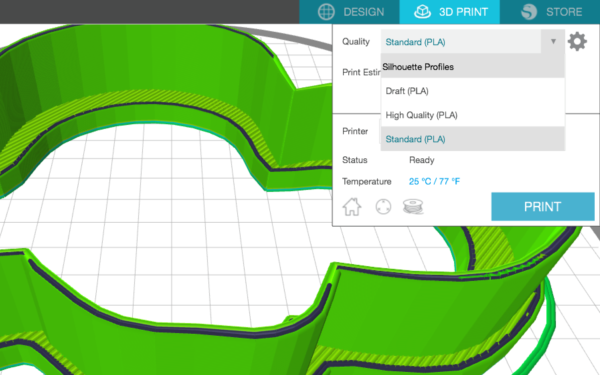 6. You can also change any preset print settings to create your own print profiles by clicking on the gear icon. Start with an existing profile, and then make your adjustments in these tabbed sections. Changes can be saved as a new profile and will not save over one of the three default profiles. We will use the high-quality settings for this project.
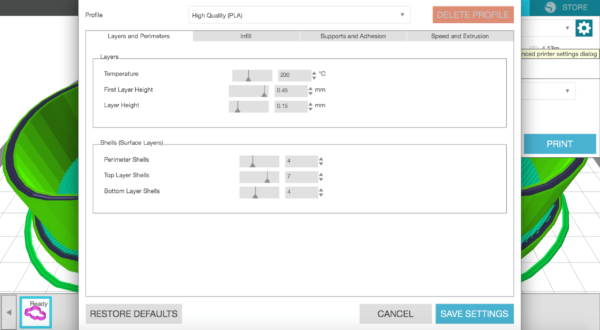 7. In this tab, you also can see the status of the Silhouette Alta® as well as the estimate of the needed filament in meters and an estimate of the total printing time.
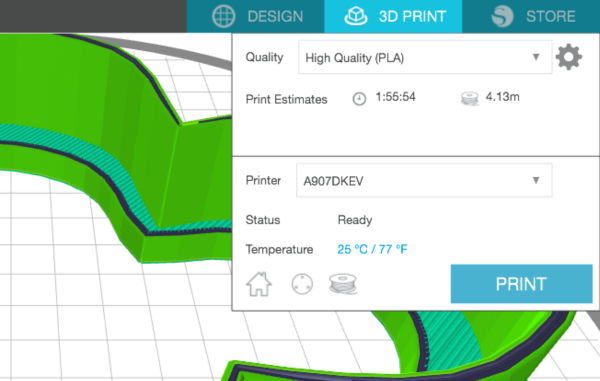 8. Apply the platform tape on the platform (if you haven’t already done so),
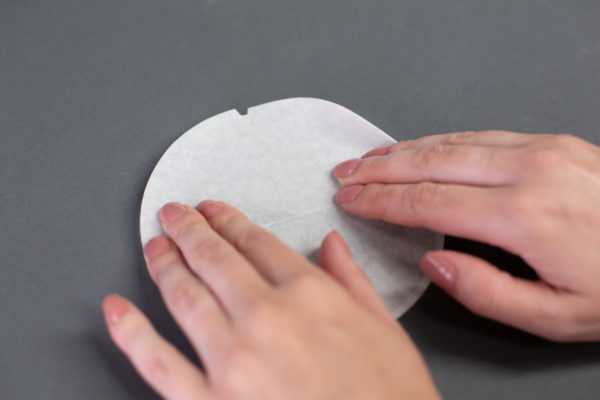 and place the platform under the print nozzle with the tape side facing up. Make sure the notch of the platform lines up with the notch at the bottom of the machine.
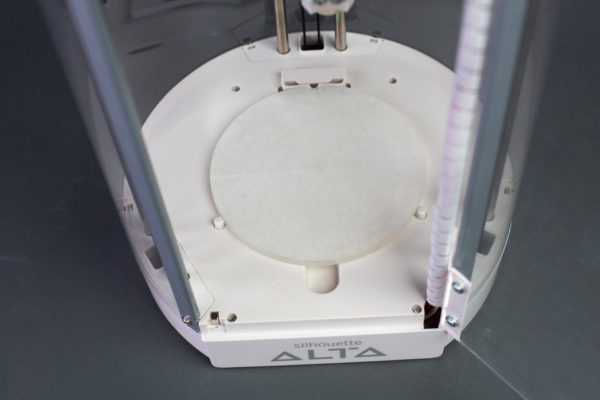 9. Now we need to load the filament in your Alta 3D printer. To do so, in Silhouette 3D™, click on the Filament button.
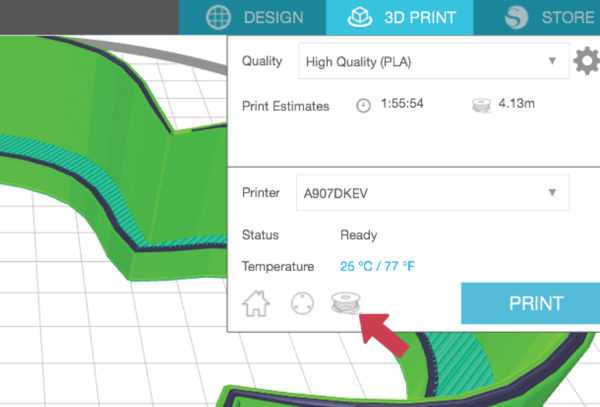 Next, click on Load Filament.
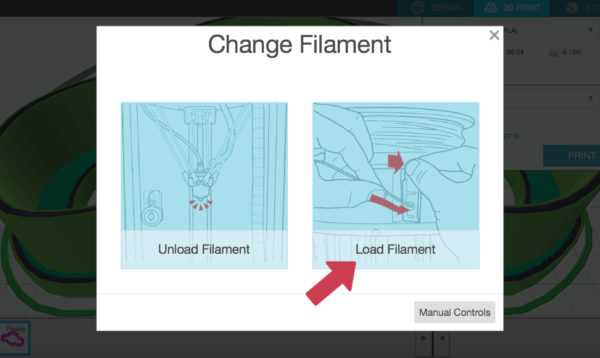 Follow the steps on the screen to load your filament properly. Those steps are to place your filament roll on top of your machine, feed the filament through the eye on top of the machine and then the filament tube (make sure you slide the filament tube back through the eye to protect it from extra wearing), press the tab on the filament loading lever to open the hole where you inserted the filament, release the tab, and then press Load in the Silhouette 3D™ software.
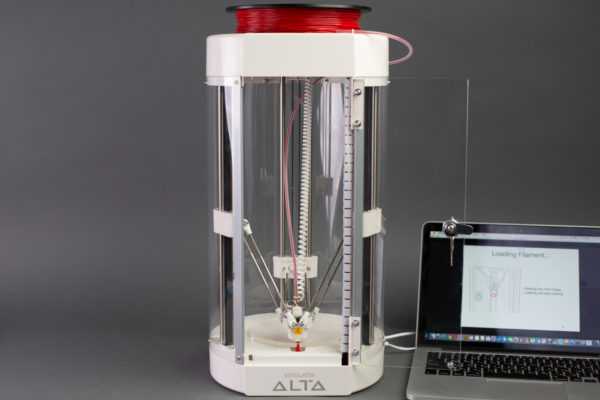
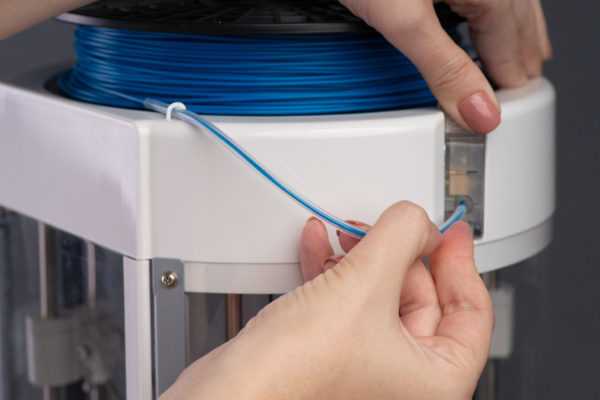 The machine will feed the filament through the inner print tube and heat up the print head.
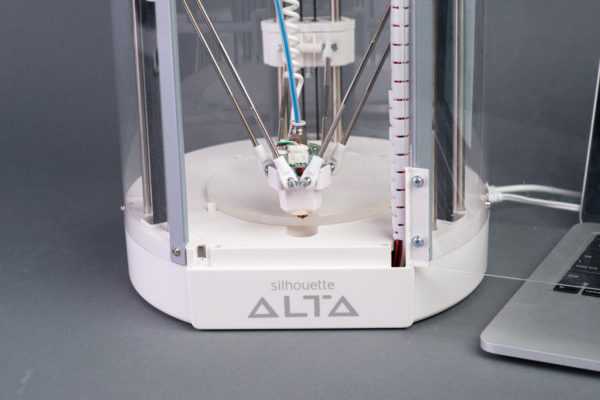
 10. When you’re ready to start your 3D print, click Print.
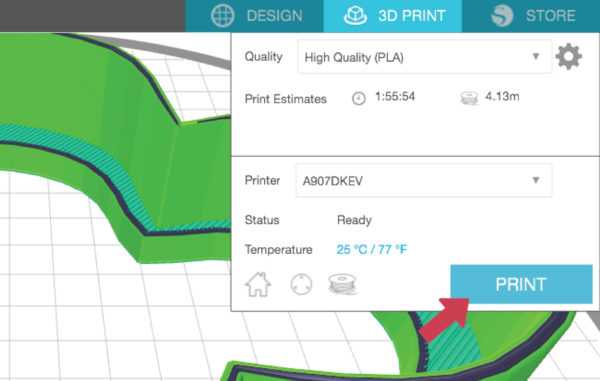 11. When the machine has heated the filament to the indicated temperature set in the print settings, the machine will begin to print the design.
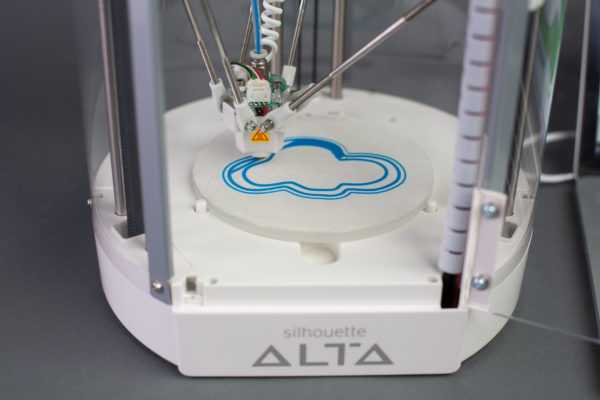 12. After your machine is done printing the design, give the design a few minutes to cool.
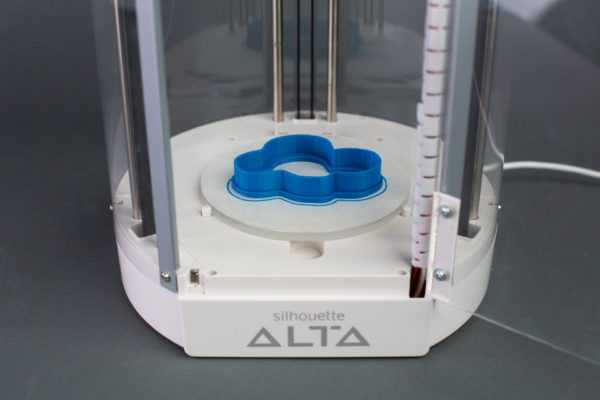 Gently remove the design from the platform. Begin to break away the first layer and any support or hanging pieces to reveal your printed design.
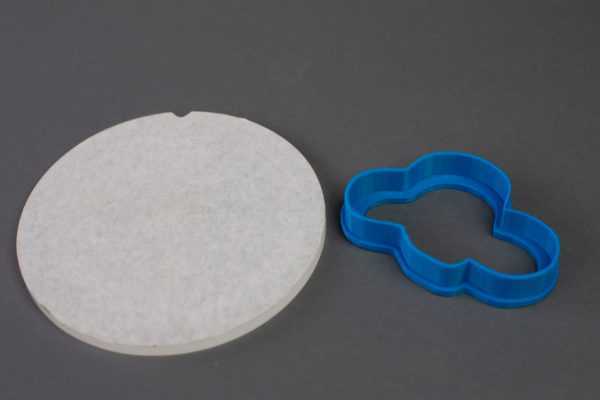
Step Two: Turning 2D Designs into 3D Objects
1. As you can see, the designs you’ve purchased or moved into the Cloud, along with any subfolders you may have created in Silhouette Studio®, are all here in Silhouette 3D™.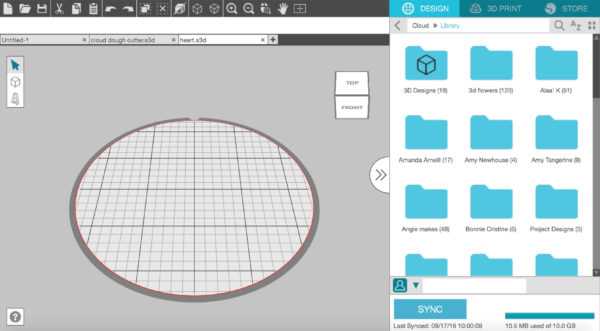 2. To find a 2D design, either double-click on the folders to open them and navigate to the design you want or use the search option to type in a key word. To open a design, double-click on it.
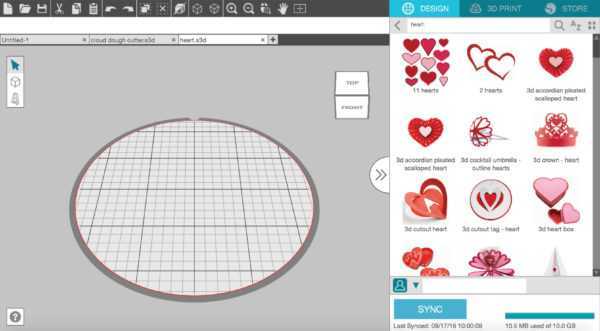 3. 2D designs bring up a pop-up box for you to select from six different import (or extrusion) options, which are Extrusion, Cookie Cutter, Jewelry Box, Stencil Box, Stencil, and Wax Pendant. Click on the Cookie Cutter button.
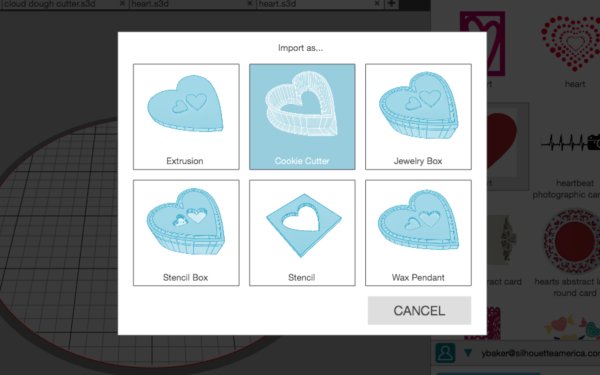 4. Now we have a 3D heart-shaped cookie cutter.
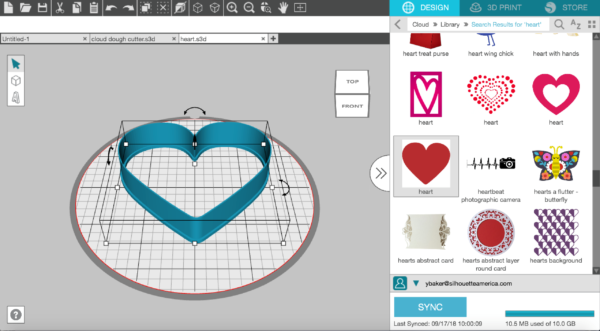 5. Let’s use a different color of filament for this cookie cutter. To change the filament, you need to go to the 3D Print tab and click on the filament icon.
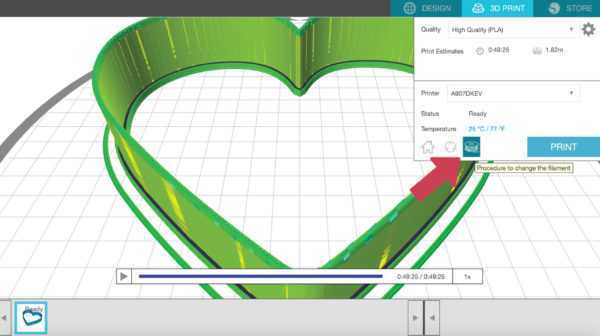 6. Click Unload Filament.
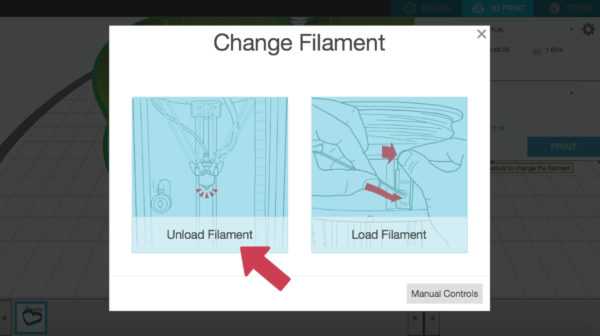 7. Follow instructions on the screen and click Unload. The Alta will automatically unload the filament.
 8. Now you can load a different color of filament and proceed to print.
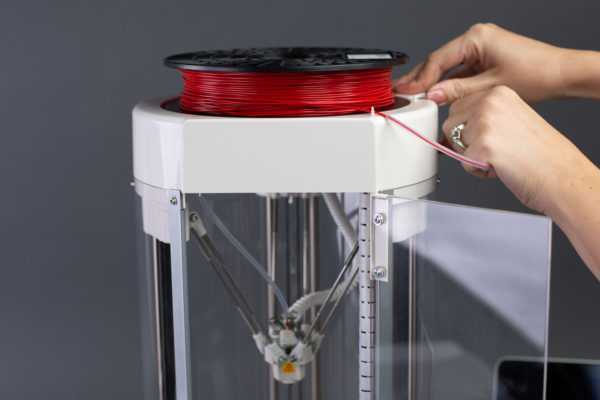
 9. After your machine is done printing the design, give the design a few minutes to cool and gently remove the design from the platform.
Step Three: Buying 3D Design from the Design Store
1. Now let’s print a couple more cookie cutters. We will use designs from the Silhouette Design Store this time. In Silhouette 3D™, go to the Store tab, and then click 3D and 3D printing. Type “cookie cutter” in the search bar.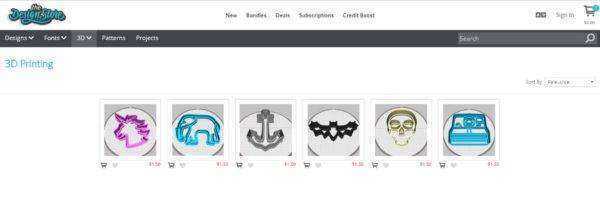 2. Download your selected designs. We will use the “Unicorn” design (Design ID #267551) in this example. All downloaded Alta 3D designs can be found in your Library in the 3D Designs folder.
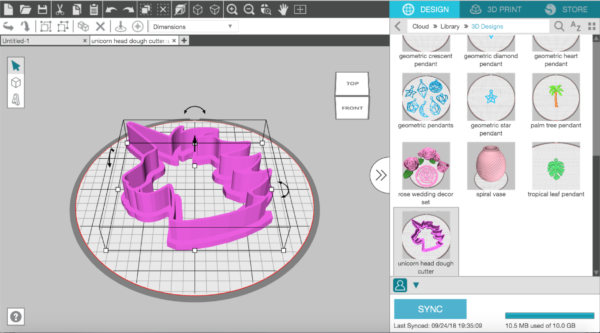
 3. Adjust all print settings, change the filament if needed, and proceed to the 3D printing process as described above.
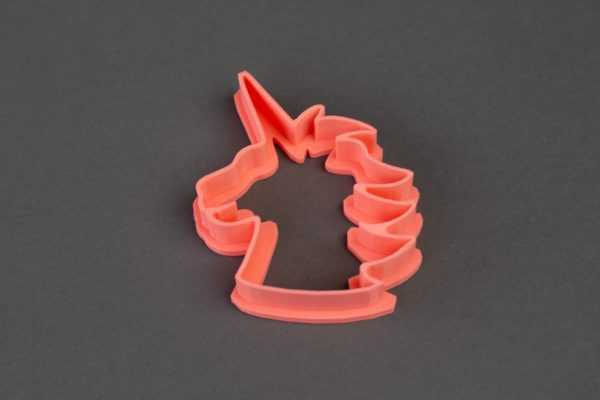 Now we have a good set of different cookie cutters you can use for different occasions! Have fun!
 Silhouette would like to thank Natalie Steed (White Rose Cookies) for baking and decorating such amazing cookies for this blog post!
Share with us the cookie cutter shapes you want to print with your Silhouette Alta™ in the comments below.