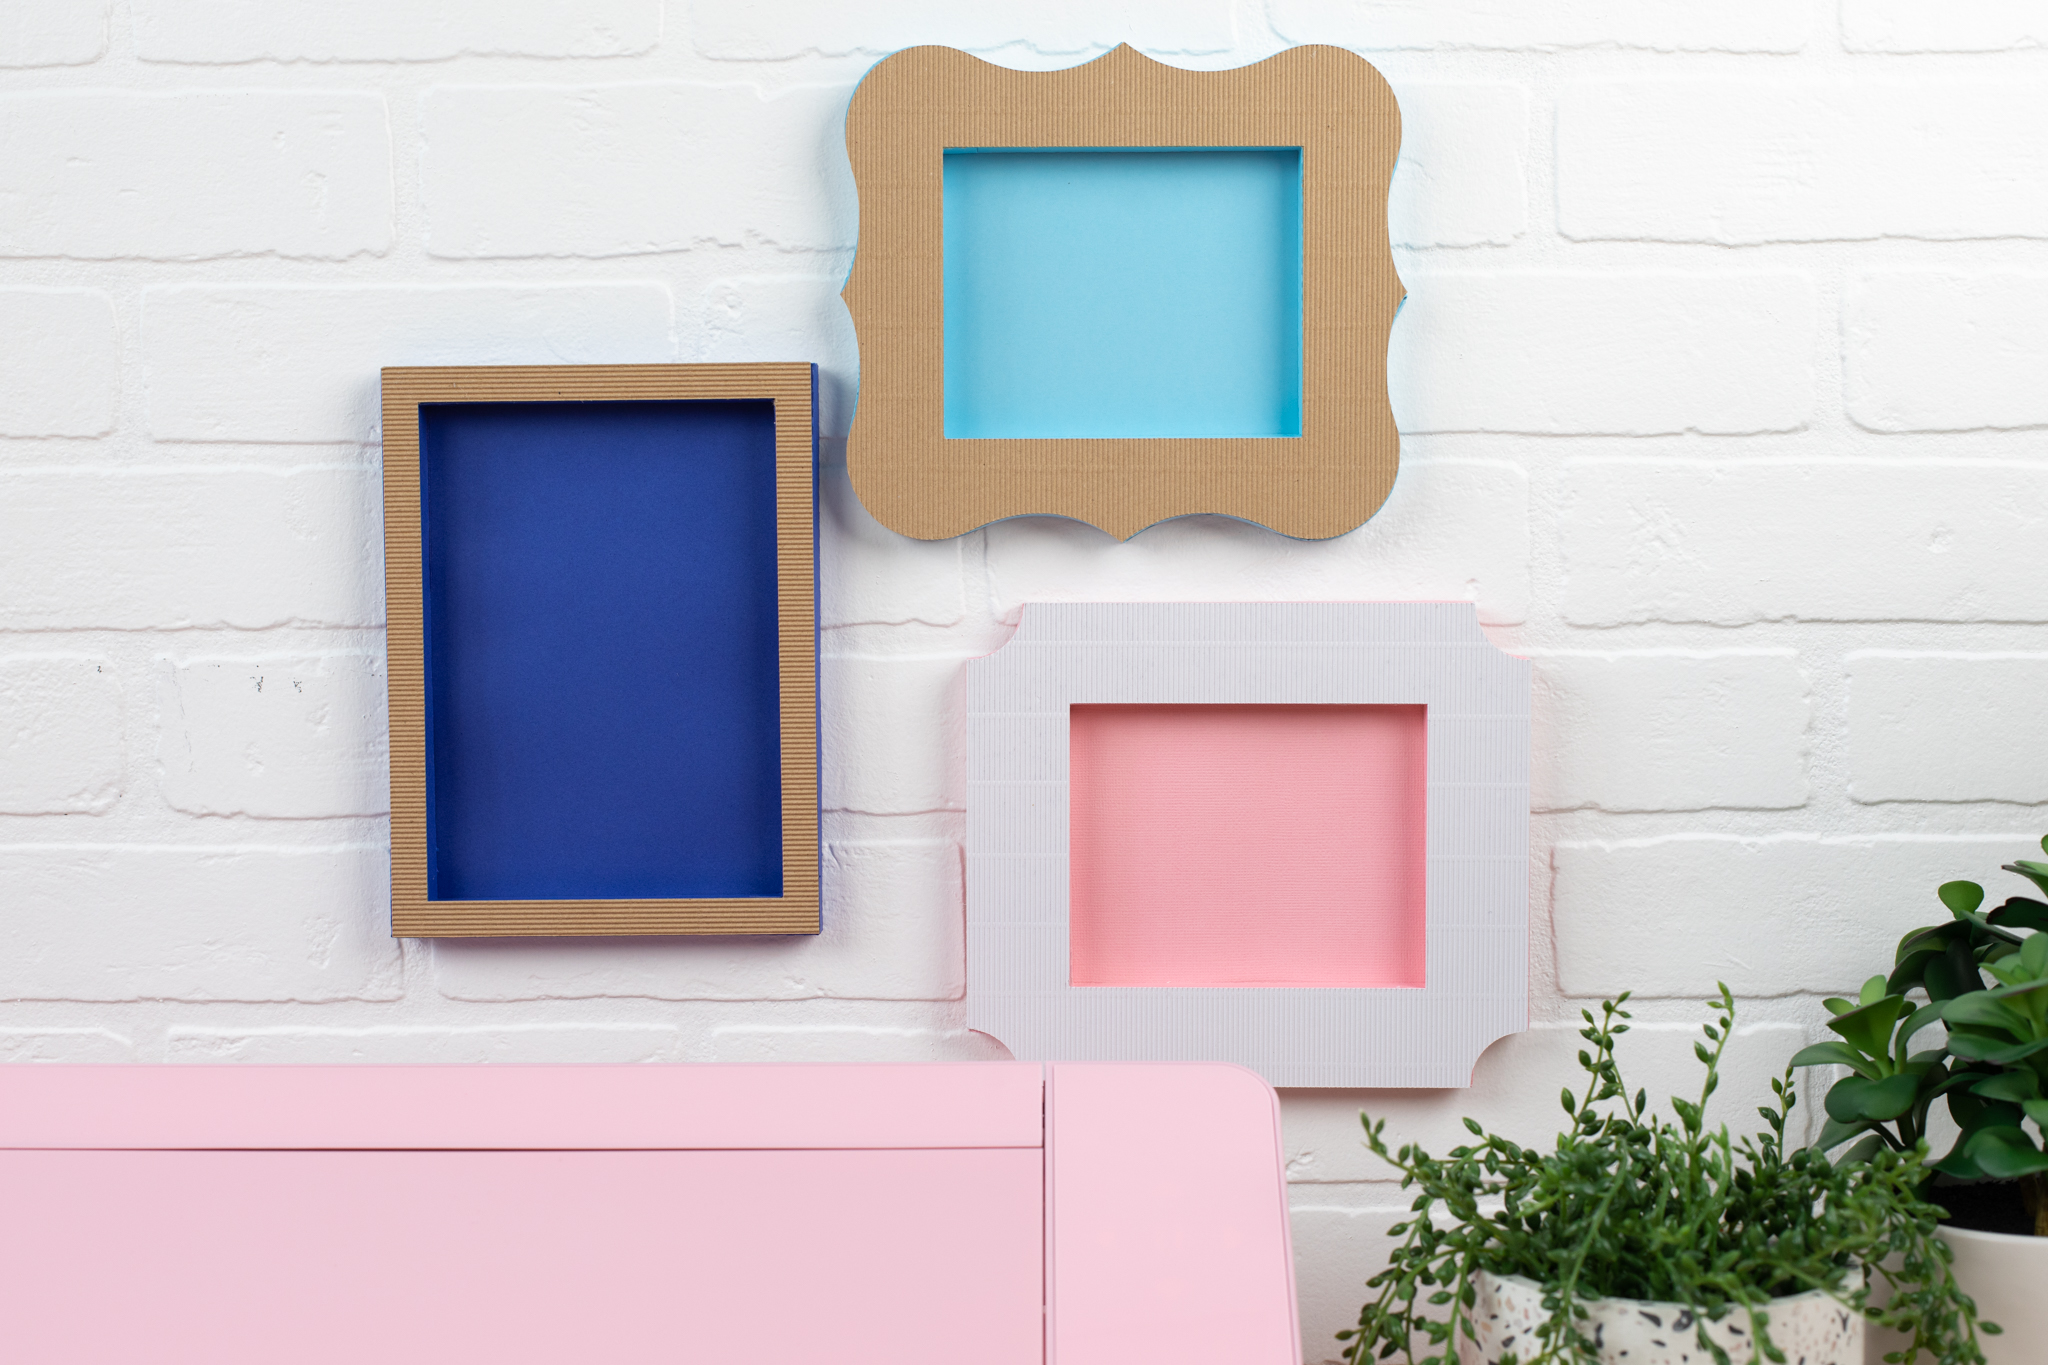
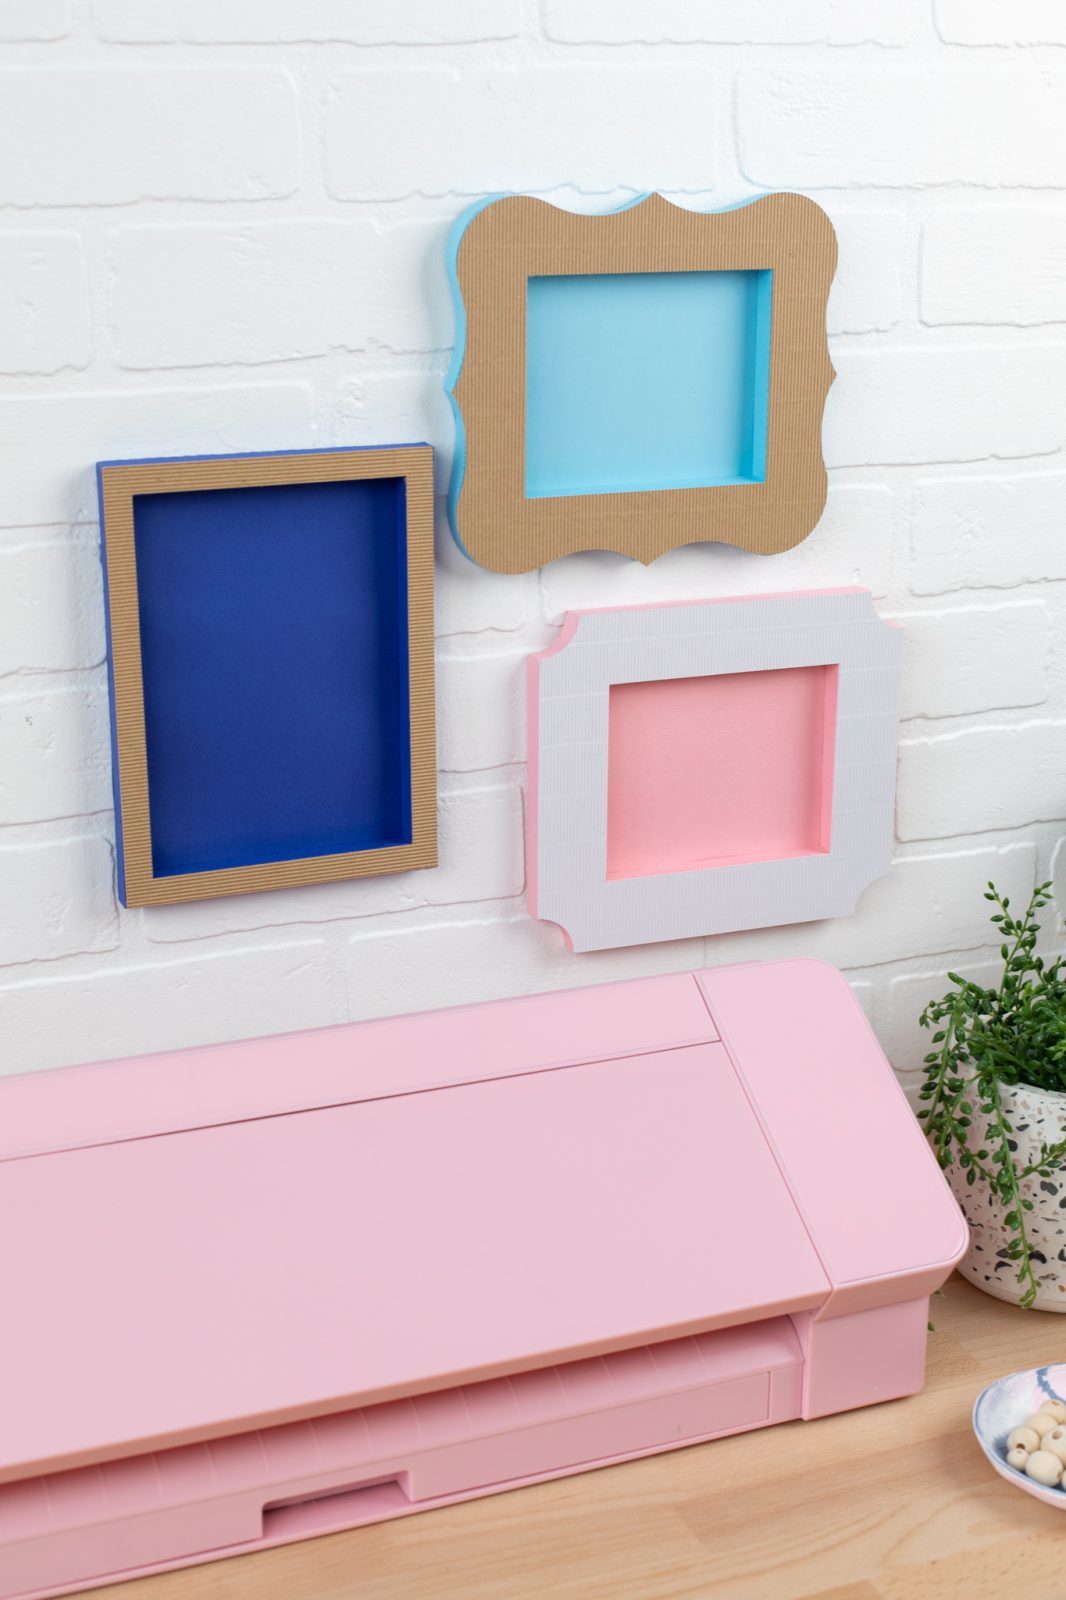
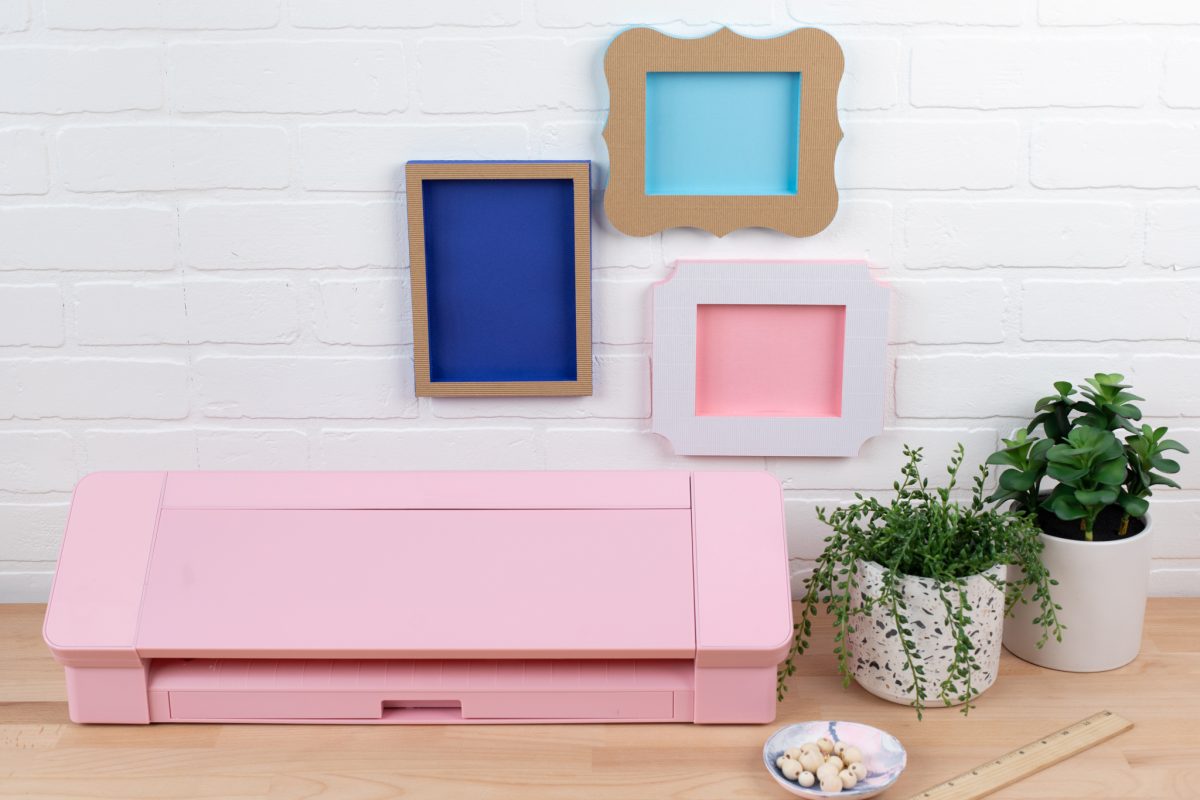
Picture frames can be expensive, so why not make your own?! These fun photo frames are made with paper and then covered with corrugated paper to add a unique texture. Keep the colors neutral or use spray paint to add a splash of color!
Supplies Needed:
- Silhouette Cameo® or Silhouette Portrait®
- Silhouette Studio®
- Silhouette Cutting Mat, optional
- Silhouette Cutting Blade
- Cardstock
- Corrugated Paper
- Adhesive
- Spray paint, optional
- Design ID #41437, #41436, and #41435
Step One: Formatting the Cut File
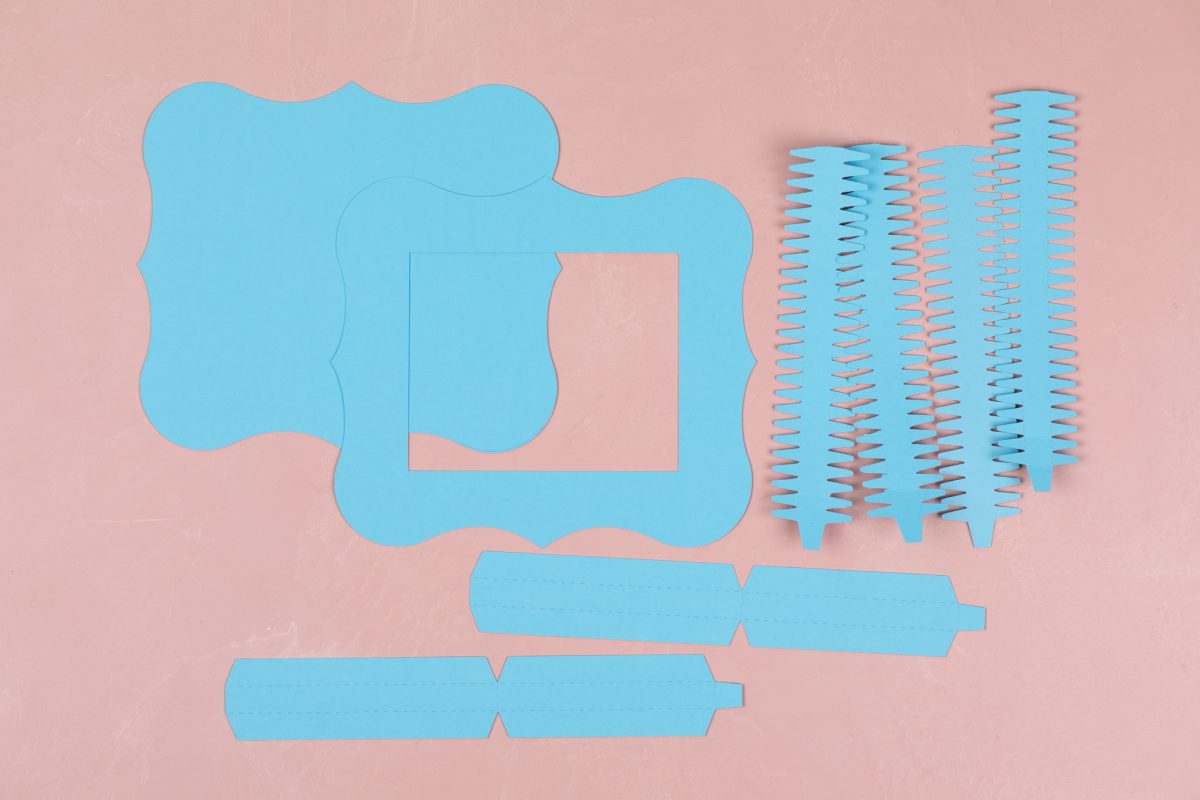
1. Insert one of the frame files into Silhouette Studio®. Resize as desired. Cut the entire file from cardstock. If you don’t resize the file, you’ll need two pieces of 12-by-12-inch cardstock.
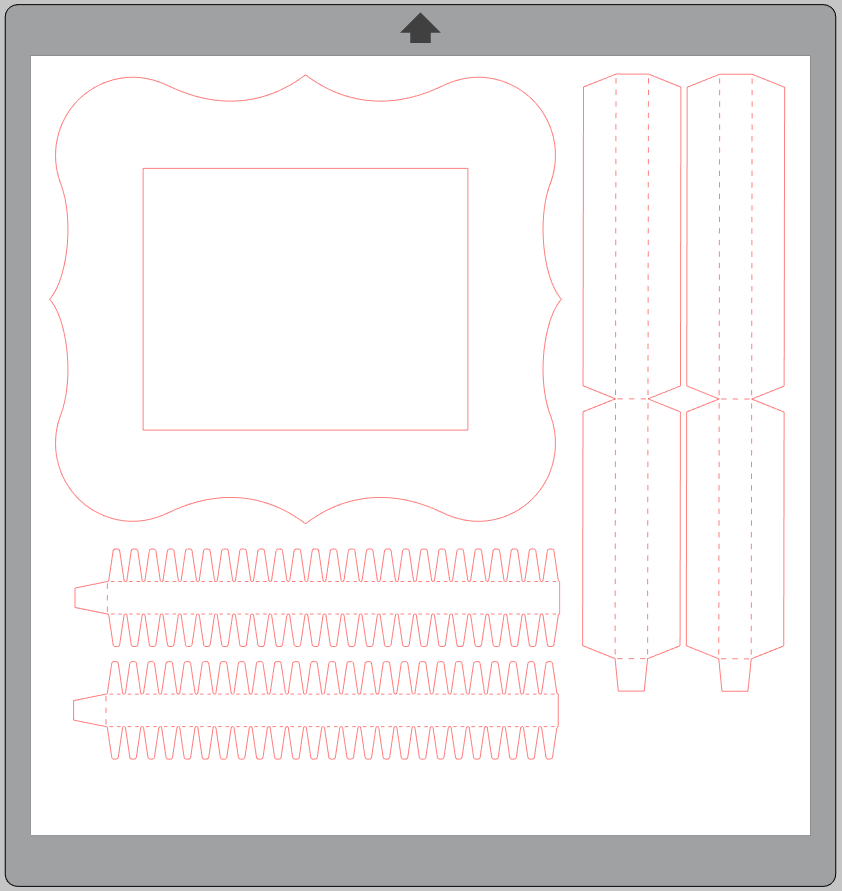
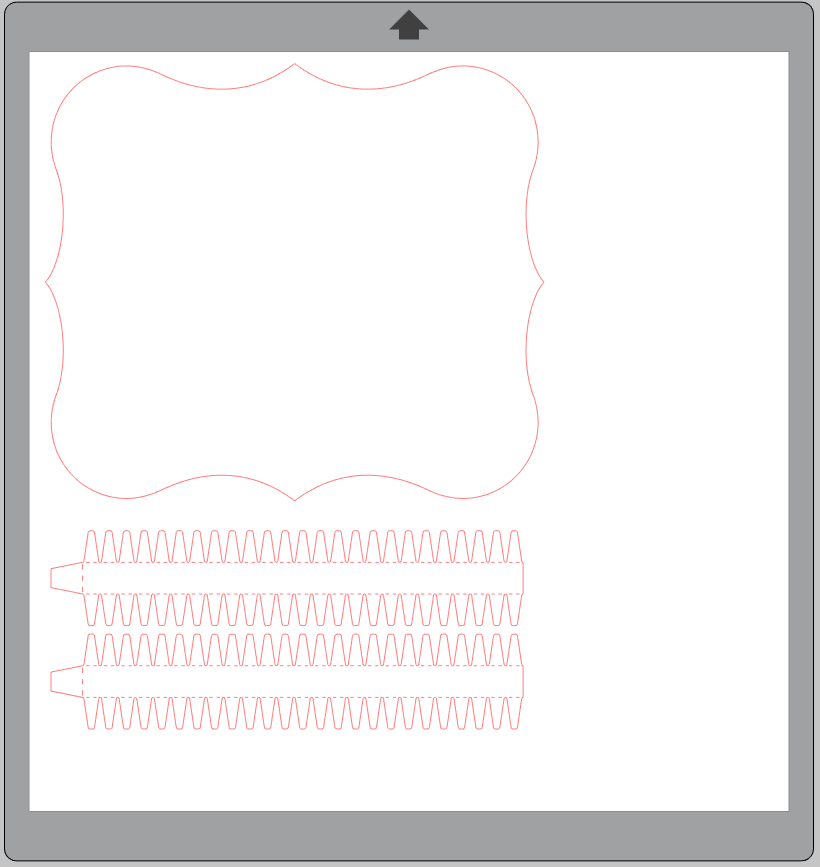
2. Then cut only the main frame portion of the design from corrugated paper.

Step Two: Assemble the Frames
1. Once all your elements are cut, fold the long straight edge pieces along their fold lines. These pieces will act as the inside border for your frame.

2. Glue them along the inside border of your frame, gluing the tabs together.
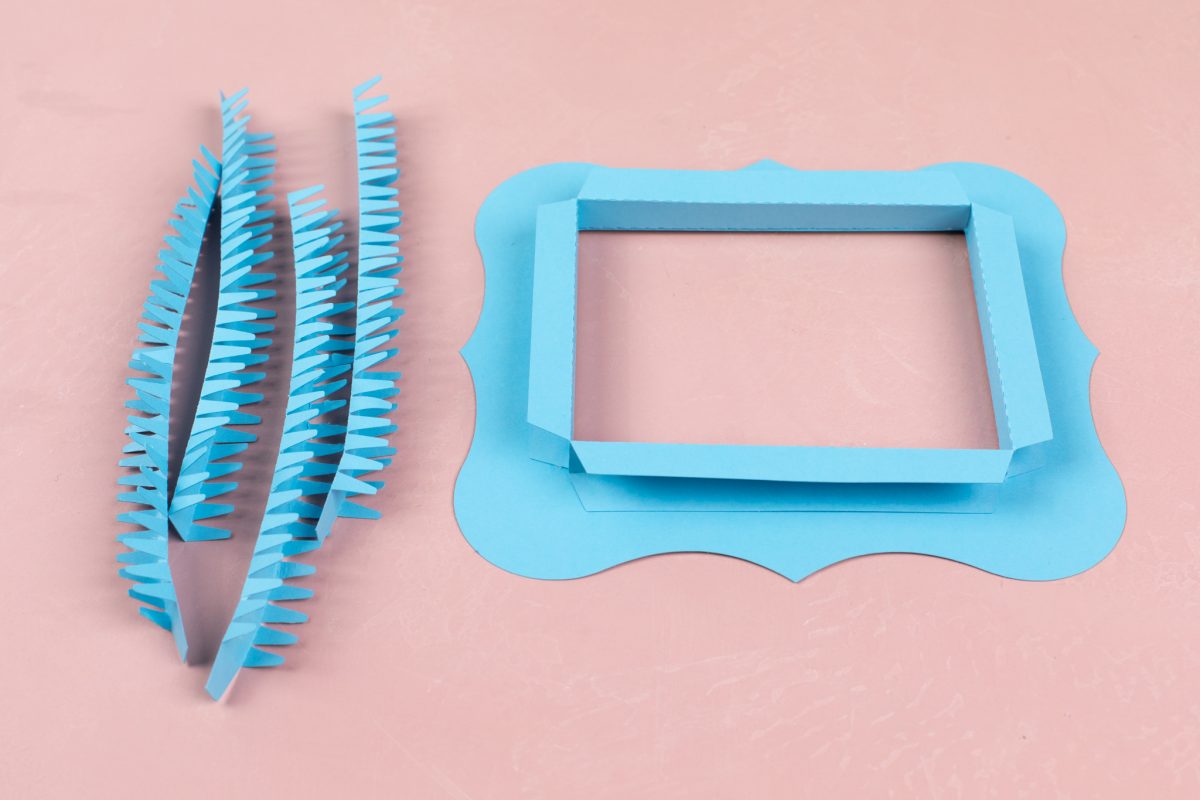
3. Next, fold all the teeth inward of the four remaining edge pieces. These will act as the outer border of the frame.
4. Glue the 4 outer border pieces together using the tabs, so you have one long piece to work with. Starting at one of the four points of the frame, begin to glue the outer border to the edge of the frame. The teeth allow you to gently bend and fit the curved edge of the frame.
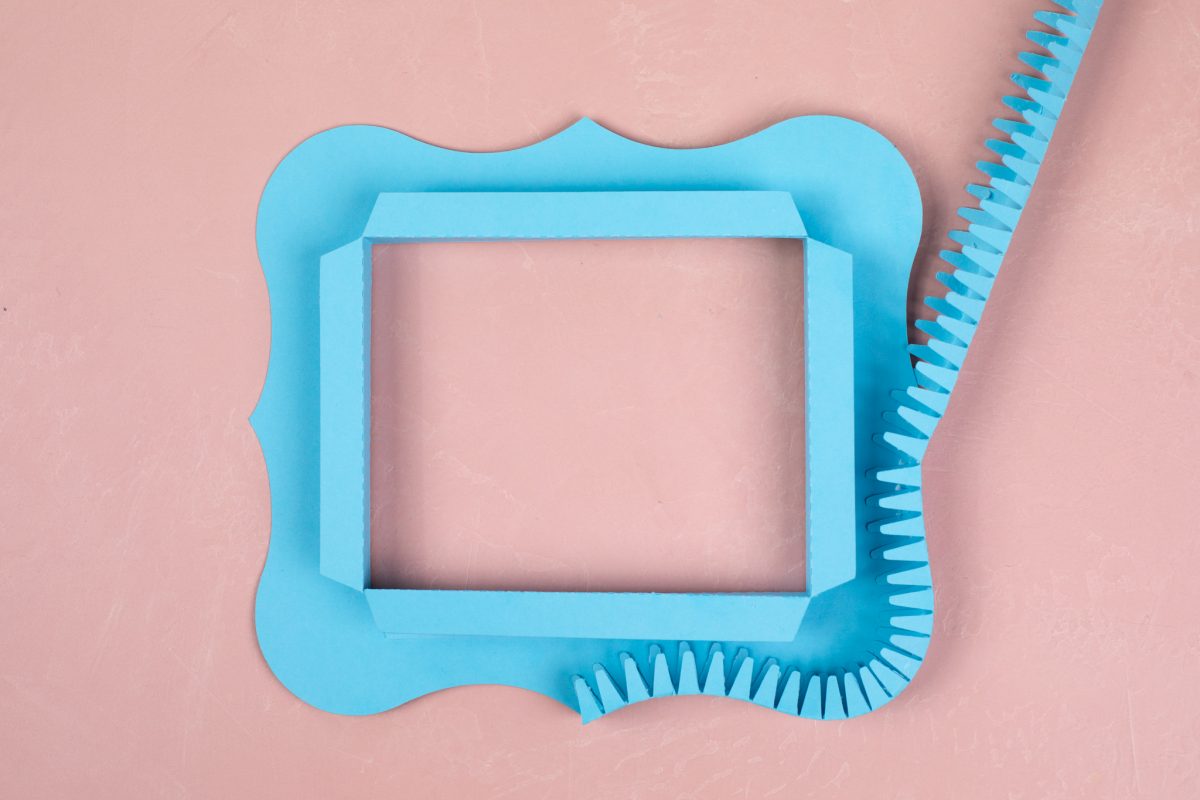
5. Once both inner and outer borders and glued into place, apply the corrugated paper to the front of the frame and also the back piece. If you’d like to insert a photo, do that before gluing in the back piece.

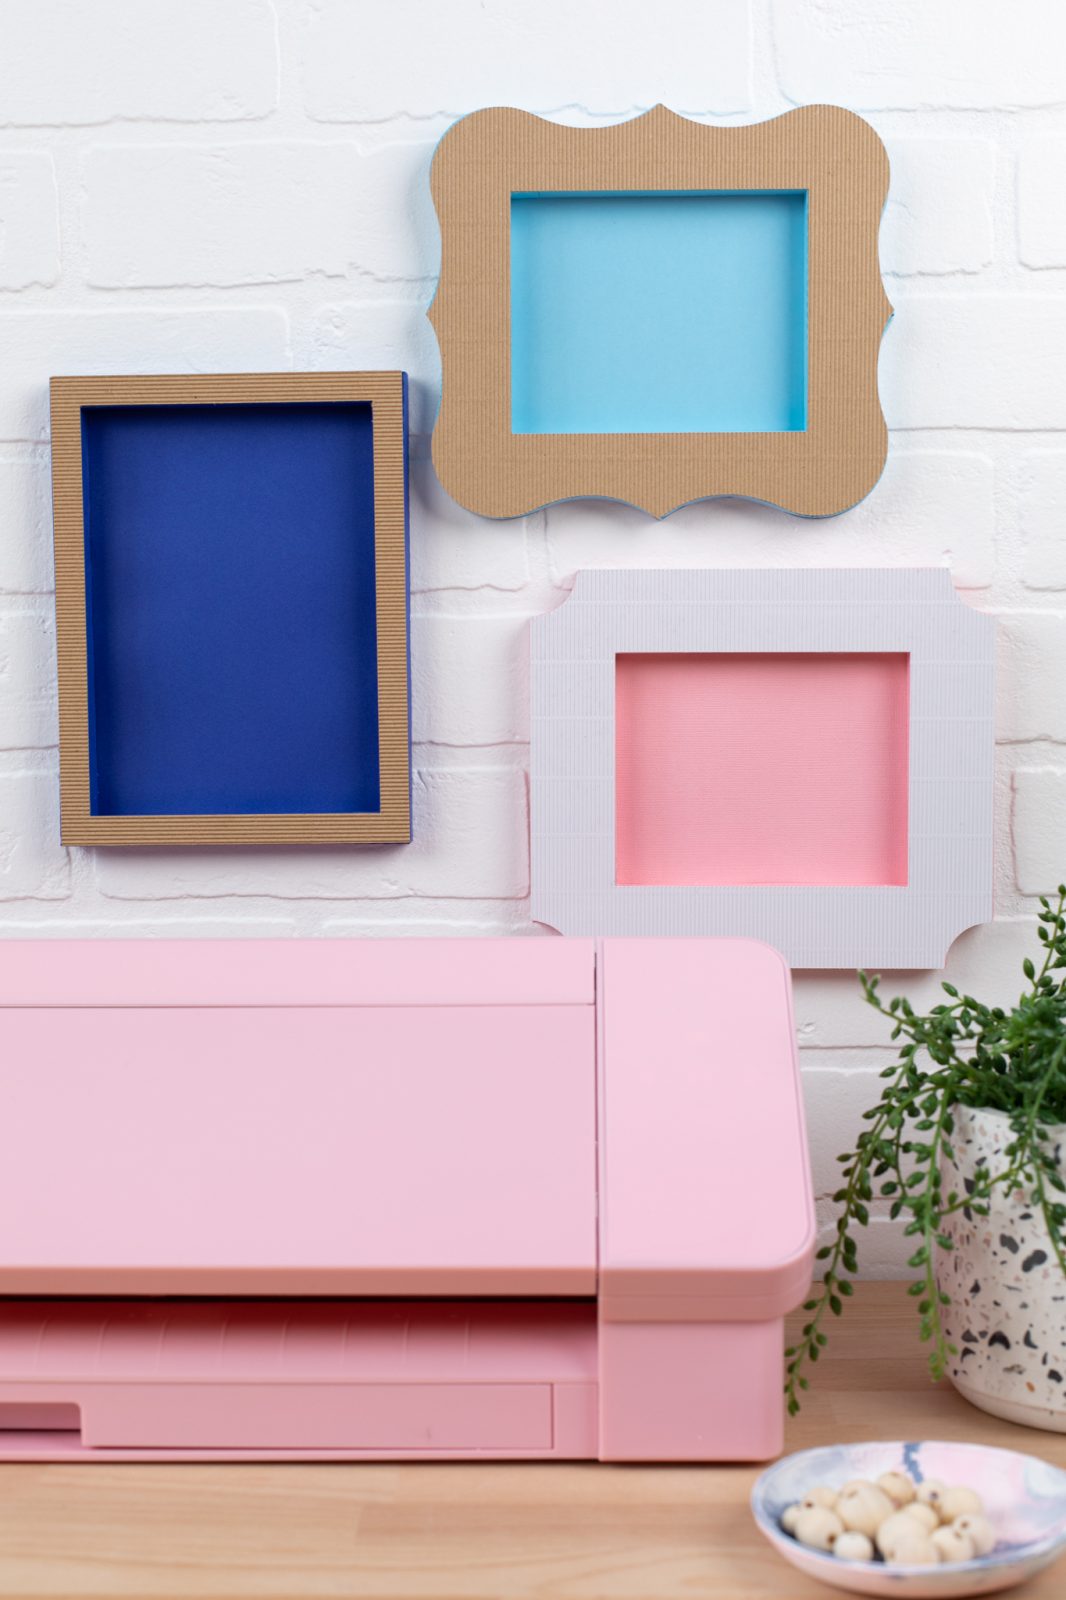
Your frame is now complete! The additional designs are assembled the same way and look lovely all together!
 Free Class - Shaker Card with the ES Mat
  Free Class - Foiled Gift Tags with the Heat Pen
Nasze Naturalne
September 3, 2025
Your authentic voice really shines through in everything you create and share
Naszenaturalne
September 2, 2025
Really love your style
Kelly Wayment
June 28, 2024
You can use it with vinyl as long as it is smooth and flat to allow the static charge to hold on to it. Rolled vinyl that wants to go back to its rolled shape will not necessarily work well, and it would need to be trimmed to fit the ES mat cutting area.
Kelly Wayment
June 28, 2024
Yes, you can use the heat pen while using the ES mat. 🙂
Yurii
March 2, 2024
Hello. May it be used with heat pen?
Thanks
Jerome
February 24, 2024
Hi, works this with the normal vinyl foils or only with printer papter etc?