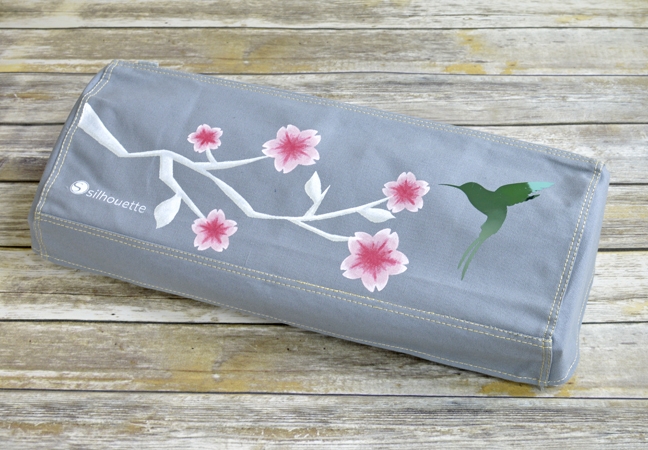
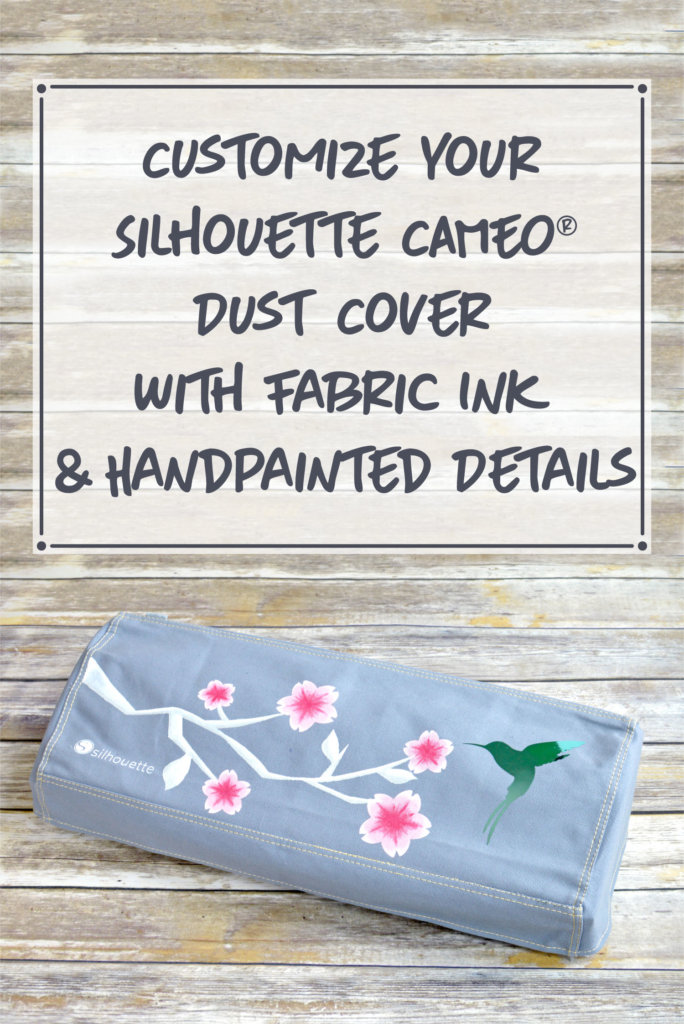
Looking for an easy first project to try out those fabric inks you couldn’t wait to get your hands on? Your Silhouette dust cover is the perfect canvas (literally) for some handmade art.
Supplies Needed:
- Silhouette dust cover
- Silhouette Stencil Vinyl
- Silhouette Transfer Tape
- Fabric Ink (assorted colors)
- Metallic Heat Transfer Material
- Paintbrush
- Iron or heat press
Designs Needed:
- Sakura Flowers (Design #8076)
- Hummingbirds Set (Design #78150)
Step 1: Cut Your Materials
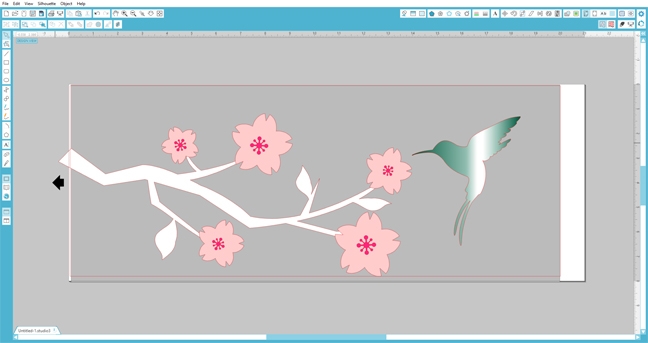
For projects with a lot of different components, I like to plan out my overall design in Silhouette Studio® first. This helps ensure that certain colors and sizes of shapes will coordinate nicely. Once I was satisfied with my design, I cut the cherry blossom branch and flowers out of stencil vinyl and the hummingbird design out of the new metallic mint heat transfer material.
Step 2: Apply Fabric Ink
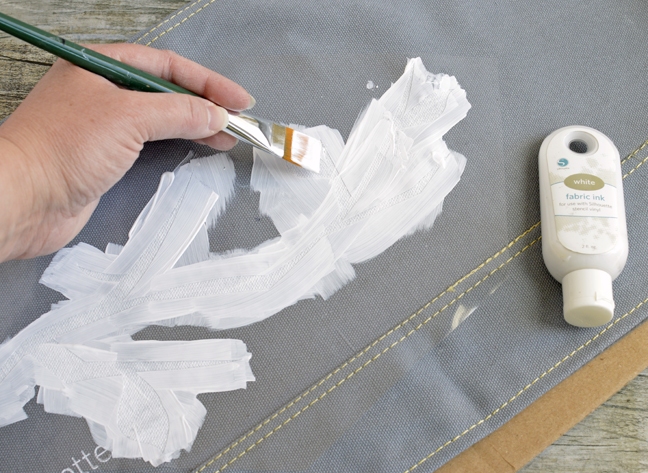
Transfer the cherry blossom branch stencil to your dust cover using transfer tape and apply white fabric ink over the entire design in an even coat. When swiping with a paintbrush rather than dabbing with a sponge, it’s best to pull the ink inward from the edge of the stencil material as pushing it outward into the edge of the vinyl may cause bleeding.
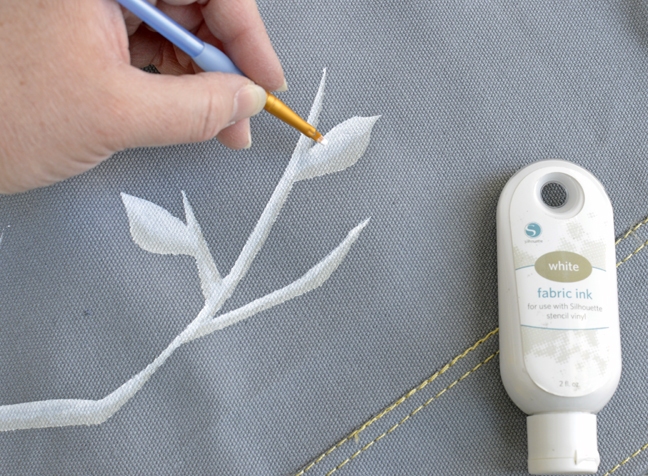
Remove the stencil and allow to dry. To give my design dimension and a painterly look, I applied additional fabric ink freehand to the branch. This is not as difficult as it sounds! Simply use a detail paintbrush and grey fabric ink to add a subtle shadow to the lower edge of the branch and a second coat of white fabric ink to add a highlight to the top edge of the branch. While the ink is still wet, use a dry brush to blend the edges of the colors inward.
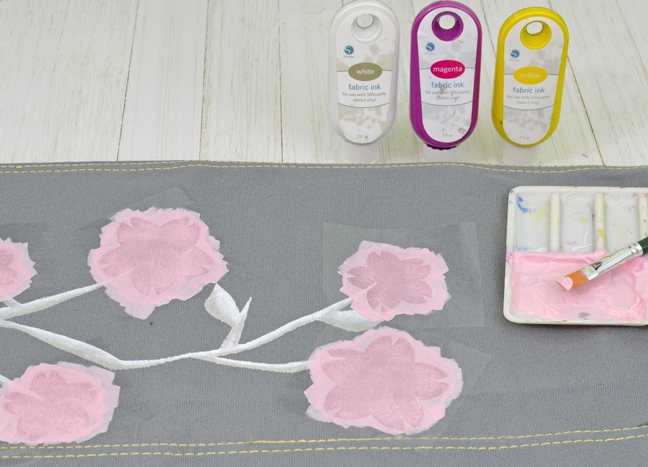
Allow the branch to dry completely and then apply the flower stencils to your dust cover with transfer tape. For this next step, I wanted a pale, peachy pink…so I mixed white, magenta, and a dash of yellow fabric ink together in my palette until I achieved a color I liked. Don’t be afraid to mix your inks for a truly custom design!

To continue with that handpainted look, I added magenta fabric ink to the center of each flower with a detail brush and white highlights to the outer edges of the petals.
Step 3: Apply Metallic Heat Transfer Material

Have you seen the new metallic heat transfer material? I cut the hummingbird design out of the gorgeous metallic mint color to add a little emphasis to this component (and so that I wouldn’t have to handpaint all of the details 😉 ). Press the design onto your dust cover with an iron or heat press.
Step 4: Enjoy Your Custom Dust Cover

Now every time I go to use my CAMEO 3, I’ll be reminded of spring flowers and that little streamertail that holds a special meaning for me (he’s the national bird of Jamaica, where I was married, and also known as the doctor bird).
How will you personalize your dust cover with fabric ink?
Nasze Naturalne
September 3, 2025
Your authentic voice really shines through in everything you create and share
Naszenaturalne
September 2, 2025
Really love your style
Kelly Wayment
June 28, 2024
You can use it with vinyl as long as it is smooth and flat to allow the static charge to hold on to it. Rolled vinyl that wants to go back to its rolled shape will not necessarily work well, and it would need to be trimmed to fit the ES mat cutting area.
Kelly Wayment
June 28, 2024
Yes, you can use the heat pen while using the ES mat. 🙂
Yurii
March 2, 2024
Hello. May it be used with heat pen?
Thanks
Jerome
February 24, 2024
Hi, works this with the normal vinyl foils or only with printer papter etc?