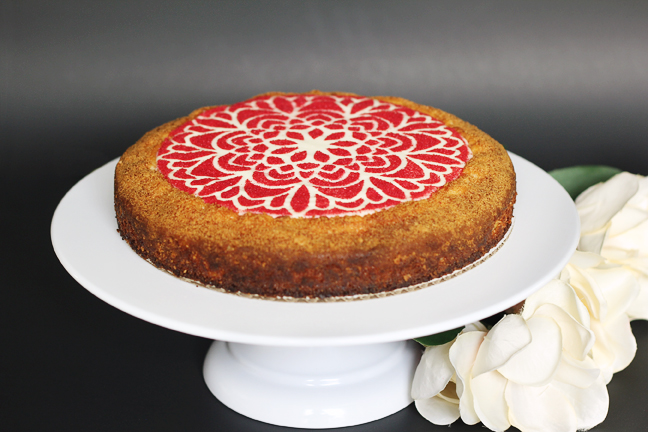
Hi, there! Kelly here to show you how to create an eye-popping design on a cheesecake (or dessert of choice) with simple cardstock and a Silhouette CAMEO®. It’s so easy! Let me show you how.
Supplies Needed:
- Silhouette CAMEO®
- Silhouette Studio® (Standard Edition or higher)
- CAMEO 12-inch Cutting Mat
- Silhouette Cutting Blade
- Spatula Tool
- 12-inch-by-12-inch Cardstock
- Design ID #228536
Step One: Create Stencil Design
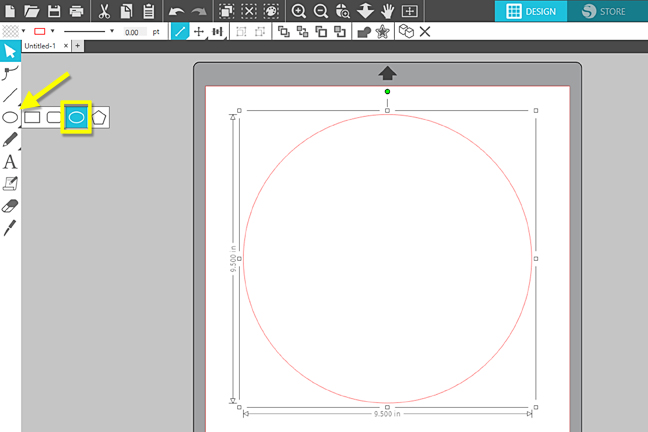
1. In Silhouette Studio®, start with a full 12-inch page size in the Page Setup panel. Also choose the CAMEO 12 x 12 cutting mat.
2. With the drawing tools, choose the Ellipse and draw a circle (hold the Shift key while dragging) that’s 9.5 inches.
3. Draw a second circle that’s 7.0 inches.
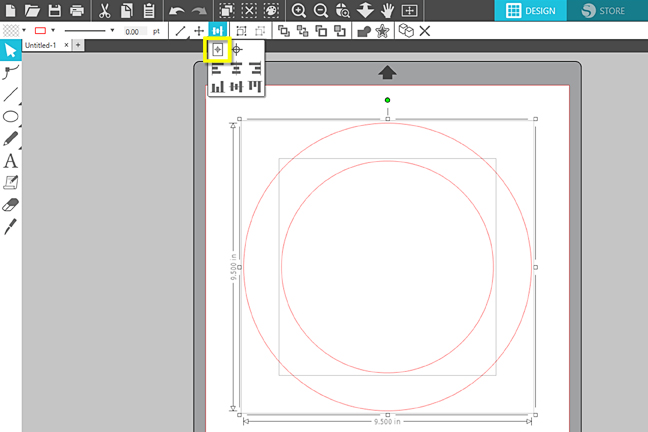
4. Select the two circles and align them with each other with the “Center” function in the Quick Access Toolbar or choose Object > Align > Align-Center-Middle.
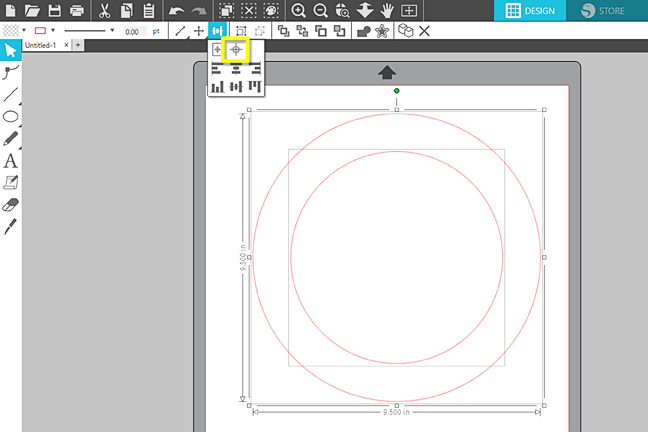
5. Keep them selected and choose “Center to Page” on the Quick Access Toolbar or choose Object > Align > Center to Page.
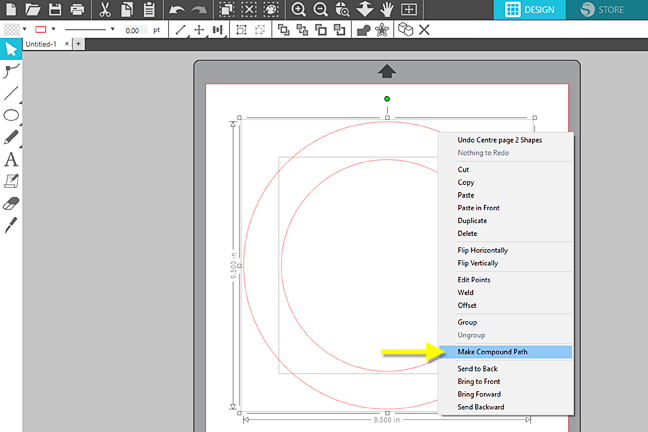
6. Right-click and choose “Make Compound Path” or find this command in the Modify panel. If you fill this with color, it will show as a ring with an empty center.
7. Open the Flower design (#228536) and resize it down to about 7.0 inches.
8. Select the flower and choose “Center to Page” on the Quick Access Toolbar. (I’ve recolored mine for visibility.) Alternately, you could select the flower and the outer ring and choose “Center” instead.

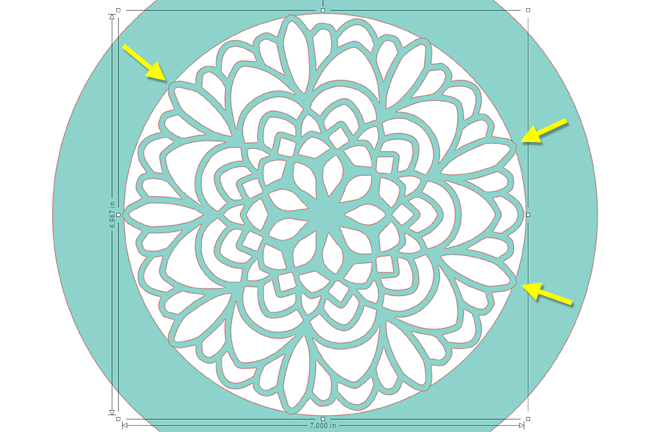
9. The longest tips of your design should slightly overlap the ring you created. Resize slightly larger and, if necessary, nudge the design over using your keyboard arrow keys, if necessary. The goal is to have it look centered and have several points overlapping in preparation for welding the flower to the outer ring.
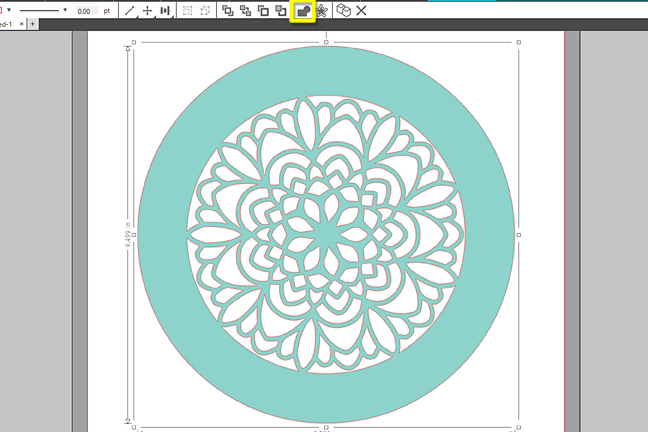
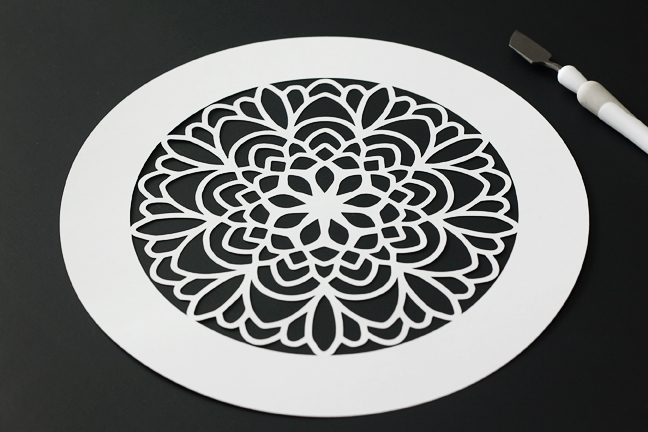
10. When it looks good, select both the flower and the ring and choose “Weld” in the Quick Access Toolbar. This completes your stencil. The holes in this design will become the colored design on your cheesecake.
Note: This design works as a stencil because the main design is all one piece and will remain so when welded to the outer frame. If you are choosing a different design, keep in mind that all the pieces not connected to the main design will fall away once cut, such as centers of letters.
Step Two: Cut Design from Cardstock
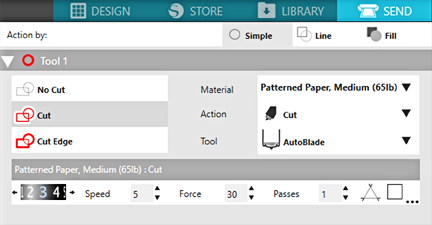
1. Go to the Send Tab (Simple Action) and set this up to cut as follows:
- Material = Pattern Paper (or whatever your preferred settings are for the paper you’re using)
- Action = Cut
- Tool = AutoBlade (or your preferred blade)
2. Load a piece of 12-inch cardstock on your mat, load it into your CAMEO, and click Send.
3. When finished, carefully remove the stencil from the cutting mat. Use a spatula tool to help with the intricate areas.
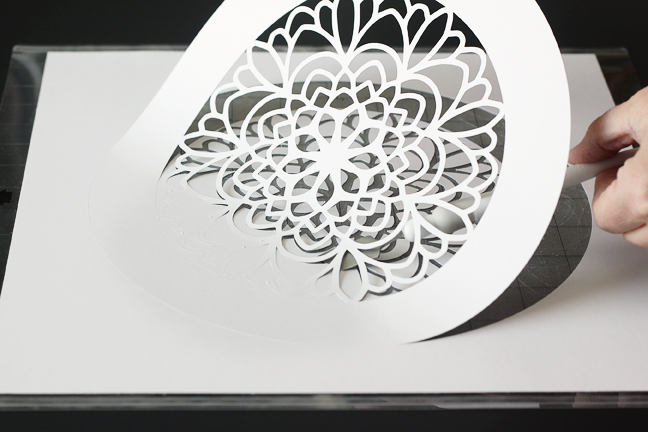
Note: I use cardstock as a one-time-use material for my cheesecake stencils. It’s big enough to cut the wide border that protects areas I don’t want covered in colored powder, and it’s cheap and disposable while I test stencil designs and sizes.
If you are decorating a dessert smaller than 9 inches and want a reusable stencil, you could make the whole design smaller and use non-adhesive stencil sheets in the Portrait or CAMEO.
Step Three: Use Your Stencil
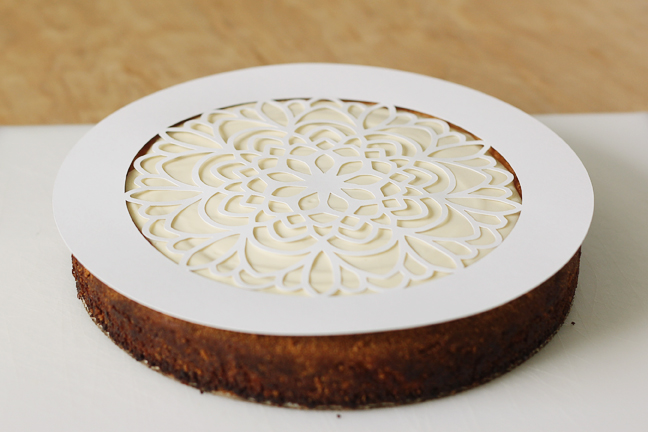
1. Shortly before presenting the dessert, lightly place the stencil centered on top of the cheesecake or preferred dessert. Don’t press down to leave any marks.
2. Use crushed freeze-dried raspberries or cocoa powder in a fine mesh sieve to sprinkle the fine powder over the stencil openings.
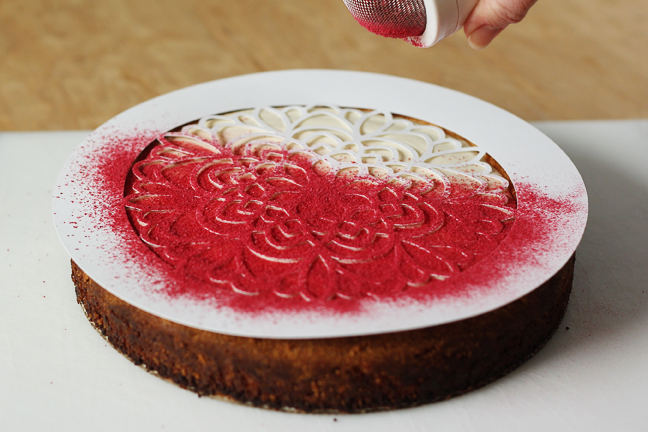
3. Carefully remove the stencil and discard. While the moisture in the dessert may eventually alter the color of the powder, the lines stay crisp and clean.
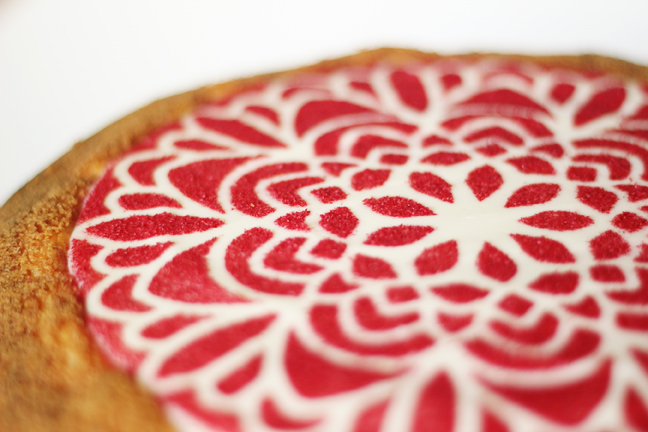
Isn’t that pretty?
I’ve used paper stencils many times on my favorite homemade cheesecake, but you could use a stencil like this on a variety of desserts, whether homemade or purchased.
 Free Class - Father's Day Apron Set
  Free Class - Custom Graduation Tumbler
Nasze Naturalne
September 3, 2025
Your authentic voice really shines through in everything you create and share
Naszenaturalne
September 2, 2025
Really love your style
Kelly Wayment
June 28, 2024
You can use it with vinyl as long as it is smooth and flat to allow the static charge to hold on to it. Rolled vinyl that wants to go back to its rolled shape will not necessarily work well, and it would need to be trimmed to fit the ES mat cutting area.
Kelly Wayment
June 28, 2024
Yes, you can use the heat pen while using the ES mat. 🙂
Yurii
March 2, 2024
Hello. May it be used with heat pen?
Thanks
Jerome
February 24, 2024
Hi, works this with the normal vinyl foils or only with printer papter etc?