
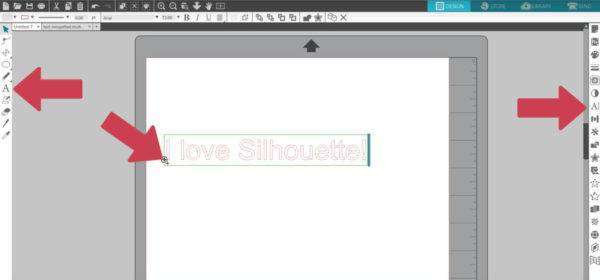
As you may have learned in our tutorial for “Basic Design and Text Tools in Silhouette Studio®,” creating text is as simple as choosing the Text tool on the left, placing a cursor on the page, and typing the text.
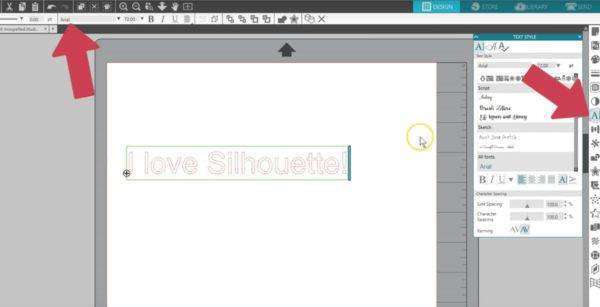
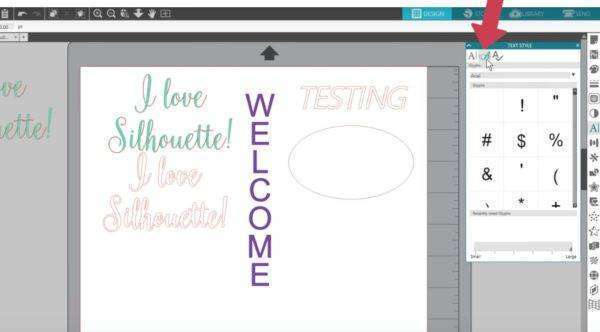
Open the Text Style panel or use the Quick-access Toolbar to choose from any font that is installed on your computer.
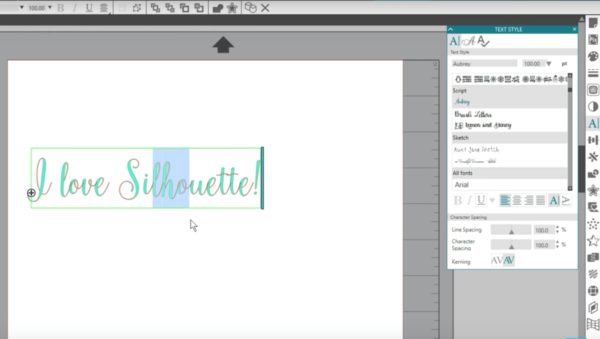
Adjusting the size is as simple as choosing a preset or typing the desired size into the input box.
You can change text properties when text is highlighted in Text Editing mode or when the text is selected as an object. To enter the Text Editing mode, double-click the text.
If you want to change just a few characters within the text box, you’ll need to highlight those while you are in the Text Editing mode.
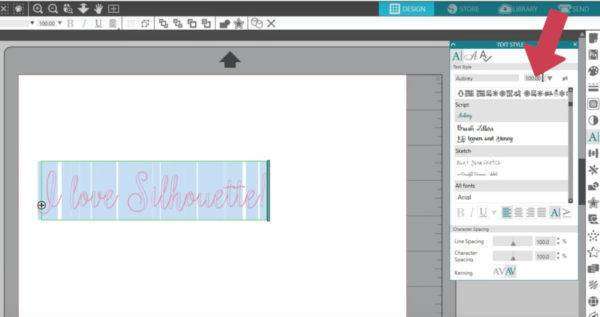
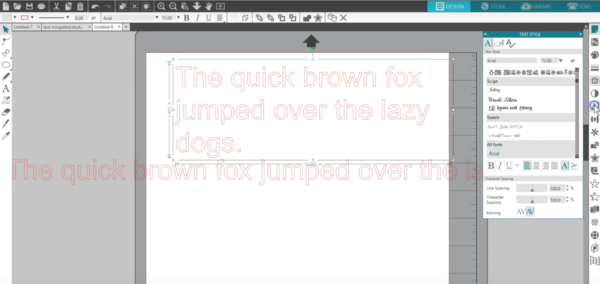
Let’s go a little deeper. When in the Text Editing mode with the green box and flashing cursor, you can use this slider bar on the right to create line breaks in your text.
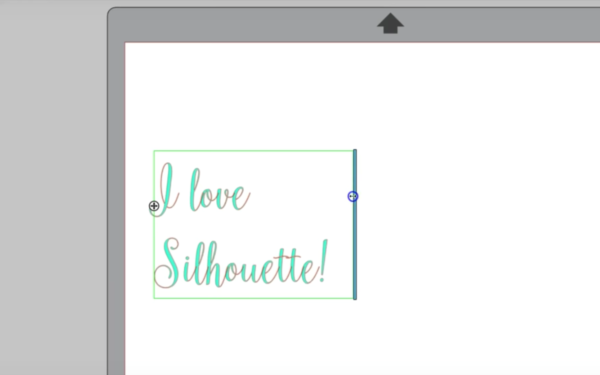
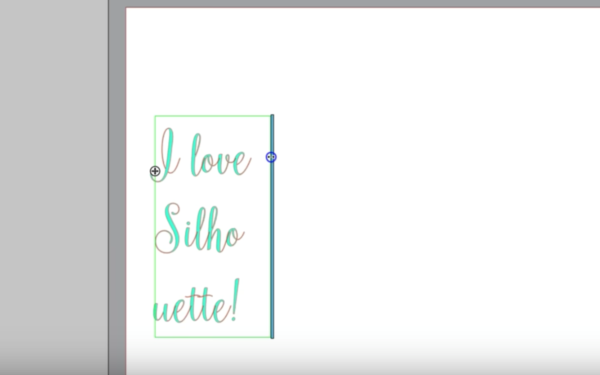
It will first break between words, but as you continue to shrink that available space, it will move individual letters down to the next line.
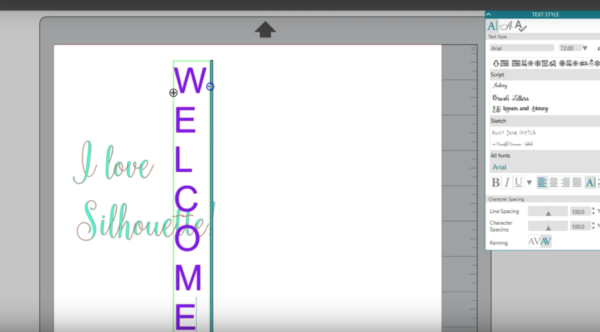
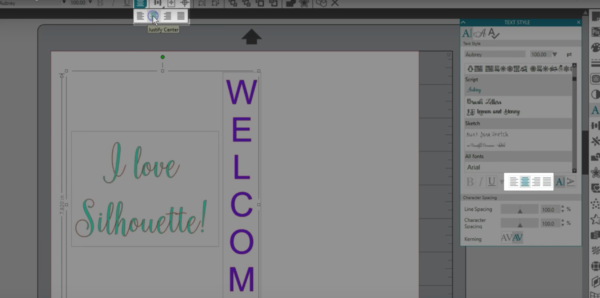
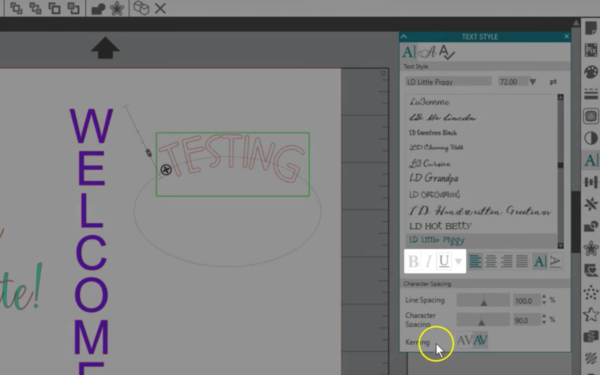
Let’s say you want to make a welcome sign and you want your text to type vertically. Choosing the vertical option will rotate it so it types down the side.

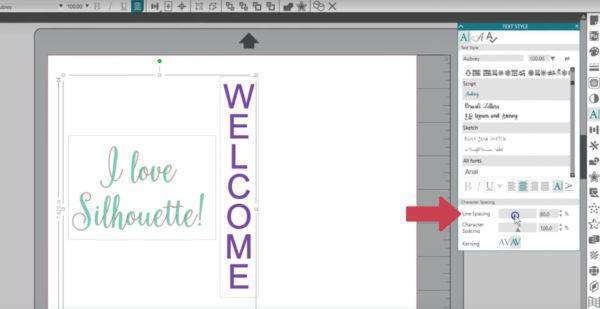
To get each letter on its own line, drag the slider to move those letters down.
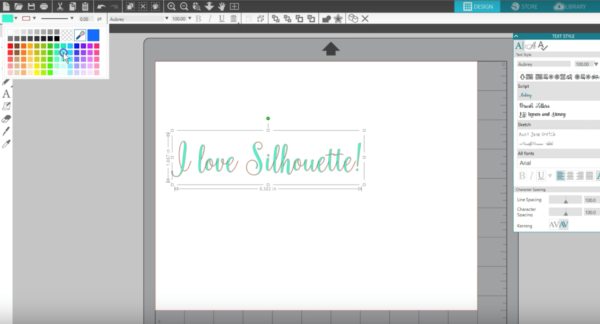
Change your justification with these options in the Text Style panel or in the Quick-access Toolbar drop-down menu.
Line Spacing adjusts the spacing between the lines.
Character Spacing adjusts the spacing between letters. Keep in mind this affects the spacing for the entire text box, even if you have just a few letters highlighted.
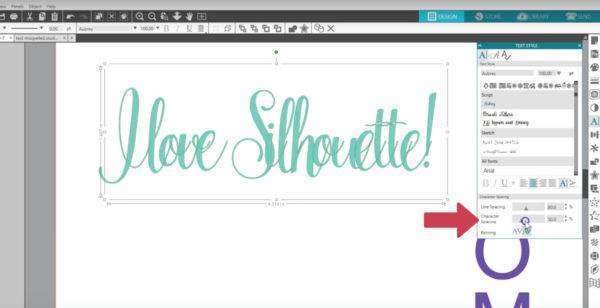
Character spacing is really helpful for certain script fonts that may not overlap as you expect, or when working with text on a path. You can find out more about text to path with our tutorial on “How to Curve Text.”
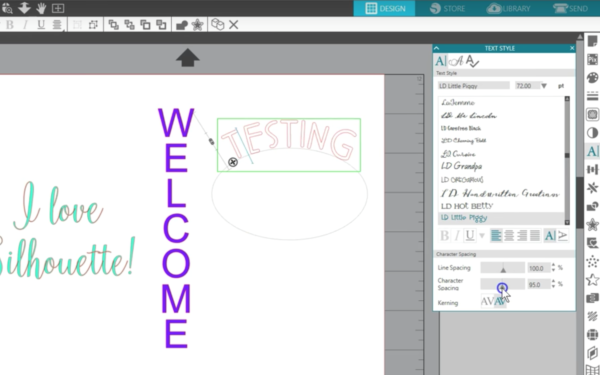
There are two more parts of the Text Style panel we should mention. Kerning is on by default, and you can turn it off in this panel. Kerning adjusts the spacing between letters in your font so they look and fit better together. With most fonts, you won’t see a difference, so we recommend leaving it on.

Bold, Italic, Underline, and other options will be available depending on the particular font.
Most fonts do not have these options and will be grayed out, but if you have a font that you know has extra characters available, check here with this drop-down arrow.

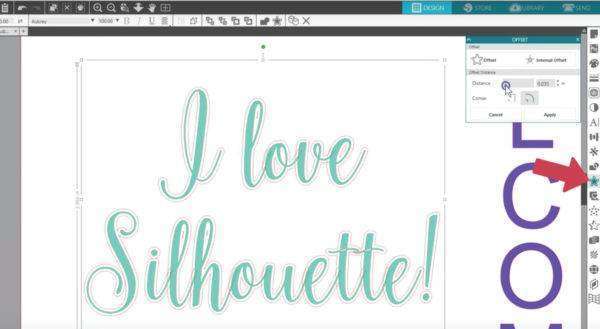
If you want to create a faux bold, you can use your Offset Tool.
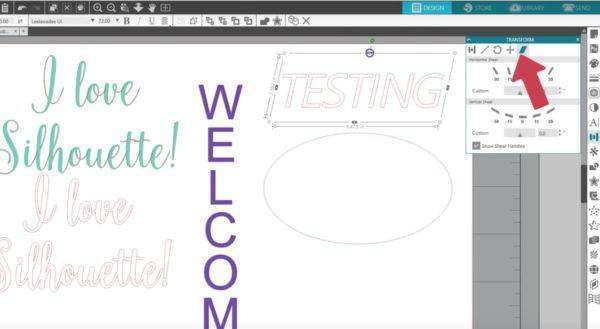
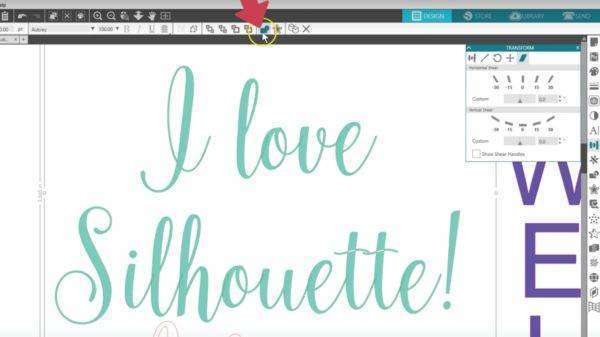
If you want to force your text into italics, users that have Silhouette Studio® Designer Edition and higher can go to the Transform panel and use the Sheer tab.
The ability to edit text as text ends as soon as you ungroup it, use any Modify tools on it (like welding), or if you convert it to a path. Saving a copy of your text off to the side before making any of these kinds of changes will keep your original text intact.
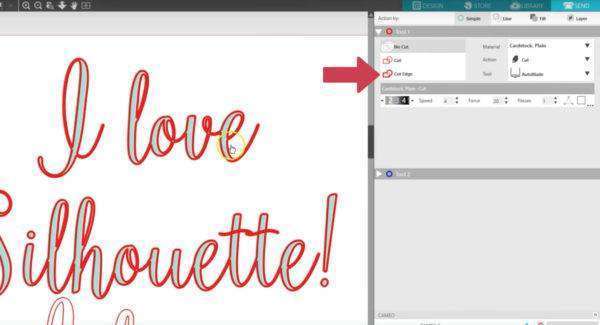
To keep overlapped letters from cutting into each other, you have two choices. The first is to use the Weld function, but keep in mind that using this option causes the text to loose its text properties, like the font name, the font size, and the ability to change what it says.
The second way is in the Send panel. Choose the Cut Edge option. That’s an autoweld that cuts around the outside edge of your letters and ignores overlapped areas. Your text stays editable when using this option.
Back in the Text Style panel, those with Designer Edition or higher have the tab for Glyphs. You can find special characters for your installed fonts and easily add them here. Check out our tutorials for “Using Glyphs in Silhouette Studio®” for more information on that Designer Edition and higher feature.
The last tab in the Text Style panel is a Spell Checker.
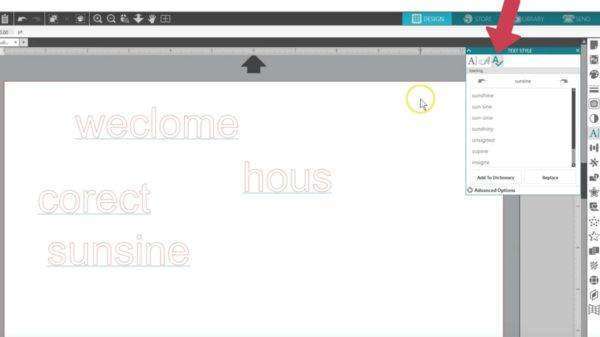
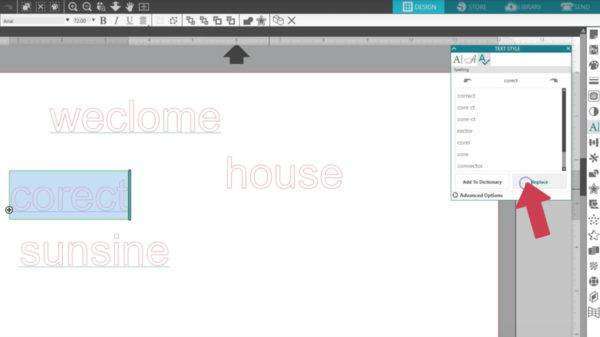
If you have misspelled words on your page, indicated by a little blue underline on those words, you can right click to see suggestions, go to Spelling to see more suggestions in the Spelling Panel,

or go straight to the Spelling panel and use the arrows to cycle through flagged words on the page.
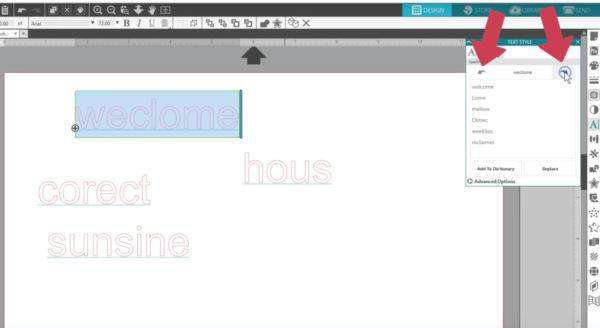
Highlight the suggestion and click Replace to fix that word.
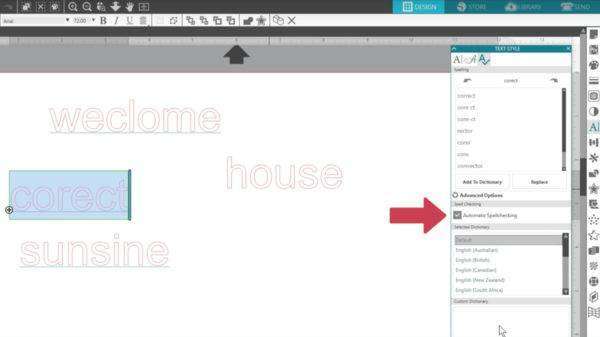
Advanced Options lets you turn off the automatic spell check, select from some alternate dictionaries, and add new words to a custom dictionary.
Here’s a tip on copying and pasting text. If you copy text from another program, you can paste it into Silhouette Studio®, either with or without starting a text cursor first.
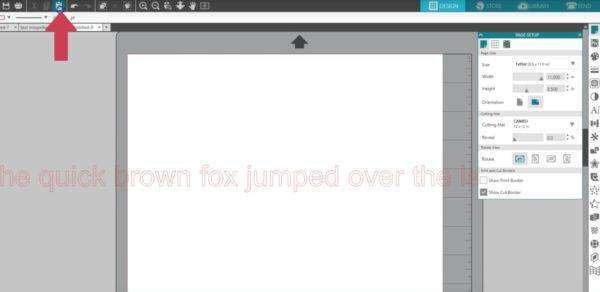
It doesn’t keep the font when copying, so you need to adjust that after the text is on your work page.

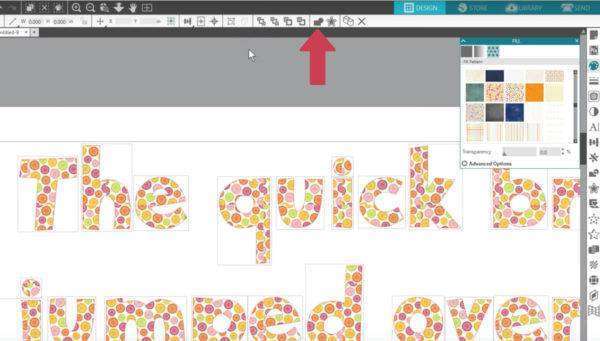
One last thing about working with text in Silhouette Studio®. If you fill your text with a pattern, the pattern fills each letter at a different scale.
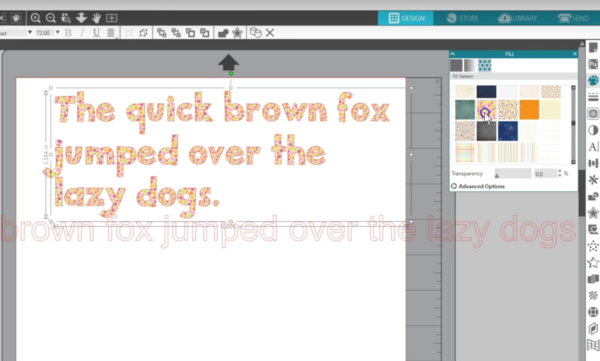
To get the pattern to look uniform across the letters, simply Weld the text first. Just make sure you’ve got your text the way you want it before welding it together because after you weld it, it cannot be changed and you’ll have to start over.
Hopefully this tutorial will help you get well on your way to working with text in Silhouette Studio®!
Nasze Naturalne
September 3, 2025
Your authentic voice really shines through in everything you create and share
Naszenaturalne
September 2, 2025
Really love your style
Kelly Wayment
June 28, 2024
You can use it with vinyl as long as it is smooth and flat to allow the static charge to hold on to it. Rolled vinyl that wants to go back to its rolled shape will not necessarily work well, and it would need to be trimmed to fit the ES mat cutting area.
Kelly Wayment
June 28, 2024
Yes, you can use the heat pen while using the ES mat. 🙂
Yurii
March 2, 2024
Hello. May it be used with heat pen?
Thanks
Jerome
February 24, 2024
Hi, works this with the normal vinyl foils or only with printer papter etc?