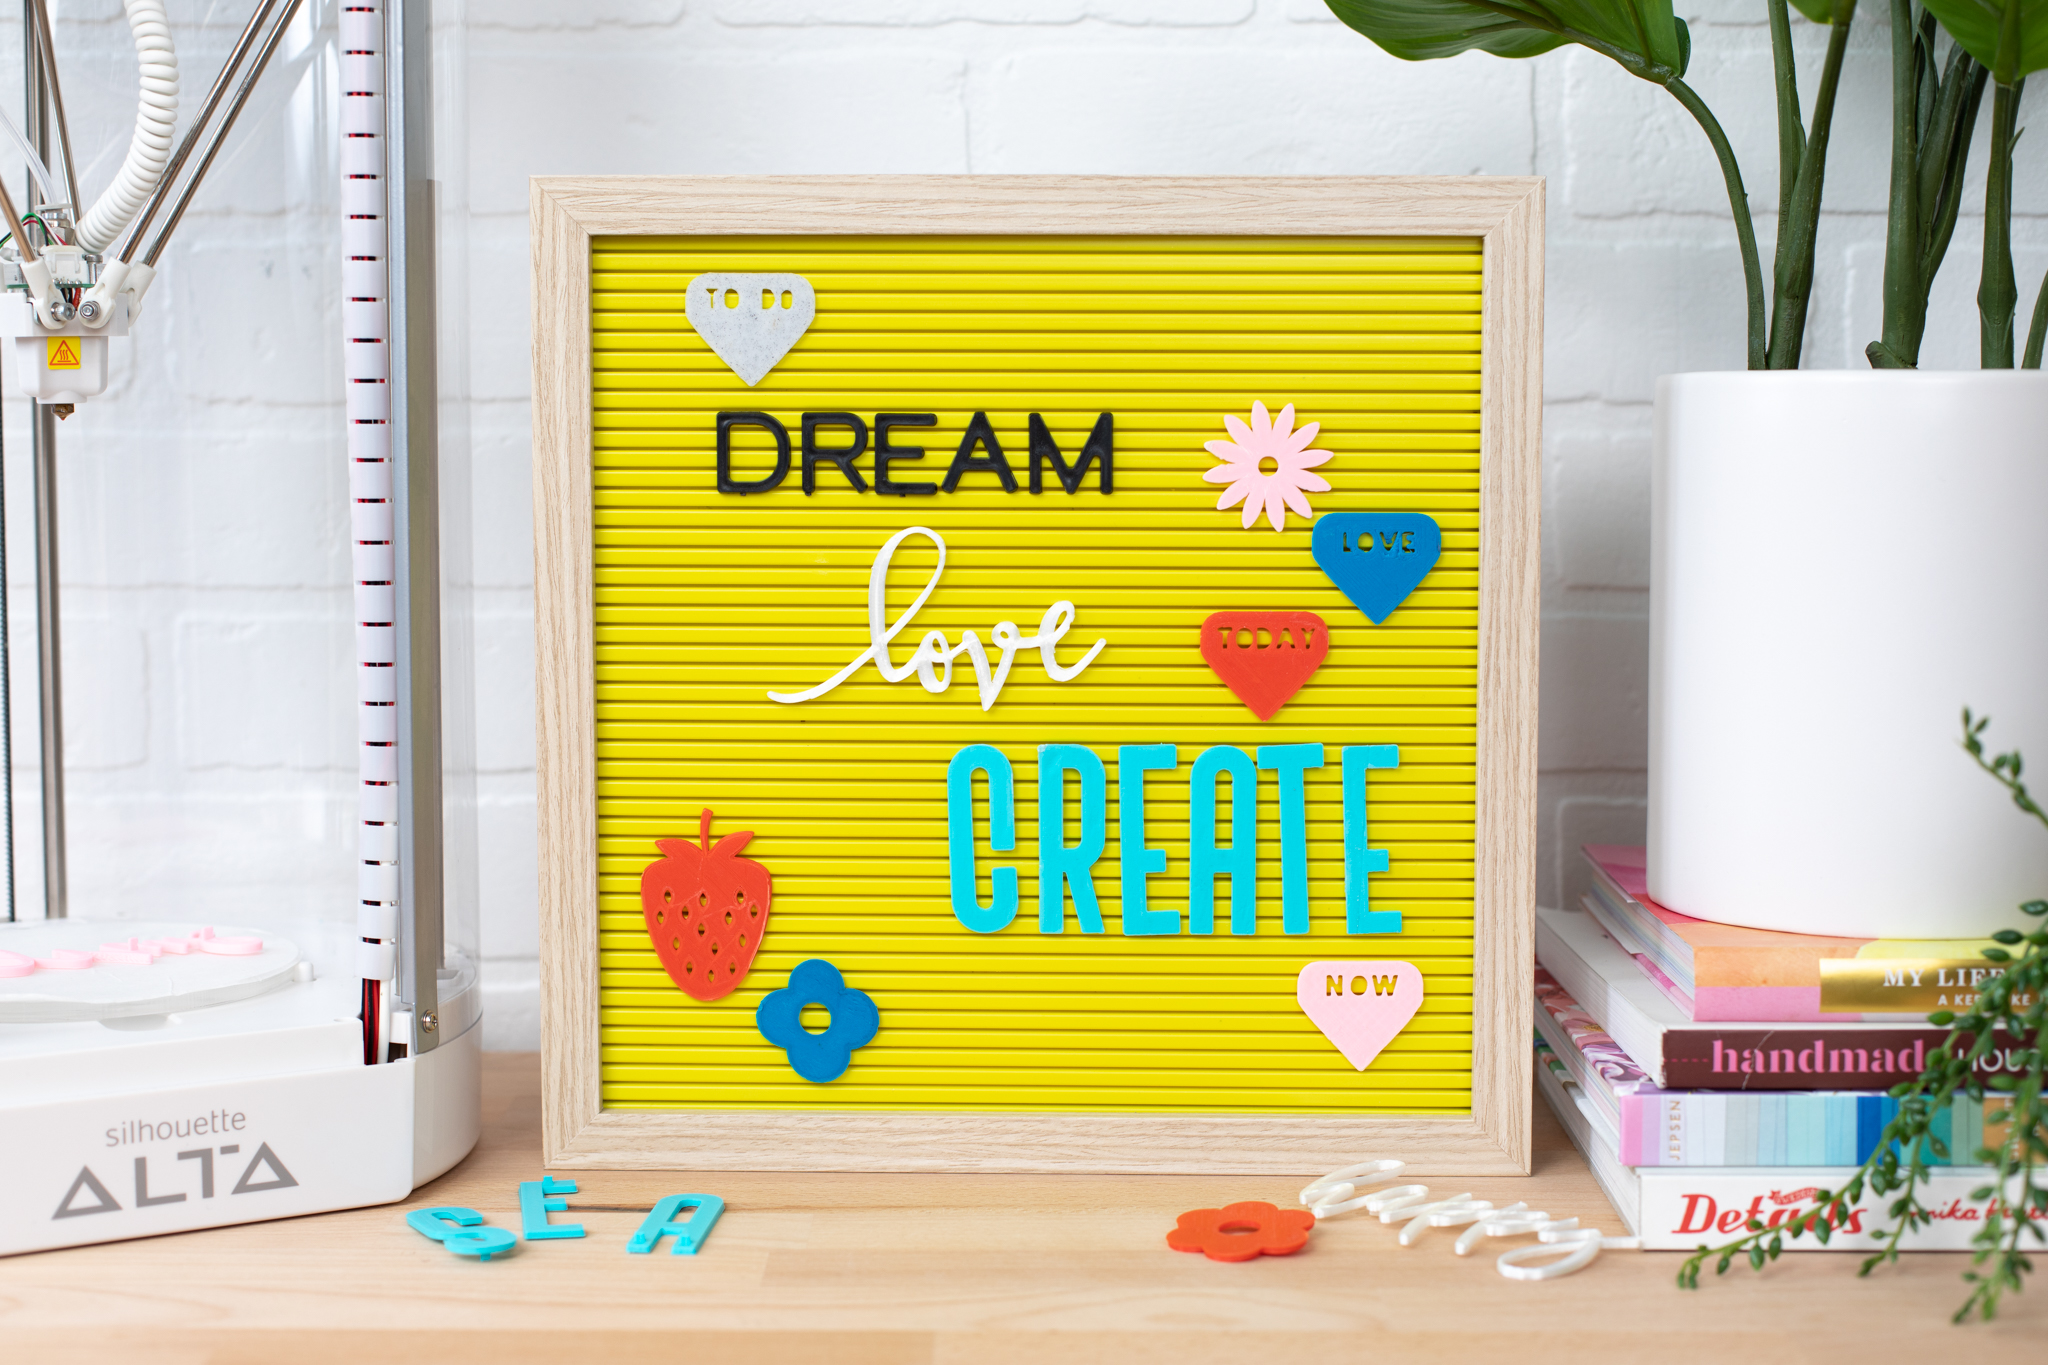
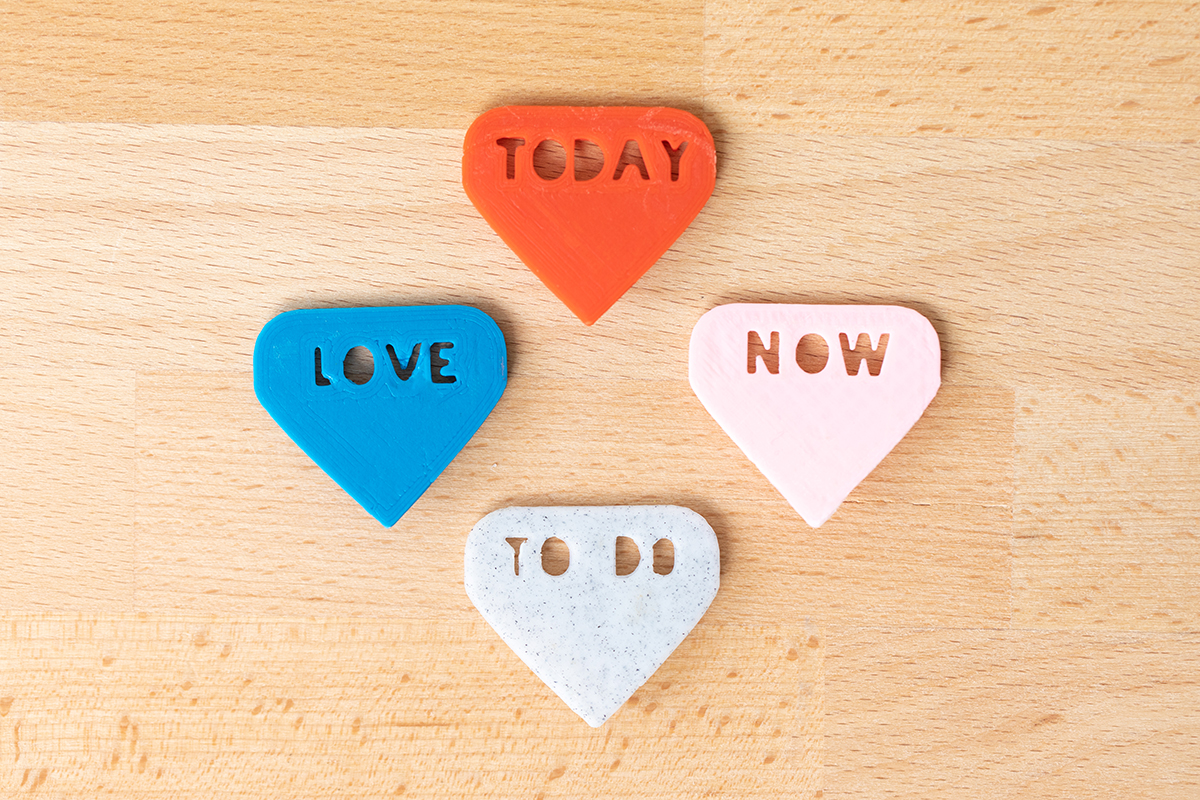
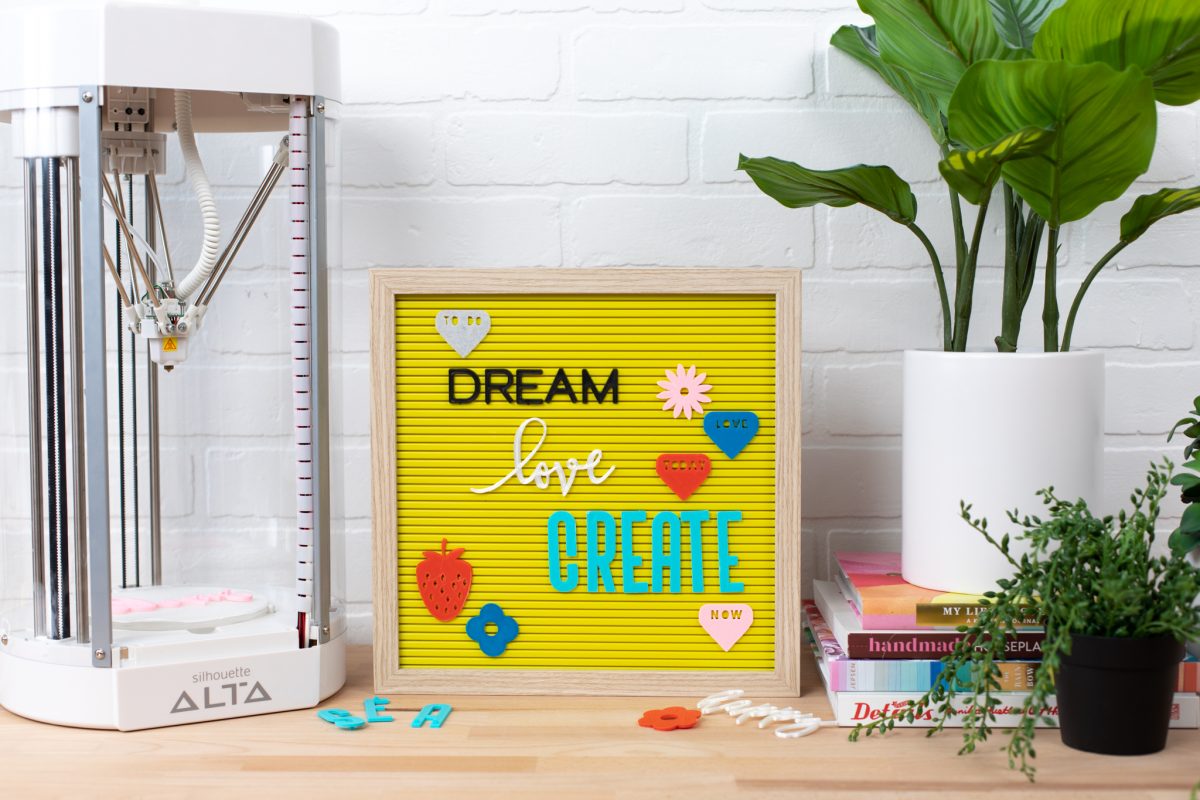
If you haven’t jumped on the letter board trend, now is the time, especially since you can create custom letters and designs with your Alta Plus 3D printer! For this project we turned a set of planner tabs into fun additions for your letter board. We also made larger letters and a few other designs that were created in the exact same manner, so you can use this tutorial as a jumping-off point for all your Alta creations!
Supplies Needed:
- Silhouette Alta® 3D Printer
- Silhouette Studio® Software
- Silhouette 3D™ Software
- Silhouette Cameo®, Silhouette Portrait®, or Silhouette Curio™ (optional)
- PLA 1.75 mm Filament in multiple colors
Disclaimer: The design that was used for this project is no longer available in the Silhouette Design Store. But here are some similar designs you can use instead: Design ID #56859, Design ID #32375, Design ID #44593, Design ID #132683. Don’t forget that if you have Designer Edition Plus or higher, you can also use the Flexishapes tool to create your own shapes.
You can subtract words or phrases from the design if you’d like to add your own. You can always add vinyl after you’ve printed your 3D designs too!
Step One: Prepare 2D Design
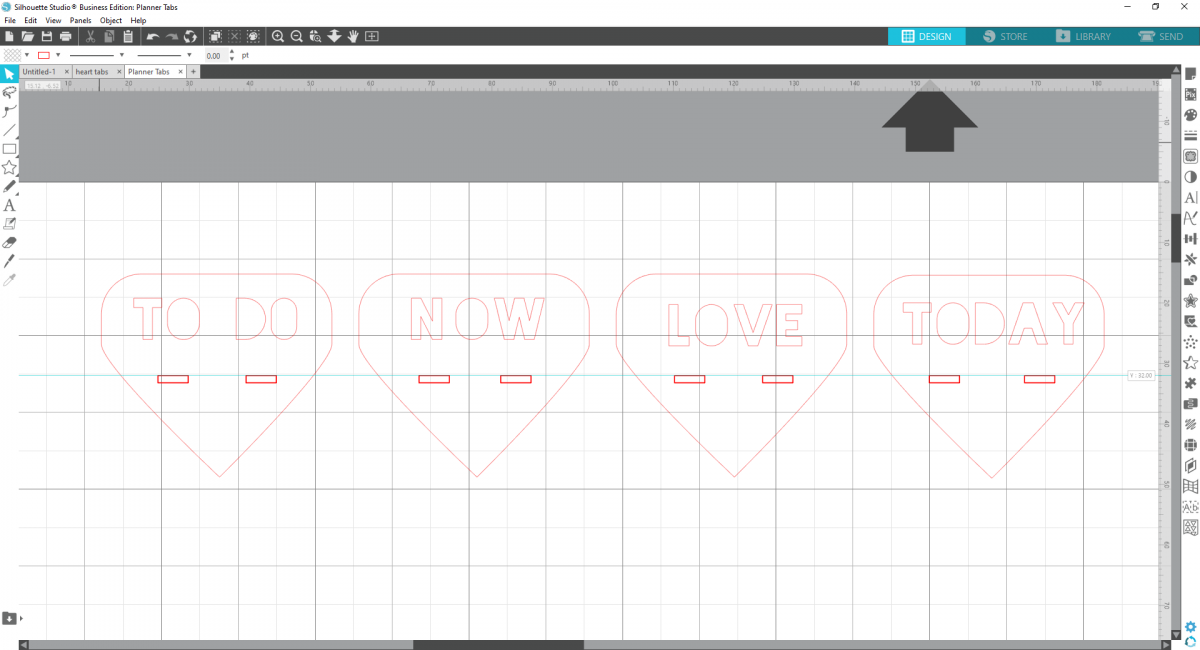
1. We’re going to set up our design within Silhouette Studio® first and then import it into Silhouette 3D™. Begin by inserting the design. Size the tabs to be approximately 1.5 inches wide.
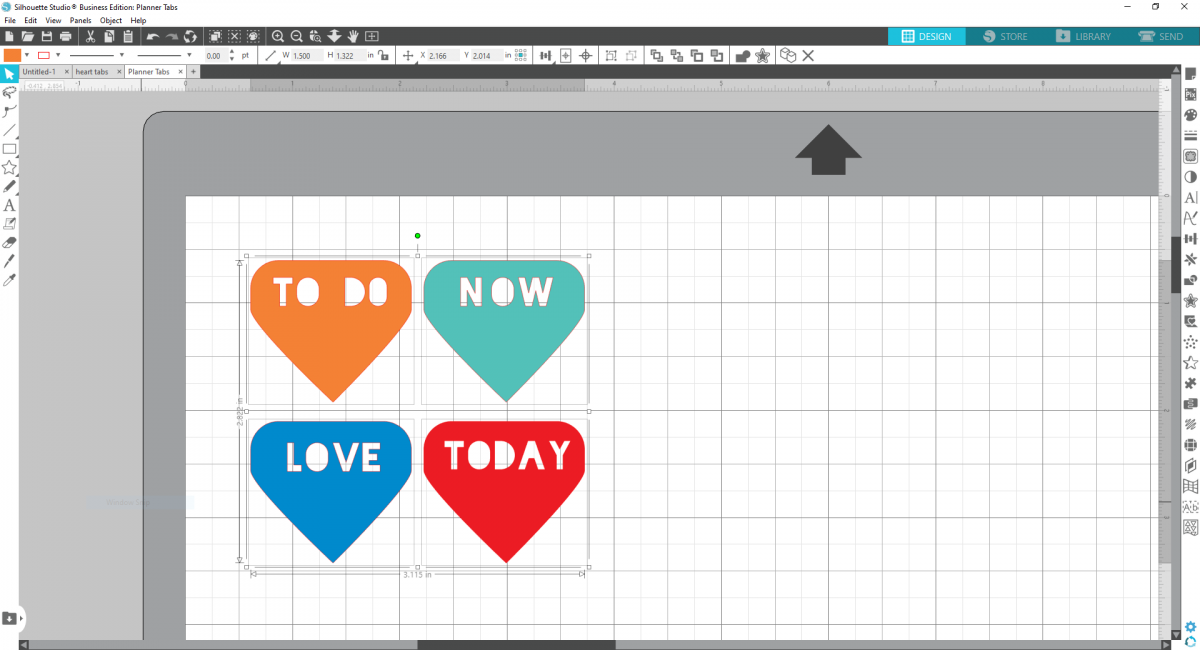
2. Now line all the tabs up within the software. Use the align tools to help with this. If you have Designer Edition or higher, pull down a ruler guide from the upper guide and place right through the middle of the designs, below the letters. This will ensure that all the small tabs we’re going to create are aligned perfectly. (Note: If you have Basic Edition, you can draw a straight line using the Line tool and place it across the tabs after you’ve lined up all the tabs.)
3. To create the tabs that will stick into the letter board, we will create small rectangles that fit into the grooves of your letter board. To make sure the tabs are the right thickness, measure the width of the grooves in your letter board or the tab thickness of some letters that came with it.
4. With the drawing tools, create a rectangle with those measurements. Our rectangles measured 1.2 mm thick by 5 mm wide. Place two small rectangle along the ruler guide (or straight line you added) within a planner tab.
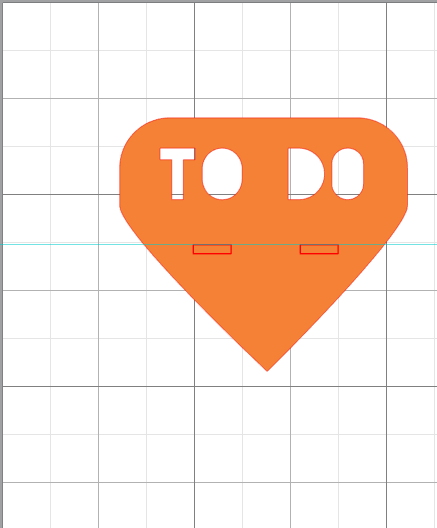
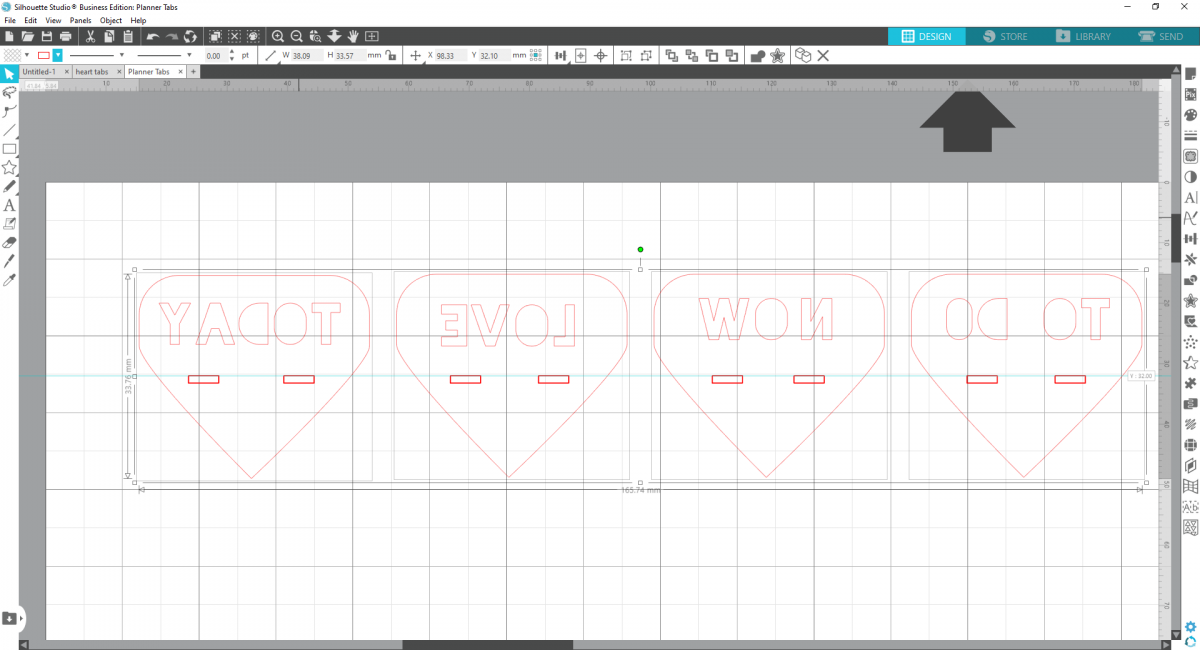
5. Now duplicate the rectangle shape and place two on each design, aligning them each along the ruler guide so they’ll line up evenly on your letter board. I turned the fill color off so you can see clearly how the tabs are all at the same level.
6. Group each planner tab with its respective rectangle by highlighting both pieces, right-clicking and selecting “Group.” You can also simply press and hold Command/Control and G on your keyboard.
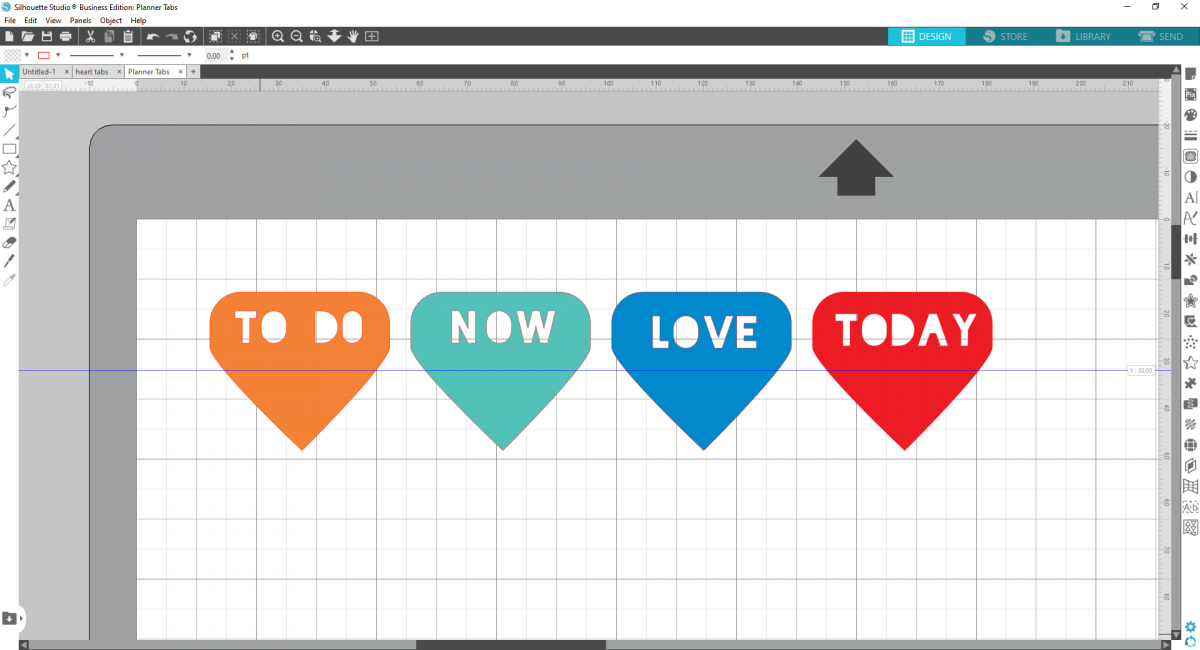
7. Now select all the planner tabs and flip them horizontally, or in other words, mirror them. Again, do this by selecting all the pieces, right-clicking, and selecting “Flip Horizontally.”
Step Two: Import the Design into Silhouette 3D™
1. Open Silhouette 3D™ and open your saved design. Import the design as “Extrusion.” Readjust the size of your designs as desired, as the software resizes anything to make it fit on the platform.

2. If you’d like to print all the tabs out on the same colors, rearrange the designs so they all fit within the print bed and group them together. This will allow all of them to print in one go.
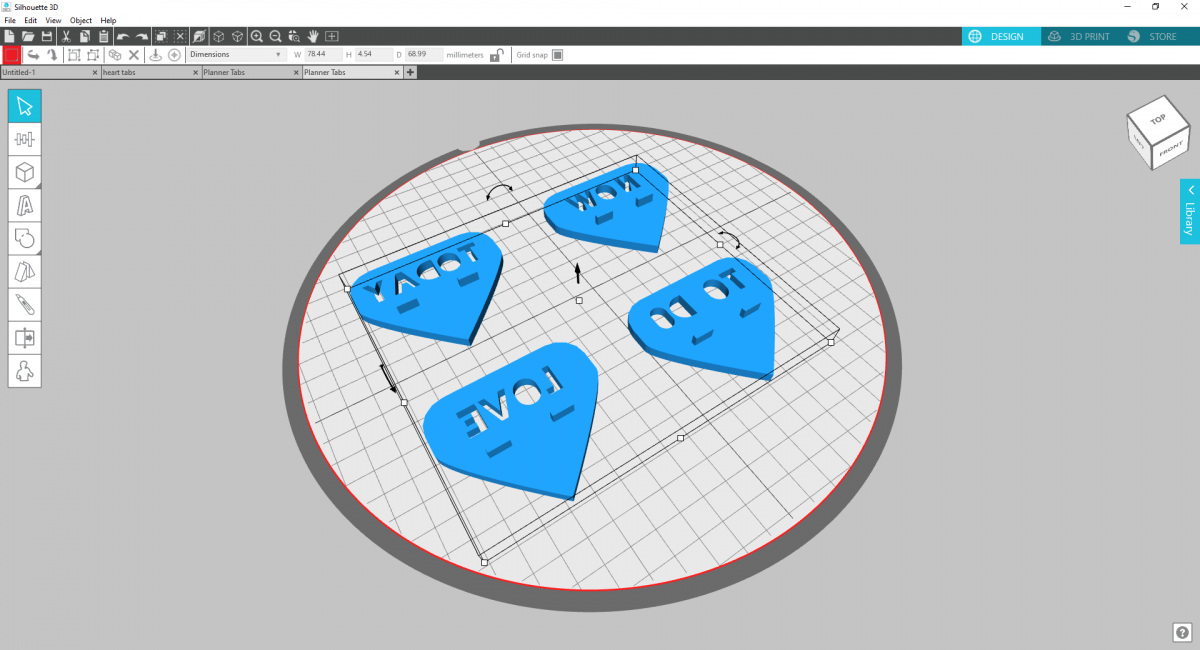
3. If you want to print them in different colors, you can skip this step, as you’ll have to change out the filament color between each print job.
Step Three: Print Your Design
1. To print your design, make sure your Alta Printer is connected and turned on. Prepare the platform and load the filament.
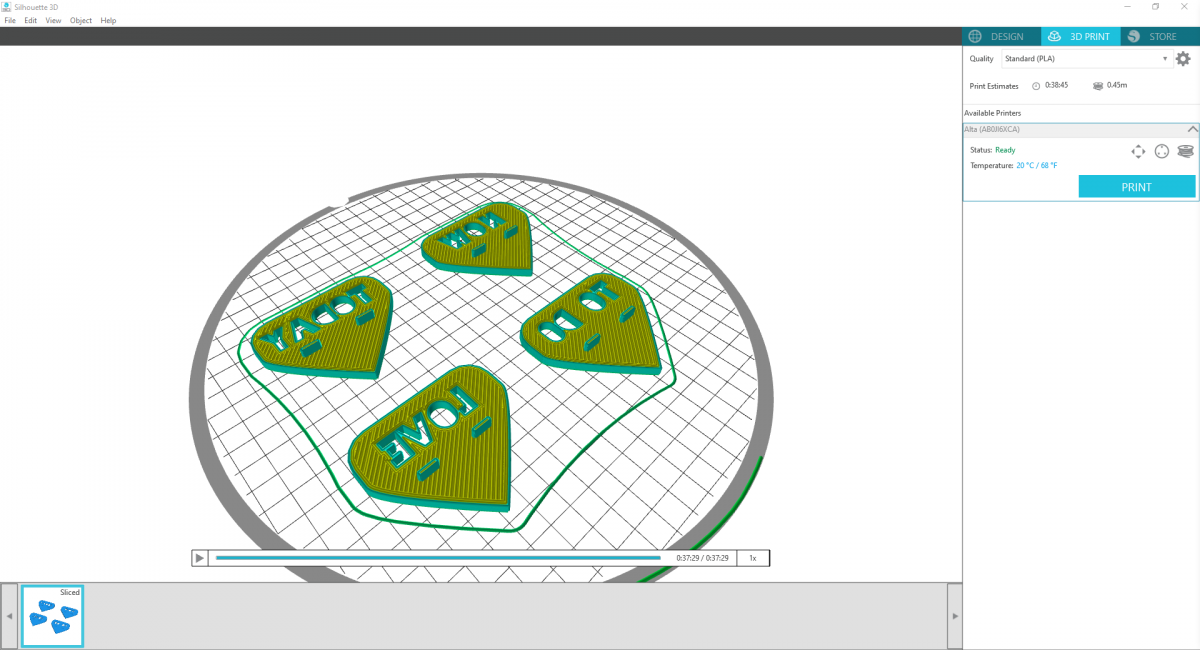
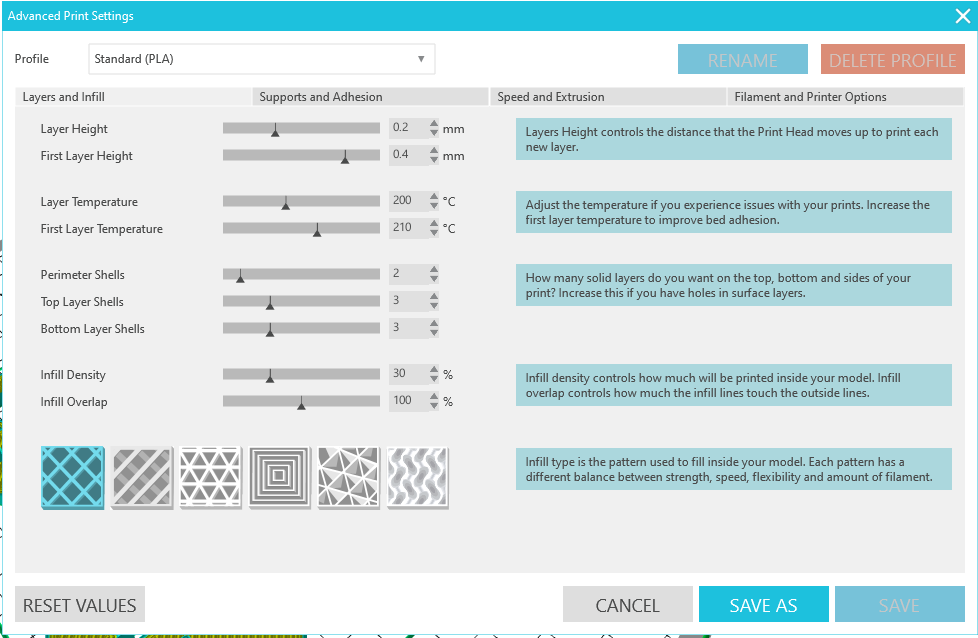
2. For this design, I’ve found that the following adjustments are beneficial for a successful print. Open “Advanced Printer Settings Dialogue,” which is accessed by selecting the small cog image to the right of the quality drop-down menu.
3. Under the Layers and Infill panel increase the “First Layer Height” to .4.
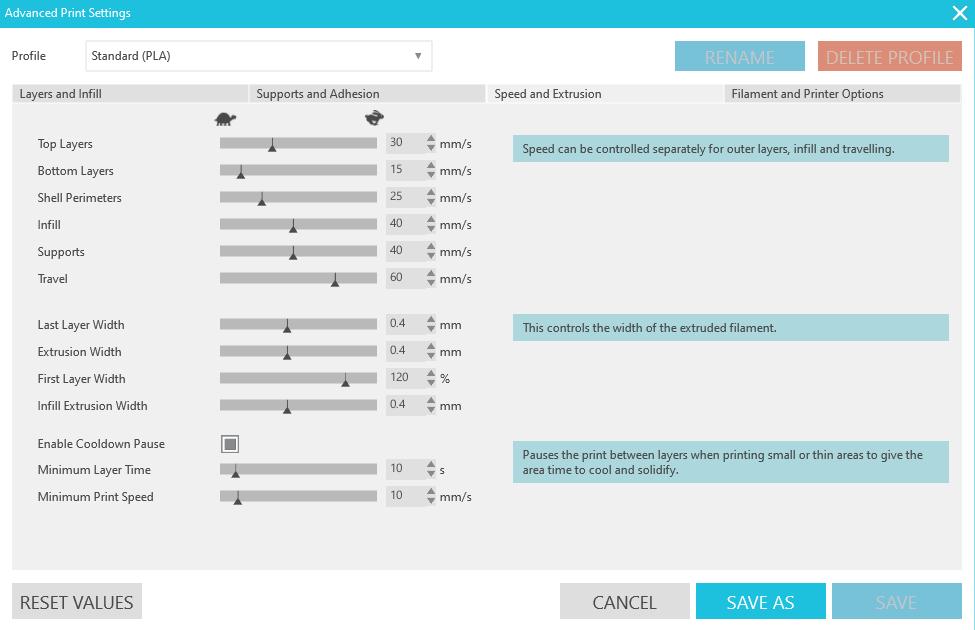
4. Then open the Speed and Extrusion panel and increase the “First Layer Width” to 120% and increase the “Minimum Layer Time” to 10.
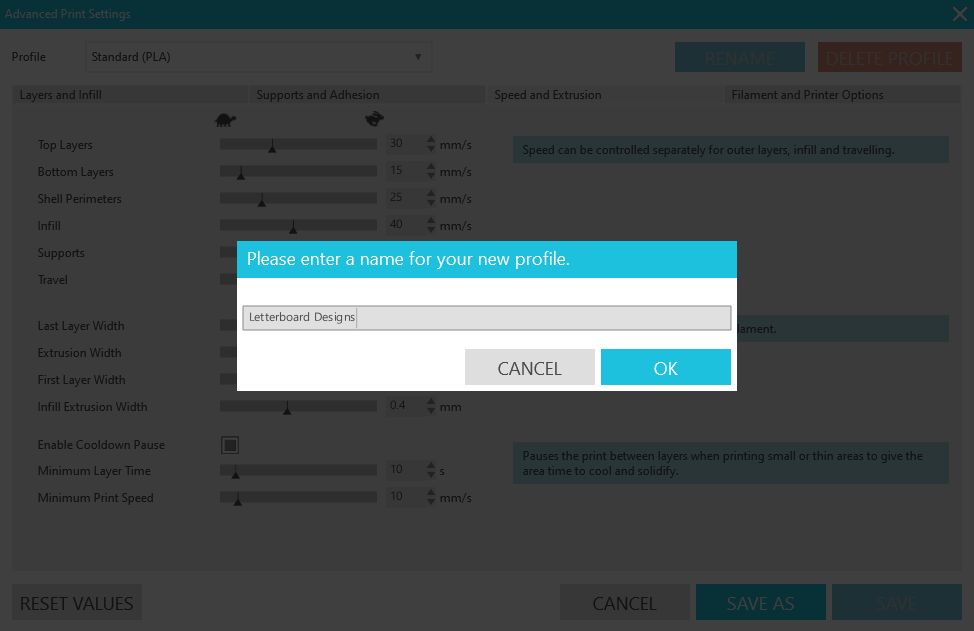
5. Save these settings as “Letterboard Designs” or something similar so you can always reference them for future letter board projects!
6. Now change your Quality settings to those you just saved and go ahead and print your designs!
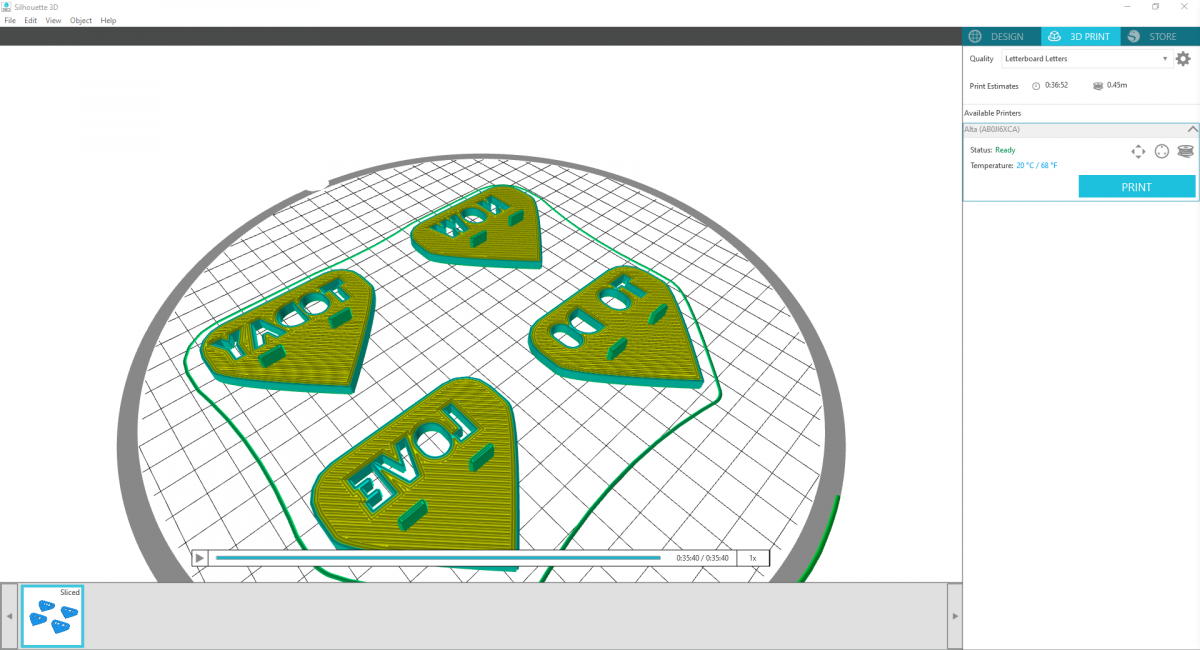
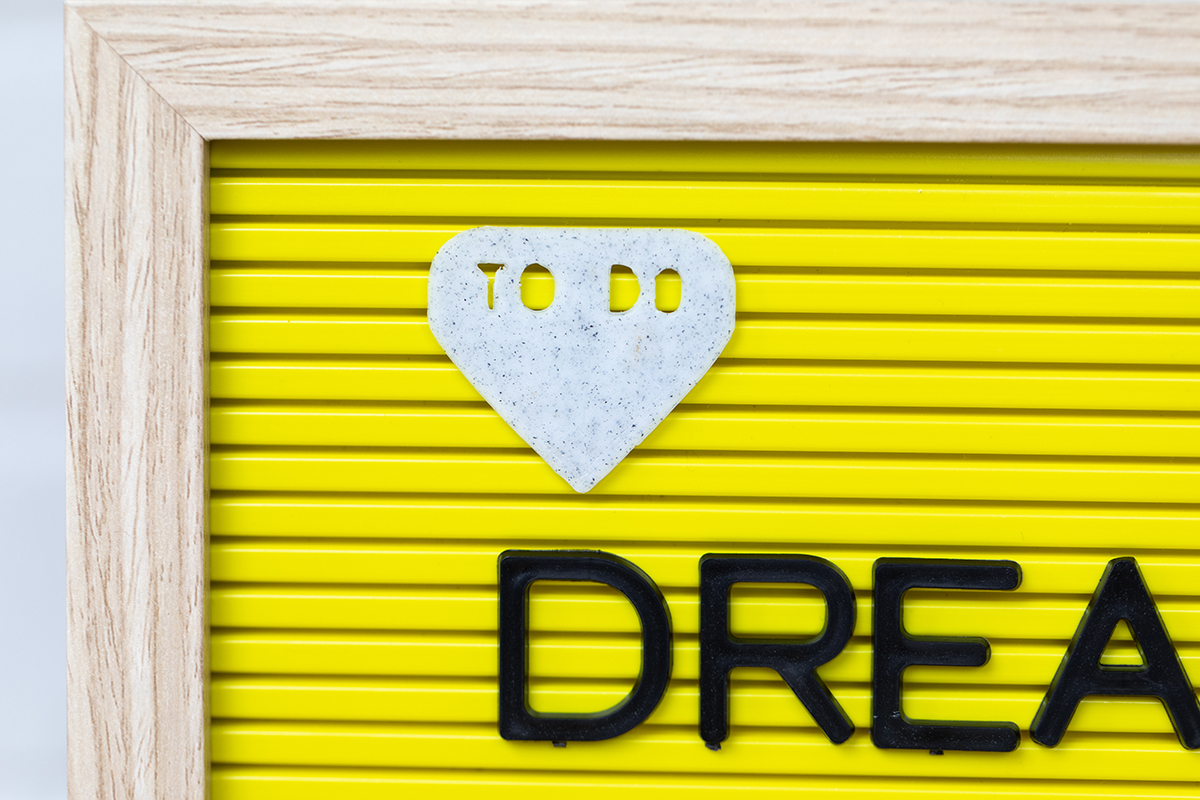
7. Remove your designs gently with the help of the spatula tool and pop into your letter board! You can use this same technique for any design you’d like for your letter board, including giant letters, flowers, etc!
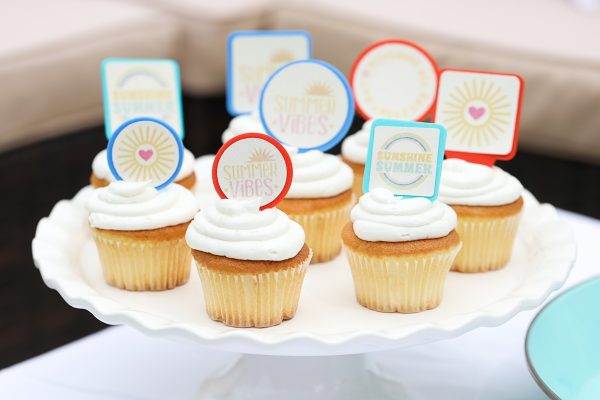 3D Printed Cupcake Topper Picks
  Create a Custom Vase with the Silhouette Alta® Plus