Friends, it’s that time of year again– when avoiding candy is impossible and we curse the ghouls that allow us to eat it all. And by ghouls, I mean my own inability to ever let the sugar-life slide. I was born on Halloween though, so I think it’s part of my make-up. No? Yes. To keep with this months’ treat theme, let’s me share with you how I added additional cuteness to these kisses via my Silhouette Mint… and then ate them all before I could even pass them out. Whatever.
What you’ll need:
- Silhouette Adhesive Kraft Paper
- Silhouette Mint™
- Silhouette Mint 30 mm x 30 mm Stamp Kit
- Silhouette Mint 15 mm x 15 mm Stamp Kit
- Candy!
Let’s begin!
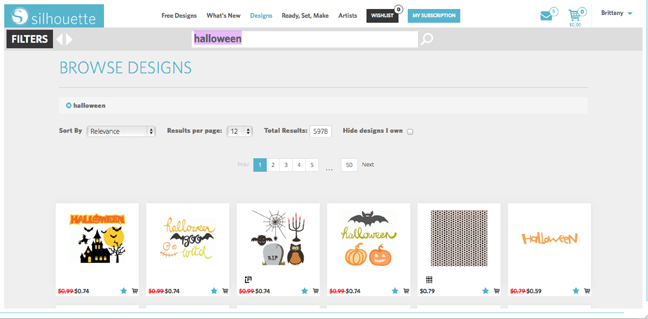
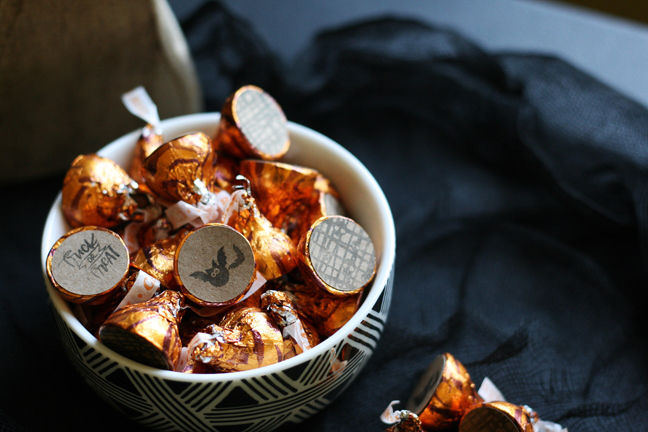
- To start, search the Silhouette Design Store for the halloween shapes you want to use on your candy. For this project I used: Halloween Background (#13108), Trick or Treat (#152851) and Chubby Bats (#3906). The chubby bats make me LOL.
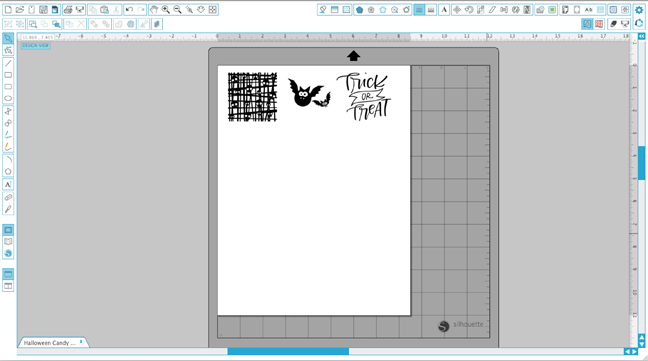
2. Once your shapes are chosen and purchased, open them up in Silhouette Studio® from your Library. (Yes, this is a Mint tutorial—we will get there.) With all three shapes open, select file > save. (You’re also going to want to use Silhouette Studio® + your Silhouette CAMEO® to cut the circle stickers out of Adhesive Kraft Paper. You can do this before or after creating your stamps.)
Now, let’s move over to Mint Studio™! (That’s where the magic of stamp-making happens)
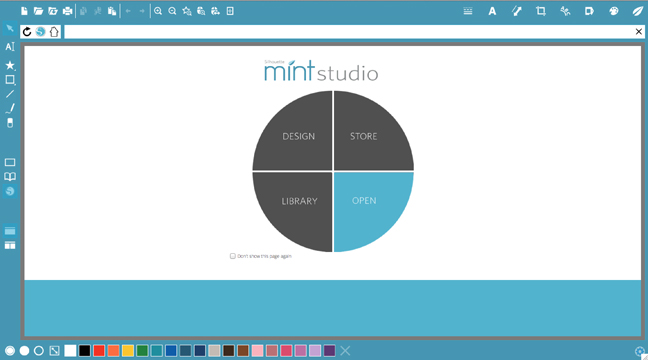
3. As Mint Studio™ opens, you will be given four choices: Design, Store, Library, and Open. Select Open and locate the file you just saved from Silhouette Studio®. This will open all three shapes you have picked for your project.
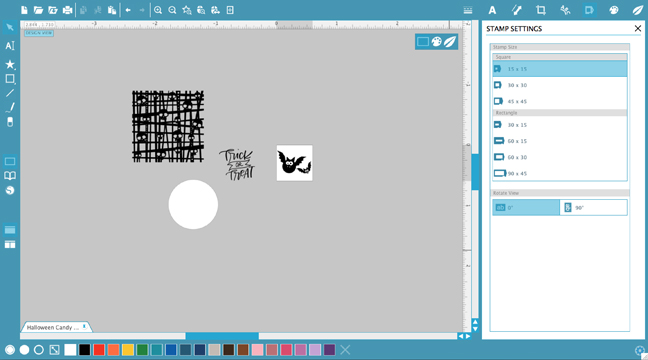
4. Size your designs accordingly to the stamp size you are using. For the Trick or Treat design, as well as the Chubby Bats, I used the 15 mm x 15 mm stamp kit. The Halloween Background design I put on the 30 mm x 30 mm stamp size.
Tip: Make a circle the size of your candy sticker (.819) so that you can appropriately size the designs to fit.
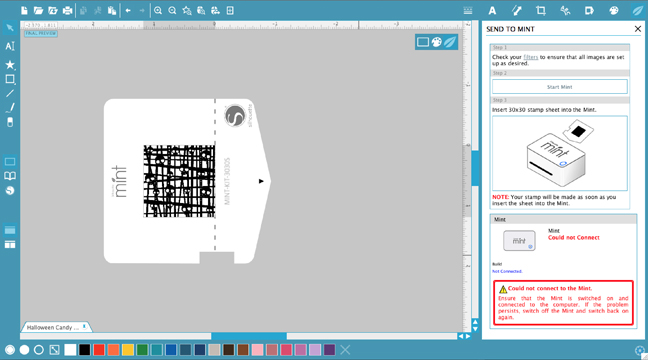
5. Let’s make some stamps! Luckily, the steps for creating stamps via Silhouette Mint™ is pretty straight-forward and doesn’t change much from project to project. Once your file is set up and your shape is sized within the correct stamp format, you’re good to go. Locate the leaf shape in the upper right hand corner of Mint Studio™ to open the Send to Mint dialogue box. Don’t be alarmed: Your design will appear automatically mirrored. This will ensure your design is the correct way for stamping.
6. From here, you can follow the step by step instructions in the window on your right hand side. Select Start Mint and insert the correctly sized stamp sheet into the back of your Silhouette Mint™ as illustrated. If you forget to connect your mint, there will be a warning to remind you! Allow your stamp sheet to move through the Silhouette Mint™ entirely before removing it from the front, once it is complete. Creating your stamp is effortless- really. That little magic machine does all the hard work, and you get to just sit back and… try not to eat all the candy in the less than 60 seconds it takes to make the stamp.
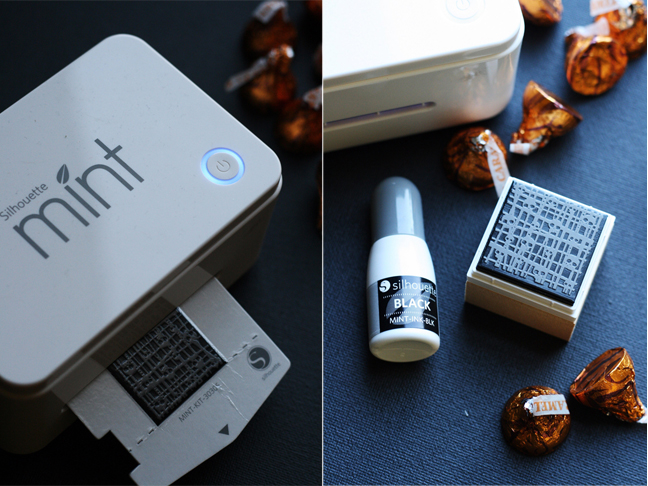
7. Once your stamp is created you can remove the stamp pad from the cardboard holder, mount it to it’s base, and get it inked up. The longer you allow the ink to set the more vibrant your stamp will be. I like to give it a minute or two before I stamp all the excess ink off. When your stamp begins to print a clean design, you’re ready to start stamping your stickers.
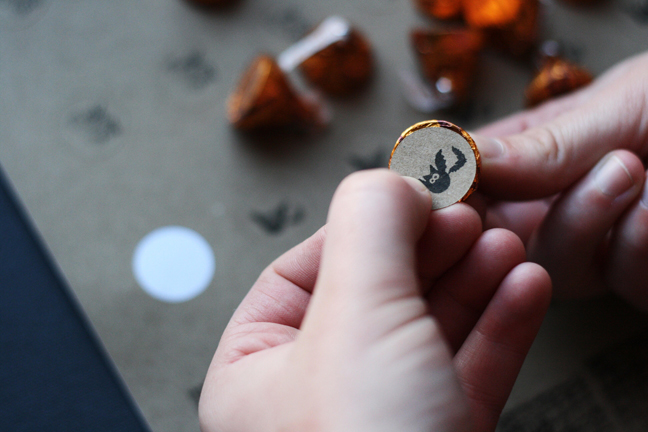
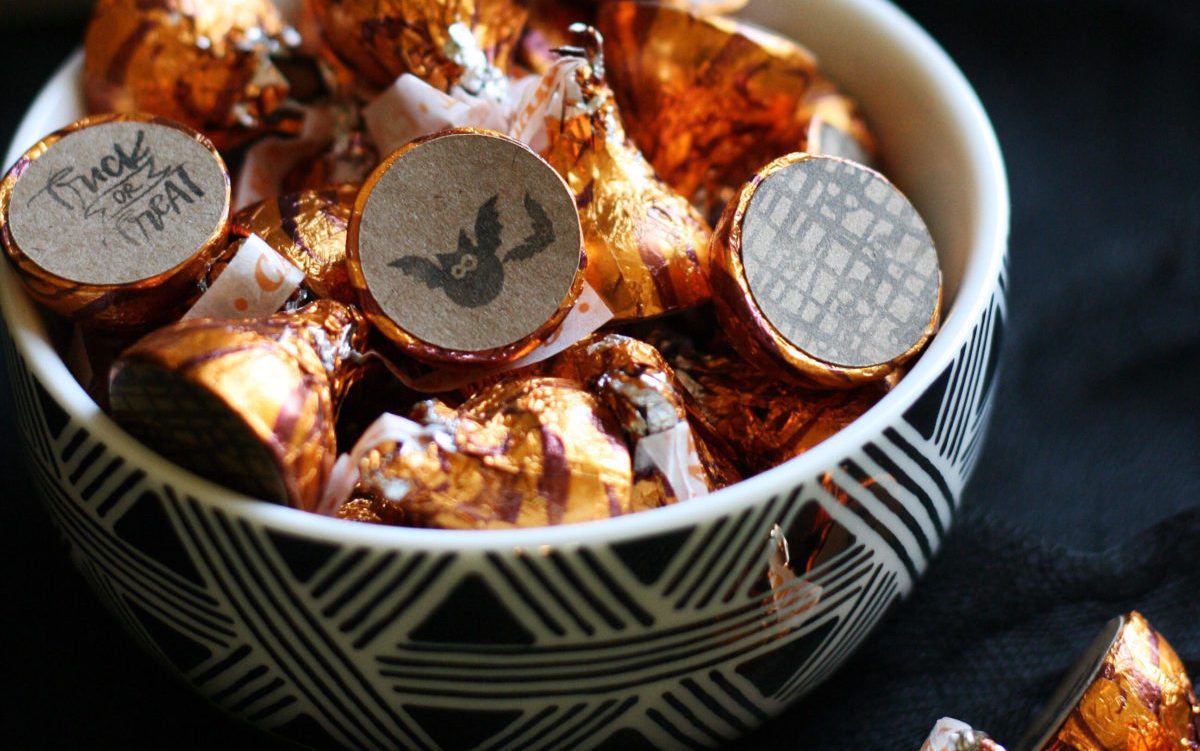
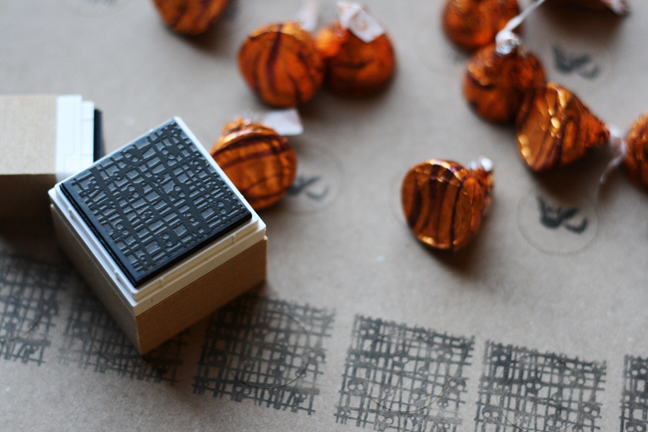
8. Alternating between stamps, fill up your sticker sheet until they are all covered. That’s it! Now your candy stickers are ready to go. Simply stick them to the bottom of the kisses and watch as you transform a typical treat into something with a little more Halloween happiness.
Enjoy the holiday- I’ll be over here turning 30. Spooky.