
Looking for you next weekend craft? We have you covered. In just a few simple steps you can take your favorite font(s) and turn them into an art piece you can be proud of.
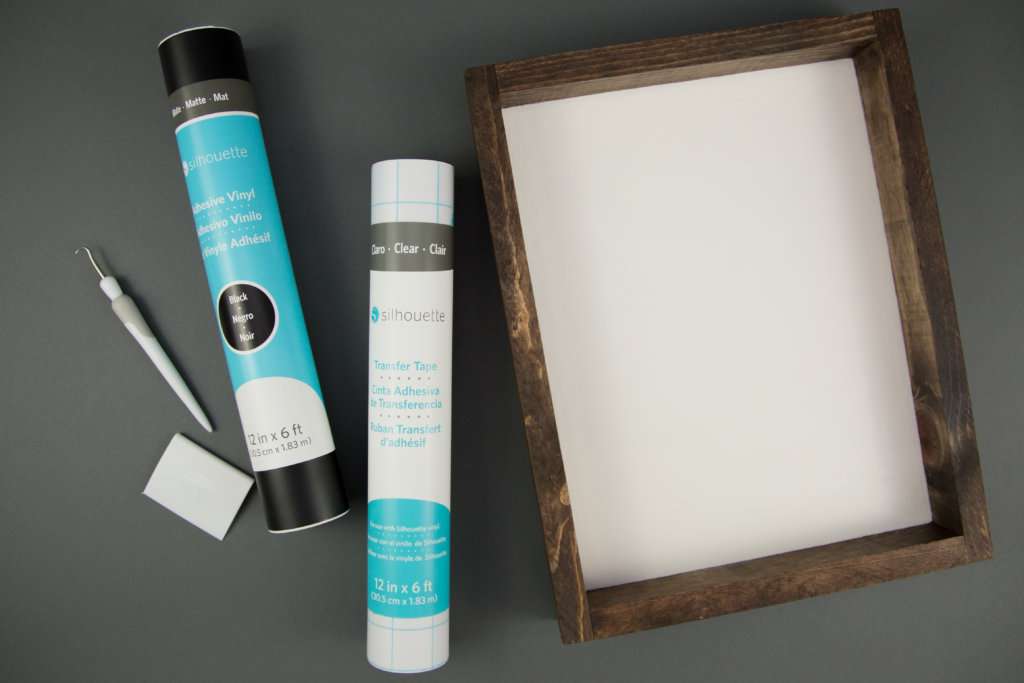
Supplies Needed:
- Silhouette CAMEO® or Silhouette Portrait® or Silhouette Curio™
- Silhouette Matte Vinyl – Black
- Silhouette Transfer Tape
- Wooden Sign
- Design ID # 217137
- Design ID # 57531
Step One: Design
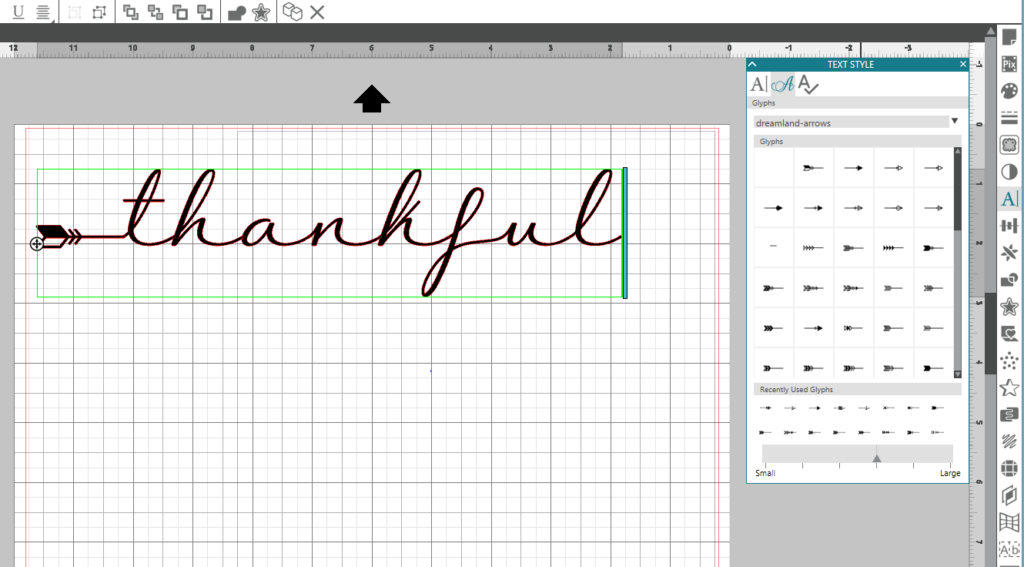
- Open up Silhouette Studio®. Using the text tool, type out the word ‘thankful’ in all lowercase. With the text selected open the Text Style Panel and select Design ID # 217137 .

- Add the arrow details to your font by selecting the new Glyph Feature located in your Text Style Panel. Select whichever combination of the arrow head and tail you would like. The Glyph Feature is available in the Designer Edition or above of Silhouette Studio® 4.1. (Tip: If you haven’t updated your software or if you have the Basic edition of 4.1, you can still add the arrows to your design by using the capitals of letters. Each capital letter has a different arrow associated with it.)
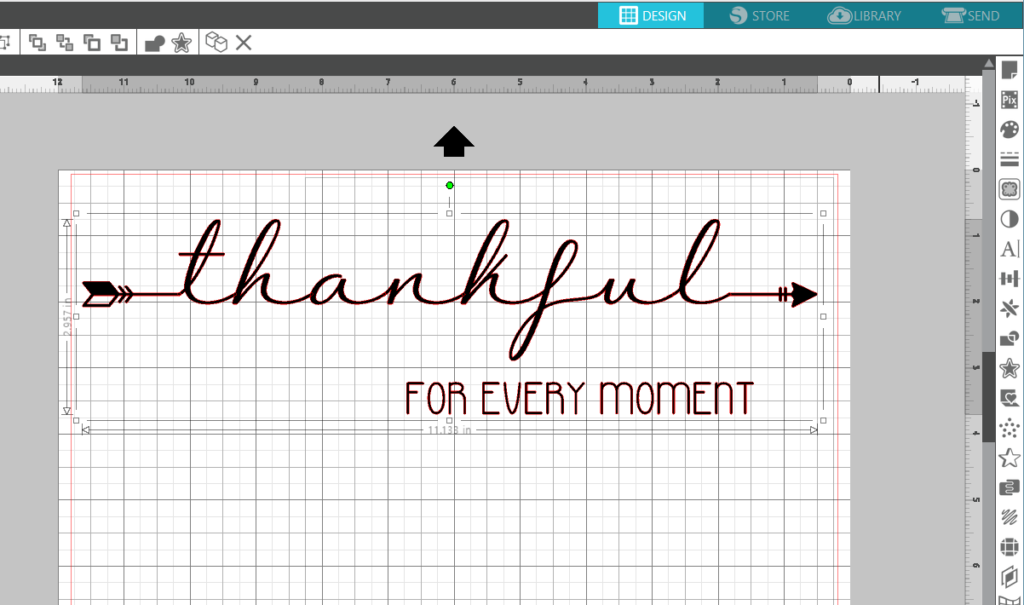
- Adjust the size of the design by selecting it and dragging the outer corner to make it larger or smaller to fit the dimensions of your wooden sign.
- Once you have adjusted your font to the perfect size, using the Text Tool, type out ‘For every moment’. With the text selected, open the Text Style Panel and select Design ID # 57531.
- Adjust the size of your second line of text and position it under the ‘thankful’ design.
- In Silhouette Studio®, select the Send window in the top right-hand corner. Select your entire design and make sure the Cut Edge option is selected.

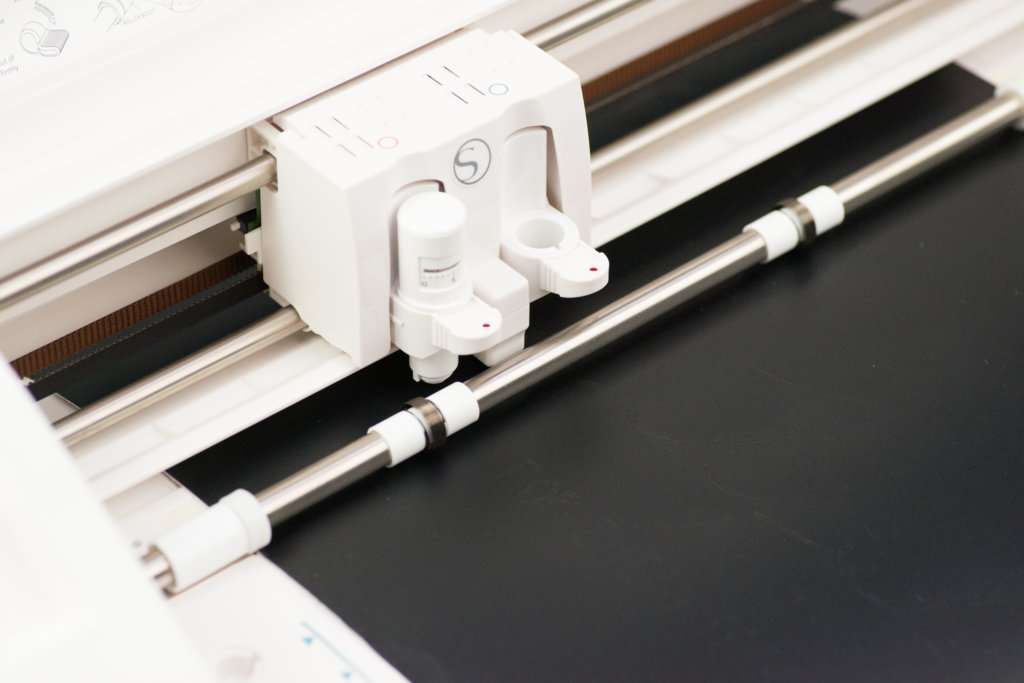
- Load your vinyl into your machine.
- In the Send window, select the Vinyl setting and select Send. (Remember that if you don’t have an Autoblade, you will need to adjust your blade settings.)
Step Two: Assembly
- After your machine is done cutting, unload the vinyl from your machine and weed away unnecessary parts of the design.
- Place the Transfer Tape over your design to help move your design over to the wood sign. (We painted our wood sign beforehand. We chose a dark stain for the frame portion and a nice, clean white for the center.)
- Slowly peel away the white backing from the vinyl.
- Align your design on your wooden sign. Once you have it in the position you like, use your Scraper Tool to help adhere the vinyl to your wooden sign.
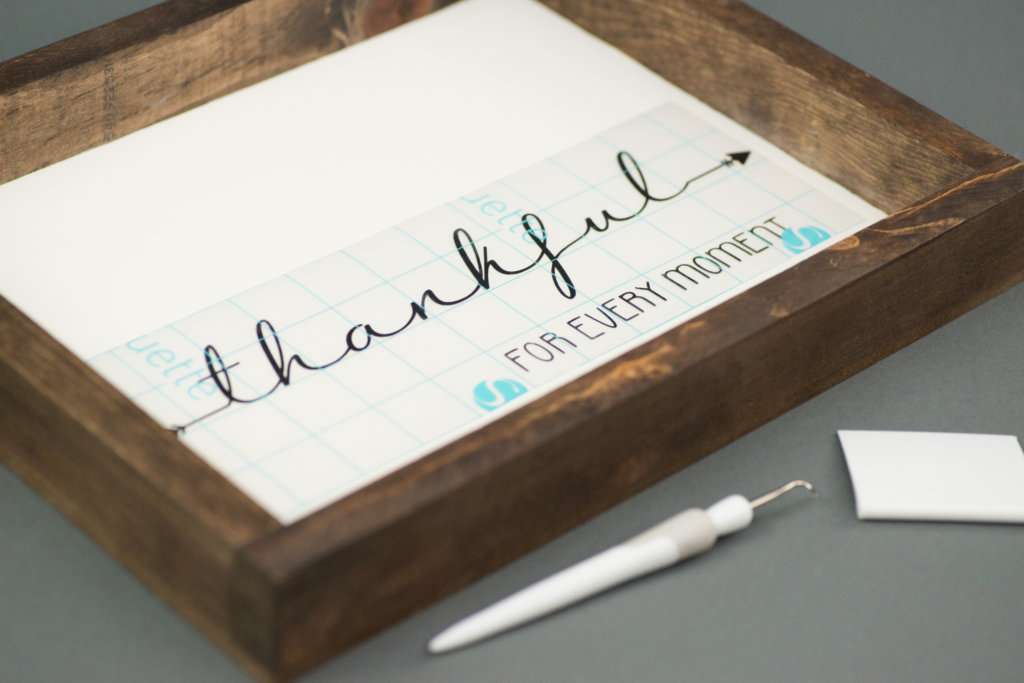
- Slowly peel away the transfer tape to reveal your finished sign.

jocelyn
September 6, 2017
such a cute idea! where is the wooden sign from?
Kelly Wayment
September 11, 2017
The unfinished wooden sign came from a local shop in American Fork, Utah, called The Wood Connection.
Jocelyn
September 12, 2017
Thank you, Kelly! I just spent a good amount of time browsing The Wood Connection’s website 🙂
Colette
September 7, 2017
Yes, where do I get a blank wood sign?
Kelly Wayment
September 11, 2017
See my comment above in response to Jocelyn.
Nathania
September 8, 2017
Would love to know where to get a woodeb sign!
Kelly Wayment
September 11, 2017
See my comment above in response to Jocelyn.
Teresa
September 8, 2017
Beautiful! What size is this sign? where can I find this wooden and what kind of wood? Thanks..
Kelly Wayment
September 11, 2017
See my comment above in response to Jocelyn. Based on the screenshots it looks like this sign is about 12 inches wide and probably 8 or 9 inches tall.
Helen
September 8, 2017
Fabulous sign!!!
Bellule
September 9, 2017
So gorgeous !!
Edward
September 18, 2017
Pretty cool idea.. Can you please post a tutorial for transferring image apart from quotes ?
Sandy Davis
December 12, 2017
What tricks did you use to stain and paint? I’ve tried several but can’t get it just right. I keep getting paint on the stain part and when I fix it I get stain on the paint part, LOL!