
I’m going big and bold today with the help of my Silhouette Portrait®. Kelly here, sharing a tutorial on how to customize your kitchen mixer with vinyl. This is a fun project to add a little character to your kitchen, and it’s completely reversible because the vinyl can be removed when you’re ready for a change. You can use any vinyl, but I chose the carbon fiber vinyl to add extra texture.
You’ll notice I am using my Portrait instead of my Cameo for this project. You can use either machine. I love my Portrait because it can do just about everything my Cameo can do, but its small size makes it easy to move and transport. I call it my “portable powerhouse.” It’s a lot easier to move than my mixer!
Let’s get started.
Supplies Needed:
- Silhouette Portrait®
- Silhouette Studio® – any edition
- Carbon fiber vinyl – gold
- Transfer tape
- Hook
- Scraper
- Scissors
- Kitchen mixer
- Design IDs #135107, #293541, #182599, #172204
Step One: Create the Design
1. As you consider a design for your mixer, be aware of the curved surface of your mixer. That adds a tricky element when applying vinyl. These leaf designs (listed above) are a great choice because the outer tips are able to flex and curve with the curved surface of the mixer as you apply them.
2. Choose your design area setup in the Page Setup panel.
- Machine = Portrait
- Cutting mat = None
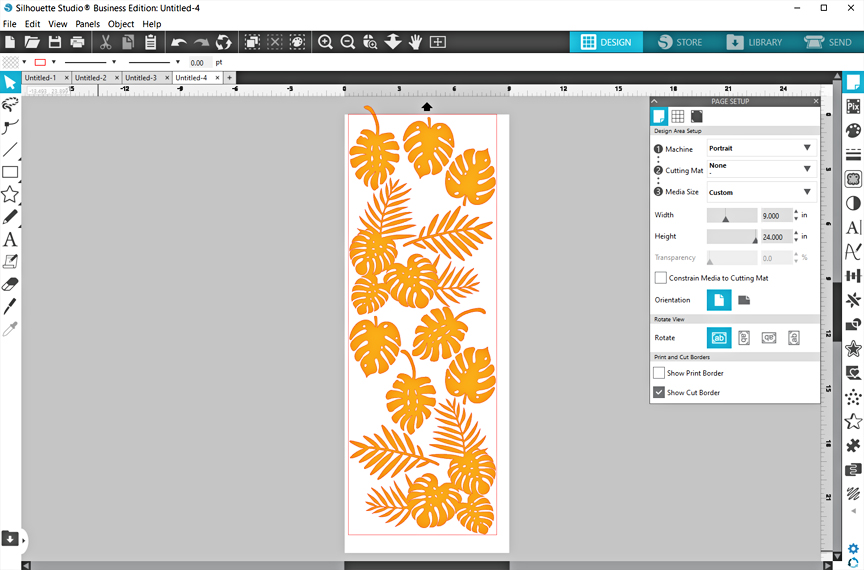
- Media Size = Custom (9 inches x 24 inches)
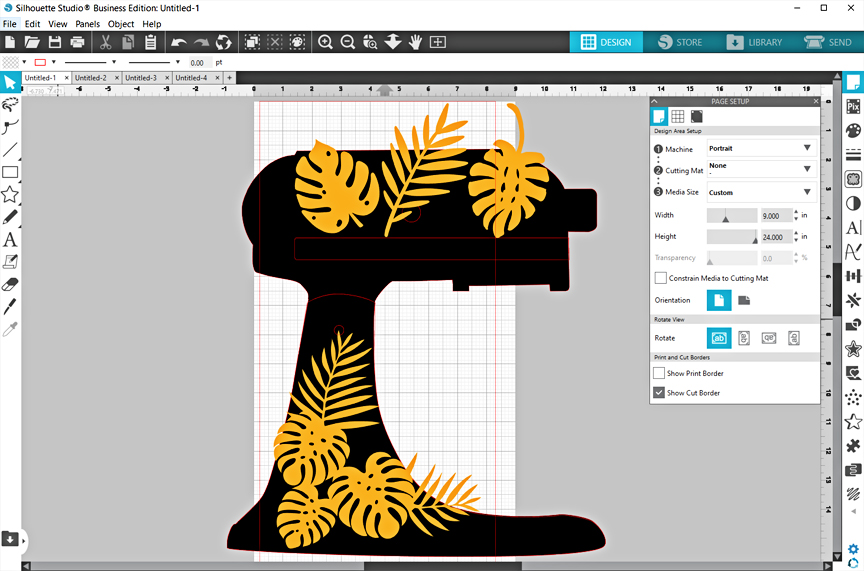
3. This step is optional, but because my mixer looks a lot like this mixer in the Design Store, I used it as reference for size and placement of my leaf designs.
4. Resize the mixer design to match yours (my real mixer is 14 inches tall).
5. Open the leaf designs #135107, 293541, and 182599. Then resize and position them to fit your mixer.
Note: This is not the final design, so the shapes can go out of the cutting bounds during the design phase. You just need to make sure any designs to cut will fit within the cut area.
6. Move the mixer to the side or copy the leaves to a new page (same size) and position as necessary. If using the specialty carbon-fiber gold vinyl, you must limit the total design to a 9-inch x 24-inch page size.
7. Fit all leaves within the cut area. If any design extends beyond the red cut line, the blade will lift and will not cut there. Remember if you are applying a corner design like the Palm Leaves Corner, you need to make a mirror copy for the opposite side of your mixer.
Design tips for a curved surface:
- Choose a design that is not attached on the outer edges (leaves like this are a good choice).
- Don’t go too big; opt for multiple small designs when working with lots of curves.
- Avoid applying to curves, if possible.
Step Two: Cut the Vinyl
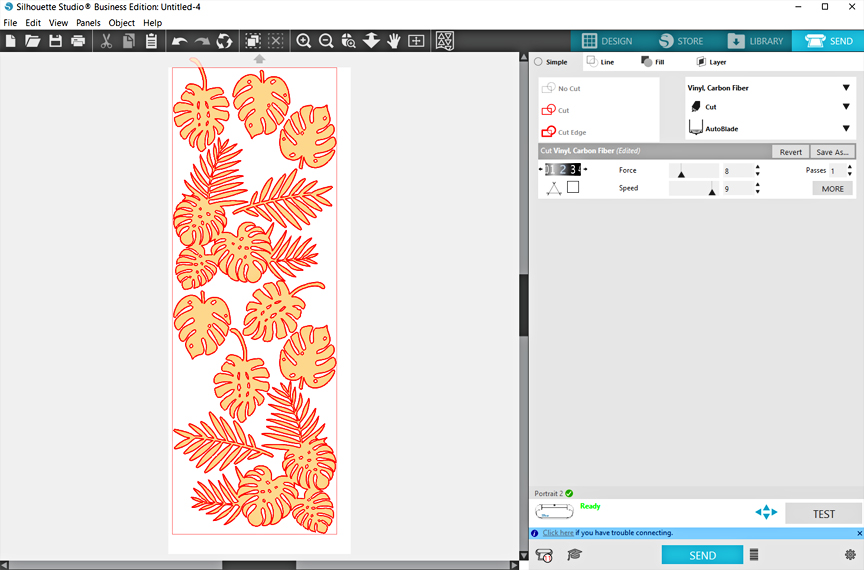
Now it’s time to cut these out. This project uses the full 9-inch x 24-inch piece of carbon fiber vinyl, so I’ll be loading it directly into the Portrait machine.
1. In the Send tab:
- Verify the cut lines are showing and no designs are overlapping
- Material = “Vinyl, Carbon Fiber” (You should test cut your settings first, but I prefer settings of Blade 2, Force 8, Speed 9.)
- Correct machine selected (Portrait 2)
2. Adjust your ratchet blade, if using, or let the Autoblade adjust automatically. Lock it into the tool holder.
3. Load the carbon fiber vinyl with no mat securely between both rollers.
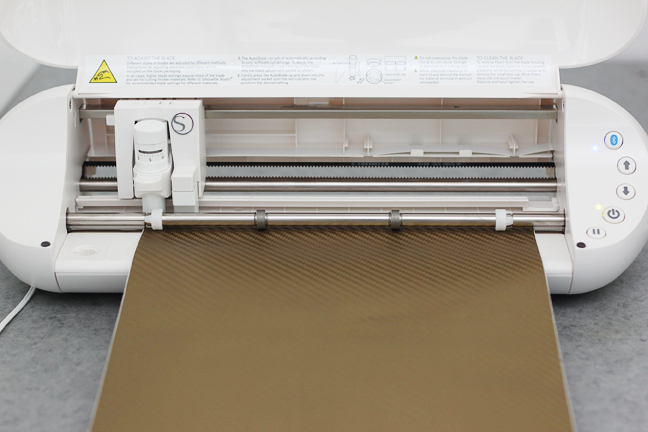
4. Click Send.
Step Three: Weed the Vinyl
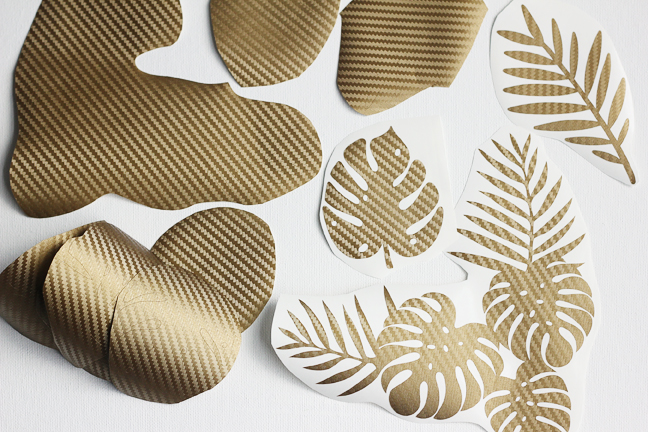
1. The design will be easier to apply as individual leaves, so trim the designs apart with scissors.
2. Weed the excess vinyl with a hook tool.
Step Four: Apply the Vinyl
1. With the vinyl cutouts weeded and ready, you can guess the placement now that you’ve got the 3D surface in front of you. Don’t feel tied to the original placement from your 2D design phase; you may want to use more or less vinyl than originally planned.
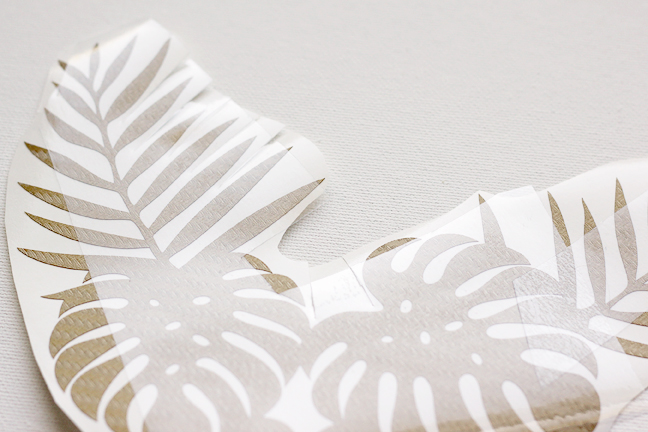
2. On your clean mixer, you can use transfer tape or just peel the vinyl cutouts off their backing like individual stickers.
3. If using transfer tape, trim it close to the design’s edge (you don’t even have to cover the full design) and snip with scissors between the leaves so it can curve with the surface as you apply it.
4. Flip the design over and pull the backing away from the transfer tape and vinyl cutout. See this Vinyl all the Things video for more tips on working with vinyl.
5. Any time you are applying vinyl to a curved surface, press the center down first and work outwards. The outer edges need to be free to conform to the shape in order to avoid creases and bubbles.
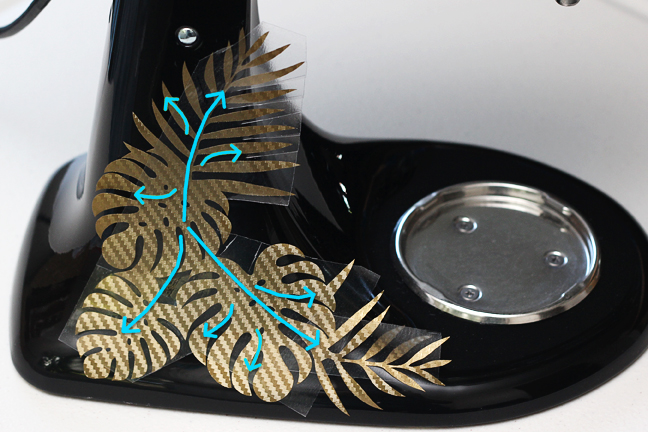
6. Continue applying the leaves until you are satisfied. If you have leftover leaves like I do, you may want to add them to a few other appliances or surfaces in your kitchen to continue the theme.
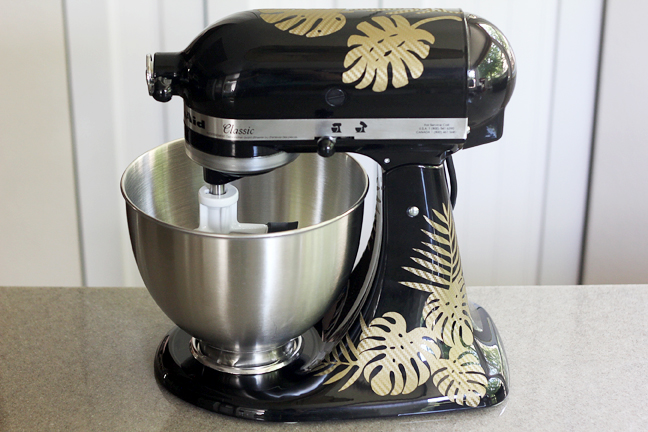
Isn’t the texture from the carbon fiber vinyl fun?

I hope you enjoyed this project! I’d love to see how you decorate your kitchen mixer!

 Free Class - Father's Day Apron Set
  Free Class - Custom Graduation Tumbler
Nasze Naturalne
September 3, 2025
Your authentic voice really shines through in everything you create and share
Naszenaturalne
September 2, 2025
Really love your style
Kelly Wayment
June 28, 2024
You can use it with vinyl as long as it is smooth and flat to allow the static charge to hold on to it. Rolled vinyl that wants to go back to its rolled shape will not necessarily work well, and it would need to be trimmed to fit the ES mat cutting area.
Kelly Wayment
June 28, 2024
Yes, you can use the heat pen while using the ES mat. 🙂
Yurii
March 2, 2024
Hello. May it be used with heat pen?
Thanks
Jerome
February 24, 2024
Hi, works this with the normal vinyl foils or only with printer papter etc?