
Hey everyone! Today we are going to talk about an advanced cut setting called “cut by line” or “cut by color.” This advanced feature is available with all editions of the software: Basic, Designer and Business.
Once you get the hang of it, it’s really quite simple!
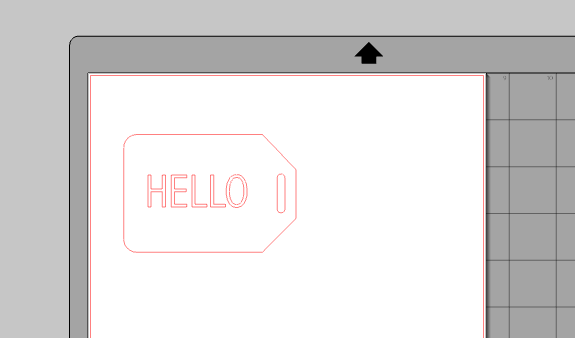
STEP ONE: Create your design.
I decided to make a simple “HELLO” tag with the Silhouette Sketch Pens. Grab your tag shape and add text by using the text tool.
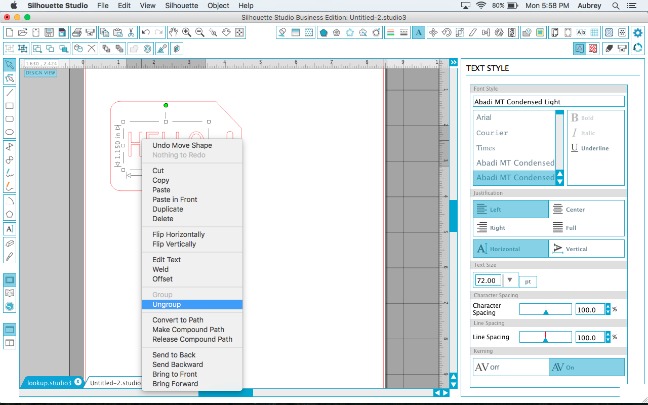
STEP TWO: Ungroup your letters so you can fill them individually.
Right click your text and select “Ungroup.”
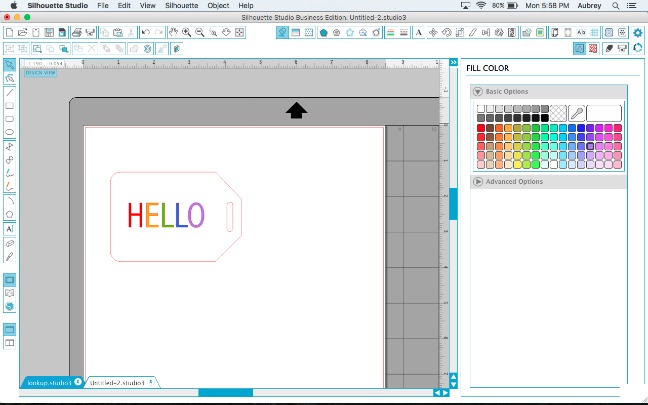
Use the Fill window to add some basic rainbow colors to each letter. I chose to use colors that closely matched the colors of sketch pens I was going to use.
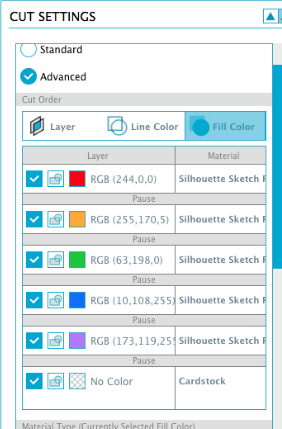
STEP THREE: Open your Cut Settings window and click on “Advanced.”
You will see a list of the fill colors you used. The neat thing about this feature is you tell the machine to pause after each letter while you change out the sketch pen to a different color…all without unloading your mat!
STEP FOUR: Click and drag the colors to the order you want them in.
This is important because once your machine starts going, you can’t see what order you placed them. So I put the colors in order with the order they were in on the word. For example, I made sure that red was first, followed by orange, etc.
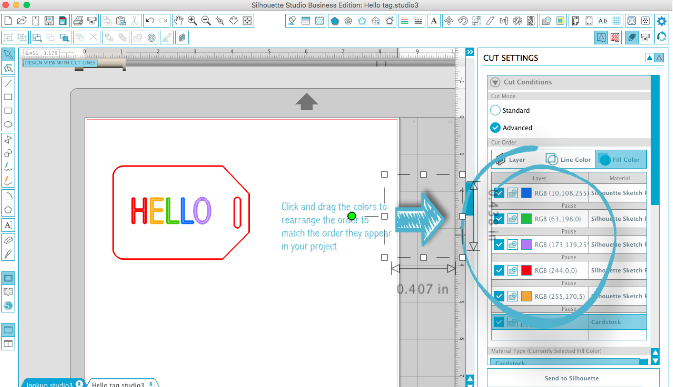
STEP FIVE: Right click each color and “Add Pause” after each, as seen in the picture above.
This will tell the machine to pause to give you time to switch sketch pen colors.
STEP SIX: Select material.
For all the colors, select “Silhouette Sketch Pen” under the Materials Window. For the outline of the tag, I chose “Cardstock” because I want that part cut out instead of sketched. (see here the rearranged order of colors to match the order of my letters.)
STEP SEVEN: Place your paper on your mat, load your mat and click “Send to Silhouette.”
I had the red sketch pen loaded first and the machine drew the “H” and then paused. Now load the orange sketch pen and click “Resume.” Do NOT click Start again. You will not have to unload your mat until the entire project is done! Continue with each color, change out the pen and click “resume.”
Once all the colors have been drawn, load your blade at the predetermined blade length, click “resume” and the machine will now cut out the tag shape. Now you’re done!

Tie your cute tag onto a pretty present and you’ll be sure to wow the recipient! Because of this advanced cutting feature, you have the ability to create some wonderful, detailed projects– all without having to load and unload your mat a million times. You can have several colors drawn all in the same project!
Happy Crafting!
Nasze Naturalne
September 3, 2025
Your authentic voice really shines through in everything you create and share
Naszenaturalne
September 2, 2025
Really love your style
Kelly Wayment
June 28, 2024
You can use it with vinyl as long as it is smooth and flat to allow the static charge to hold on to it. Rolled vinyl that wants to go back to its rolled shape will not necessarily work well, and it would need to be trimmed to fit the ES mat cutting area.
Kelly Wayment
June 28, 2024
Yes, you can use the heat pen while using the ES mat. 🙂
Yurii
March 2, 2024
Hello. May it be used with heat pen?
Thanks
Jerome
February 24, 2024
Hi, works this with the normal vinyl foils or only with printer papter etc?